概要
Railsアプリケーションにて、投稿に紐付く画像を複数枚、プレビュー表示させながら投稿できる機能を実装したので備忘録としてまとめます。
Productに複数のImageが紐付きます。
ひとつのツイートで複数の画像が投稿できるイメージです。
ビューのところは特にもっといい方法があるんだろうなと思っておりますが、
改善点や間違いがあれば是非コメントいただけますと幸いです!
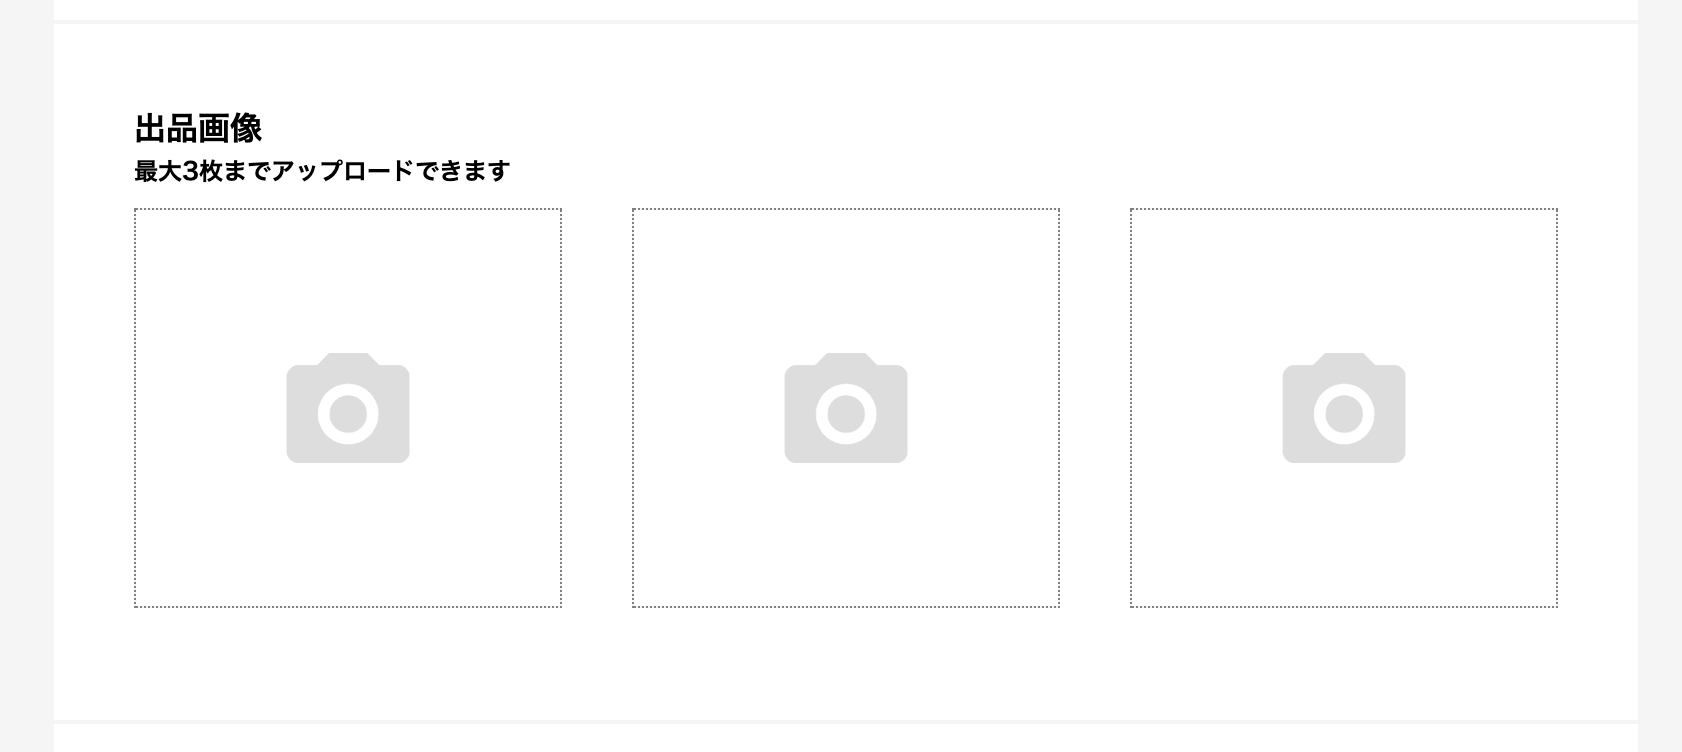
完成イメージ
導入したGem
・carrierwave
・mini_magick
マイグレーション
マイグレーションは通常通り・・・
.rb
class CreateProducts < ActiveRecord::Migration[5.2]
  def change
    create_table :products do |t|
      t.string :name, null: false
      t.timestamps
    end
  end
end
.rb
class CreateImages < ActiveRecord::Migration[5.2]
  def change
    create_table :images do |t|
      t.string :image
      t.references :product, null: false, foreign_key: true
      t.timestamps
    end
  end
end
モデル
accepts_nested_attributes_forにて「Productに紐付くImage」というネストの関係を作ることができます。
.rb
class Product < ApplicationRecord
  has_many :images, dependent: :destroy
  accepts_nested_attributes_for :images
end
optional: trueは外部キーのnilを許可するという役割。
.rb
class Image < ApplicationRecord
  belongs_to :product, optional: true
  mount_uploader :image, ImageUploader
end
コントローラー
buildはnewと同じ役割です。
_attibutesを用いてProductのparamsの中で一括で受け取るように記述します。
.rb
class ProductsController < ApplicationController

  def new
    @product = Product.new
    @image = @product.images.build
  end

  def create
    @product = Product.new(product_params)
      if @product.save
          params[:images]["image"].each do |image|
            @image = @product.images.create!(image: image)
          end
        redirect_to root_path
      else
        @product.images.build
        render action: 'new'
      end
  end

  private

  def product_params
    params.require(:product).permit(:name, images_attributes: [:name]).merge(user_id: current_user.id)
  end

end
ビュー
今回は最大3枚までとしました。
画像数が多くなれば書き方はもっと工夫した方がいいのかなと思っております・・・
fields_forをつかうことでform_for内で異なるモデルに保存できるようになります。
.rb
  = form_with(model: @product, local: true) do |f|
    .upload__box__head
      出品画像
      %p.upload__box__head__sub
        最大3枚までアップロードできます
    .upload__box__images
      = f.fields_for :images do |i|
        .upload__box__image
          %label{for: "image1"}
            = image_tag "pict/item_upload_dummy.png", alt: "Item upload dummy" ,height: "100%", width: "100%", id: "preview1", class: "preview-image"
          = i.file_field :image, multiple: true, id:"image1", type: "file", accept: "image/*", onchange: "previewImage1(this);", style: "display: none;", name: "images[image][]"
        .upload__box__image
          %label{for: "image2"}
            = image_tag "pict/item_upload_dummy.png", alt: "Item upload dummy" ,height: "100%", width: "100%", id: "preview2", class: "preview-image"
          = i.file_field :image, multiple: true, id:"image2", type: "file", accept: "image/*", onchange: "previewImage2(this);", style: "display: none;", name: "images[image][]"
        .upload__box__image
          %label{for: "image3"}
            = image_tag "pict/item_upload_dummy.png", alt: "Item upload dummy" ,height: "100%", width: "100%", id: "preview3", class: "preview-image"
          = i.file_field :image, multiple: true, id:"image3", type: "file", accept: "image/*", onchange: "previewImage3(this);", style: "display: none;", name: "images[image][]"
JS
ここも1つにまとめられそうではありますね・・・
.js
function previewImage1(obj){
  var fileReader = new FileReader();
  fileReader.onload = (function() {
    document.getElementById('preview1').src = fileReader.result;
  });
  fileReader.readAsDataURL(obj.files[0]);
}

function previewImage2(obj){
  var fileReader = new FileReader();
  fileReader.onload = (function() {
    document.getElementById('preview2').src = fileReader.result;
  });
  fileReader.readAsDataURL(obj.files[0]);
}

function previewImage3(obj){
  var fileReader = new FileReader();
  fileReader.onload = (function() {
    document.getElementById('preview3').src = fileReader.result;
  });
  fileReader.readAsDataURL(obj.files[0]);
}
以上となります!
なにぶん初心者のため、ここはこう書いたらリファクタリングできるよ!とかあればご教示いただけますと幸いです!