以前、Django + jsonrpcserver + Docker Compose で作った "JSON-RPC 2.0" 準拠の API 動作環境に関する記事を投稿しました。
→「Python の jsonrpcserver ライブラリを使ったら Django が JSON-RPC の API サーバになった」
今回はこの環境に pytest を追加して parametrize で複数パターンの一括テストを行い、またテストクライアントの IP アドレスを偽装してみます。
pytest を使う(unittest ではなく)
Python / Django では unittest が標準のユニットテストフレームワークですが、ここではサードパーティの pytest と pytest-django をインストールして使用します。
わざわざモジュールや設定を追加してでも pytest を使いたい理由はいろいろありますが、個人的にはテストコードの可読性向上に大きなメリットを感じています。
以下の 2 つのコードは、3 つの関数の戻り値がそれぞれ 0、0 以外、0 以上であることを unittest と pytest でテストする例です。
class TestSamples(unittest.TestCase):
    def test_sample(self):
        self.assertEqual(func1(), 0)
        self.assertNotEqual(func2(), 0)
        self.assertGreaterEqual(func3(), 0)
def test_sample():
    assert func1() == 0
    assert func2() != 0
    assert func3() >= 0
unittest のコードは JUnit 由来の伝統的な方式なので、テストクラスと比較条件ごとのメソッドを使用しますが、pytest は assert 文と比較演算子だけで簡潔なテストコードが書けます。
pytest-django のテスト環境を Docker Compose に追加する
以前の記事で作った動作環境に、pytest-django のテスト環境を追加します。
django_jrpc/
├── code/
│   ├── rpcproject/
│   │   ├── tests/
│   │   │   └── test_rpc.py  # 今回追加
│   │   ├── __init__.py
│   │   ├── asgi.py
│   │   ├── settings.py
│   │   ├── urls.py
│   │   ├── views.py   # 後で変更
│   │   └── wsgi.py
│   ├── manage.py
│   └── pytest.ini     # 今回追加
├── docker-compose.yml
├── Dockerfile
└── requirements.txt   # 変更
pytest.ini
pytest の設定ファイル pytest.ini を code/ の直下(manage.py と同じ階層)に作成します。
[pytest]
DJANGO_SETTINGS_MODULE = rpcproject.settings
addopts = -p no:cacheprovider --cov --cov-branch
-
DJANGO_SETTINGS_MODULE: プロジェクトの settings.py ファイル- パス
rpcproject/settings.pyをrpcproject.settingsと記述
- パス
-
addopts: pytest に追加するオプション-
-p no:cacheprovider: キャッシュ生成を無効化 -
--cov --cov-branch:カバレッジを出力
-
requirements.txt
下の 3 つのパッケージを追記します。
Django==3.1.5
django-ipware==3.0.2
jsonrpcserver==4.2.0
pytest
pytest-cov
pytest-django
- pytest: pytest 本体
- pytest-django: pytest を Django で使うためのプラグイン
- pytest-cov: カバレッジを出力するためのプラグイン
コンテナの再ビルドと起動
requirements.txt を保存したら、コンテナを再ビルドして起動します。
docker-compose up -d --build
-
django_jrpc/(docker-compose.yml があるディレクトリ)で実行する
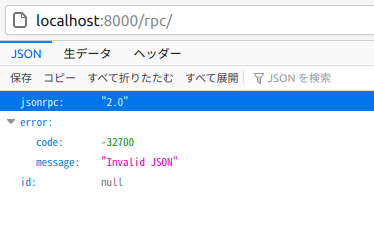
Web ブラウザでlocalhost:8000/rpc/にアクセスして「Invalid JSON」エラーが表示されれば、リクエストが正しくルーティングされてjsonrpc関数が正常に動作しています。
テストコードを作成してリクエストを POST する
今回追加したファイル code/rpcproject/tests/test_rpc.py にテストコードを作成します。
レスポンスのステータスと JSON の戻り値をテストする
前回作った、2 つの整数の商と余りを返す関数 "division" をテストします。
テストクライアントのクラスとして django.test.Client を使用します。
参考: Django ドキュメント - テストクライアント
import json

# テスト関数名は`test_`で始まる任意の名前
def test_division(client):
    # パラメータ名「client」で django.test.Client のオブジェクトを受け取る

    # POST する JSON-RPC リクエスト
    # この時点ではまだ Python の辞書型(dict)なので、「"divisor": 16,」と「"id": 1,」の
    # 各行末のカンマが許容される(JSON では不可)
    payload = {
        "jsonrpc": "2.0",
        "method": "division",
        "params": {
            "dividend": 1080,
            "divisor": 16,
        },
        "id": 1,
    }

    # JSON と下記のオプションを指定して POST リクエストを送り、API のレスポンスを得る
    response = client.post(
        path="/rpc/", data=payload, content_type="application/json-rpc", follow=True
    )
    # HTTP レスポンスのステータスコードを期待値(200 OK)と比較する
    assert response.status_code == 200

    # JSON-RPC レスポンスを辞書型に変換してから結果を取り出して、それぞれの期待値と比較する
    content = json.loads(response.content)
    assert content["result"]["quotient"] == 67  # 商
    assert content["result"]["remainder"] == 8  # 余り
-
client.post()のパラメータ-
path="/rpc/": URL のlocalhost:8000に続くパスを指定します -
data=payload: 上で定義した辞書型変数を POST データとして渡します -
content_type="application/json-rpc": payload の辞書を変換して JSON-RPC リクエストを生成します -
follow=True: リダイレクトが要求された場合に、True で自動的にリダイレクト先までフォローしてくれます。False にするとリダイレクトが要求された時点で終了するので、ステータスコードが 30x に、content が None になります。
-
{
  "jsonrpc": "2.0",
  "result": {
    "quotient": 67,
    "remainder": 8,
    "ipaddress": "127.0.0.1"
  },
  "id": 1
}
pytest を実行してテスト結果とカバレッジを確認する
コンテナ名が不明の場合は、コマンドdocker-compose psで実行中のコンテナを確認します。
docker-compose ps
      Name                     Command               State           Ports
-----------------------------------------------------------------------------------
django_jrpc_web_1   python3 manage.py runserve ...   Up      0.0.0.0:8000->8000/tcp
表示されたコンテナ名を使って、以下のコマンドでコンテナの中に入ります。
docker exec -it django_jrpc_web_1 bash
コンテナの中でpytestコマンドを実行して、以下のようにテスト結果とカバレッジが表示されたら成功です。
collected 1 item

rpcproject/tests/test_rpc.py .                                  [100%]

----------- coverage: platform linux, python 3.9.1-final-0 -----------
Name                           Stmts   Miss Branch BrPart  Cover
----------------------------------------------------------------
rpcproject/__init__.py             0      0      0      0   100%
rpcproject/settings.py            18      0      0      0   100%
rpcproject/tests/test_rpc.py       9      0      0      0   100%
rpcproject/urls.py                 4      0      0      0   100%
rpcproject/views.py               16      1      0      0    94%
----------------------------------------------------------------
TOTAL                             47      1      0      0    98%

========================= 1 passed in 0.82s ==========================
クライアントの IP アドレスと経路を偽装してテストする
あまり需要はないと思いますが、クライアントの IP アドレスや経路によって結果が変わる場合を想定して、リクエストの HTTP ヘッダを偽装してテストを行います。
偽装しないで同じコンテナ内でテストを実行すると、クライアントの IP アドレスは常に127.0.0.1になります。
直接接続のリクエストを偽装
    response = client.post(
        path="/rpc/", data=payload, content_type="application/json-rpc", follow=True,
        REMOTE_ADDR="192.168.1.2"
    )

    content = json.loads(response.content)
    assert content["result"]["ipaddress"] == "192.168.1.2"
client.post()に HTTP ヘッダと同名のパラメータREMOTE_ADDRを追加します。上記は192.168.1.2のホストから直接接続された場合の偽装です。
中継されたリクエストを偽装
    response = client.post(
        path="/rpc/", data=payload, content_type="application/json-rpc", follow=True,
        HTTP_X_FORWARDED_FOR="192.168.1.2,10.20.30.40,127.0.0.1"
    )

    content = json.loads(response.content)
    assert content["result"]["ipaddress"] == "192.168.1.2"
HTTP ヘッダHTTP_X_FORWARDED_FORと同名のパラメータにカンマ区切りの IP アドレスを指定することで、ロードバランサーなどで中継されたリクエストを偽装することができます。
カンマ区切りの先頭がクライアントの IP アドレスで、以降中継ノードのアドレスが続きます。
ここでテストしている関数 "division" が返すipaddressの値はクライアントのアドレスなので、上記のテストではカンマ区切りの先頭のアドレス192.168.1.2をアサートしています。
→「DjangoでクライアントのIPアドレスを取得する」
@pytest.mark.parametrize で複数パターンをテストする
pytest の parametrize を使って、1 つのテストコードで複数のパターンをテストします。
参考: pytestのparametrizeの使い方とその有用性について
その前に views.py を変更して、クライアントの IP アドレスによって分岐する処理を追加します。
以下の例では、アドレスが192.168.1.*に一致しない場合はHTTP 400 Bad Requestを返して終了し、それ以外はこれまでどおりの動作になります。
from django.http import JsonResponse
from django.http.response import HttpResponse
from django.views.decorators.csrf import csrf_exempt
from jsonrpcserver import method, dispatch

import ipware

@csrf_exempt
def jsonrpc(request):
    ipaddress, _ = ipware.get_client_ip(request)

    # クライアントの IP アドレスが 192.168.1.* でない場合は、HTTP 400 Bad Request を返す。
    if not ipaddress.startswith("192.168.1."):
        return HttpResponse(status=400)

    response = dispatch(request=request.body.decode(), context={'ipaddress': ipaddress})
    return JsonResponse(
        response.deserialized(), status=response.http_status, safe=False
    )
この変更によって192.168.1.*に一致しないクライアントに正しくBad Requestが返されることを複数のパターンでテストします。
以下は追加のテストコードの例です。
クライアントの IP アドレス192.168.1.2と192.168.1.254でステータスコード 200 (OK) が、192.168.2.2と10.20.30.1で 400 (Bad Request) が返されることをテストします。
import pytest

# HTTP_X_FORWARDED_FOR の値とレスポンスステータスのパターン
# 下のテスト関数で各タプルの値を、パラメータ x_header と http_status で受け取る
host_x_headers = (
    ("192.168.1.2,127.0.0.1", 200),
    ("192.168.2.2,127.0.0.1", 400),
    ("192.168.1.254,127.0.0.1", 200),
    ("10.20.30.1,192.168.1.1", 400),
)

@pytest.mark.parametrize("x_header, http_status", host_x_headers)
def test_client_address(client, x_header, http_status):
    payload = {
        "jsonrpc": "2.0",
        "method": "division",
        "params": {"dividend": 1080, "divisor": 16},
        "id": 1,
    }

    # タプルの値 x_header をパラメータ HTTP_X_FORWARDED_FOR で指定する
    response = client.post(
        path="/rpc/", data=payload, content_type="application/json-rpc", follow=True,
        HTTP_X_FORWARDED_FOR=x_header
    )
    # タプルの値 http_status がレスポンスステータス値と一致するかをテストする
    assert response.status_code == http_status
-
@pytest.mark.parametrize: テスト関数で pytest の parametrize を使うためのデコレータです-
"x_header, http_status":host_x_headers内の各タプルで定義した 2 つの値を受け取る変数名を、カンマ区切りの文字列で定義します
-
-
def test_client_address(client, x_header, http_status):-
x_header, http_status: デコレータで定義した名前のパラメータを使って、host_x_headersの各タプルの値を受け取ります
-
再度コンテナの中でpytestコマンドを実行して、テスト結果を確認します。
collected 5 items

rpcproject/tests/test_rpc.py .....                              [100%]

----------- coverage: platform linux, python 3.9.1-final-0 -----------
Name                           Stmts   Miss Branch BrPart  Cover
----------------------------------------------------------------
rpcproject/__init__.py             0      0      0      0   100%
rpcproject/settings.py            18      0      0      0   100%
rpcproject/tests/test_rpc.py      16      0      0      0   100%
rpcproject/urls.py                 4      0      0      0   100%
rpcproject/views.py               19      1      2      0    95%
----------------------------------------------------------------
TOTAL                             57      1      2      0    98%

========================= 1 passed in 0.82s ==========================
テストが成功し、出力結果が5 itemsに増えたことから、タプルで定義したパターンごとに 1 つのテストとカウントされたことが確認できました。
今後の予定
盛り込みすぎると読み返しにくくなるので、以下は今後の予定にします
- VS Code Remote Containers で開発・デバッグ環境をコンテナ化
- pylint-django + black + rope によるリント、フォーマット、リファクタリング環境
- Pylance を使った静的型付け
- Model とデータベースの使用
- フィクスチャを使ったテストデータの投入