概要
この記事では、Godot Engine でブルームを適用する方法について書きます。
ブルームとは以下のように、明るい部分を広げて明るい部分を強調しつつも、ぼやっと明るくなるので、何となく高級感が出ます。
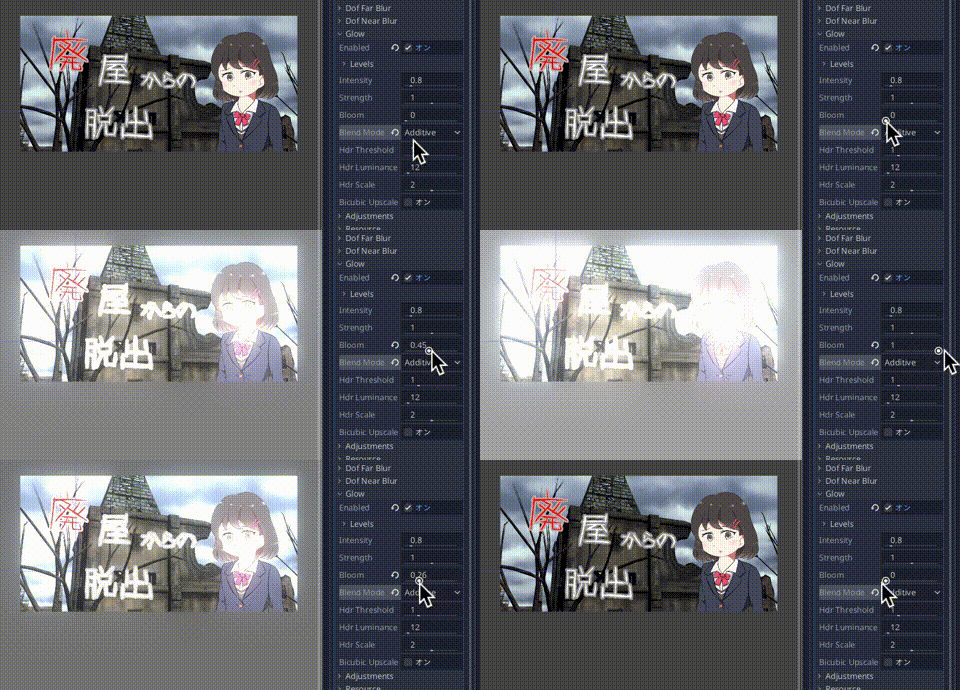
ただ、常時適用する場合は強くかけすぎるとゲームプレイを阻害するので、目立たせたいオブジェクトのみに適用するか、うっすらと適用するのが使い道としてはよさそうです。
ブルームの実装
画像の登録
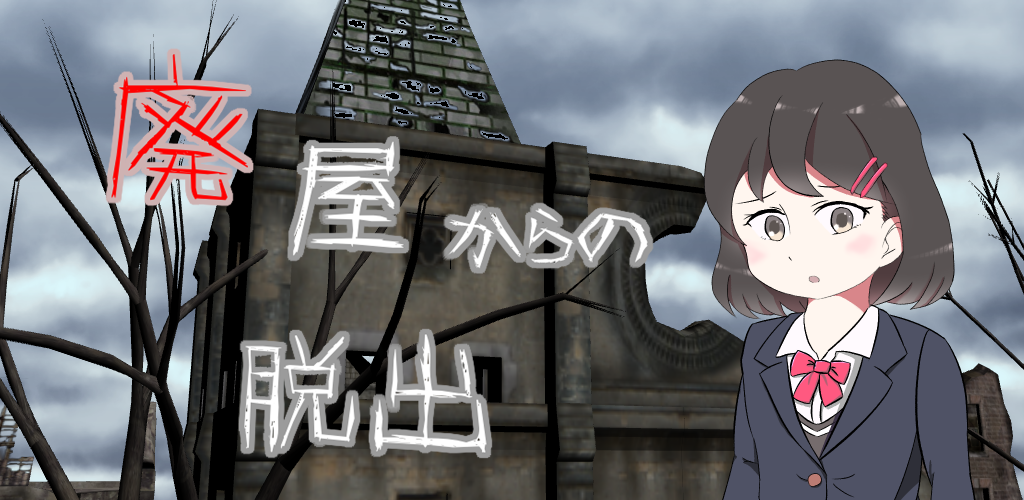
今回の素材として以下の画像を使用します。名前を "bg.png" として保存します。
画像の配置
シーンを作成して画像を配置します。
場所はどこでも問題ありません。
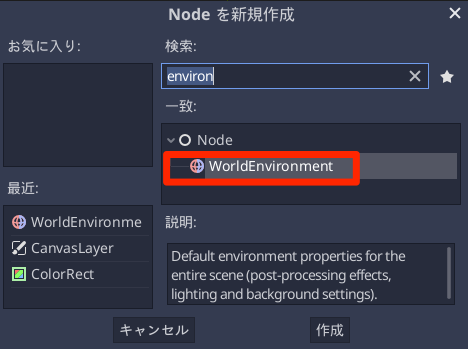
WorldEnvironmentの追加
このWorldEnvironmentさんはかなり優秀で以下の機能を持っています。
- Depth of Field Blur :被写界深度=ぼかし
- Glow :輝度調整
- Tonemap (Auto Exposure):トーンマップ(自動露出)
- Adjustments :調整
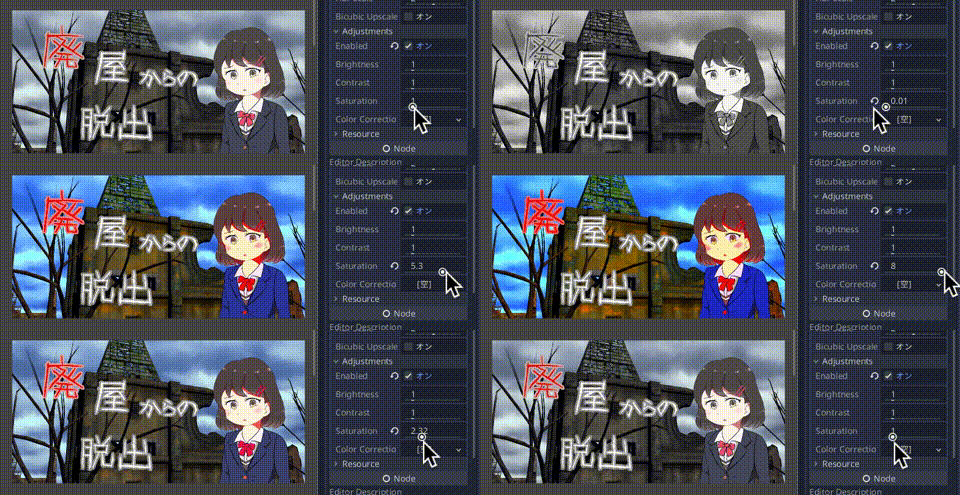
例えば、"Depth of Field Blur" はぼかしを簡単に実装できます。また "Adjustments" では輝度調整、コントラスト、彩度の調整ができます。
下のGIF動画は、Adjustments > Saturation による彩度調整です。グレースケール(灰色にする)や彩度を高くしてビビットな色使いにしたりできます。
Environmentの追加
WorldEnvironmentを追加した状態だと以下のような警告が表示されています。
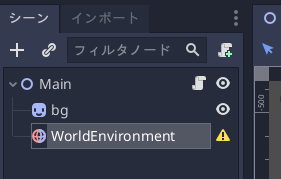
これは Environmentが追加されていないためです。
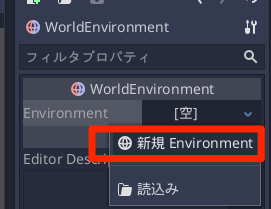
インスペクタからEnvironmentを追加します。
手順としては、WorldEnvironment > Environment > [空] をクリックして「新規 Environment」を選択します。
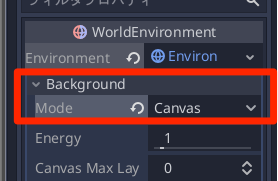
Environment > Background > Mode を「Canvas」に変更します。
そして、Glow > Enabled にチェックを入れると、Glow > Bloom の値を変化せることでブルームをかけることができます。
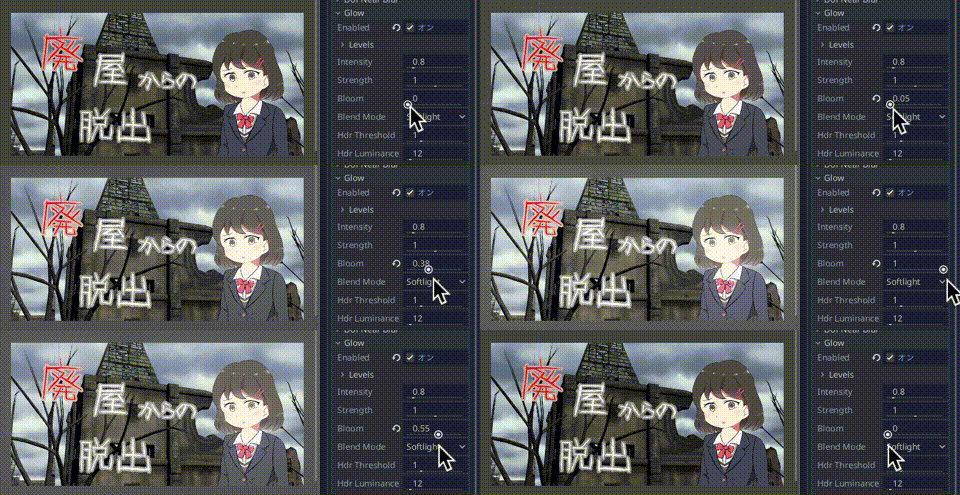
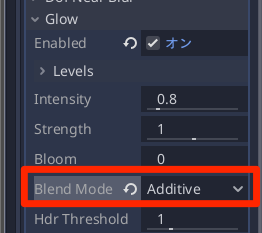
ブルームのかかり方が弱いなぁ……と思ったら Glow > Blend Mode を 「Softlight(弱いライト)」から「Addictive(加算)」にすると強めにブルームが適用されます。

シェーダーで実装する
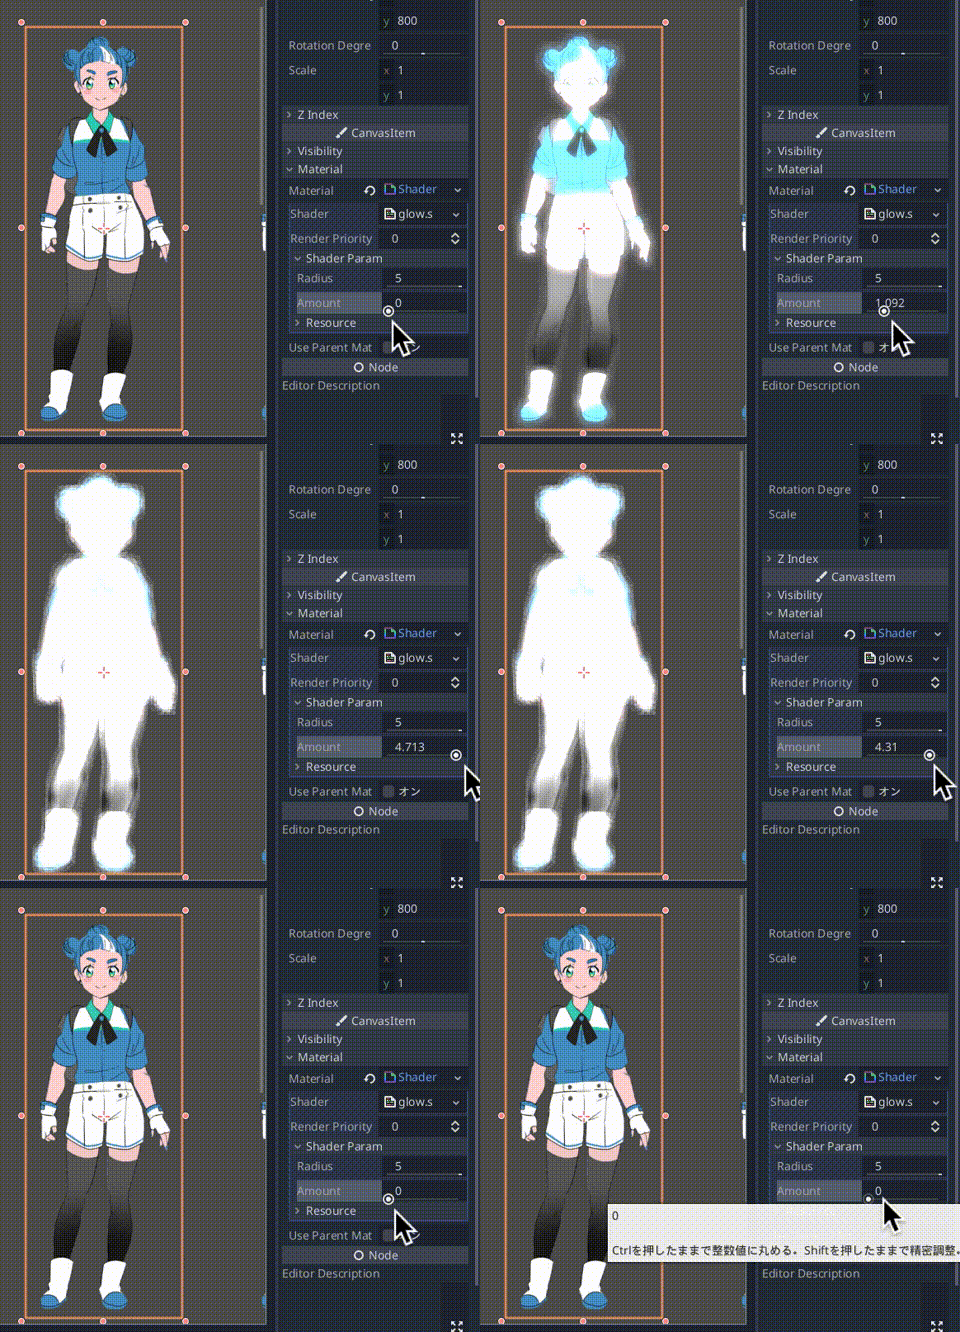
公式のサンプルを見ていたらシェーダーでのグローの実装例があったので合わせて紹介しておきます。
shader_type canvas_item;
render_mode blend_premul_alpha;

uniform float radius : hint_range(2, 5);
uniform float amount : hint_range(0, 5);

void fragment() {
	float r = radius;
	vec2 ps = TEXTURE_PIXEL_SIZE;
	vec4 col = texture(TEXTURE, UV);
	vec4 glow = col;

	glow += texture(TEXTURE, UV + vec2(-r, -r) * ps);
	glow += texture(TEXTURE, UV + vec2(-r, 0.0) * ps);
	glow += texture(TEXTURE, UV + vec2(-r, r) * ps);
	glow += texture(TEXTURE, UV + vec2(0.0, -r) * ps);
	glow += texture(TEXTURE, UV + vec2(0.0, r) * ps);
	glow += texture(TEXTURE, UV + vec2(r, -r) * ps);
	glow += texture(TEXTURE, UV + vec2(r, 0.0) * ps);
	glow += texture(TEXTURE, UV + vec2(r, r) * ps);

	r *= 2.0;
	glow += texture(TEXTURE, UV + vec2(-r, -r) * ps);
	glow += texture(TEXTURE, UV + vec2(-r, 0.0) * ps);
	glow += texture(TEXTURE, UV + vec2(-r, r) * ps);
	glow += texture(TEXTURE, UV + vec2(0.0, -r) * ps);
	glow += texture(TEXTURE, UV + vec2(0.0, r) * ps);
	glow += texture(TEXTURE, UV + vec2(r, -r) * ps);
	glow += texture(TEXTURE, UV + vec2(r, 0.0) * ps);
	glow += texture(TEXTURE, UV + vec2(r, r) * ps);

	glow /= 17.0;
	glow *= amount;
	col.rgb *= col.a;

	COLOR = glow + col;
}
