本記事はProxmoxでHDDをntfsフォーマットしてKVMで利用したいという方向けに作成しています。
ntfsならWindows使えよいう方もいらっしゃるかもしれませんが…
大まかな手順としては以下の2つになります。
- パーティション作成
- ntfsでフォーマット
環境情報
- proxmox8.1.3
- KVM(Miracle Linux8.8)
NTFS認識用PKG導入
# apt -y install ntfs-3g
フォーマットするDISKの確認
sdc をフォーマットしていきたいと思います。
# lsblk
NAME                         MAJ:MIN RM   SIZE RO TYPE MOUNTPOINTS
sda                            8:0    0   7.3T  0 disk
└─sda1                         8:1    0   7.3T  0 part
sdb                            8:16   0   7.3T  0 disk
└─sdb1                         8:17   0   7.3T  0 part
sdc                            8:32   0   7.3T  0 disk
パーティション作成
8TBのディスクなので、以下の手順でgdiskコマンドを利用してGPT対応のパーティションを作成していきます。
- パーティションの確認
- パーティションの作成
- ディスクへ書き込み
パーティションの確認
Command (? for help): p
# gdisk /dev/sdc
GPT fdisk (gdisk) version 1.0.9

Partition table scan:
  MBR: protective
  BSD: not present
  APM: not present
  GPT: present

Found valid GPT with protective MBR; using GPT.


Command (? for help): p
Disk /dev/sdc: 15628053168 sectors, 7.3 TiB
Model: ST8000DM004-2U91
Sector size (logical/physical): 512/4096 bytes
Disk identifier (GUID): F5047C02-4594-4B2B-8718-03695FFBBA21
Partition table holds up to 128 entries
Main partition table begins at sector 2 and ends at sector 33
First usable sector is 34, last usable sector is 15628053134
Partitions will be aligned on 2048-sector boundaries
Total free space is 15628053101 sectors (7.3 TiB)

Number  Start (sector)    End (sector)  Size       Code  Name
パーティション作成
Command (? for help): n
Command (? for help): n
Partition number (1-128, default 1):
First sector (34-15628053134, default = 2048) or {+-}size{KMGTP}:
Last sector (2048-15628053134, default = 15628053134) or {+-}size{KMGTP}:
Current type is 8300 (Linux filesystem)
Hex code or GUID (L to show codes, Enter = 8300):
Changed type of partition to 'Linux filesystem'
ディスクへ書き込み
Command (? for help): w
Command (? for help): w

Final checks complete. About to write GPT data. THIS WILL OVERWRITE EXISTING
PARTITIONS!!

Do you want to proceed? (Y/N): y
OK; writing new GUID partition table (GPT) to /dev/sda.
The operation has completed successfully.
ntfsでフォーマット
# mkfs -t ntfs -Q /dev/sdc1
KVMに作成したntfsディスクをパススルー
以下の手順でntfsディスクをKVMでマウントできるようにします。
- ntfsフォーマットしたディスクのUUIDを確認
- ProxmoxでKVMにパススルーコマンドを実施
- KVMでマウント
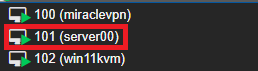
ProxmoxにはKVMに番号が振られています。
今回は101番のserver00にパススルーしていきます。
ntfsフォーマットしたsdc1ディスクのUUIDを確認
# ls -ltr /dev/disk/by-uuid/
total 0
lrwxrwxrwx 1 root root 10 Mar 23 15:31 2de8aa8d-586d-4805-b1bf-cf608ad67a5c -> ../../dm-1
lrwxrwxrwx 1 root root 10 Mar 23 15:31 54a0f76a-20d3-4d6a-924b-19218993601f -> ../../dm-0
lrwxrwxrwx 1 root root 10 Mar 23 15:31 208EBEBA4839594A -> ../../sda1
lrwxrwxrwx 1 root root 10 Mar 23 15:31 4F9F24E07DBA1A91 -> ../../sdb1
lrwxrwxrwx 1 root root 10 Mar 23 15:31 5050E74A027E6097 -> ../../sdc1
lrwxrwxrwx 1 root root 15 Mar 23 15:31 9B78-11DF -> ../../nvme0n1p2
VM101を下記コマンドでシャットダウンする
# shutdown -h now
ProxmoxでKVMにパススルーコマンドを実施
qm set VM番号 --sataX /dev/disk/by-uuid/パススルーするUUID
# qm set 101 --sata2 /dev/disk/by-uuid/5050E74A027E6097
パススルーされたかProxmoxのwebコンソールで確認
VMのハードウェアで確認してください。

VM101にログインしてディスクを確認
# ll /dev/disk/by-uuid/
合計 0
lrwxrwxrwx 1 root root 10  3月 23 15:32 0442d205-17dd-41d4-91b3-ee329fe8f142 -> ../../dm-0
lrwxrwxrwx 1 root root  9  3月 23 15:32 208EBEBA4839594A -> ../../sdb
lrwxrwxrwx 1 root root  9  3月 23 15:32 4F9F24E07DBA1A91 -> ../../sdc
lrwxrwxrwx 1 root root  9  3月 23 15:32 5050E74A027E6097 -> ../../sdd
lrwxrwxrwx 1 root root 10  3月 23 15:32 65dc7b0a-c4af-4a12-9ed4-810bc5f6996e -> ../../sda2
lrwxrwxrwx 1 root root 10  3月 23 15:32 682e0dde-e301-40af-95e4-4e5a08299967 -> ../../dm-2
lrwxrwxrwx 1 root root 10  3月 23 15:32 7455537f-d6e0-4e2f-baed-ecdee02bde44 -> ../../dm-1
lrwxrwxrwx 1 root root 10  3月 23 15:32 86DE-1894 -> ../../sda1
ntfs認識用PKGを適用
# yum -y install ntfs-3g
/etc/fstabにVM起動時にmountされるように設定
# vim /etc/fstab

#
# /etc/fstab
# Created by anaconda on Sat Nov 18 04:07:13 2023
#
# Accessible filesystems, by reference, are maintained under '/dev/disk/'.
# See man pages fstab(5), findfs(8), mount(8) and/or blkid(8) for more info.
#
# After editing this file, run 'systemctl daemon-reload' to update systemd
# units generated from this file.
#
/dev/mapper/ml-root     /                       ext4    defaults        1 1
UUID=65dc7b0a-c4af-4a12-9ed4-810bc5f6996e /boot                   ext4    defaults        1 2
UUID=86DE-1894          /boot/efi               vfat    umask=0077,shortname=winnt 0 2
/dev/mapper/ml-home     /home                   ext4    defaults        1 2
/dev/mapper/ml-swap     none                    swap    defaults        0 0

UUID=5050E74A027E6097 /var/www/html/DISK/HDD0 auto defaults 0 0
再起動
# reboot
再ログインをしてマウントされているか確認
# df -h
ファイルシス        サイズ  使用  残り 使用% マウント位置
devtmpfs              3.6G     0  3.6G    0% /dev
tmpfs                 3.6G     0  3.6G    0% /dev/shm
tmpfs                 3.6G  8.9M  3.6G    1% /run
tmpfs                 3.6G     0  3.6G    0% /sys/fs/cgroup
/dev/mapper/ml-root    69G  6.7G   59G   11% /
/dev/mapper/ml-home    40G   44M   38G    1% /home
/dev/sda2             974M  319M  589M   36% /boot
/dev/sda1             599M  5.8M  594M    1% /boot/efi
/dev/sdb              7.3T  6.1T  1.3T   84% /var/www/html/DISK/HDD00
tmpfs                 728M  8.0K  728M    1% /run/user/987
tmpfs                 728M  8.0K  728M    1% /run/user/1000