きっかけ
- 仕事で触ることになりそうなので、入門してみることに
ゴール
タイトルの通りだけど、
- Node.js + MySQL な環境にAPM とInfrastructure のAgent を放り込む
- 各々の機能については、New Relicのサイトへ
- New Relic 側でメトリクスを拾える
サーバの情報
以下の環境を用意する。(全部、ローカルネットワーク)
- APサーバ
- CentOS 7
- Apache
- Node.js(Express.js)
- hostname を
apserver.example.comとする
- DBサーバ
- CentOS 7
- MySQL
- hostname を
dbserver.example.comとする
DBサーバの準備
MySQL のインストール、初期設定
yum のリポジトリを追加して、インストールする。
# yum install https://dev.mysql.com/get/mysql80-community-release-el7-3.noarch.rpm
# yum -y install mysql-community-server
systemd にenable で登録、MySQL を起動する。
# systemctl enable mysqld.service
# systemctl start mysqld.service
Password はログに書いてある。
# cat /var/log/mysqld.log | grep gene
2020-08-13T13:30:27.617777Z 6 [Note] [MY-010454] [Server] A temporary password is generated for root@localhost: ************
Node.js から接続するユーザを作成、アクセス権限を与えておく。
mysql> create user 'apusr'@'%' identified with mysql_native_password by 'P@ssw0rd';
Query OK, 0 rows affected (0.01 sec)
mysql> grant all on *.* to 'apusr'@'%';
Query OK, 0 rows affected (0.01 sec)
APサーバの準備
npm と express.js のインストール
node.js v10を使用。リポジトリに追加する。
# curl -sL https://rpm.nodesource.com/setup_10.x | sudo bash -
... snip ...
nodejs をインストールする。
# yum install -y nodejs
... snip ...
# node -v
v10.22.0
# npm -v
6.14.6
アプリケーション配置先の設置をする。
# mkdir ~/express_crud/
# cd ~/express_crud/
プロジェクトの初期化とexpress.js のインストールをする。
# npm init -y
# npm install express
node プロセスの常駐化
forever をインストールする。
# npm install -g forever
テスト用app.js で起動する
以下のapp.jsを配置する。
const express = require('express')
const app = express()
const port = 3000

app.get('/', (req, res) => res.send('Hello World!'))
app.listen(port, () => console.log(`Example app listening on port ${port}!`))
forever で起動して、疎通確認する。
# forever start app.js
# curl http://localhost:3000
Hello World!#
mysql モジュールを入れて、接続確認
app.js を改造する。
const express = require('express')
const app = express()
const port = 3000

const mysql = require('mysql');
const con = mysql.createConnection({
  host: 'dbserver.example.com',
  user: 'apusr',
  password: 'P@ssw0rd'
});

con.connect(function(err) {
  if (err) throw err;
  console.log('Connected');
});

app.get('/', (req, res) => res.send('Hello World!'))
app.listen(port, () => console.log(`Example app listening on port ${port}!`))
node で起動して、疎通確認する。(Connected が出力されていたら成功)
# node app.js
Example app listening on port 3000!
Connected
app.js からデータ参照する
先ず、DBサーバ側でデータベースを作って、テーブルを作る。
作るTable はid、name、emailをカラムに持ち、idは自動インクリメントとする。
mysql> create database datastore;
Query OK, 1 row affected (0.01 sec)
mysql> connect datastore;
Connection id:    40
Current database: datastore
mysql> create table users (id INT NOT NULL PRIMARY
KEY AUTO_INCREMENT, name VARCHAR(255) NOT NULL, email VARCHAR(255) NOT NULL);
Query OK, 0 rows affected (0.02 sec)
ユーザを1匹追加しておく。
mysql> insert into users (name, email) values ('user1', 'user1@example.com');
Query OK, 1 row affected (0.00 sec)
mysql> select * from users;
+----+-------+-------------------+
| id | name  | email             |
+----+-------+-------------------+
|  1 | user1 | user1@example.com |
+----+-------+-------------------+
1 row in set (0.00 sec)
APサーバ側でapp.js を改造する。
const express = require('express')
const app = express()
const port = 3000

const mysql = require('mysql');
const con = mysql.createConnection({
  host: 'dbserver.example.com',
  user: 'apusr',
  password: 'P@ssw0rd',
  database: 'datastore'
});

con.connect(function(err) {
  if (err) throw err;
  console.log('Connected');
});

app.get('/', (request, response) => {
        const sql = "select * from users"
        con.query(sql, function (err, result, fields) {
        if (err) throw err;
        response.send(result)
        });
});
app.listen(port, () => console.log(`Example app listening on port ${port}!`))
forever で起動して、動作確認する。
# forever start app.js
... snip ...
info:    Forever processing file: app.js
# curl http://localhost:3000/
[{"id":1,"name":"user1","email":"user1@example.com"}]
app.js からデータ登録する
body-parser モジュールを突っ込む。
# npm install body-parser
app.js を改造する。
- body-parser を使う
-
/にPOST用のエンドポイントを追加
const express = require('express')
const app = express()
const port = 3000
const mysql = require('mysql');
const con = mysql.createConnection({
  host: 'dbserver.example.com',
  user: 'apusr',
  password: 'P@ssw0rd',
  database: 'datastore'
});
const path = require('path')
const bodyParser = require('body-parser')

app.use(bodyParser.urlencoded({ extended: true }));

con.connect(function(err) {
  if (err) throw err;
  console.log('Connected');
});

app.get('/', (request, response) => {
  const sql = "select * from users"
  con.query(sql, function (err, result, fields) {
  if (err) throw err;
  response.send(result)
  });
});

app.post('/', (req, res) => {
  const sql = "INSERT INTO users SET ?"
  con.query(sql,req.body,function(err, result, fields){
    if (err) throw err;
    res.send('Completed Registration');
  });
});

app.listen(port, () => console.log(`Example app listening on port ${port}!`))
forever で起動して、動作確認する。
# forever start app.js
... snip ...
info:    Forever processing file: app.js
# curl -X POST -d 'name=user10&email=user10@example.com' http://localhost:3000/
Completed Registration
# curl -s http://localhost:3000/ | jq
[
  {
    "id": 1,
    "name": "user1",
    "email": "user1@example.com"
  },
  {
    "id": 2,
    "name": "user10",
    "email": "user10@example.com"
  }
]
app.js からデータ削除する
app.js を改造する
-
/にDELETE用のエンドポイントを追加
const express = require('express')
const app = express()
const port = 3000
const mysql = require('mysql');
const con = mysql.createConnection({
  host: 'dbserver.example.com',
  user: 'apusr',
  password: 'P@ssw0rd',
  database: 'datastore'
});
const path = require('path')
const bodyParser = require('body-parser')

app.use(bodyParser.urlencoded({ extended: true }));

con.connect(function(err) {
  if (err) throw err;
  console.log('Connected');
});

app.get('/', (request, response) => {
  const sql = "select * from users"
  con.query(sql, function (err, result, fields) {
  if (err) throw err;
  response.send(result)
  });
});

app.post('/', (req, res) => {
  const sql = "INSERT INTO users SET ?"
  con.query(sql,req.body,function(err, result, fields){
    if (err) throw err;
    res.send('Completed Registration');
  });
});

app.delete('/',(req,res)=>{
  const sql = "DELETE FROM users WHERE id = ?";
  con.query(sql,[req.query.id],function(err,result,fields){
    if (err) throw err;
    res.send('Completed Deletion');
  })
});

app.listen(port, () => console.log(`Example app listening on port ${port}!`))
forever で起動して、動作確認する。
# forever start app.js
... snip ...
info:    Forever processing file: app.js

# curl -X DELETE http://localhost:3000/?id=2
Complete Deletion
# curl -s http://localhost:3000/ | jq
[
  {
    "id": 1,
    "name": "user1",
    "email": "user1@example.com"
  }
]
app.js からデータ更新する
飽きてきたので、パス...。
OSのメトリクスを拾う設定を入れる(Infrastructure Agentの導入)
New Relic OneのホームのAdd your dataからCentOSを選択。セットアップ手順が表示される。
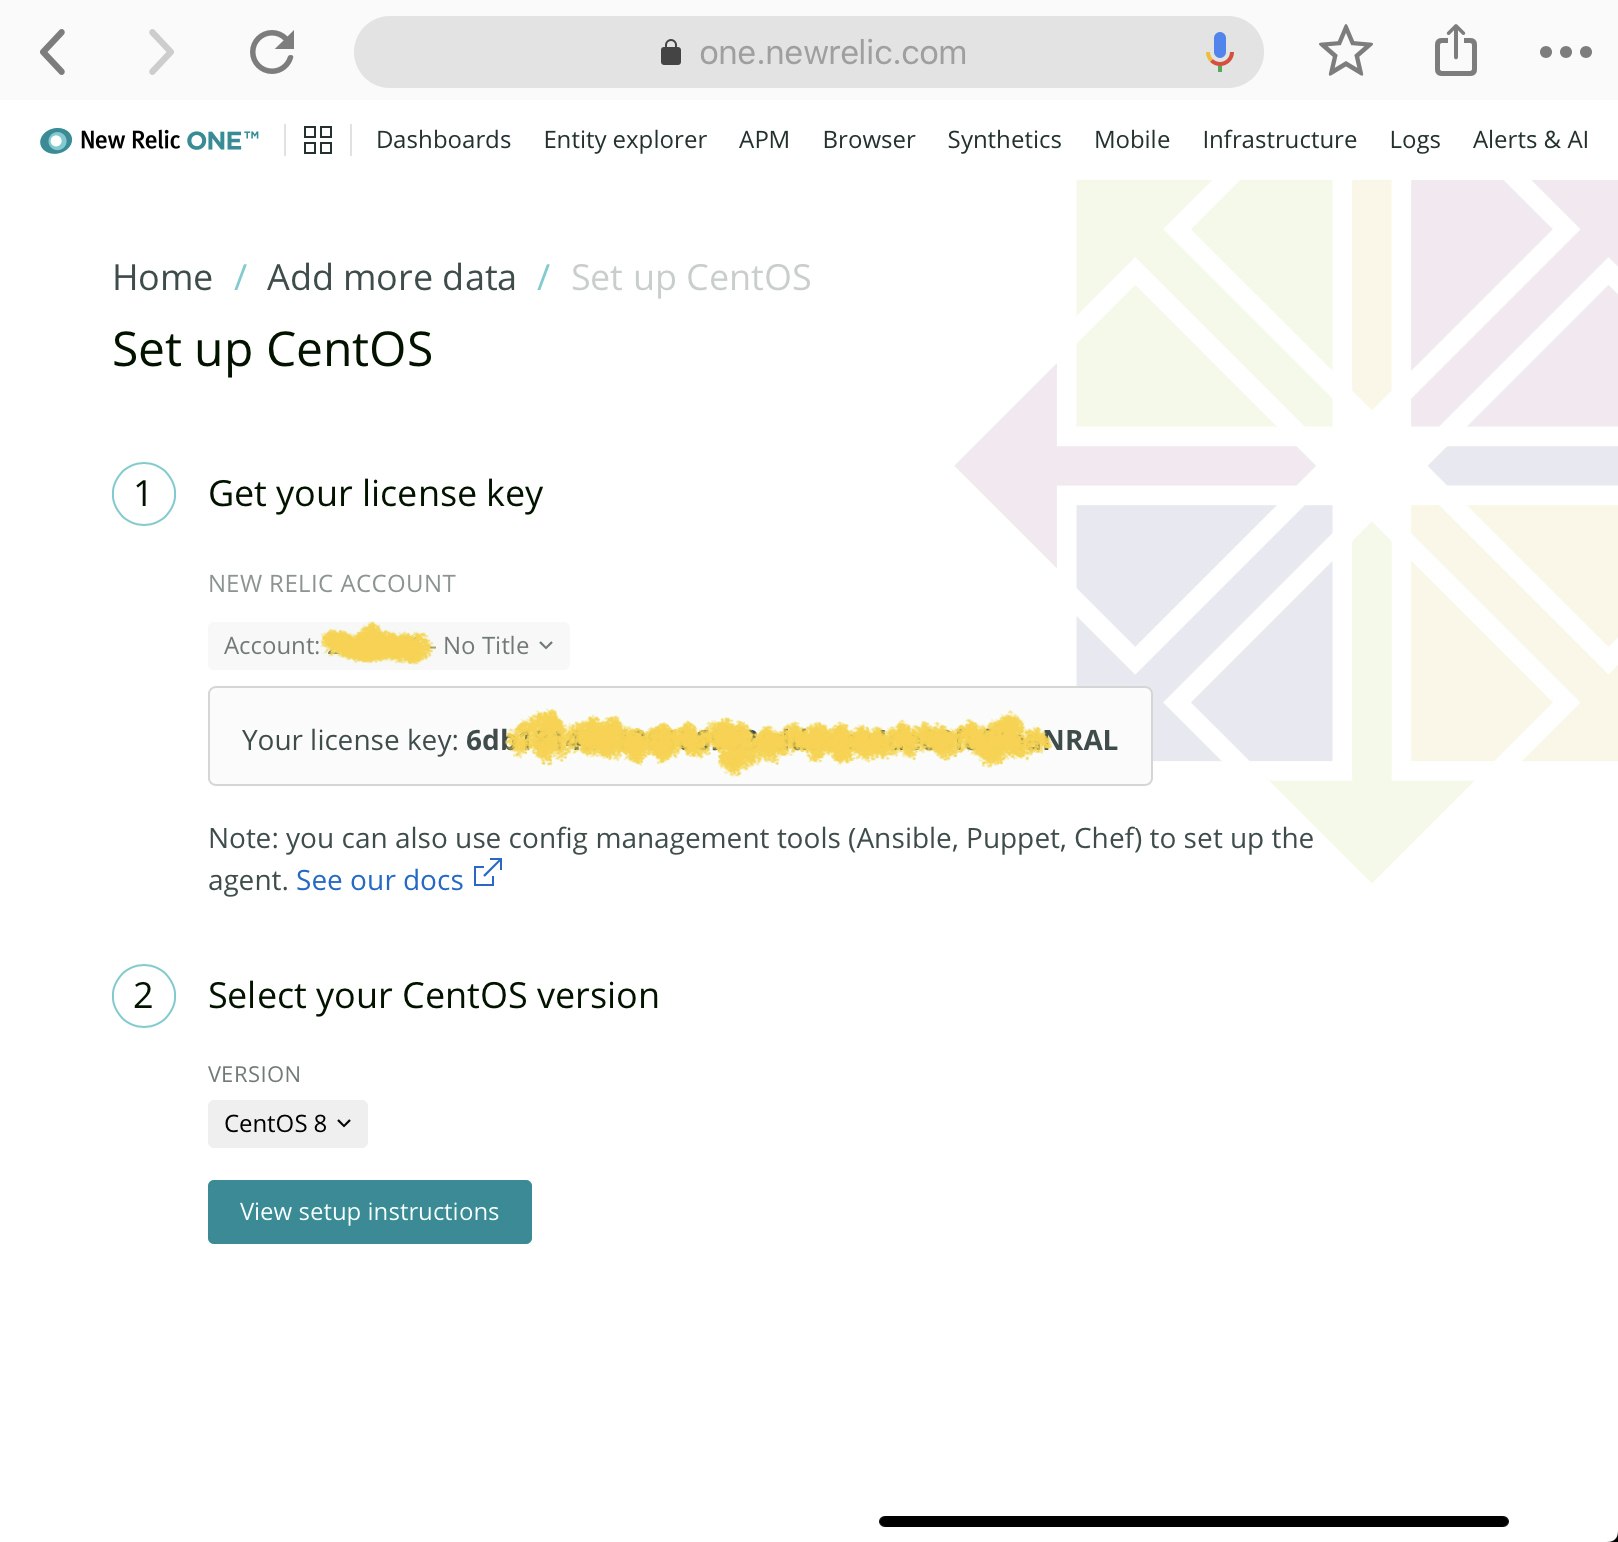
3 Deploy the agentに表示されている手順を実行する。(ベタばりでOK)
# Create a configuration file and add your license key \
echo "license_key: 6db ... snip ... RAL" | sudo tee -a /etc/newrelic-infra.yml && \
\
# Create the agent’s yum repository \
sudo curl -o /etc/yum.repos.d/newrelic-infra.repo https://download.newrelic.com/infrastructure_agent/linux/yum/el/7/x86_64/newrelic-infra.repo && \
\
# Update your yum cache \
sudo yum -q makecache -y --disablerepo='*' --enablerepo='newrelic-infra' && \
\
# Run the installation script \
sudo yum install newrelic-infra -y
systemd にも反映済み。
# systemctl status newrelic-infra
● newrelic-infra.service - New Relic Infrastructure Agent
Loaded: loaded (/etc/systemd/system/newrelic-infra.service; enabled; vendor preset: disabled)
Active: active (running) since 土 2020-08-15 13:02:13 JST; 50s ago
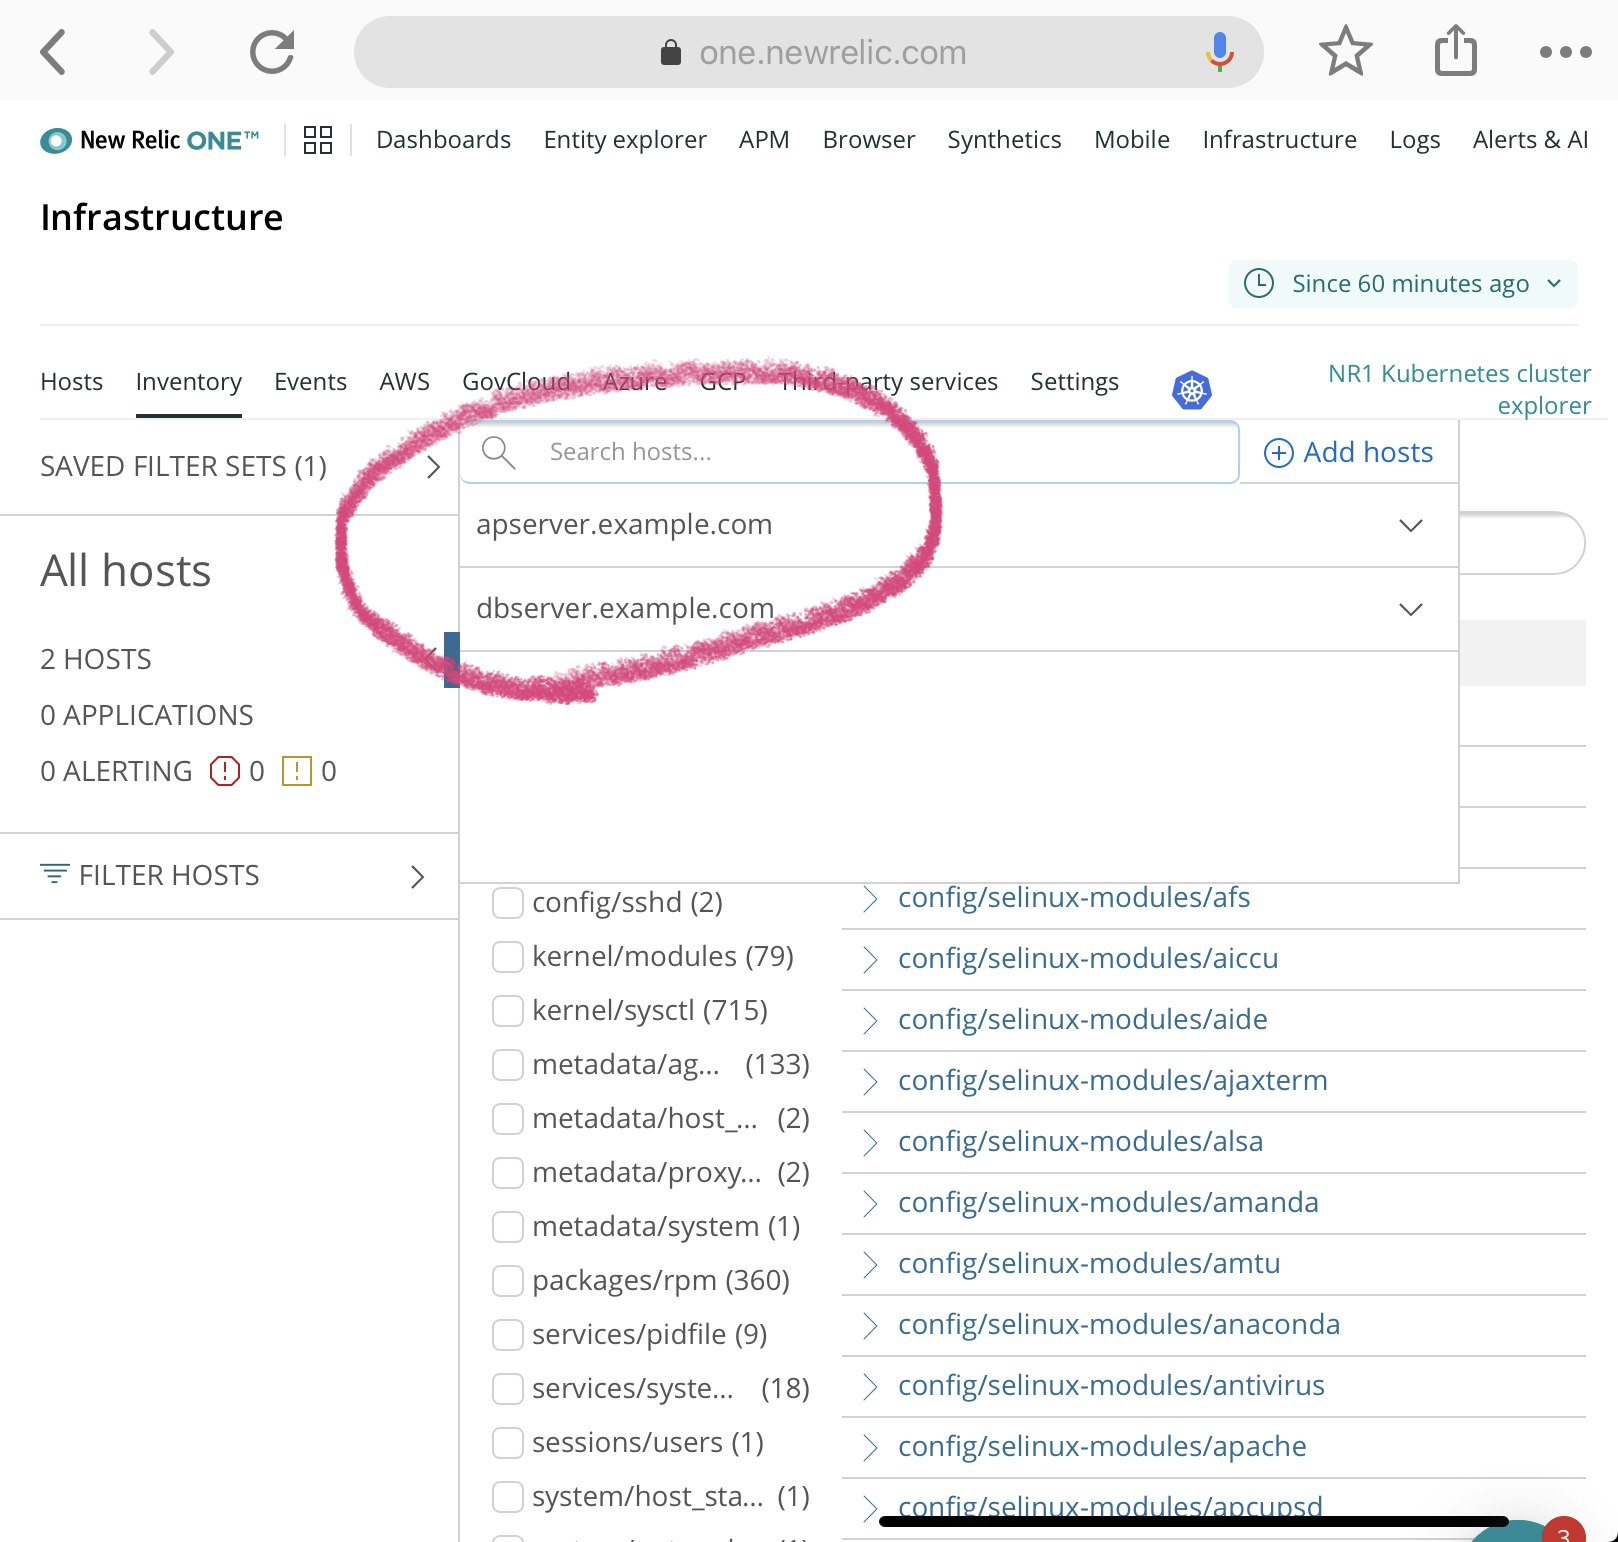
当手順をAPサーバ、DBサーバともに実施する。
実施後、New Relic One のInfrastructure のページから2つのホストが追加されていることを確認できる。
MySQL のメトリクスを拾う設定を入れる
ここのページに記載の手順に則って、コマンドを実行する
# yum -q makecache -y --disablerepo='*' --enablerepo='newrelic-infra'
# yum install nri-mysql
... snip ...
  nri-mysql.x86_64 0:1.4.0-1
完了しました!
# mysql -u root -p -e "CREATE USER 'newrelic'@'localhost' IDENTIFIED BY 'P@ssw0rd';"
Enter password:
# cd /etc/newrelic-infra/integrations.d/
# cp mysql-config.yml.sample mysql-config.yml
mysql-config.yamlを編集する。
一つ前の手順で作成したDBのユーザ情報を入れるだけ。
integration_name: com.newrelic.mysql

instances:
  - name: mysql-server
    command: status
    arguments:
        hostname: localhost
        port: 3306
        username: newrelic
        password: P@ssw0rd
        # New users should leave this property as `true`, to identify the
        # monitored entities as `remote`. Setting this property to `false` (the
        # default value) is deprecated and will be removed soon, disallowing
        # entities that are identified as `local`.
        # Please check the documentation to get more information about local
        # versus remote entities:
        # https://github.com/newrelic/infra-integrations-sdk/blob/master/docs/entity-definition.md
        remote_monitoring: true
    labels:
        env: production
        role: write-replica
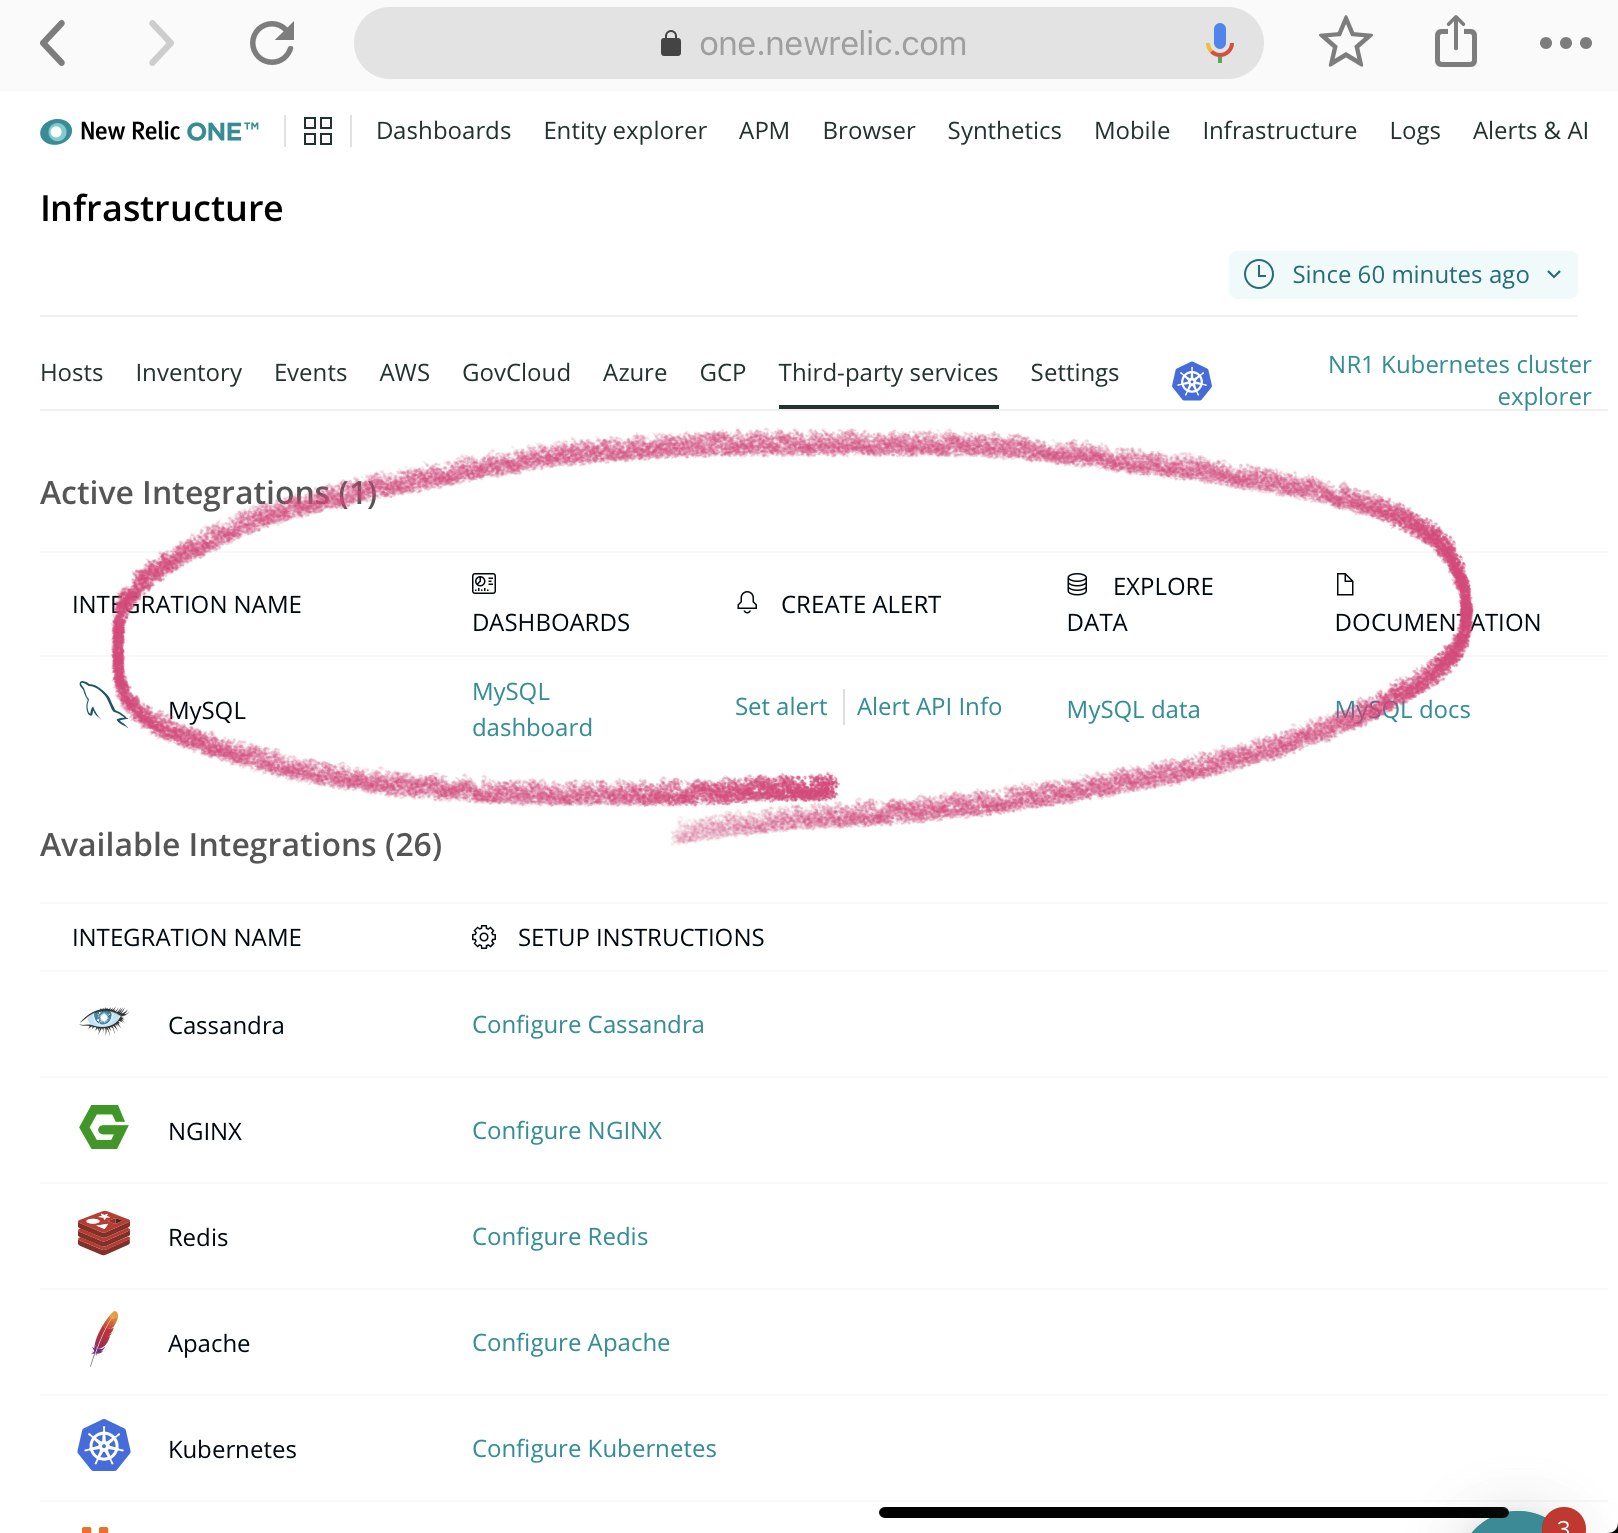
Agent を再起動する。
# systemctl restart newrelic-infra
New Relic One のInfrastructure のページからMySQLがが追加されていることを確認できる。
Node.js のメトリクスを拾う設定を入れる(APM Agentの導入)
New Relic One のAPM のページから、Node.js のアプリケーションを追加する手順を参照する。
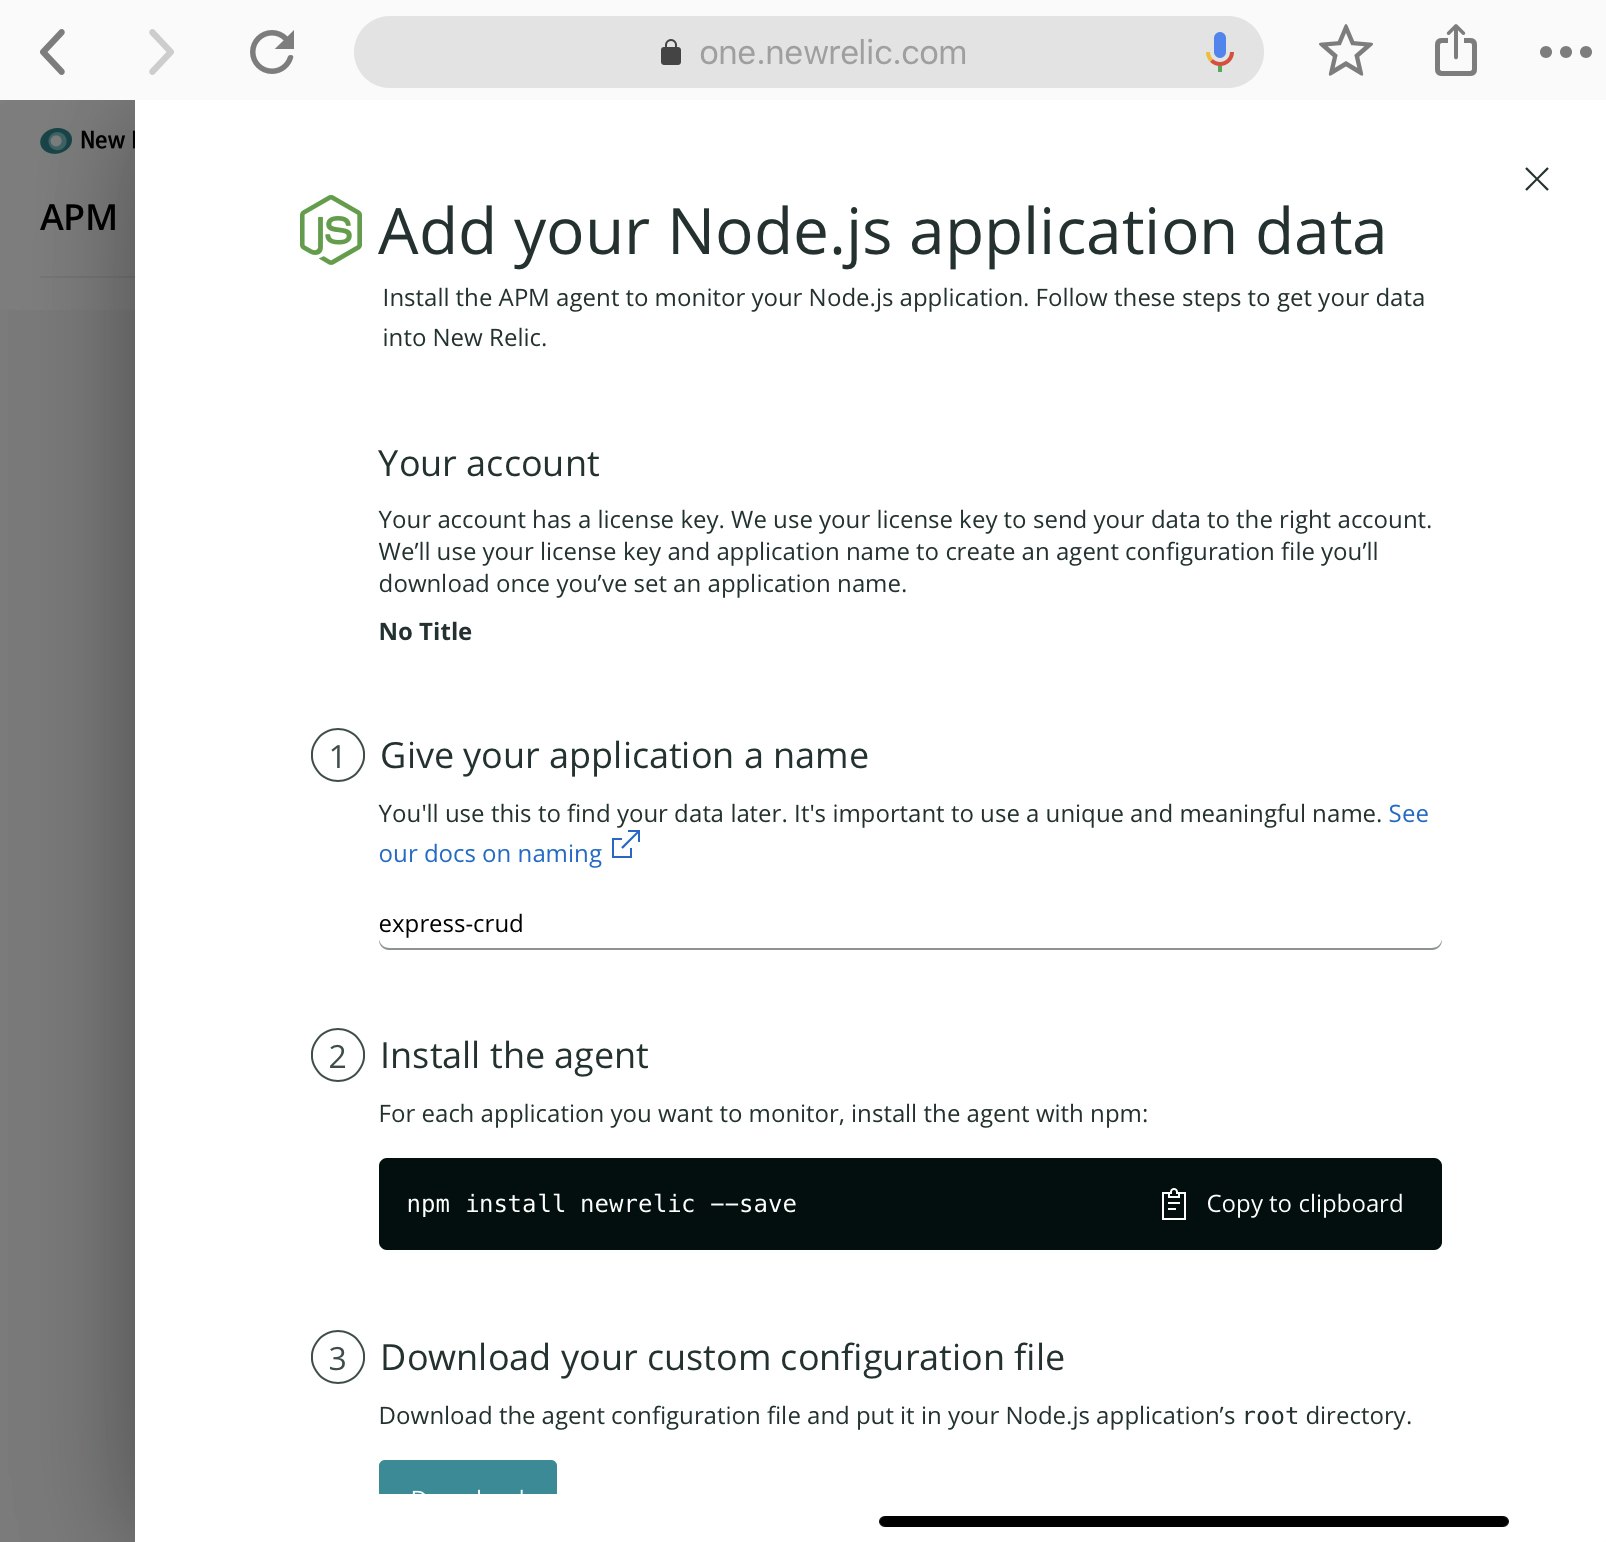
手順に記載の通り実行する。
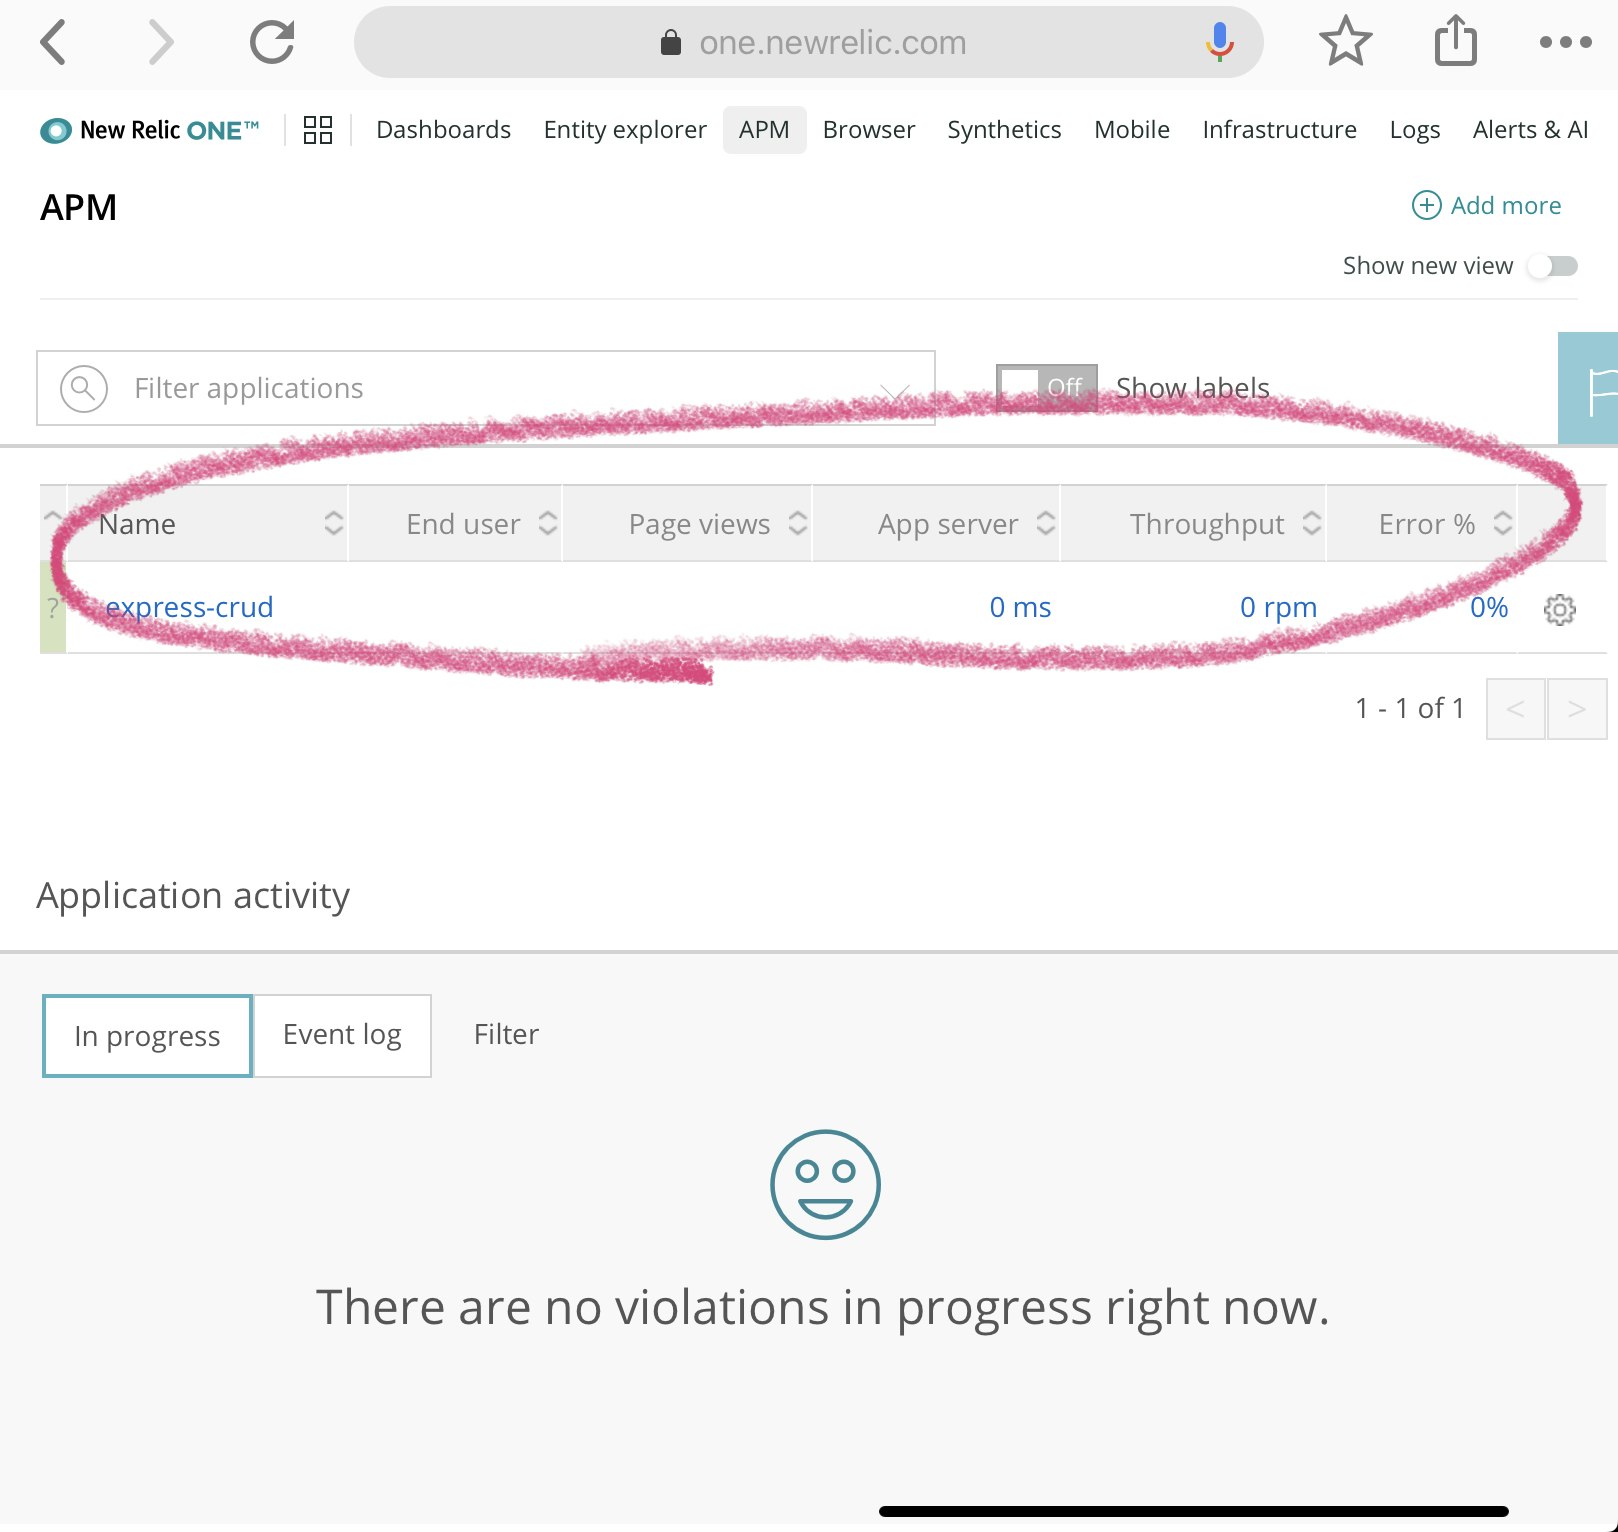
1 - アプリケーションの名前は、express-crudとする
2 - モジュールをインストールする
# cd ~/express_crud
# npm install newrelic --save
3 - 生成されたjavascriptを~/express_crud/以下に、newrelic.jsとして保存する。
4 - app.jsからrequire する。
require('newrelic');
5 - forever で起動する。
# forever start app.js
... snip ...
info:    Forever processing file: app.js
6 - New Relic One のAPM のページから、express-crudが追加されていることを確認できる。
おわり
結構簡単に導入できた。
この後、リクエスト発生させながら、どういうメトリクスが取れるか眺める。