01 はじめに
【AWS】CloudFormtionでブログサービスを構築してみた(02.EC2,RDS,ALB編)の続きである。
過去に公開した記事は下記の通りである。
・【AWS】CloudFormtionでブログサービスを構築してみた(概要編)
・【AWS】CloudFormtionでブログサービスを構築してみた(01.Network編)
・【AWS】CloudFormtionでブログサービスを構築してみた(02.EC2,RDS,ALB編)
この記事で扱うものはコンポーネントは下記である。
1.S3
2.CloudFront
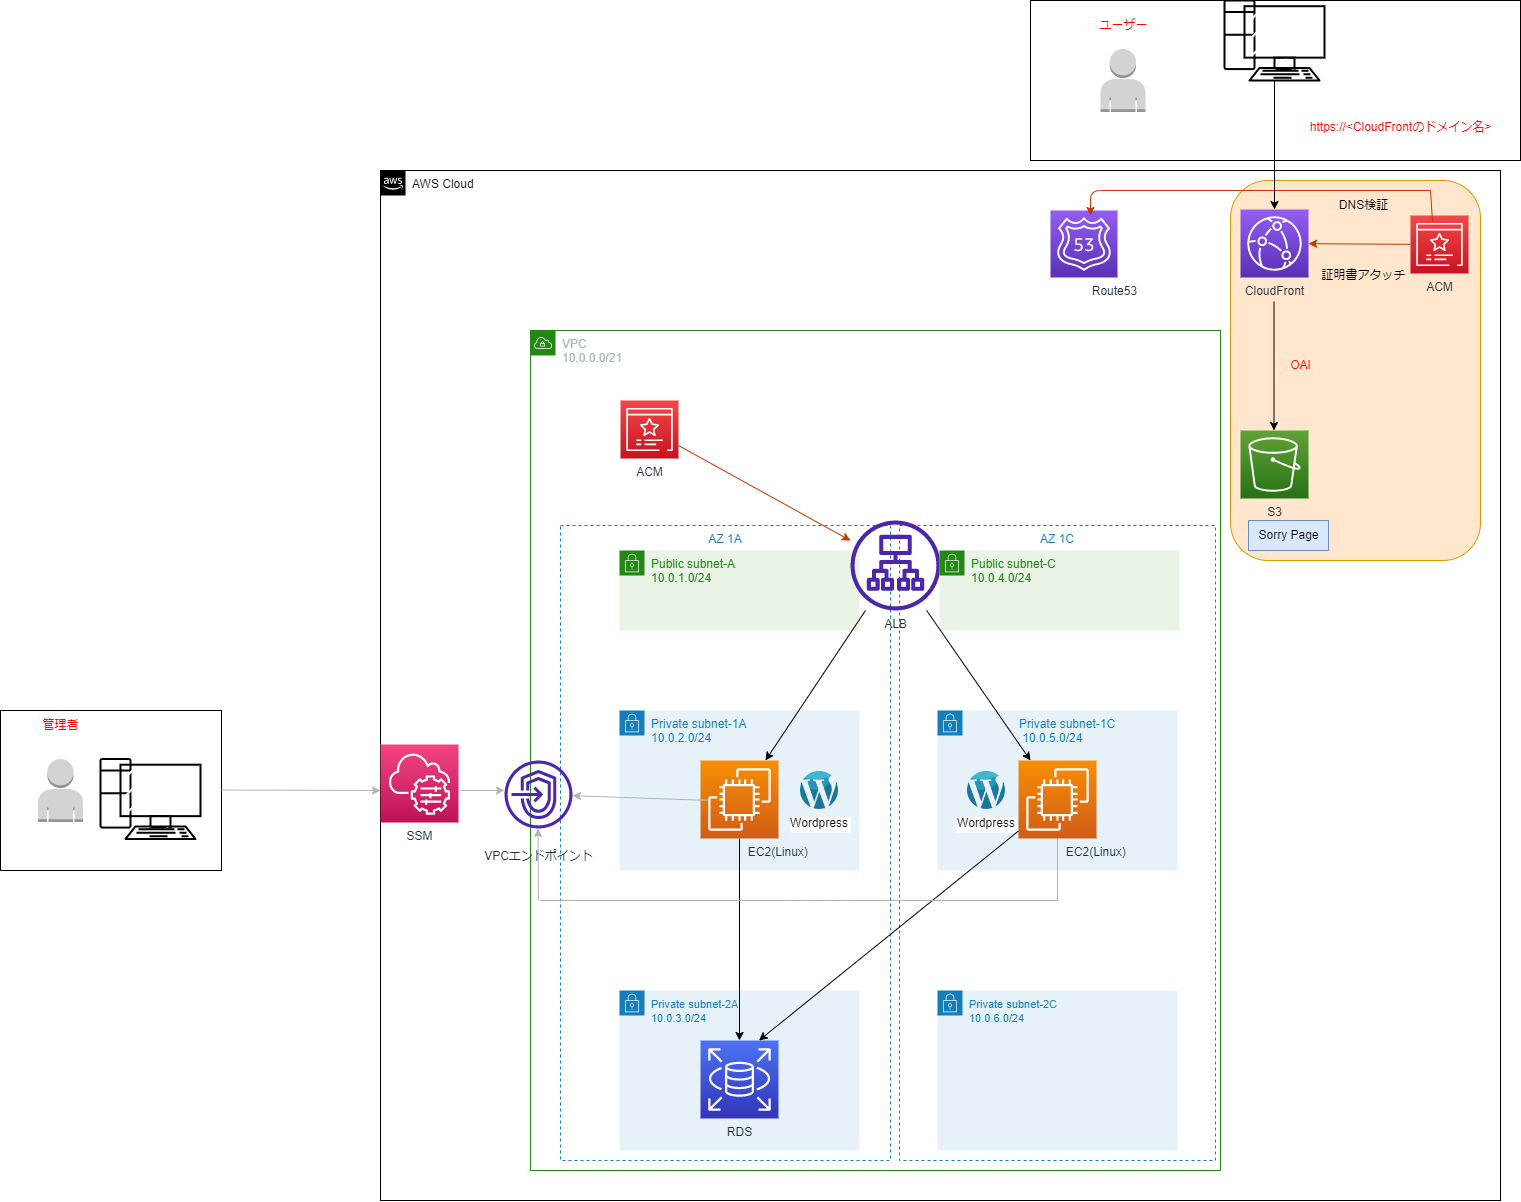
02 構成図
作成後、手動でS3にファイルをアップロードする。
03.S3-CloudFrontの設計
1.OAIを実装して、S3エンドポイントにはCloudFrontを経由した場合のみアクセス可能にする。
(S3エンドポイントには直接アクセス不可にする)
2.S3バケットポリシーのプリンシパルを
Principal: "*"
にしているが、Route53の兼ね合いでこの設定にしている。
PrincipalをCloudFrontのみ許可の設定にしたら
独自ドメインでCloudFrontに通信を流したらアクセスできなかったため。
もしこの設定以外で回避できるのであれば試してみたい。
3.httpアクセスしたらCloudFrontでhttpsにリダイレクトさせる
4.設定変更した際にすぐ反映が確認できるようにTTLは60にしている。
04.テスト方法
設定変更後は下記観点でテストする
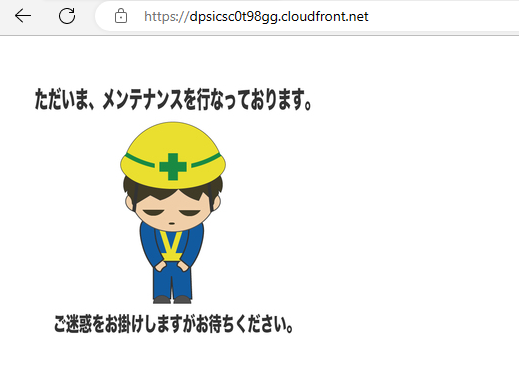
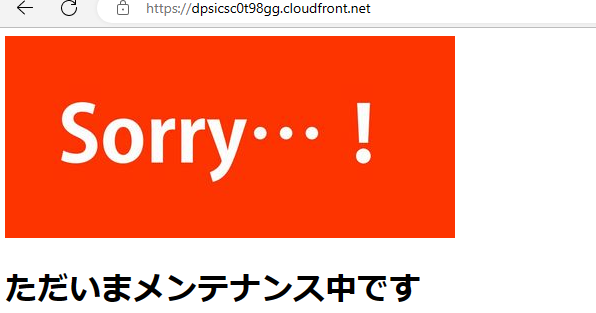
1.CloudFrontから発行されたドメインにhttpsアクセスしてSorryページが表示されるか確認する。
2.S3エンドポイントに直接アクセスしてアクセス不可なことも確認する。
3.画像を差し替える。差し替え後少し経ったら再アクセスして差し替えた画像が表示されるか確認する
4.httpアクセスがhttpsにリダイレクトされるか確認する。
05.事前準備
CloudFrontに証明書をアタッチするためバージニアリージョンで証明書を取得する。
06.テンプレートファイル
AWSTemplateFormatVersion: 2010-09-09
Description: CF-S3,CloudFront
# ------------------------------------------------------------#
#  パラメータ
# ------------------------------------------------------------#
Parameters:
  #バケット名を指定
  S3BucketName:
    Type: String
    Description: Type of this BacketName.

  #バージニアリージョンで取得した証明書のARNを指定
  ACMarn:
    Type: String
    Description: Type of this ACM-ARN at us-east-1

  #Route53で設定するFQDNを指定
  Aliases:
    Type: String
    Description: Type of this FQDN

# ------------------------------------------------------------#
#  リソース
# ------------------------------------------------------------#
Resources:
# ------------------------------------------------------------#
# S3
# ------------------------------------------------------------#
  s3Bucket:
    Type: AWS::S3::Bucket
    Properties:
      AccessControl: Private
      BucketName:  !Sub ${S3BucketName}
      #外部アクセスの許可はしない
      PublicAccessBlockConfiguration:
        BlockPublicAcls: "true"
        BlockPublicPolicy: "true"
        IgnorePublicAcls: "true"
        RestrictPublicBuckets: "true"
      Tags:
        - Key: Name
          Value: CF-S3

# ------------------------------------------------------------#
# S3バケットポリシーの設定
# ------------------------------------------------------------#
  BucketPolicy:
    Type: AWS::S3::BucketPolicy
    Properties:
      Bucket: !Ref "s3Bucket"
      PolicyDocument:
        Id: !Sub '${AWS::StackName}-BucketPolicy'
        Statement:
          - Sid: AddPerm
            Effect: Allow
            Principal: "*"
            Action:
              - s3:GetObject
            #下記2つのファイルをあげる予定なのでそれ以外は拒否する
            Resource:
              - !Sub 'arn:aws:s3:::${s3Bucket}/index.html'
              - !Sub 'arn:aws:s3:::${s3Bucket}/image/image.png'
            Condition:
            #CloudFrontとCloudFormationからのアクセスを許可する
              StringEquals:
                aws:UserAgent: Amazon CloudFront
              StringNotEquals:
                "aws:CalledVia":
                  - "cloudformation.amazonaws.com"

# ------------------------------------------------------------#
# CloudFront-OAI
# ------------------------------------------------------------#
  OriginAccessIdentity:
    Type: AWS::CloudFront::CloudFrontOriginAccessIdentity
    Properties:
      CloudFrontOriginAccessIdentityConfig:
        Comment: !Sub
          - "OAI-${S3Bucket}"
          - S3Bucket: !Ref s3Bucket

# ------------------------------------------------------------#
# CloudFrontDistribution
# ------------------------------------------------------------#
  CloudFrontDistribution:
    Type: AWS::CloudFront::Distribution
    DependsOn: s3Bucket
    Properties:
      DistributionConfig:
        Origins:
          - Id: CustomOrigin
            DomainName: !Sub "${S3BucketName}.s3.ap-northeast-1.amazonaws.com"
            CustomOriginConfig:
              HTTPPort: 80
              OriginProtocolPolicy: http-only
        Enabled: true
        #最安値のものを使用
        PriceClass: PriceClass_100
        DefaultRootObject: index.html
        CustomErrorResponses:
          - ErrorCachingMinTTL: 10
            ErrorCode: 403
            ResponseCode: 503
            ResponsePagePath: /index.html
        Comment: !Sub '${AWS::StackName}-distribution'
        DefaultCacheBehavior:
          TargetOriginId: CustomOrigin
          ForwardedValues:
            QueryString: false
          DefaultTTL: 60
          MaxTTL: 60
          MinTTL: 60
          #httpsにリダイレクトさせる
          ViewerProtocolPolicy: redirect-to-https
        Aliases:
        - !Sub '${Aliases}'
        ViewerCertificate:
          SslSupportMethod: sni-only
          AcmCertificateArn: !Ref  ACMarn
      Tags:
        - Key: CloudFormationArn
          Value: !Sub '${AWS::StackName}'


Outputs:
  #CloudFrontのDNS名の定義(Route53で使う)
  CloudFrontDNS:
      Value: !GetAtt CloudFrontDistribution.DomainName
      Export:
        Name: CloudFront-DNS-Outputs
07.テストアクセス
1.CloudFrontから発行されたドメインにhttpsアクセスしてSorryページが表示されるか確認する。

→想定通り
2.S3エンドポイントに直接アクセスしてアクセス不可なことも確認する
今回は下記ドメインにした

アクセスができないことを確認する

→想定通り
3.画像を差し替える。差し替え後少し経ったら再アクセスして差し替えた画像が表示されるか確認する。

→想定通り
4.httpアクセスがhttpsにリダイレクトされるか確認する。
>curl http://dpsicsc0t98gg.cloudfront.net -o /dev/null -w '%{http_code}\n' -s
'301
'
>
→想定通り
参考文献


