初めに
ほとんどのアプリがapi通信をすると思います。
なんか楽にクライアント生成できるのないかな〜と調べていたらretrofitというライブラリを見つけました。
今回はそれを導入してみようと思います。
サンプルアプリ
まずはサンプルアプリの仕様をざっくり決めます。
- Qiitaのapiを使用して最新記事を取得する
- 取得した記事を一覧で表示する
- 記事のタイトルをタップしたら記事詳細をwebviewで開く
今回はこんな感じの簡単なアプリにします!
retforitの仕組み
導入する前にざっくりとどういう仕組みで動くのか理解します。
公式のReadmeやSampleを見ればなんとなくわかると思いますが、
abstractでapiのエンドポイントを定義。
この定義されたファイルを元にクライアントの実体を自動生成する仕組みです。
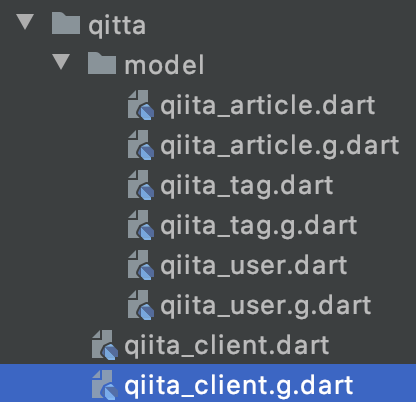
自動生成されるファイルは.g.dartとgがつくのが慣例のようです。
(多分generateのgかな?)
生成されるファイル名はpart句で宣言します。
pubspec.yaml
お決まりのyaml定義。
※バージョンを固定する場合はanyを書き換えてください。
dependencies:
  http: any
  retrofit: ^1.3.4
  json_annotation: ^3.0.1

dev_dependencies:
  retrofit_generator: any
  json_serializable: any
  build_runner: any
apiクライアントのabstract
// qiita_client.dart

part 'qiita_client.g.dart';  // これが自動生成される実体のファイル名

// ここにbaseUrlを定義(引数で上書きできるようになってます)
@RestApi(baseUrl: "https://qiita.com/api")
abstract class QiitaClient {
  // dioの説明は割愛しますm(_ _)m
  // ここはまだ実体(_QiitaClient)がないのでエラーになったままです。
  // 自動生成すると、qiita_client.g.dartの中に_QiitaClientができます
  factory QiitaClient(Dio dio, {String baseUrl}) = _QiitaClient;

  @GET("/v2/items")
  Future<List<QiitaArticle>> fetchItems(
      @Field("page") int page,
      @Field("per_page") int perPage,
      @Field("query") String query);

}
リクエスト・レスポンスのデータクラス定義
今回はレスポンスだけ定義します。
// qiita_article.dart

part 'qiita_article.g.dart';

// クラスの中に独自クラスがあって展開する場合はexplicitToJson:trueにします。
// ここではQiitaUserという独自クラスがあるのでtrueにしてます。
@JsonSerializable(explicitToJson: true)
class QiitaArticle {
  // JsonKeyでjsonの名前を定義します。同じなら省略できます。
  @JsonKey(name: 'rendered_body')
  String renderedBody;
  String body;
  bool coediting;
  @JsonKey(name: 'comments_count')
  int commentsCount;
  @JsonKey(name: 'created_at')
  DateTime createdAt;
  String group;
  String id;
  @JsonKey(name: 'likes_count')
  int likesCount;
  bool private;
  @JsonKey(name: 'reactions_count')
  int reactionsCount;
  List<QiitaTag> tags;
  String title;
  @JsonKey(name: 'updated_at')
  DateTime updatedAt;
  String url;
  QiitaUser user;
  @JsonKey(name: 'page_views_count')
  int pageViewsCount;

  QiitaArticle({
    this.renderedBody,
    this.body,
    this.coediting,
    this.commentsCount,
    this.createdAt,
    this.group,
    this.id,
    this.likesCount,
    this.private,
    this.reactionsCount,
    this.tags,
    this.title,
    this.updatedAt,
    this.url,
    this.user,
    this.pageViewsCount,
  });

}
自動生成を走らせる前は余計なコード(factryや定数とかゲッターとか)は書かないことをお勧めします。
何かしらのエラーが発生するとファイルが生成されなかったです。
自動生成
ファイルの準備が終わったらターミナルで以下コマンドを実行します。
flutter pub run build_runner build
正常に終了すると.g.dartがひょこっと出てきます。
マッピング関数追加
自動生成されたのでjson→クラス、factoryを追加してあげます。
part 'qiita_article.g.dart';

@JsonSerializable(explicitToJson: true)
class QiitaArticle {
  @JsonKey(name: 'rendered_body')
  String renderedBody;
  String body;
  bool coediting;
  @JsonKey(name: 'comments_count')
  int commentsCount;
  @JsonKey(name: 'created_at')
  DateTime createdAt;
  String group;
  String id;
  @JsonKey(name: 'likes_count')
  int likesCount;
  bool private;
  @JsonKey(name: 'reactions_count')
  int reactionsCount;
  List<QiitaTag> tags;
  String title;
  @JsonKey(name: 'updated_at')
  DateTime updatedAt;
  String url;
  QiitaUser user;
  @JsonKey(name: 'page_views_count')
  int pageViewsCount;

  QiitaArticle({
    this.renderedBody,
    this.body,
    this.coediting,
    this.commentsCount,
    this.createdAt,
    this.group,
    this.id,
    this.likesCount,
    this.private,
    this.reactionsCount,
    this.tags,
    this.title,
    this.updatedAt,
    this.url,
    this.user,
    this.pageViewsCount,
  });

  // ↓ 追記
  factory QiitaArticle.fromJson(Map<String, dynamic> json) => _$QiitaArticleFromJson(json);
  Map<String, dynamic> toJson() => _$QiitaArticleToJson(this);

  @override
  String toString() => json.encode(toJson());
  // ↑ 追記
}
apiクライアントを使う
できたクライアントを実際に使ってみます。
今回はクライアントを生成するリポジトリを作って呼び出すことにします。
Statusコードも欲しいのでApiResponseというクラスに変換して返却することにしました。
(これ本来はClient側でやるべきかもしれません)
class QiitaRepository {

  final QiitaClient _client;

  QiitaRepository([QiitaClient client]):
        // オプショナルの第2引数でbaseUrlを変更できる
        // QiitaClient(Dio(), "http://127.0.0.1:8081") という感じ
        _client = client ?? QiitaClient(Dio())
  ;

  Future<ApiResponse> fetchArticle(int page, int perPage, String query) async {

    return await _client.fetchItems(page, perPage, query)
        .then((value) =>  ApiResponse(ApiResponseType.OK, value))
        .catchError((e) {
          // エラーハンドリングについてのretrofit公式ドキュメント
          // https://pub.dev/documentation/retrofit/latest/
          int errorCode = 0;
          String errorMessage = "";
          switch (e.runtimeType) {
            case DioError:
              // 失敗した応答のエラーコードとメッセージを取得するサンプル
              // ここでエラーコードのハンドリングると良さげ
              final res = (e as DioError).response;
              if (res != null) {
                errorCode = res.statusCode;
                errorMessage = res.statusMessage;
              }
              break;
            default:
          }
          // ・・・ 省略 ・・・
        });
  }

}

// 共通のレスポンスクラスとして定義
// resultはdynamicにしとく。(使う側でcastする)
class ApiResponse {

  final ApiResponseType apiStatus;
  final dynamic result;
  final String customMessage;

  ApiResponse(this.apiStatus, this.result, this.customMessage);

}

// ここは必要に応じて定義
enum ApiResponseType {
  OK,
  BadRequest,
  Forbidden,
  NotFound,
  MethodNotAllowed,
  Conflict,
  InternalServerError,
  Other,
}
呼び出してみる
今回はChangeNotifier使ってるのでViewModel側に呼び出し部分をコーディングしました。
class HomeScreenViewModel with ChangeNotifier {

  QiitaRepository _qiitaRepository;
  List<QiitaArticle> articles = [];

  HomeScreenViewModel([QiitaRepository qiitaRepository]) {
    _qiitaRepository = qiitaRepository ?? QiitaRepository();
  }

  Future<bool> fetchArticle() async {
    return _qiitaRepository.fetchArticle(1, 20, "qiita user:Qiita")
        .then((result) {
          if (result == null || result.apiStatus!= ApiResponseType.OK) {
            // TODO: 何かしらのエラー処理

            // 画面に変更通知
            notifyListeners();
            return false;
          }

          // 結果を配列にadd
          articles.addAll(result.result);
          // 画面に変更通知
          notifyListeners();
          return true;
        });
  }
}
画面側のリストはこんな感じで単純にリストに表示するようにしました。
// ・・・ 省略 ・・・
ListView.builder(
  key: Key(WidgetKey.KEY_HOME_LIST_VIEW),
  itemBuilder: (BuildContext context, int index) {

    var length = context.read<HomeScreenViewModel>().articles.length -1;

    // 最終行まできたら
    if (index == length) {
      // 追加読み込みの関数をcall
      context.read<HomeScreenViewModel>().loadMore(context);
      // 画面にはローディング表示しておく
      return new Center(
        child: new Container(
          margin: const EdgeInsets.only(top: 8.0),
          width: 32.0,
          height: 32.0,
          child: const CircularProgressIndicator(),
        ),
      );
    } else if (index > length) {
      // ローディング表示より先は無し
      return null;
    }

    // データがあるので行アイテムを作成して返却
    return Container(
      child: rowWidget(context, index),
      alignment: Alignment.bottomLeft,
      decoration: BoxDecoration(
          border: Border.all(color: Colors.grey)
      ),
    );
  },
)
// ・・・ 省略 ・・・
できました!

終わりに
面倒なapi通信の実体の部分を自動生成してくれるので結構楽チンでした。
baseUrlも差し替えられるのでモック化も問題無くできそうな気はします。(まだ試してないです)
使っていて問題があるようでしたら追記していこうと思います。
最終的なサンプルプロジェクトはこちら
※少しづつ手を加えてるのでこちらに記載したコードと違うところがあります。
次は単体テスト・ウィジェットテスト・結合テストについて調べてみようと思います。