はじめに
- raspi4 + ubuntu20.04 + ROS(foxy)の環境を構築してみます。
- 更新日
- 2020/06/16
- 2021/07/07
目次
- Raspberry Pi 4にUbuntu 20.04 LTSをインストールする
- Ubuntu 20.04 LTSにROS2のインストール
- テストコードを実行してみる
1. Raspberry Pi 4にUbuntu 20.04 LTSをインストールする
用意したもの
- Raspberry Pi 4 computer Model B 4GB RAM
- micro SDカード(今回は16GB)
- PC(mac or windows or linux)
手順
(1) Raspberry Pi Imagerをインストール
- 公式ページからmy PCにダウンロード
- macの場合、homebrewでも簡単に取れる
brew install raspberry-pi-imager
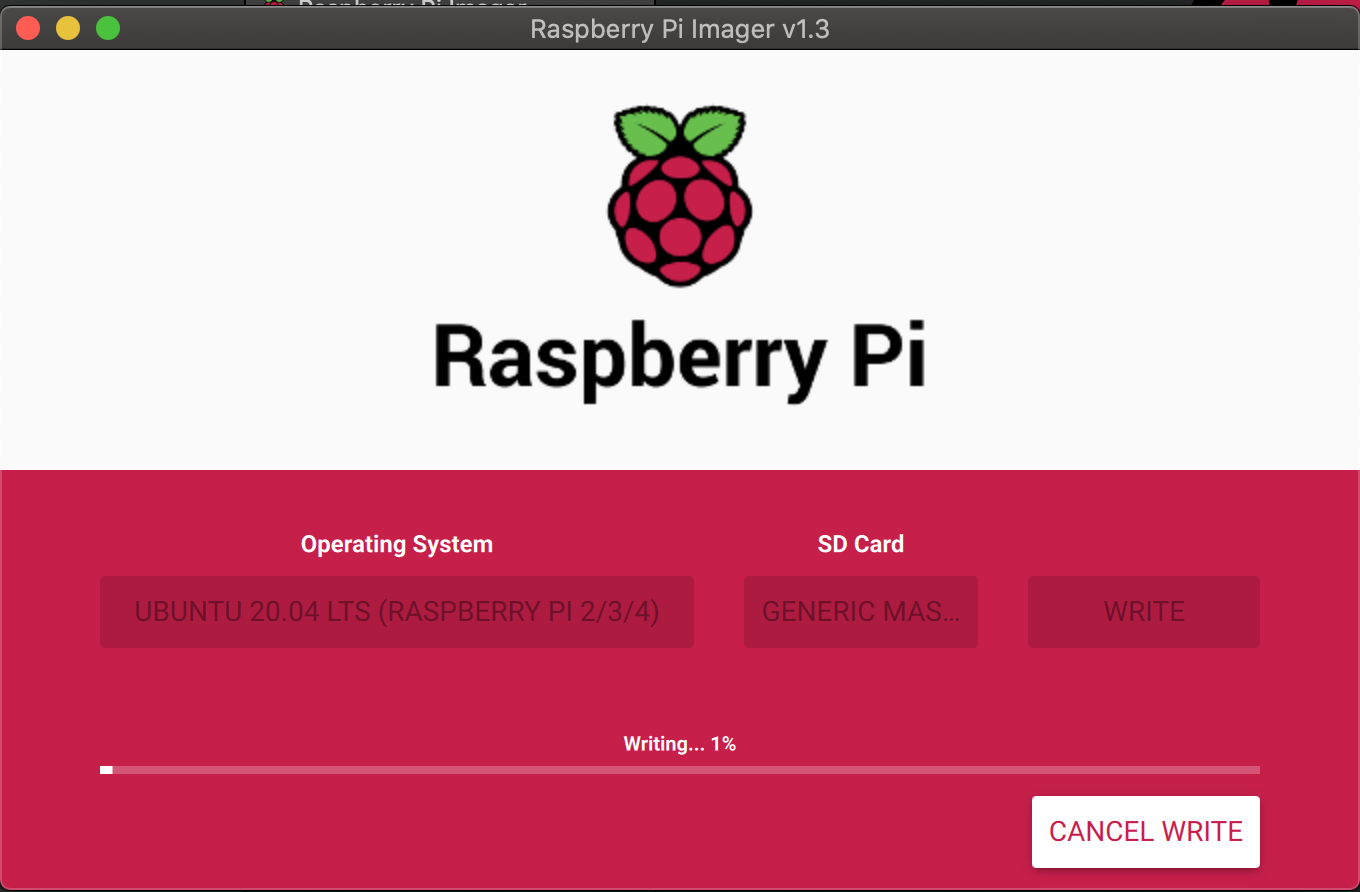
(2) Raspberry Pi Imagerを使ってmicroSDカードにイメージを書き込む
-
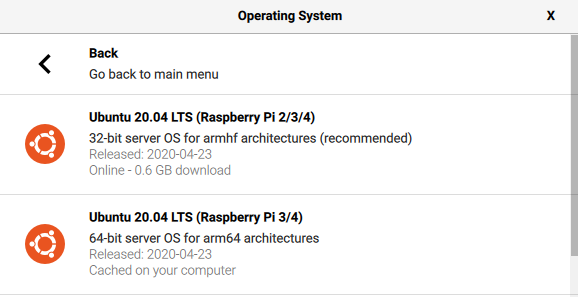
operating systemでubuntu 20.04 LTSを選択
- ROS2をインストールする場足は、64bitをとりましょう
- ちなみに、ubuntu 21.04に対応したROS2のversionは、21/07/07の時点ではreleaseされていないようです
- SD cardを指定して、WRITEを押す
- SDカードを取り外して終了
(3) raspi4を起動
- (2)でイメージを書き込んだSDカードをraspiに差して起動(電源を繋ぐ)
- 初回は時間がかかる、、?
- ログインする
- デフォルトのユーザ名
ubuntu - デフォルトのパスワード
ubuntu
- デフォルトのユーザ名
- パスワードを変更する
(4) ホスト名、タイムゾーン、IPアドレスの設定
ホスト名の設定
sudo hostnamectl set-hostname ooo
タイムゾーンの設定
sudo timedatectl set-timezone Asia/Tokyo
IPアドレスの設定
sudo vim /etc/netplan/50-cloud-init.yaml
- 参考ファイル
- 192.168.xxx.1がルーターのIP
- 192.168.xxx.yyyがraspiのIP
50-cloud-init.yaml
network:
    ethernets:
        eth0:
            dhcp4: false
            addresses: [192.168.xxx.yyy/24]
            gateway4: 192.168.xxx.1
            nameservers:
                addresses: [192.168.xxx.1]
    version: 2
- 編集が終わったらnetplanで設定を反映させる
sudo netplan apply
sudo reboot
2. Ubuntu 20.04 LTSにROS2のインストール
-
いろいろなversionがある
- これまでバージョン
- 今回は、ubuntu 20.04 LTSに対応した ROS2 foxyを使用する
-
基本的には公式ページのインストール手順に沿って思考停止でコピペしてれば終わる。はず。
- 今回は、公式ページの**Install argcomplete (optional)**までを行った。
手順
(1) ロケールのセットアップ
- OSの文字コードをUTF8にする
sudo locale-gen en_US en_US.UTF-8
sudo update-locale LC_ALL=en_US.UTF-8 LANG=en_US.UTF-8
export LANG=en_US.UTF-8
(2) Setup Sources
- ROS2のapt repositoryを加える
sudo apt update && sudo apt install curl gnupg2 lsb-release
curl -s https://raw.githubusercontent.com/ros/rosdistro/master/ros.asc | sudo apt-key add -
sudo sh -c 'echo "deb http://packages.ros.org/ros2/ubuntu `lsb_release -cs` main" > /etc/apt/sources.list.d/ros2-latest.list'
(3) ROS2のpackagesをインストール
- baseとdesktopの2種類があるが、今回はbaseをインストール
sudo apt update
sudo apt install ros-foxy-ros-base
(4) 環境設定
source /opt/ros/foxy/setup.bash
echo "source /opt/ros/foxy/setup.bash" >> ~/.bashrc
(5) argcompleteをインストール
- 必須ではない
- ROS2関連のコマンドラインをtabで補完できるようになる
sudo apt install python3-argcomplete
3. テストコードを実行してみる
- 今回は、python用のコードを実行する
手順
(1) ワークスペースを作って、テストコードを取得、
- C言語用のテストコード(rclcpp)もインストールされるので、今回は消しちゃいます。
mkdir -p ~/ros2/src
cd ~/ros2
git clone https://github.com/ros2/examples src/examples
cd ~/ros2/src/examples/
git checkout $ROS_DISTRO
rm -rf rclcpp
(2) colcon(ビルド用ツール)をインストール
- インストール参考ページ
- colconについてのページ
- colconについて
- ROS1とROS2の両バージョンが混在していてもビルドできるビルド用ツール
- ROS1パッケージのビルドはcatkin、ROS2はamentを呼出して行っている
- ROS1とROS2の両バージョンが混在していてもビルドできるビルド用ツール
sudo apt install python3-colcon-common-extensions
(3) パッケージをビルドする
cd ~/ros2
colcon build --symlink-install
(4) 環境設定
source ~/ros2/install/setup.bash
echo "source ~/ros2/install/setup.bash" >> ~/.bashrc
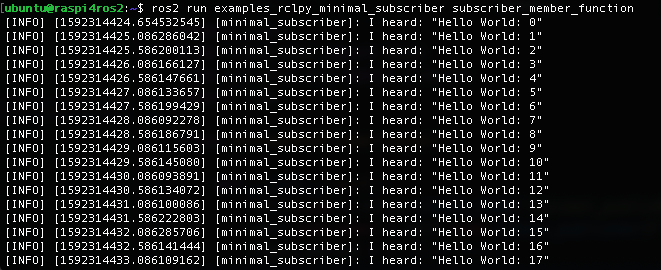
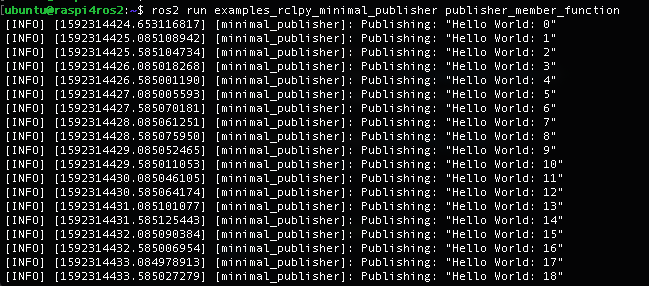
(5) 動作確認
- 端末(1)でPublisher
ros2 run examples_rclpy_minimal_publisher publisher_member_function
- 端末(2)でSubscriber
ros2 run examples_rclpy_minimal_subscriber subscriber_member_function
さすれば、 ファンタスティック!!!
-
今回実行したテストコードはこちら


