I would like to check the features of AWS Signer in the following steps.
以下の流れでAWS Signerの機能を確認します。
- Create sample python code for test of AWS Signer / 検証用サンプルPythonコードの作成&デプロイ
- Confirmation of lambda function / Lambda関数の稼働確認
- Create Signing Profiles using AWS Signer / AWS Signerにて署名プロファイルの作成
- Create Signing Jobs using AWS Signer / AWS Signerにて署名ジョブの作成
- Create code signing configuration / コード署名設定の作成
- Change the setting in lambda function / Lambda関数の設定変更(署名された関数以外デプロイ不可設定)
- Deployment test of unsigned python code / 署名されていないlambdaコードのデプロイ検証
- Deployment test of signed python code / 署名されたlambdaコードのデプロイ検証
- Summary of AWS Signer / まとめ
What Is AWS Signer?
AWS Signer is a fully managed code-signing service to ensure the trust and integrity of your code.
1. Create sample python code for test of AWS Signer / AWS Signerの検証で利用する為のサンプルPythonコードの作成
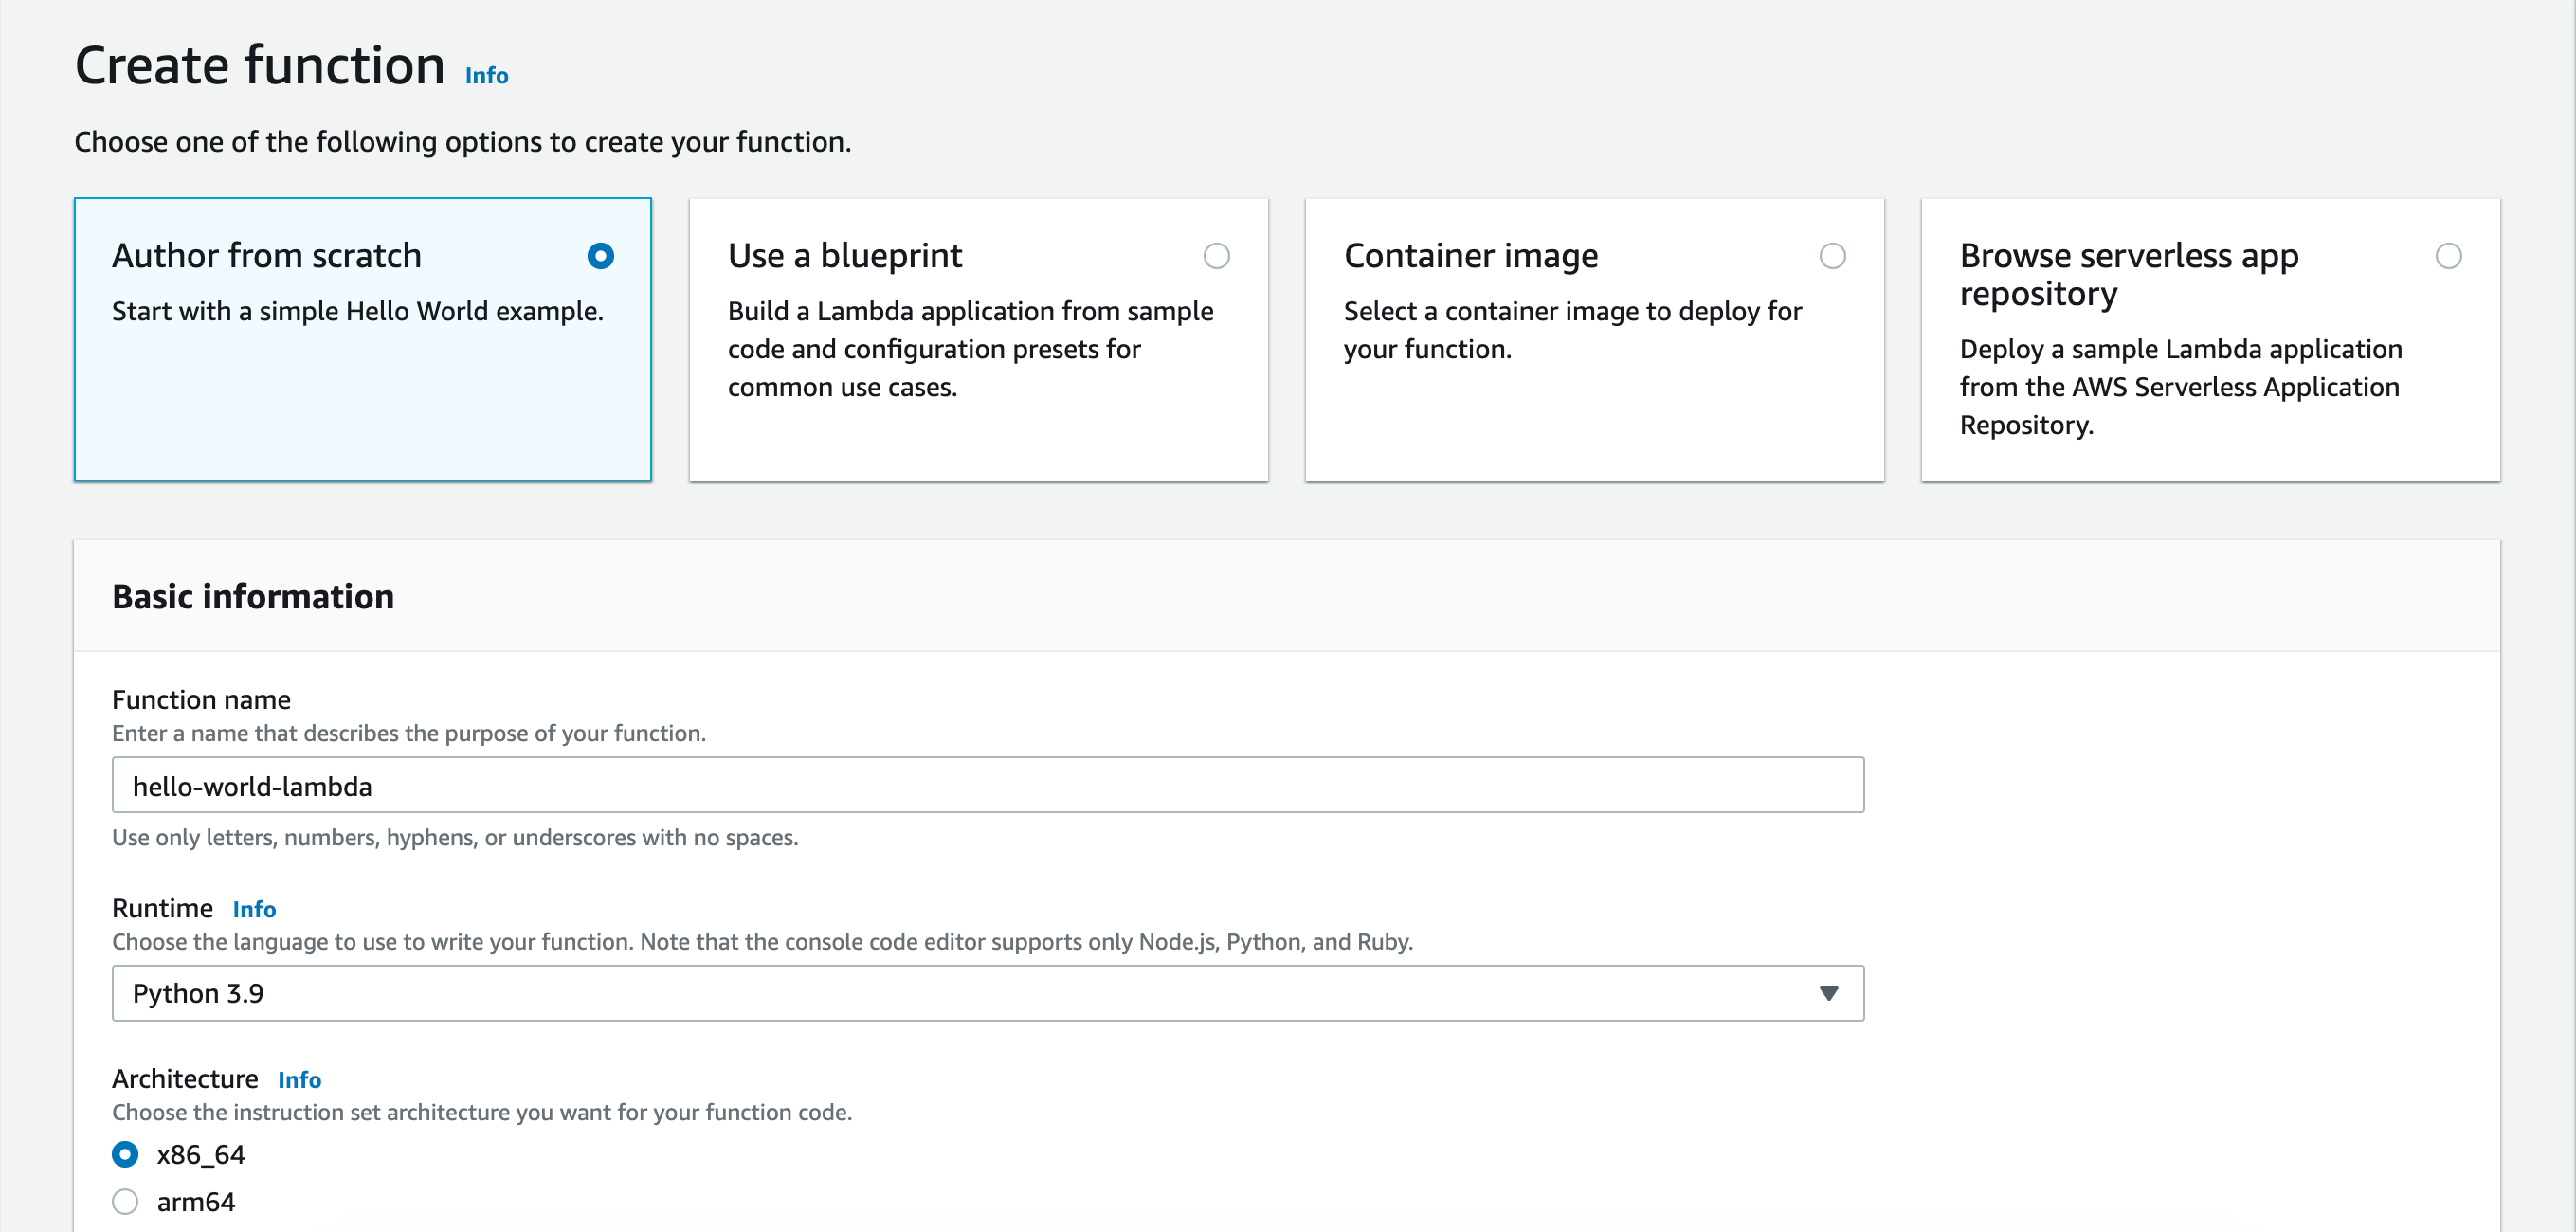
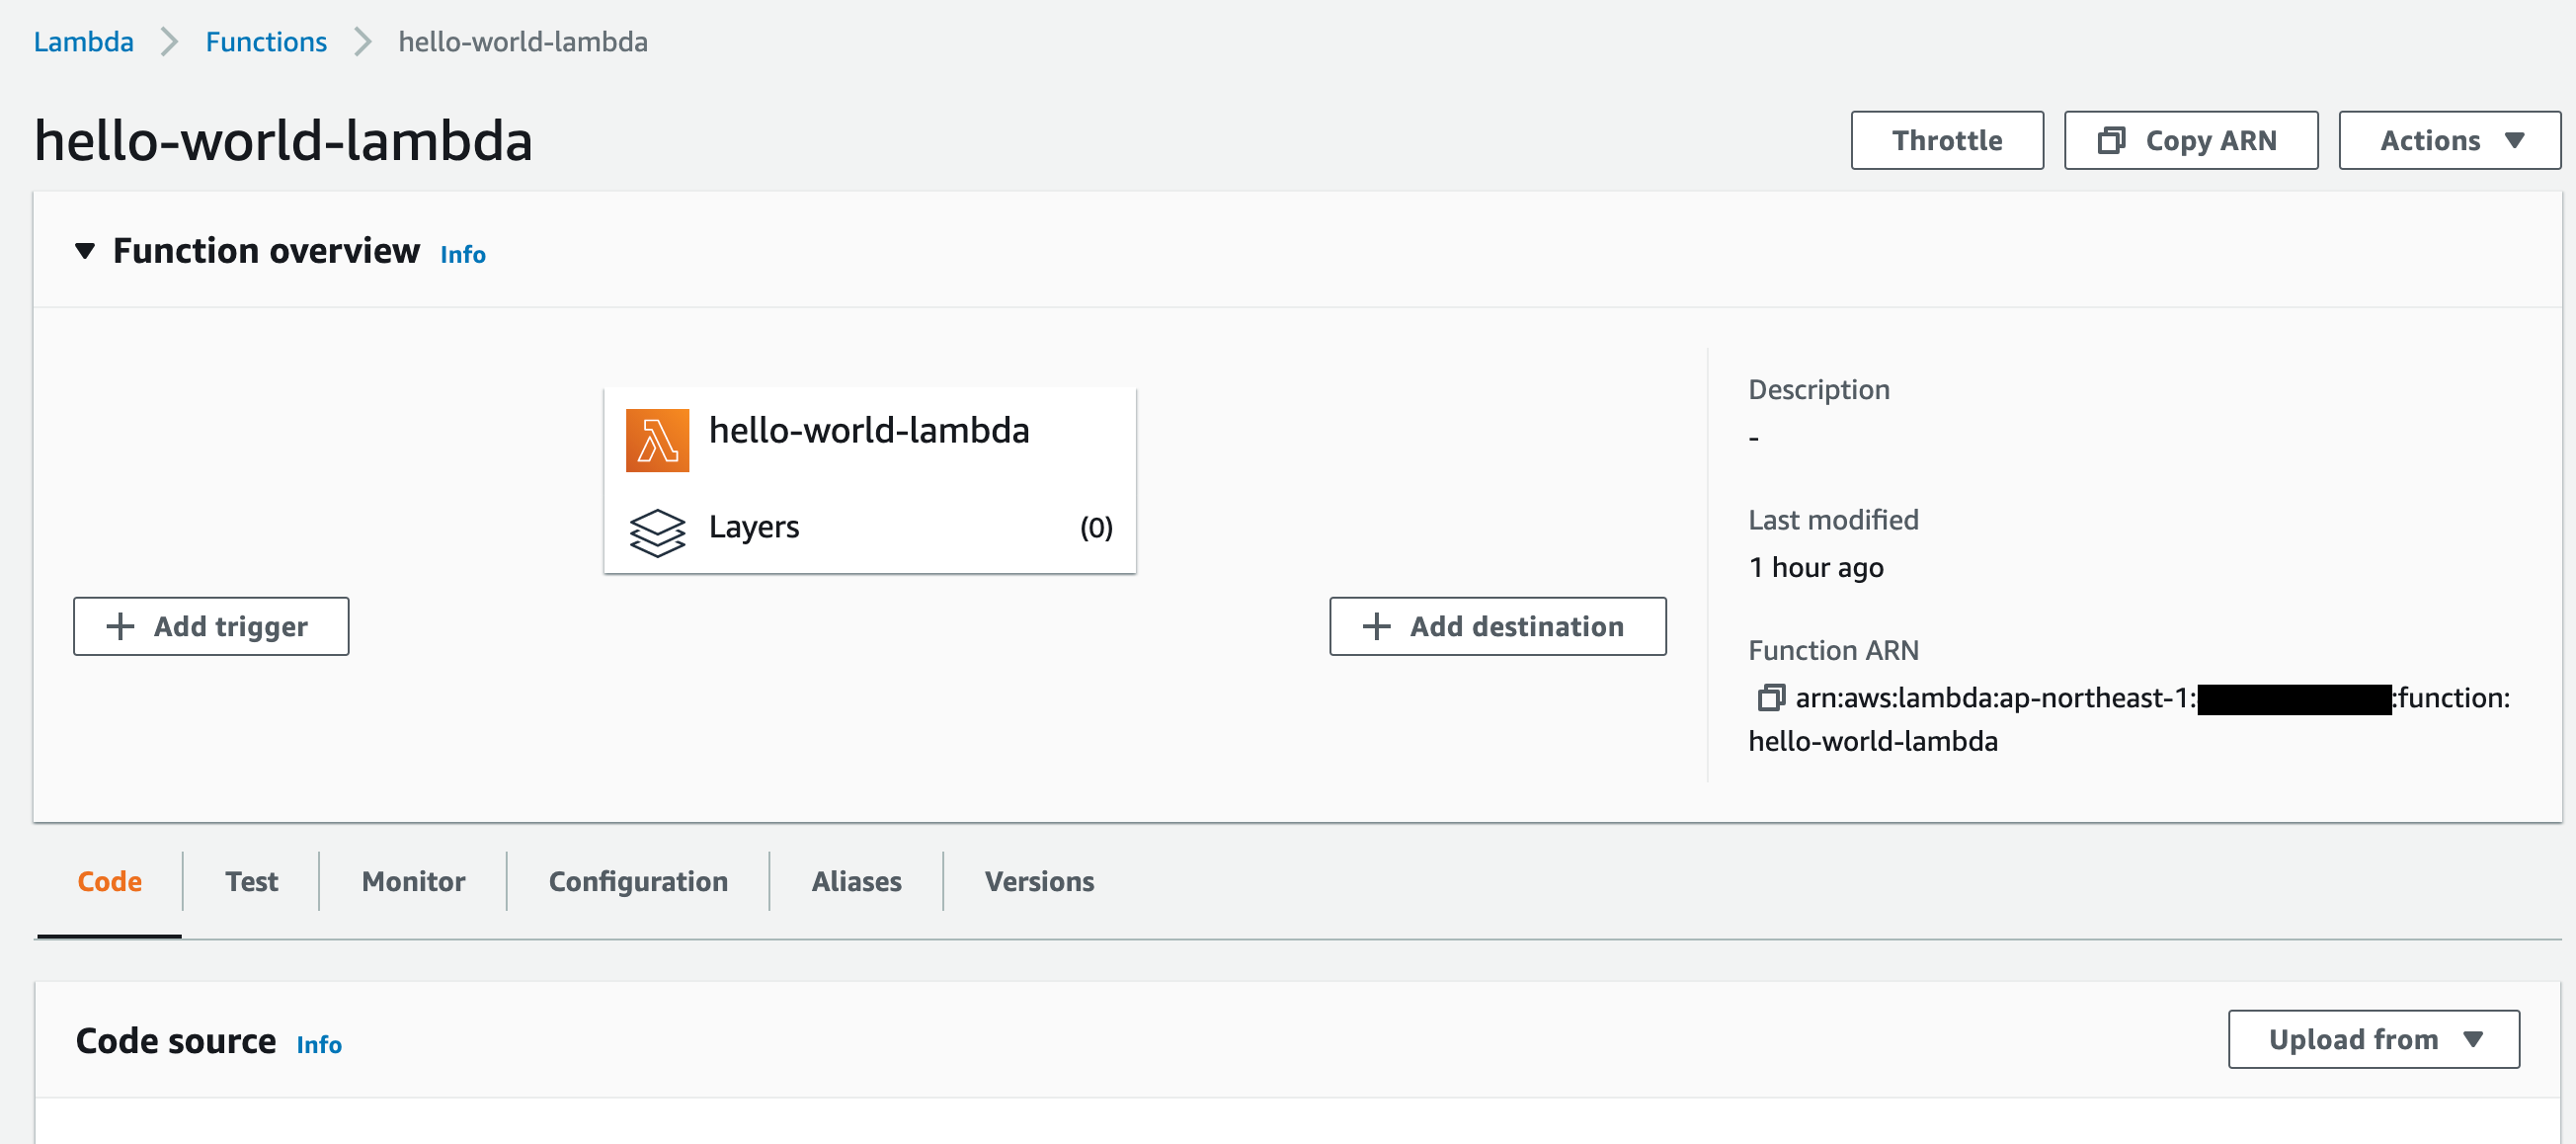
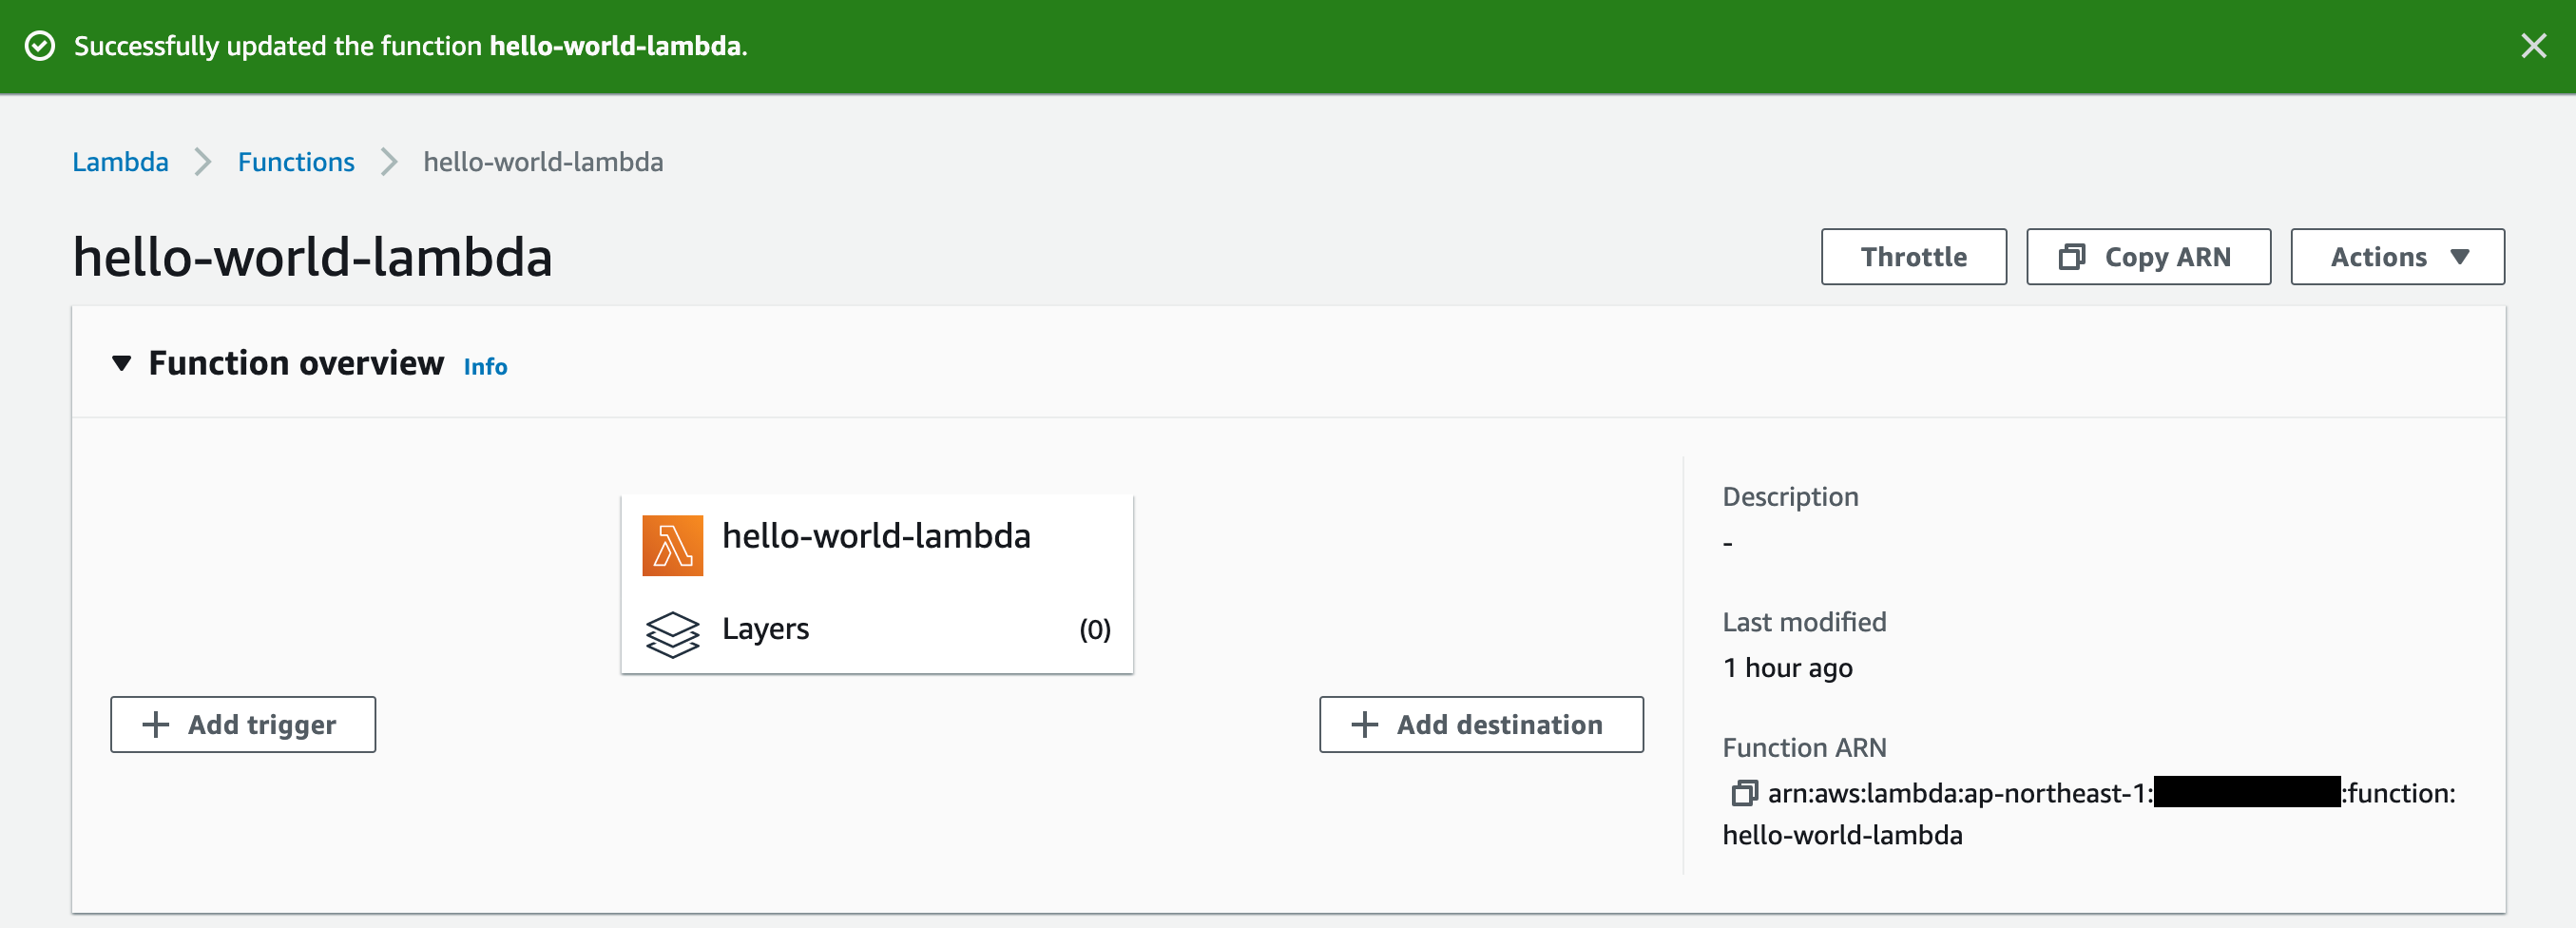
- Create lambda function using Management Console.
マネコンから、Lambda関数の作成 - The function name is "hello-world-lambda", Runtime is Python3.8.
関数名は、"hello-world-lambda", ランタイムはPython3.8 - The sample code is below.
検証で利用するサンプルコードは以下の通り
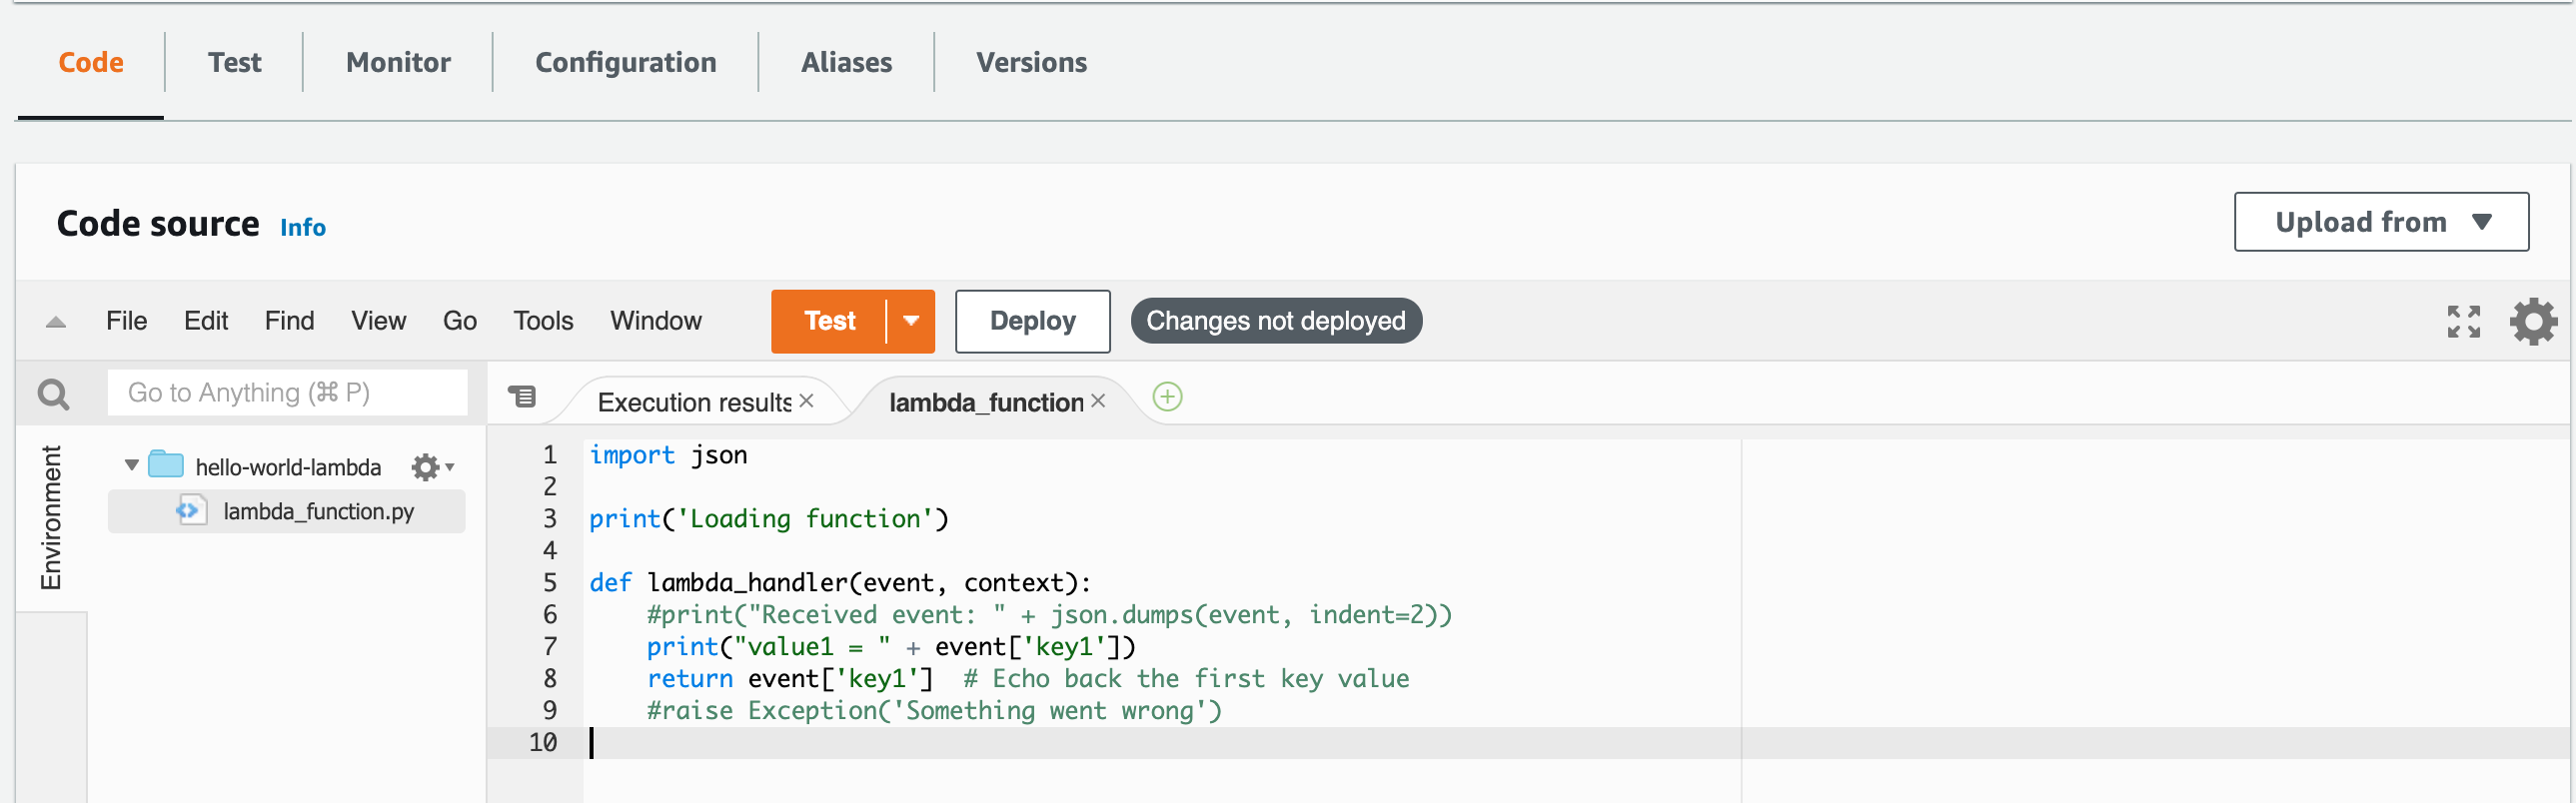
[root@localhost python]# cat hello-world-lambda.py
import json

print('Loading function')

def lambda_handler(event, context):
    #print("Received event: " + json.dumps(event, indent=2))
    print("value1 = " + event['key1'])
    return event['key1']  # Echo back the first key value
    #raise Exception('Something went wrong')

[root@localhost python]#
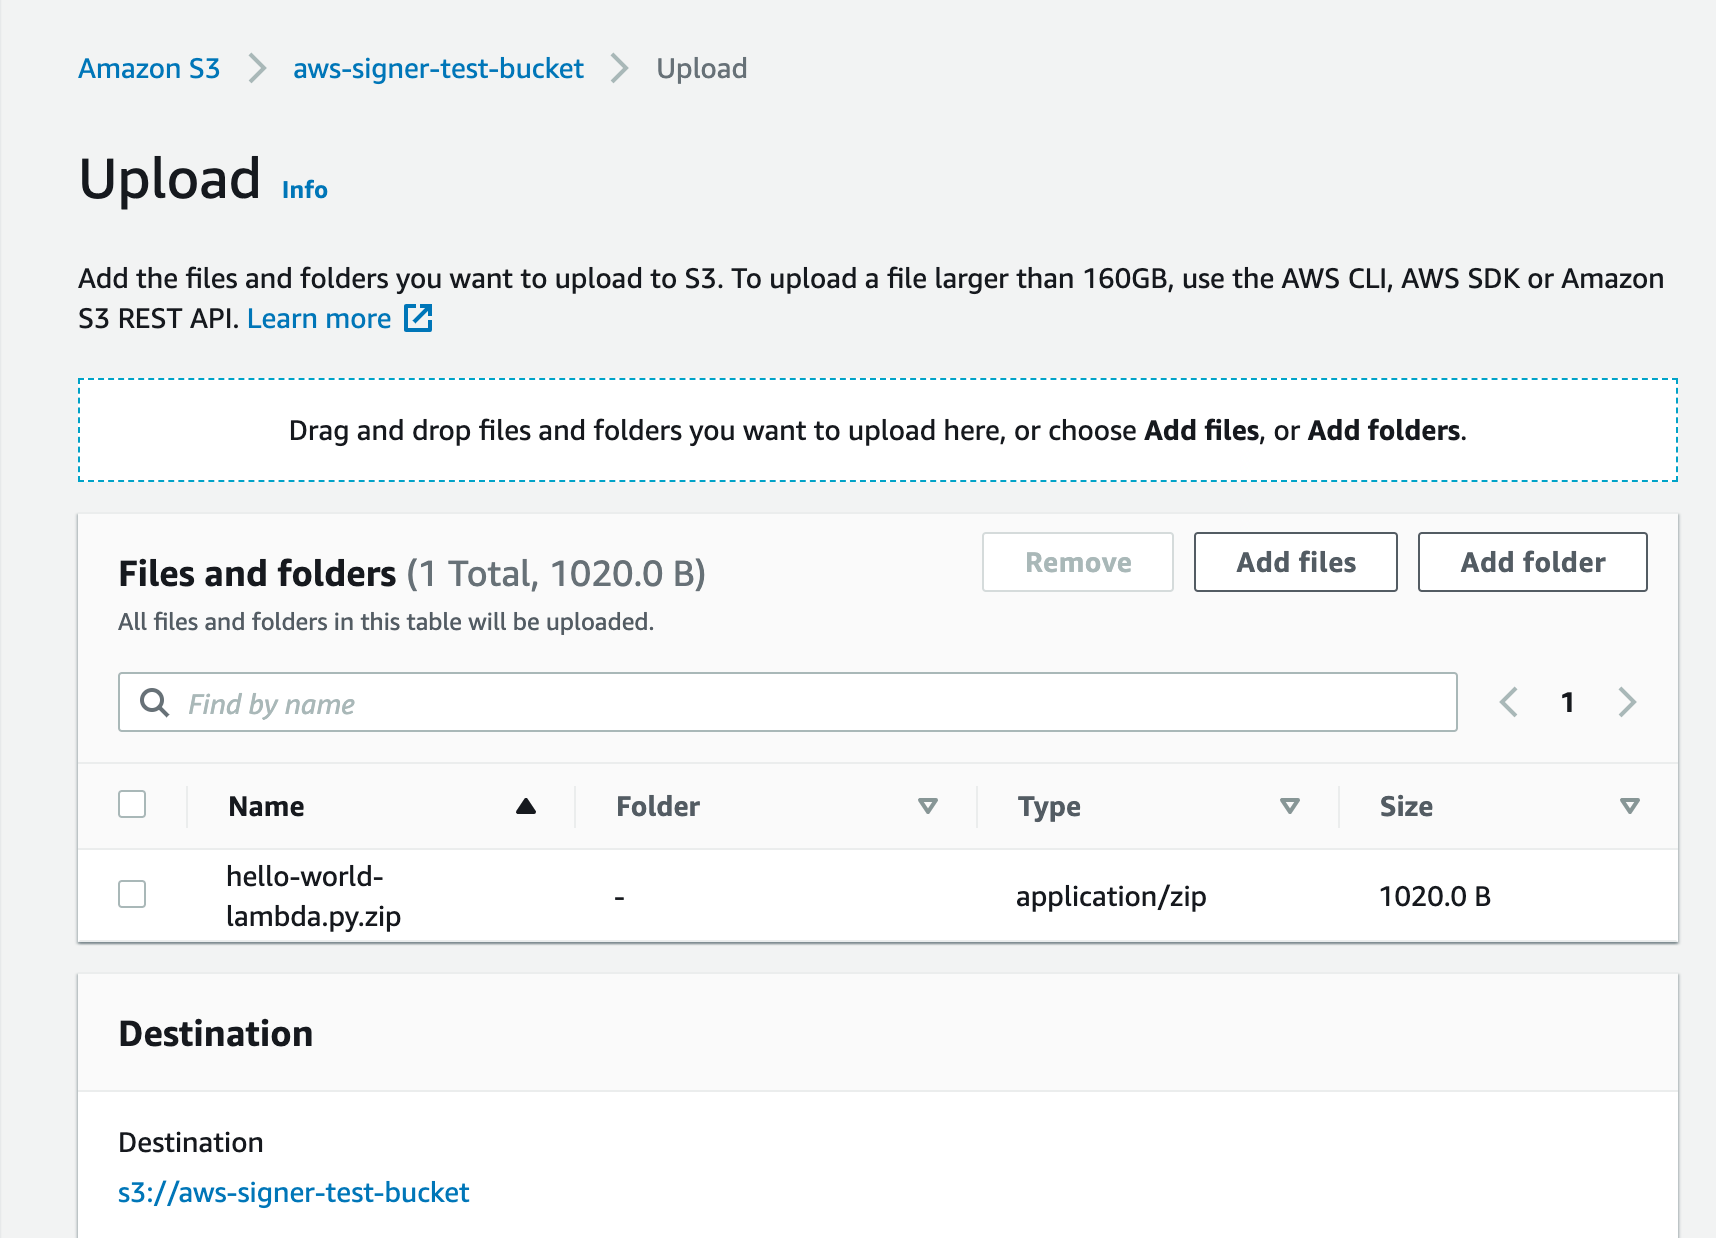
- AWS Signer sign a code which stored in S3 bucket, so I upload the python code to use it later.
AWS SignerはS3に格納されているコードに対して署名を実施する為、先ほど作成したPythonコードをS3に格納。(後ほど利用)
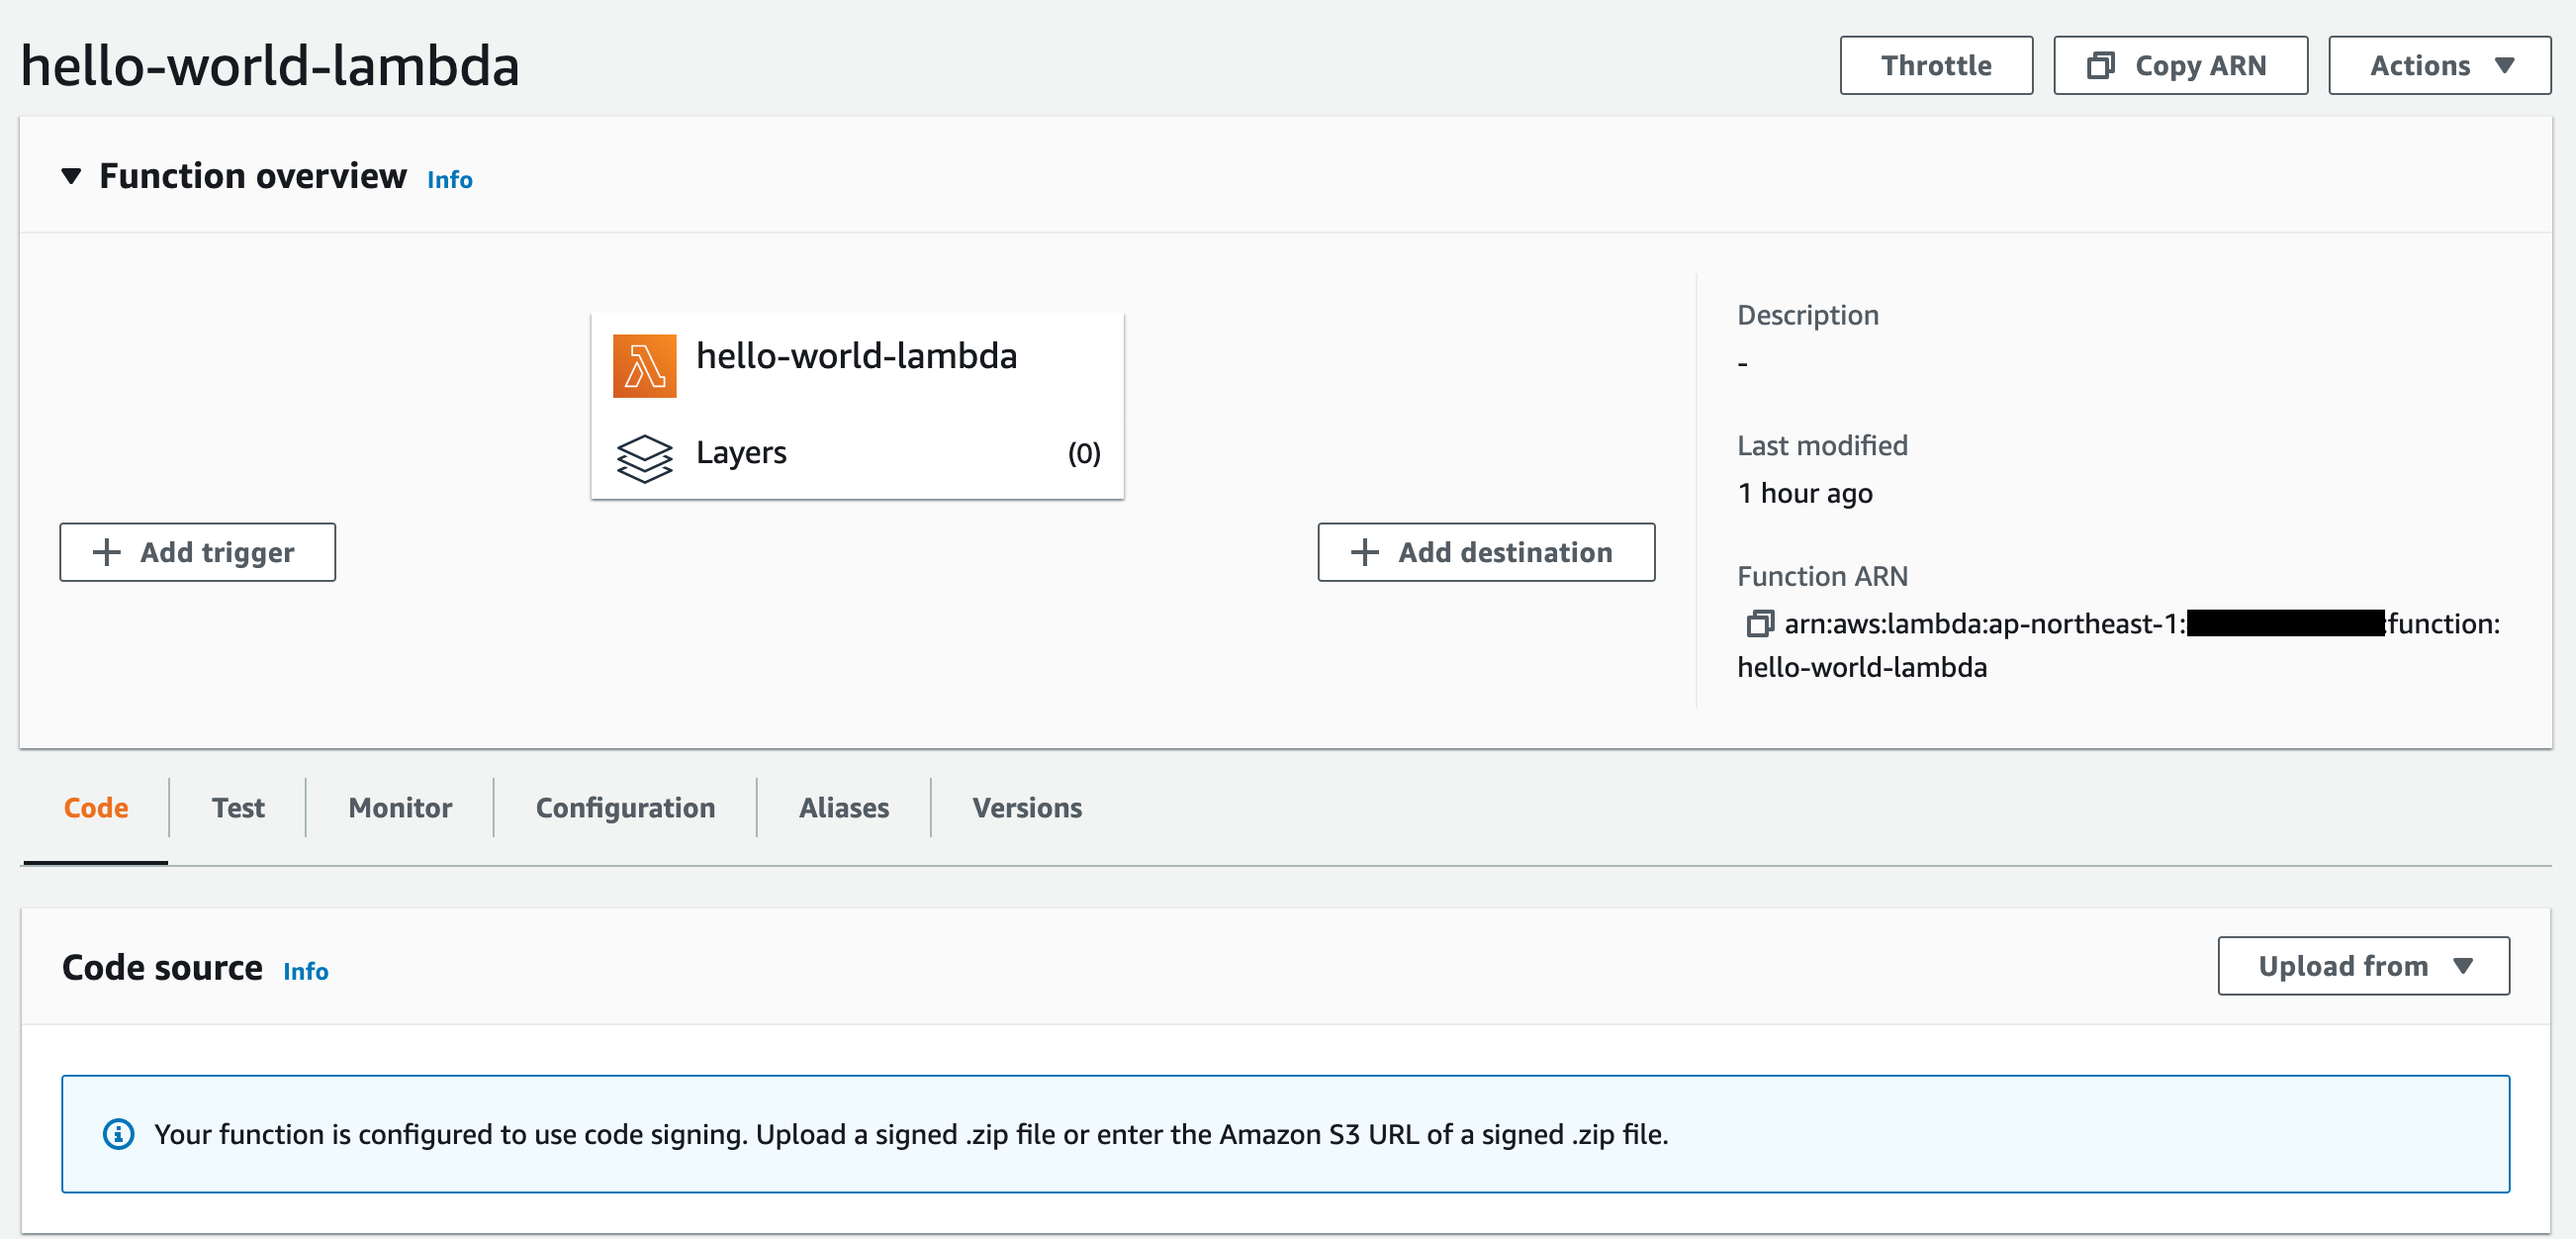
2. Confirmation of lambda function / Lambda関数の稼働確認
- Login to EC2 instance which can execute the AWS-CLI command.
AWS-CLIコマンドが利用可能なEC2インスタンス(今回はAmazonLinux)にログイン。 - Test of lambda function that is created previous step.
先ほど作成したlambda関数のテスト。(CLIから関数呼び出しで、レスポンスがresponse.jsonに格納されていることを確認)
[root@ip-10-0-0-74 ~]# aws lambda invoke --function-name hello-world-lambda --payload '{ "key1": "hello, world!"}' response.json
{
    "ExecutedVersion": "$LATEST",
    "StatusCode": 200
}
[root@ip-10-0-0-74 ~]#
[root@ip-10-0-0-74 ~]# cat response.json
"hello, world!"
[root@ip-10-0-0-74 ~]#
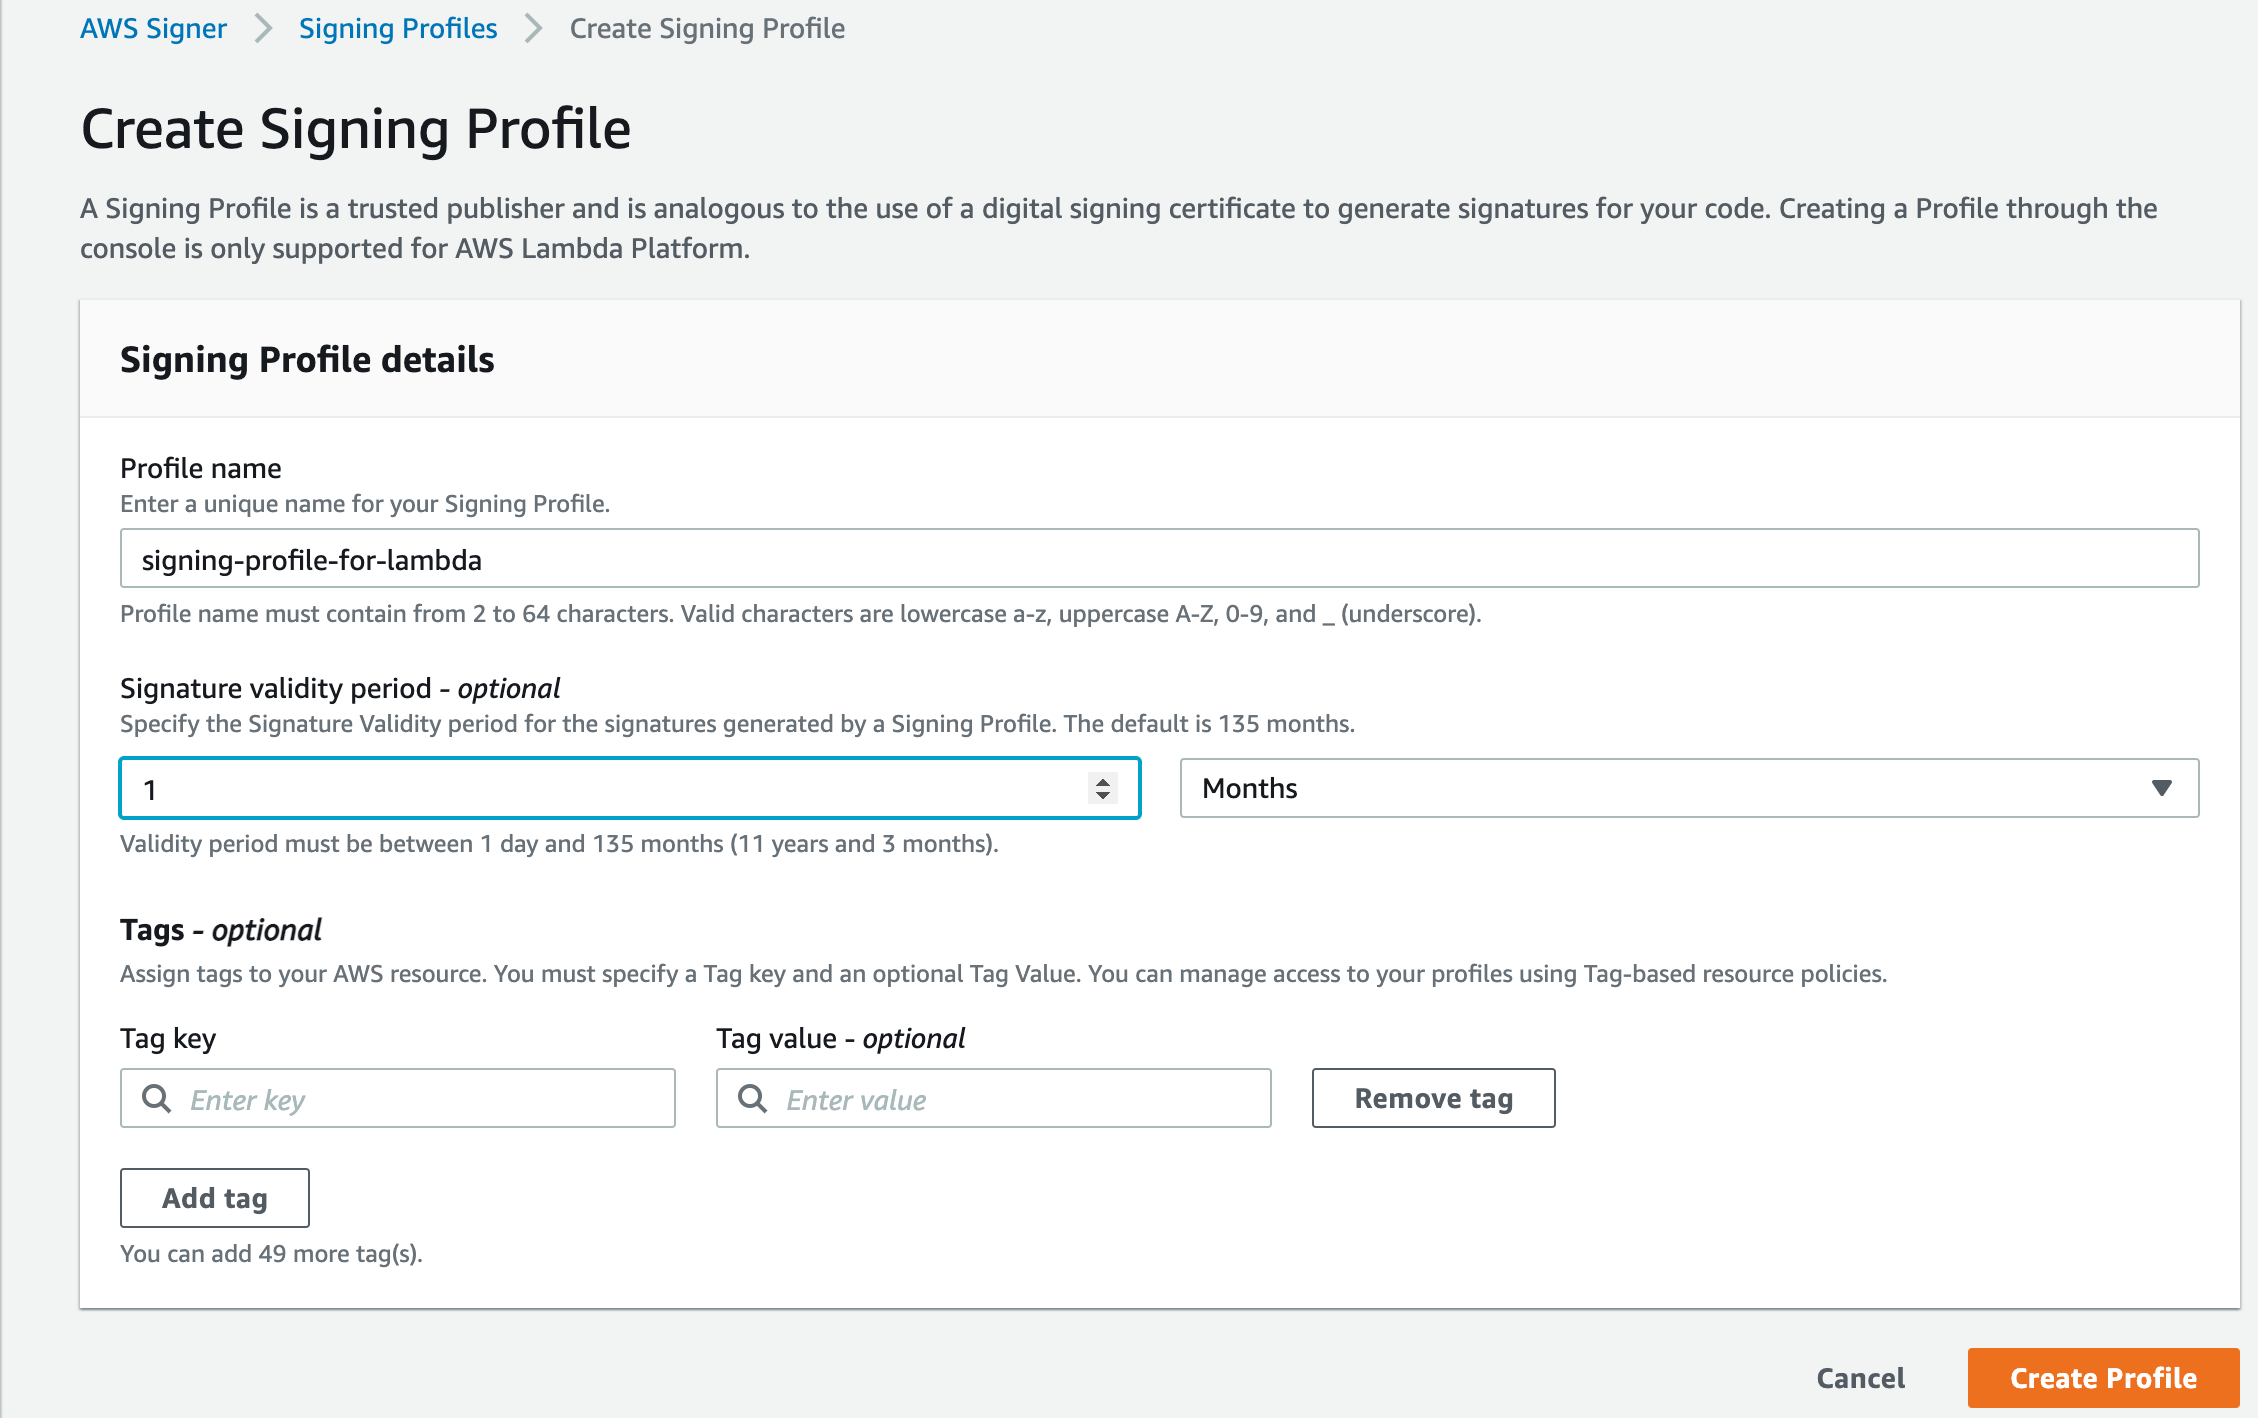
3. Create Signing Profiles using AWS Signer / AWS Signerにて署名プロファイルの作成
- Click [Signing Profiles] -> [Create Signing Profile].
[署名プロファイル] -> [署名プロファイルの作成]
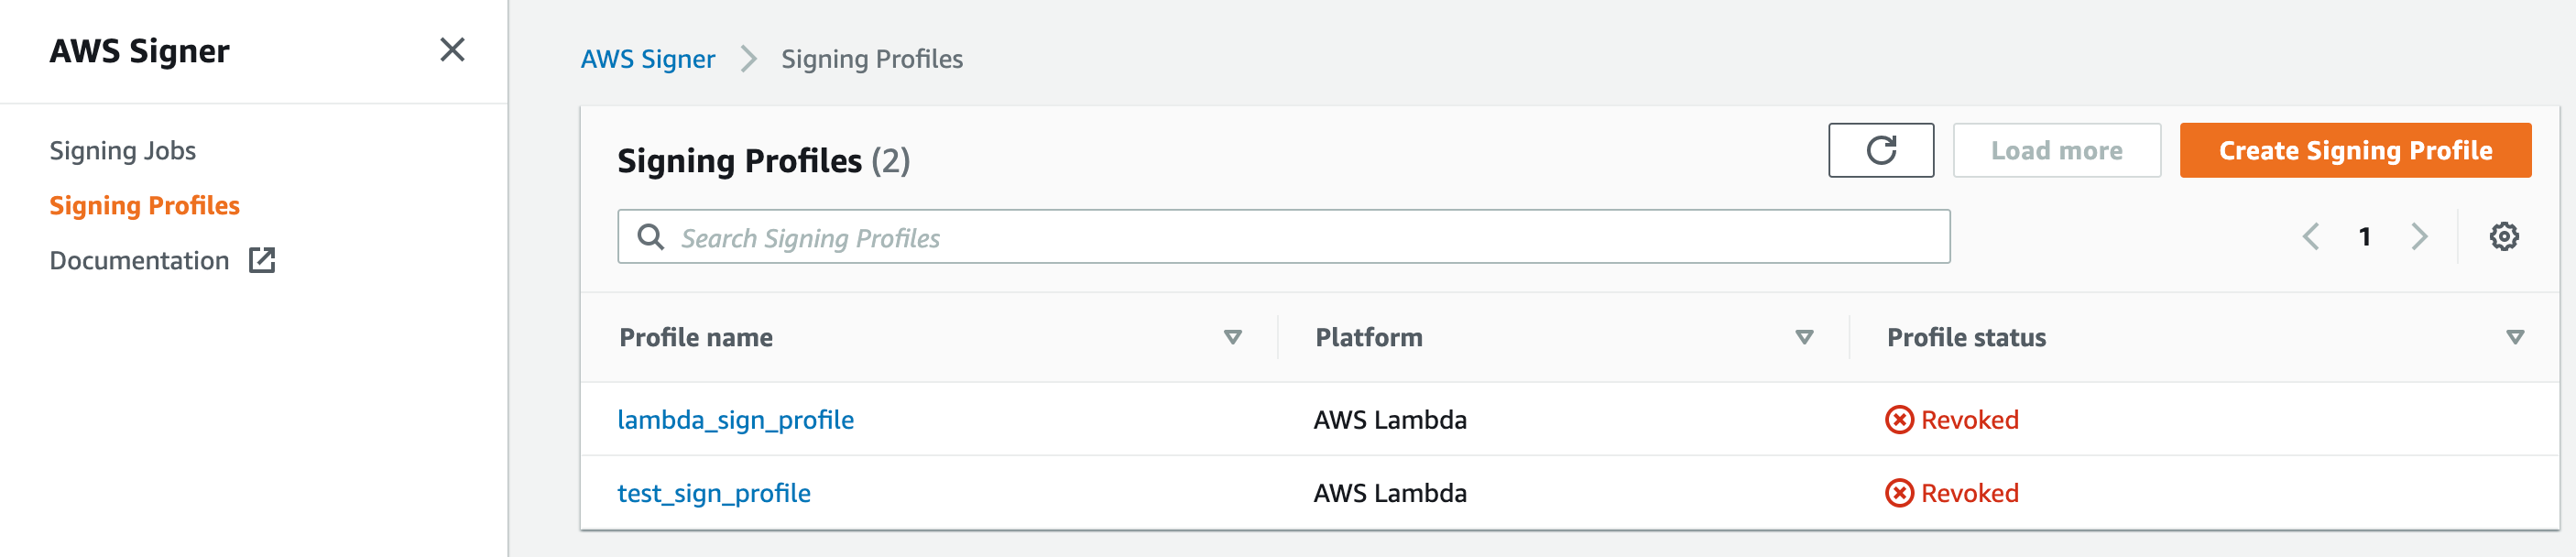
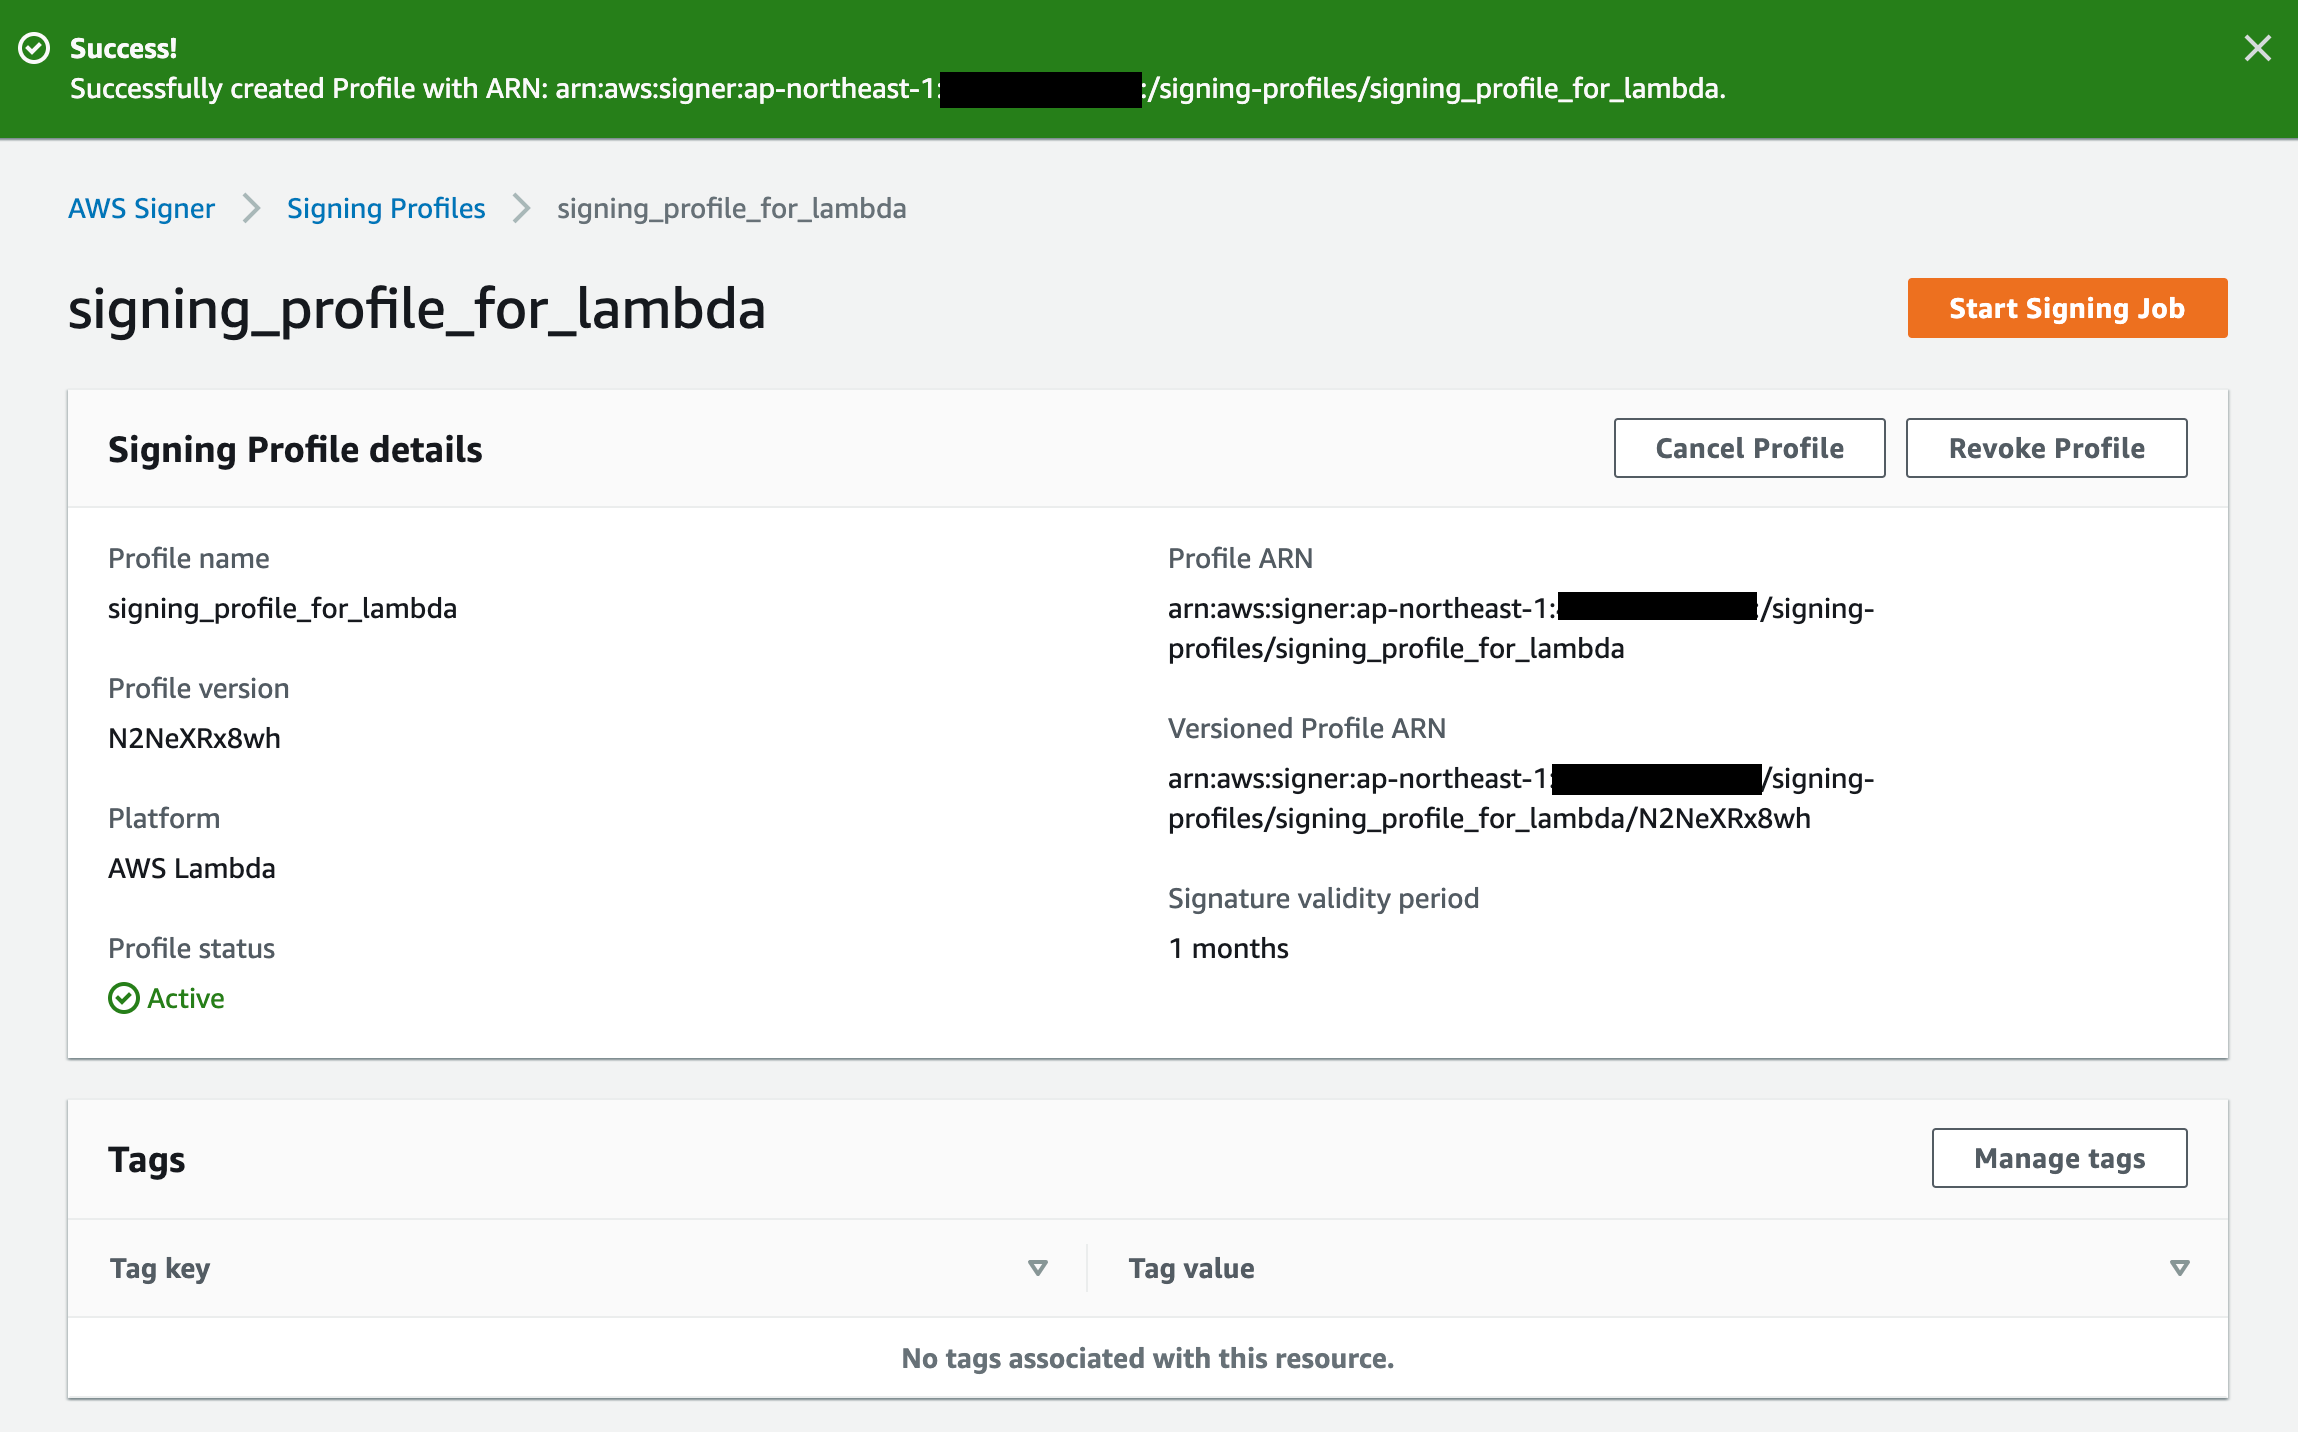
- Input the following information such as "Profile name", "Signature validity" and so on.
以下必要な情報を入力(プロファイル名、署名の有効期間、タグ) - Click [Create Profile].
プロファイルの作成を押下

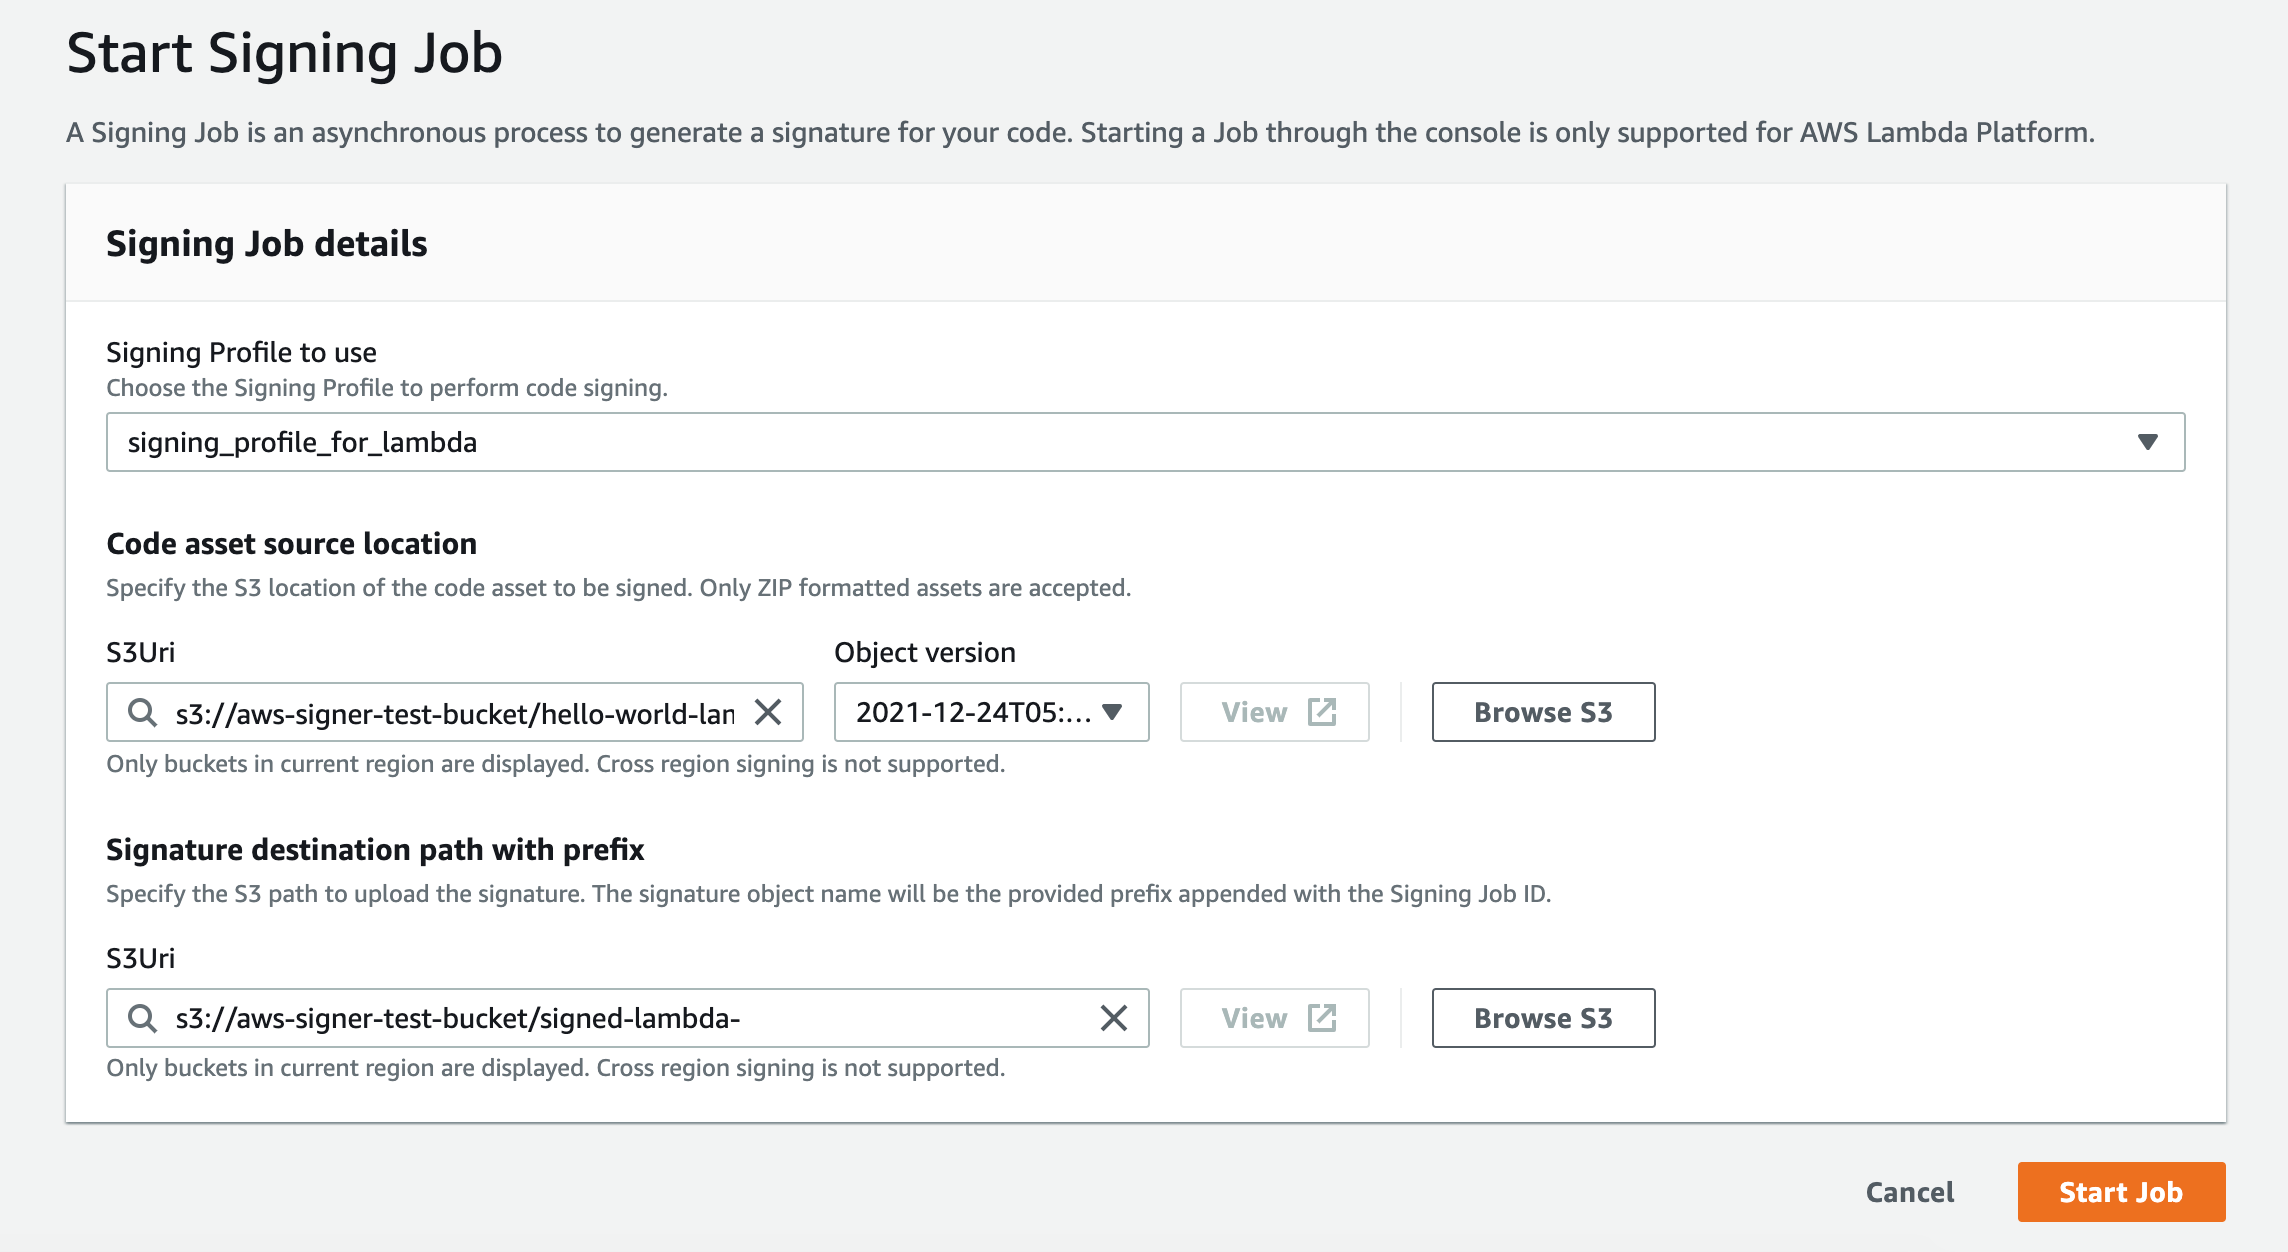
4. Create Signing Jobs using AWS Signer / AWS Signerにて署名ジョブの作成
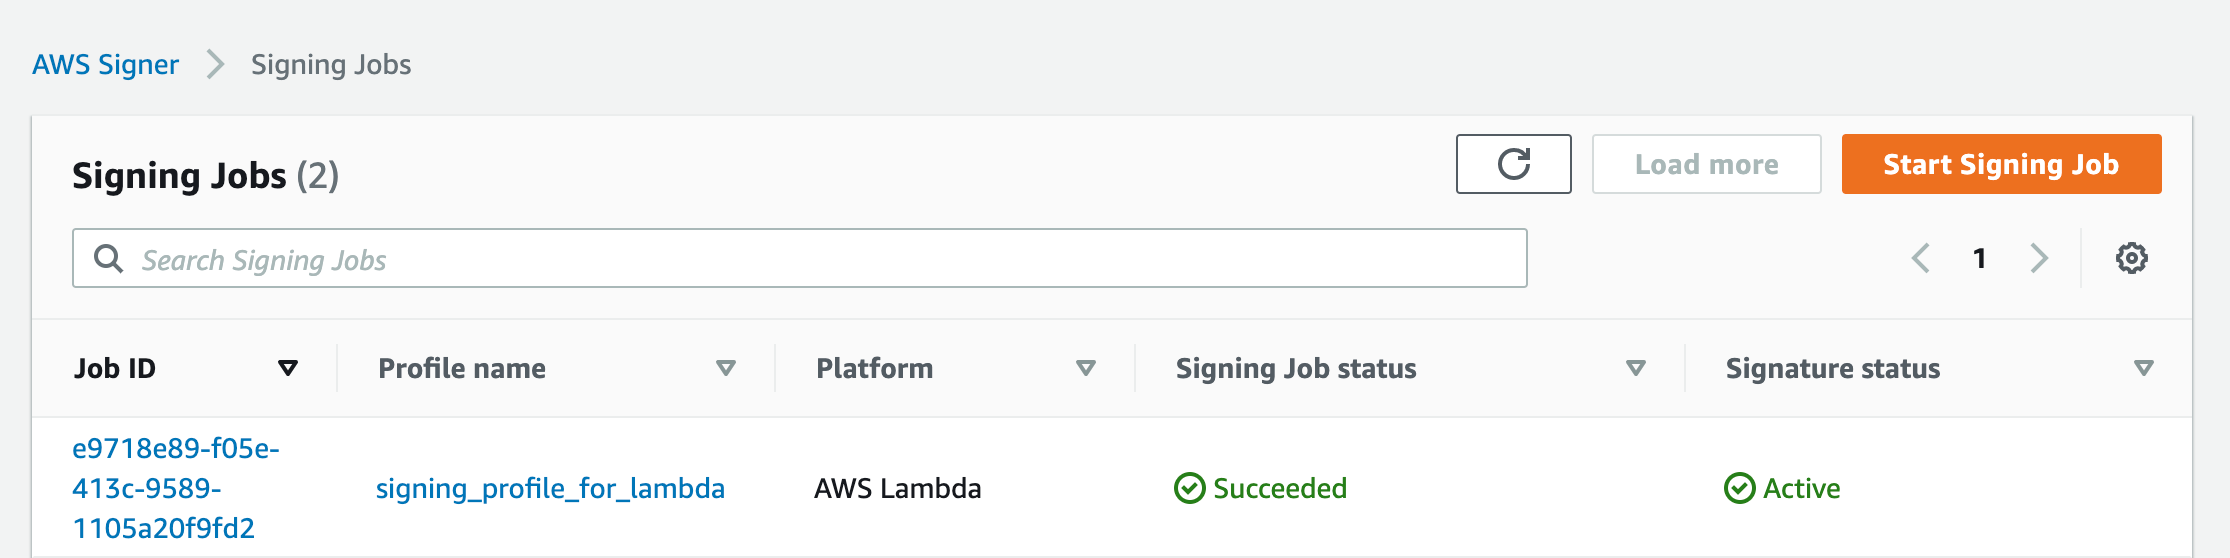
- Create Signing Jobs following steps.
以下の流れで、署名ジョブを作成。 - "Signing Jobs" is a process to sign a python code.
"署名ジョブ"とは、実際にpythonコードに対して、署名を行う為の処理を設定するもの
- Input the "Signing Profile name", "S3 URI(S3 location of the code to be signed)" and "S3 URI(S3 location of the code which was signed)" information.
"署名ジョブ"の設定の中では、「署名プロファイル名(先ほど作成したもの)」「S3 URI(署名したいコードが格納されているS3path)」「S3 URI(署名したコードを格納する為のS3path)」を指定

5. Create code signing configuration / コード署名設定の作成
- lambda console page -> [Code signing configurations].
lambdaのコンソールから、[コード署名設定]を選択
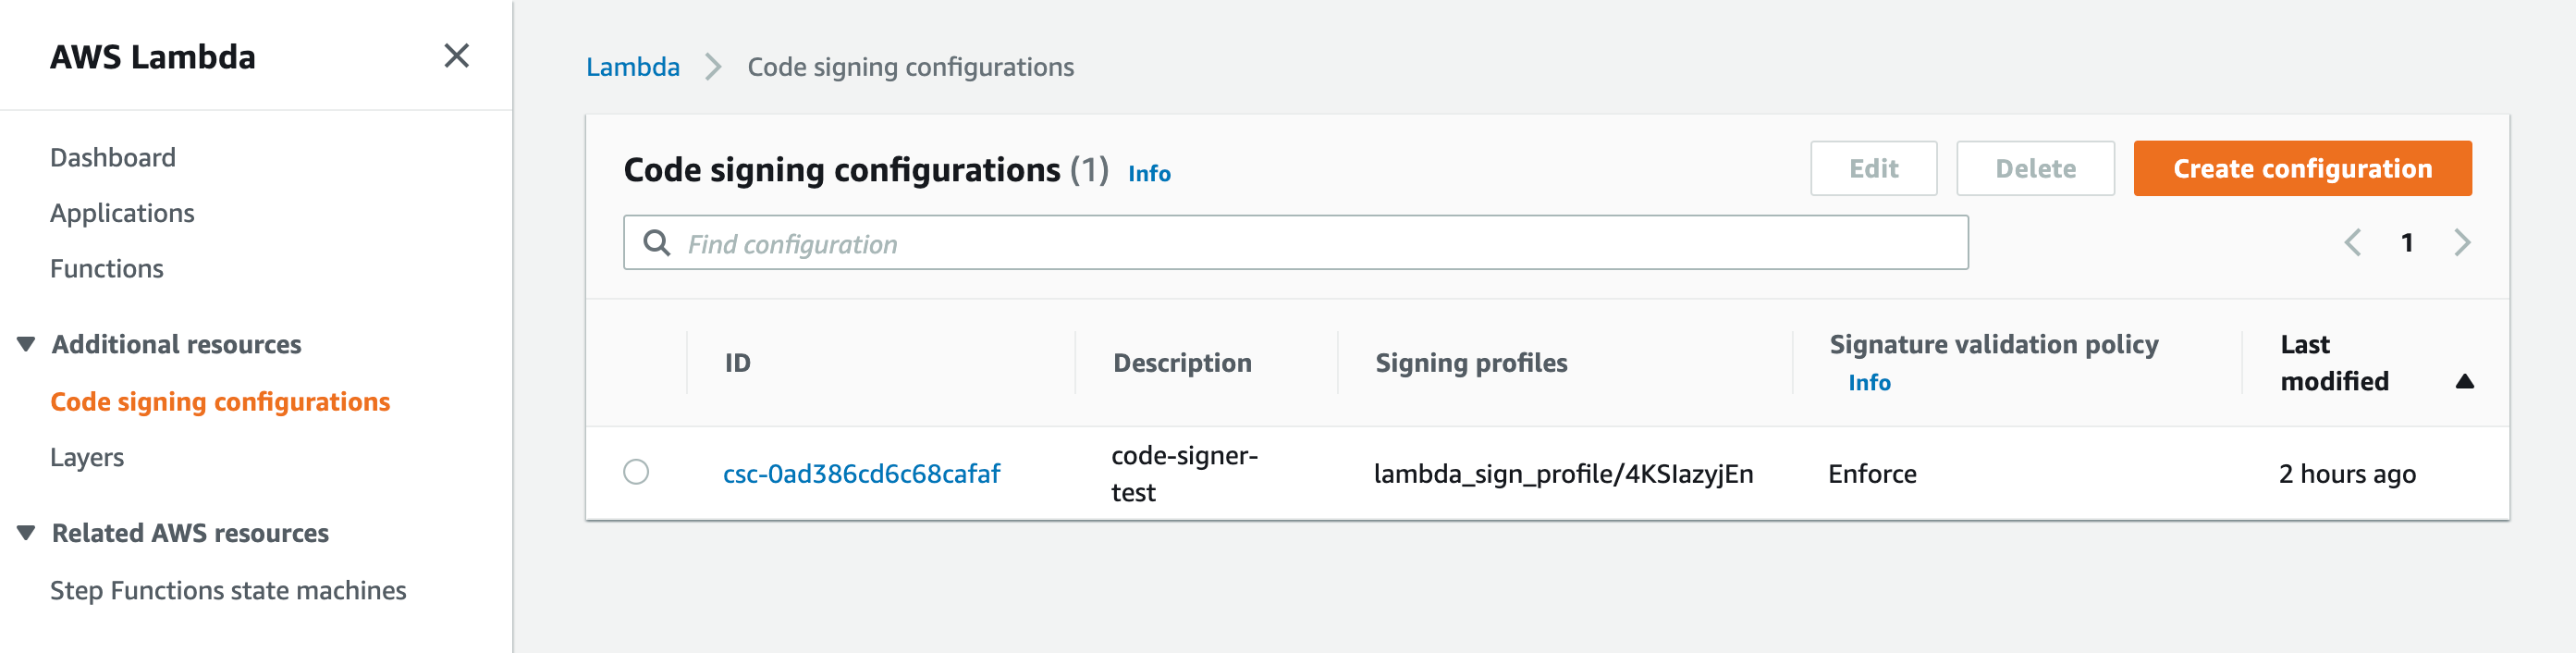
- In the code signing configuration page, select "Signing profile version ARN(which created previous step)".
コード署名のページにて、前のステップで作成した署名プロファイル(signing_profile_for_lambda)を選択 - Select the Signature validation policy.
署名検証ポリシーにて、"Warn"か"Enforce"を選択 - If you select the "Warn", the deployment succeed with a warning logged to CloudWatch.
"Warn"を選択した場合、デプロイは成功し、CloudWatchに警告が記録される - If you select the "Enforce", the deployment will be blocked when the code is signed by an unapproved profile, or if the signature is expired or revoked.
"Enforce"を選択した場合、未承認のプロファイルによってコードが署名されていたり、署名の有効期限が切れたり取り消されたりした場合、デプロイがブロックされる

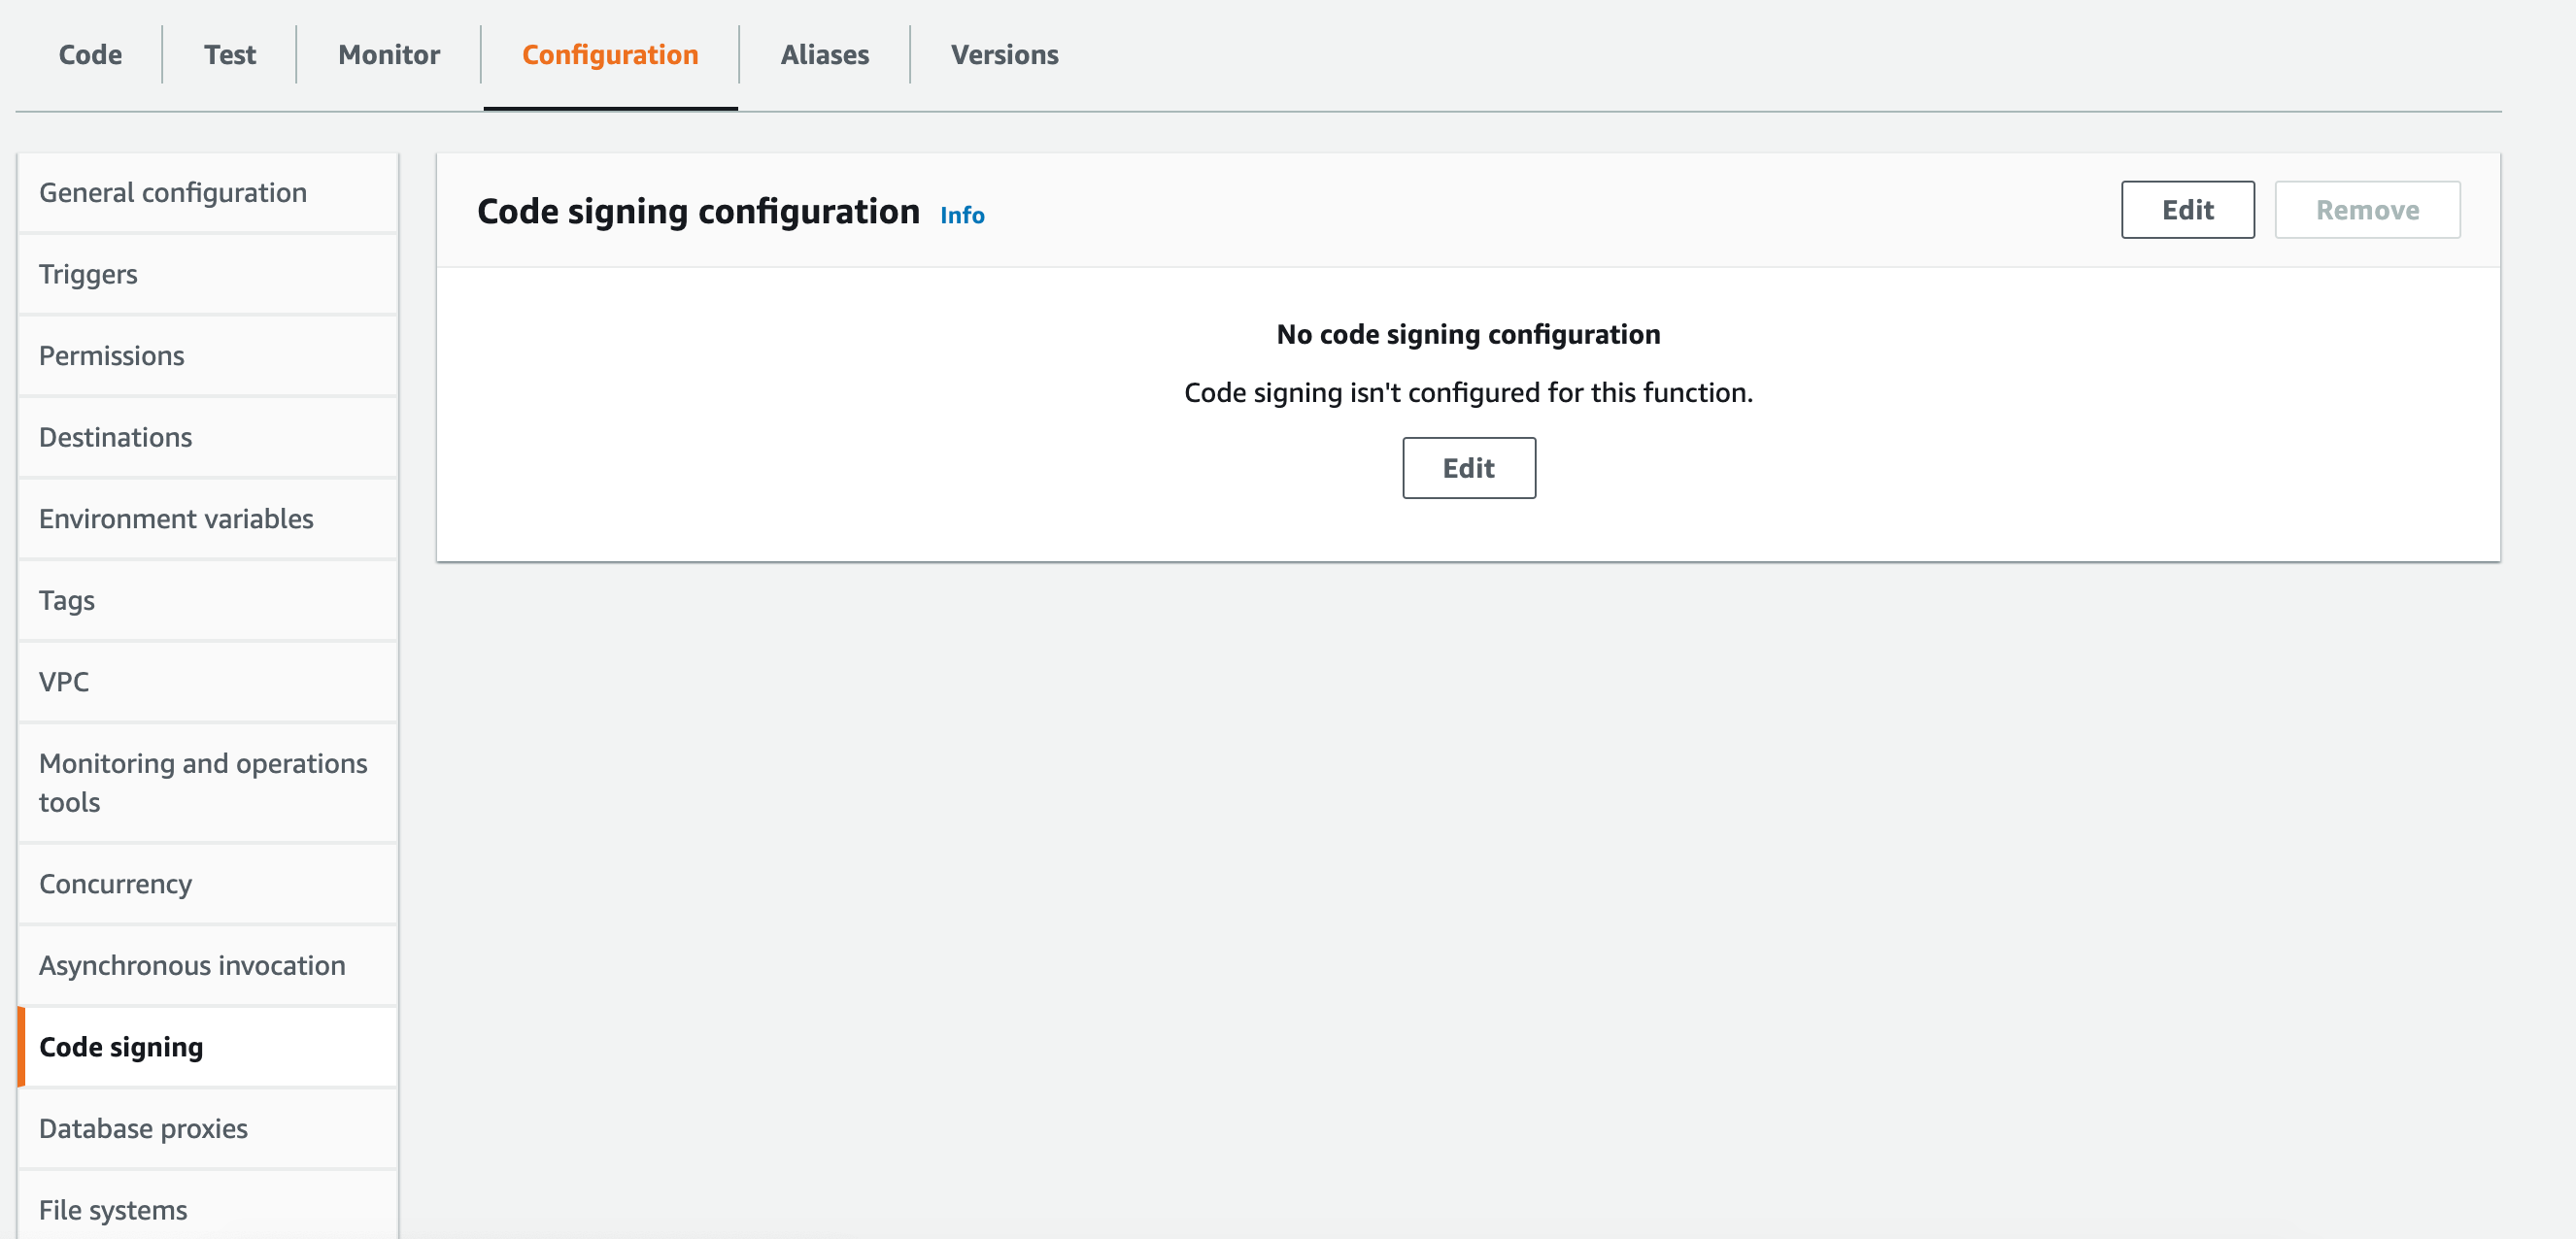
6. Change the setting in lambda function / Lambda関数の設定変更(署名された関数以外デプロイ不可設定)
- To enforce that allow to deploy only signature code.
署名されたコード以外を当該lambdaにデプロイ(更新)できないようにする為の設定を追加 - From the lambda function page, select the [Configuration]->[Code signing]->[Edit].
設定したいLambda関数のページから、[設定]->[コード署名]->[編集]を選択
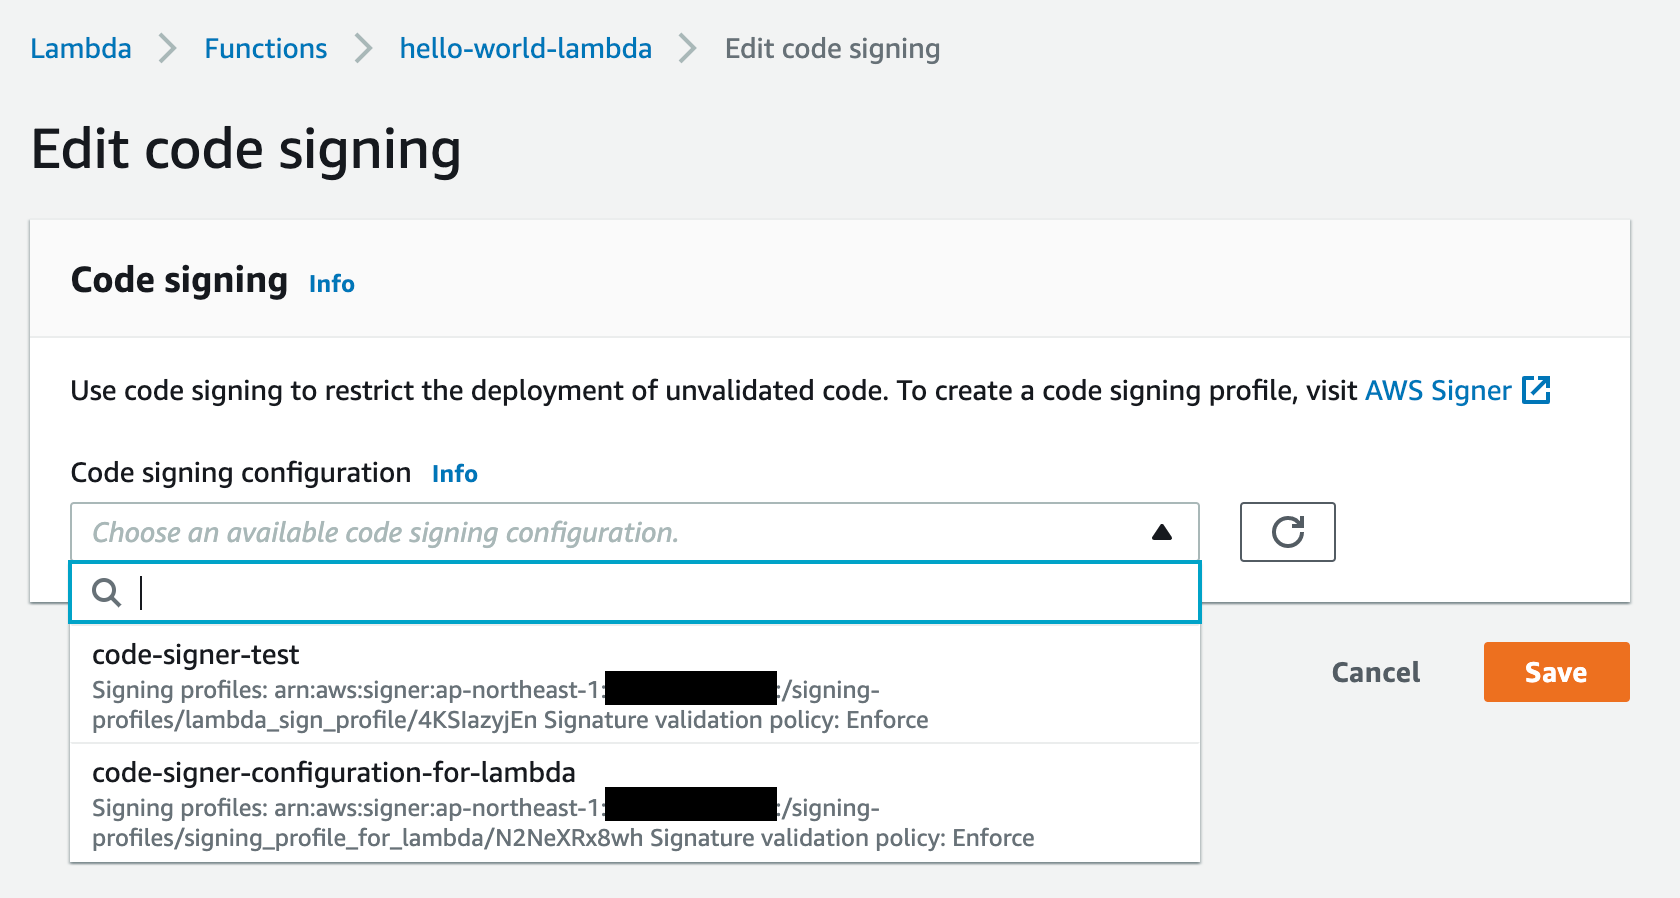
-
Select the Code signing configuration which you created 1 step before.
一つ前のステップで作成した、コード署名設定(code-signer-configuration-for-lambda)を選択
-
The lambda function code which was signed, is not shown in the console page.
コード署名されたlambda関数のソースコードは、マネコンから参照できなくなる(模様)
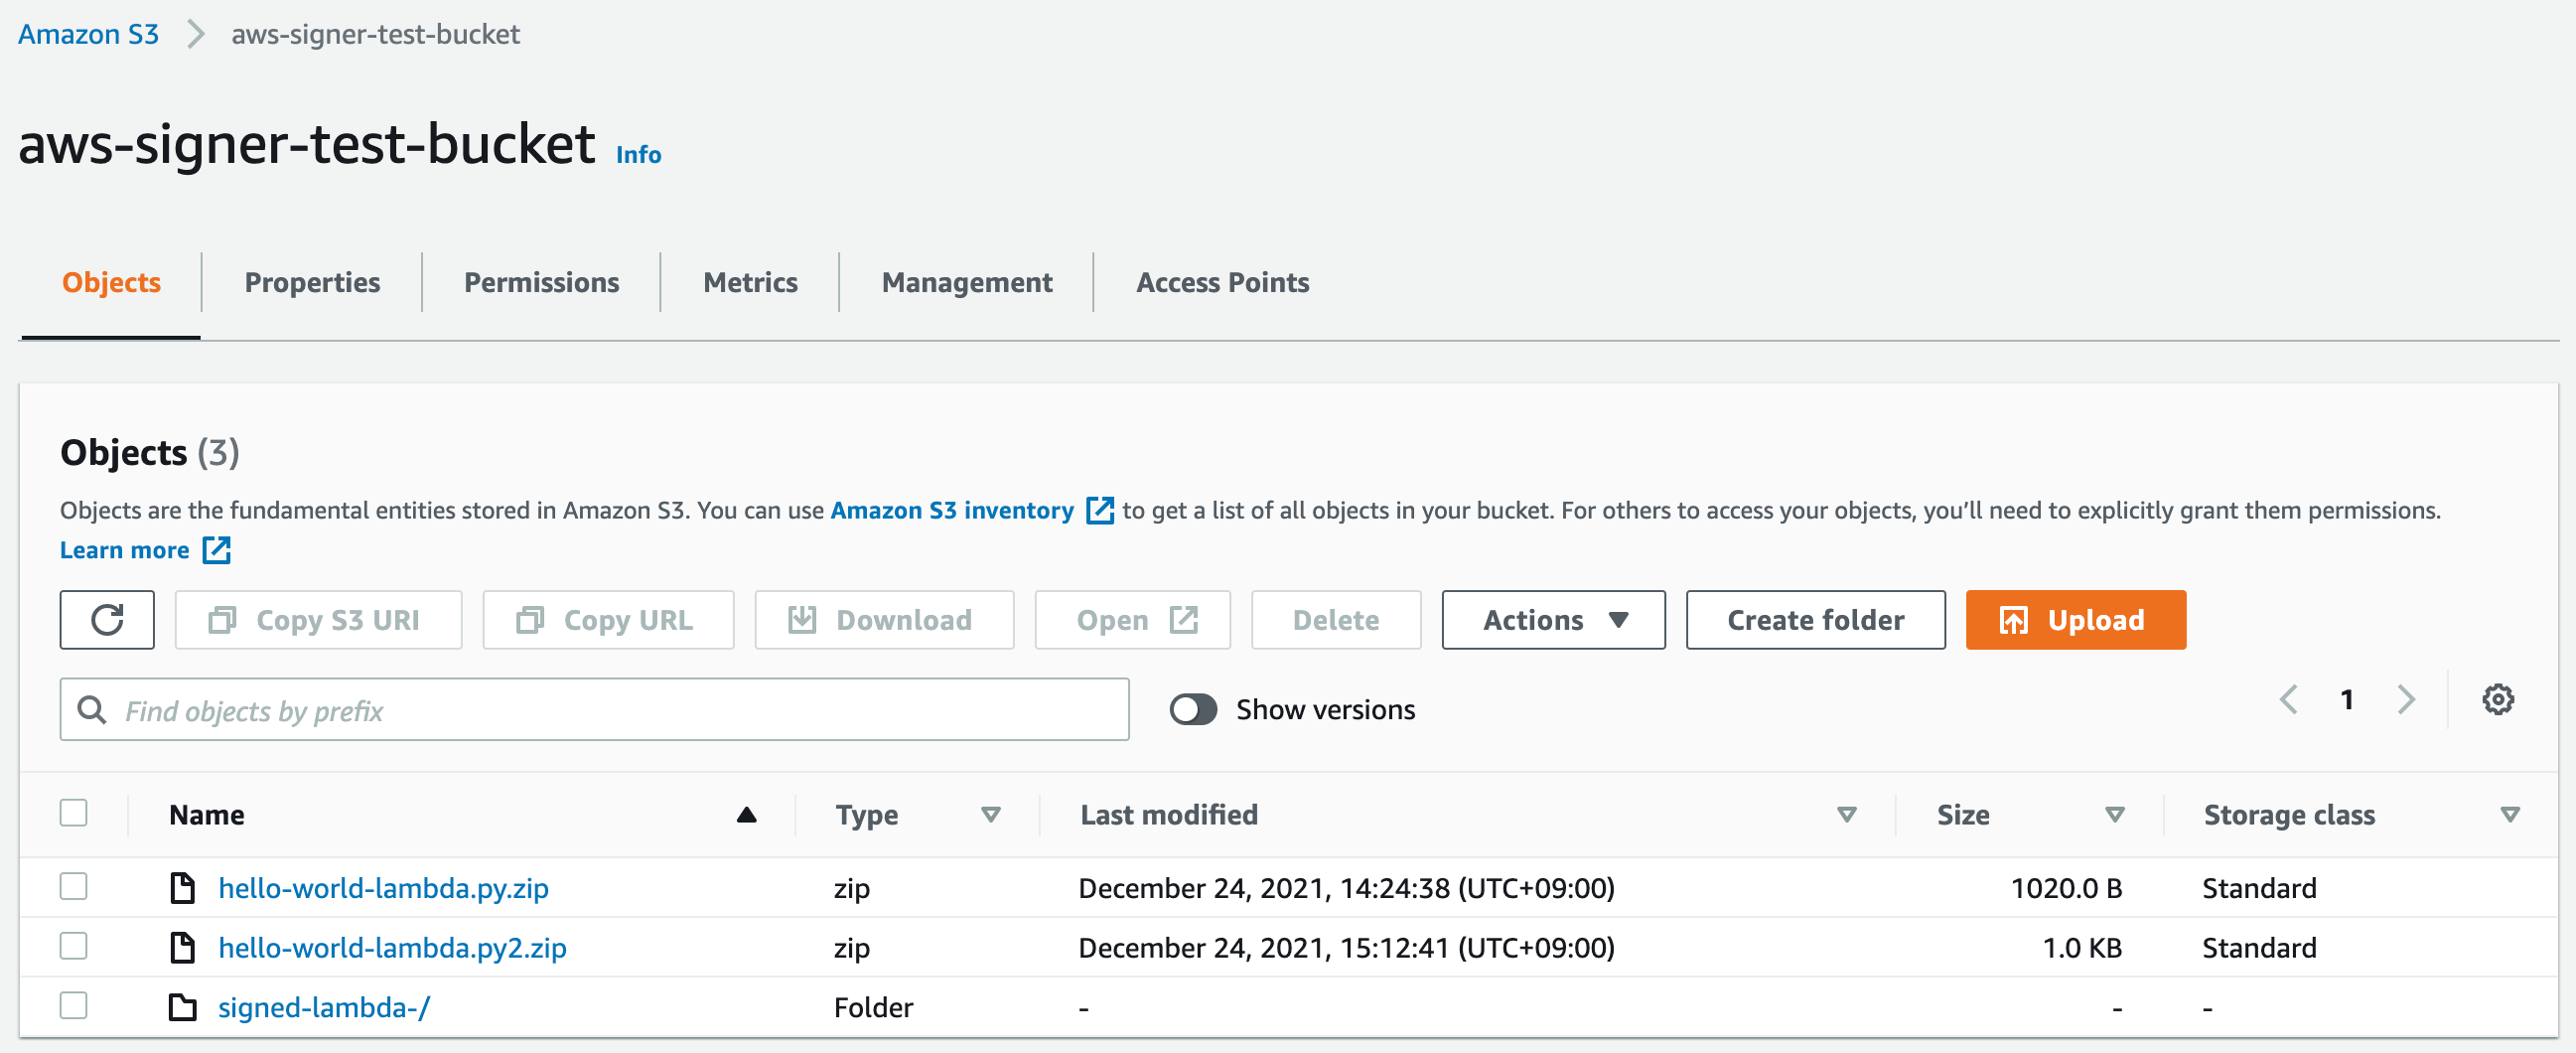
7. Deployment test of unsigned python code / 署名されていないlambdaコードのデプロイ検証
-
Upload a python code which is modified without signature.(hello-world-lambda.py2.zip)
修正したコードを署名なしで、S3にアップロード.
-
Try to deploy the python code to lambda function.
lambda関数へのpythonコードのデプロイ(更新)の実施
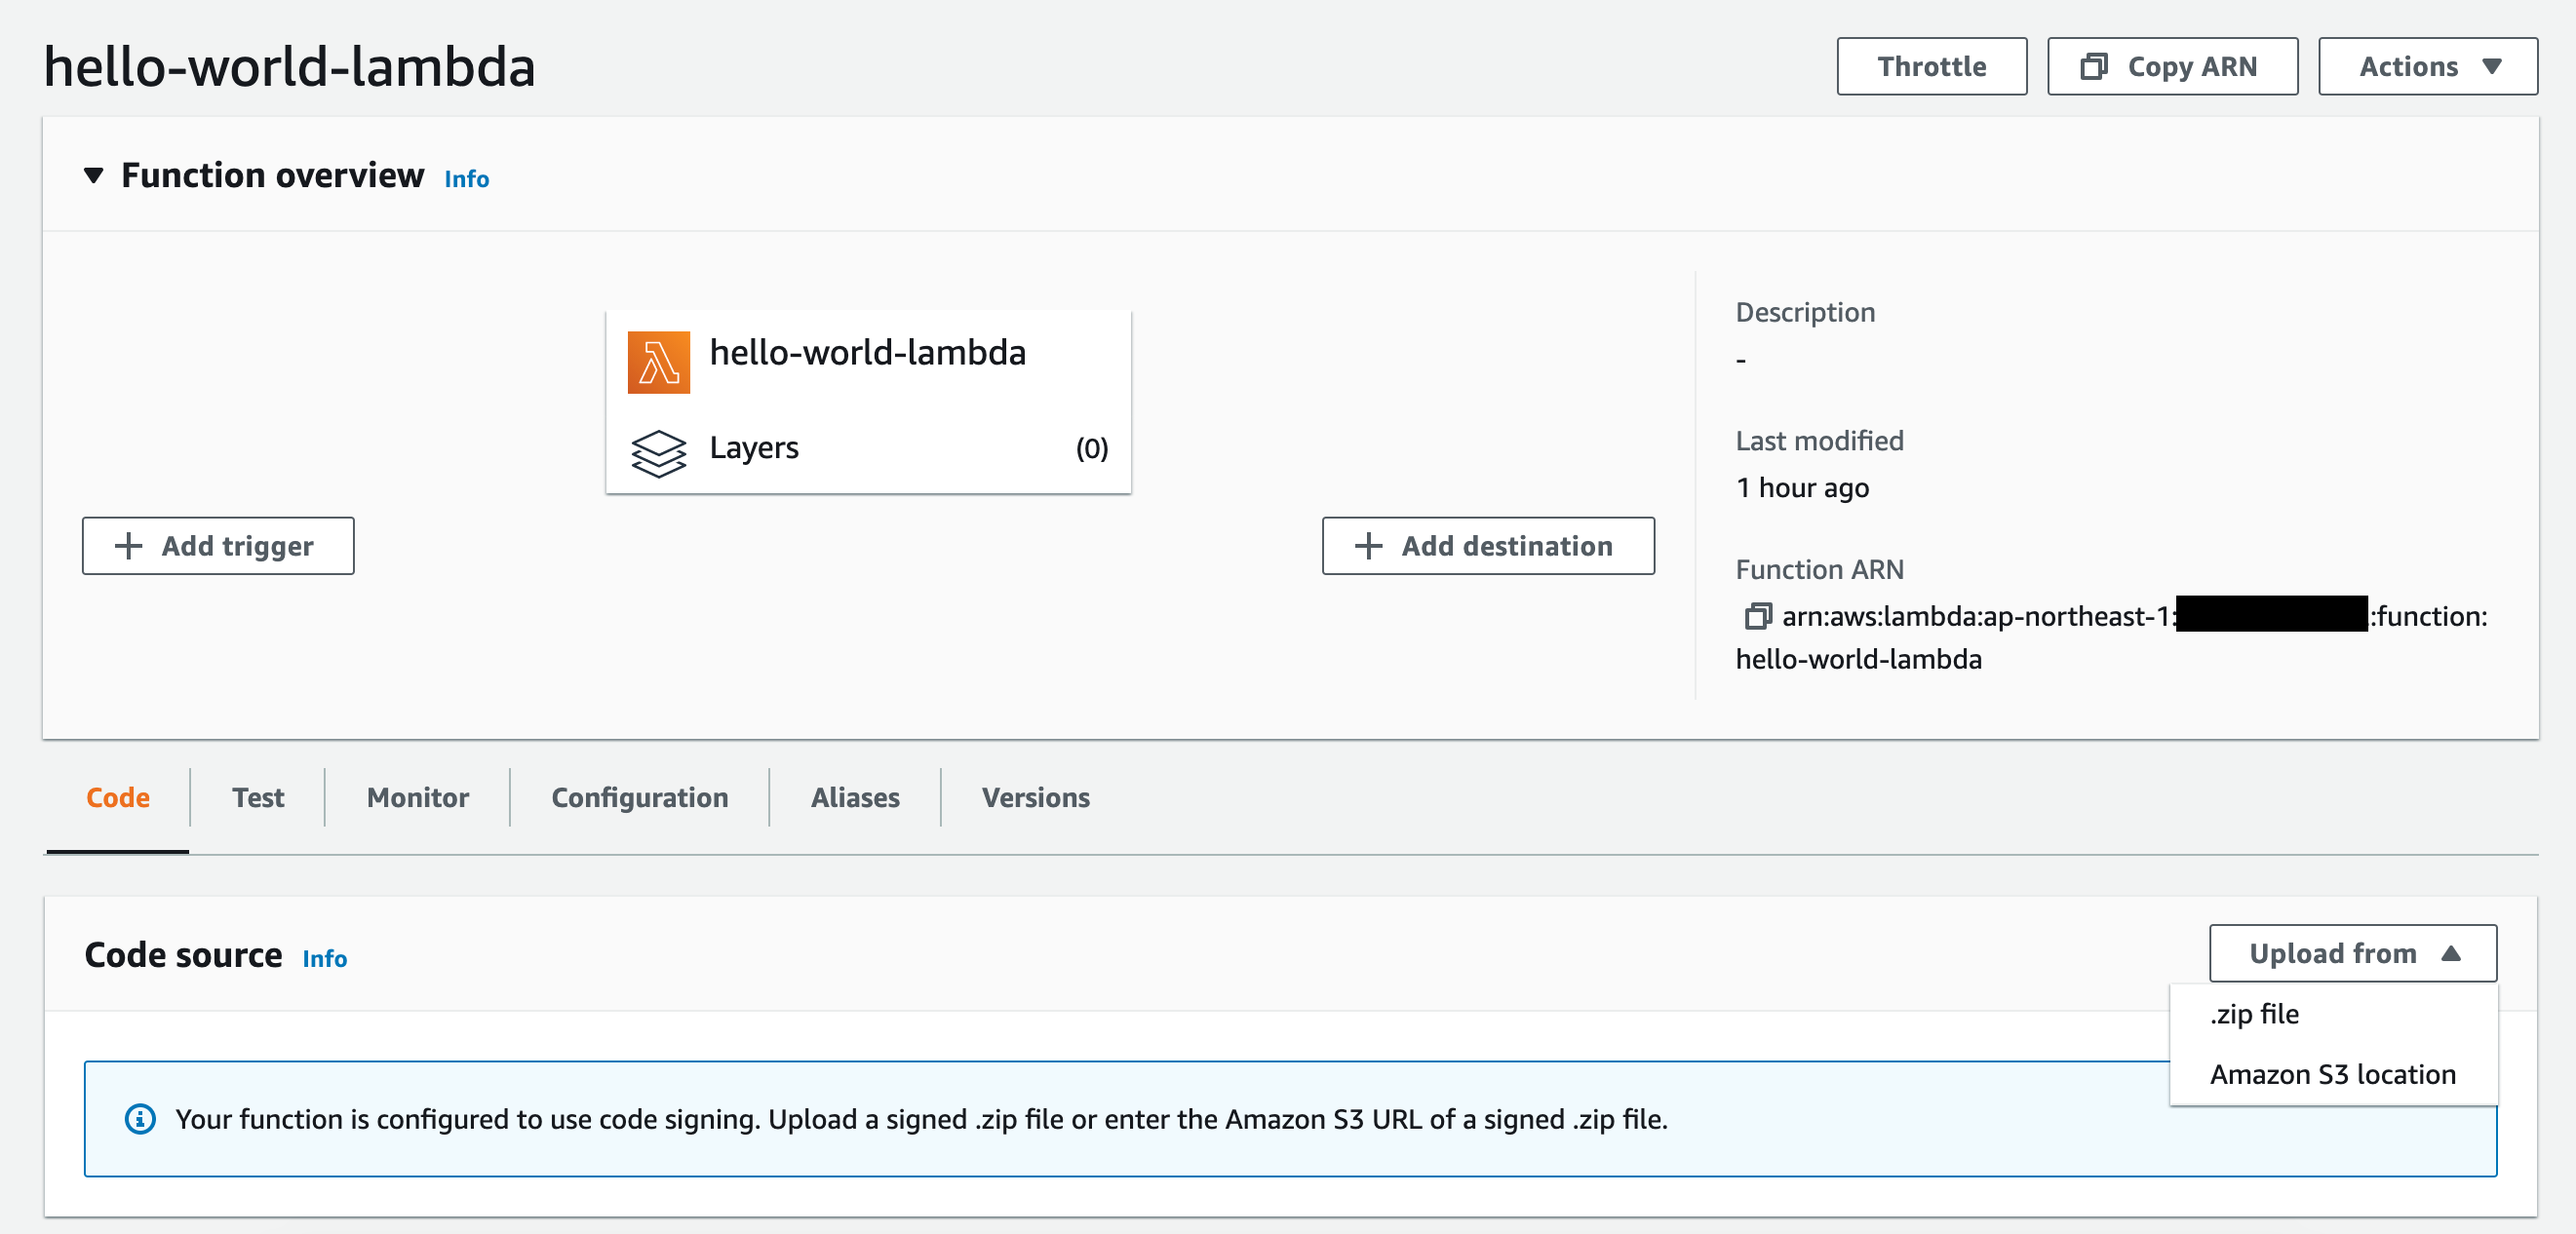
-
Select the (unsigned)python zip file in S3 bucket.
(署名されていない)pythonコードのzipファイルをS3から選択
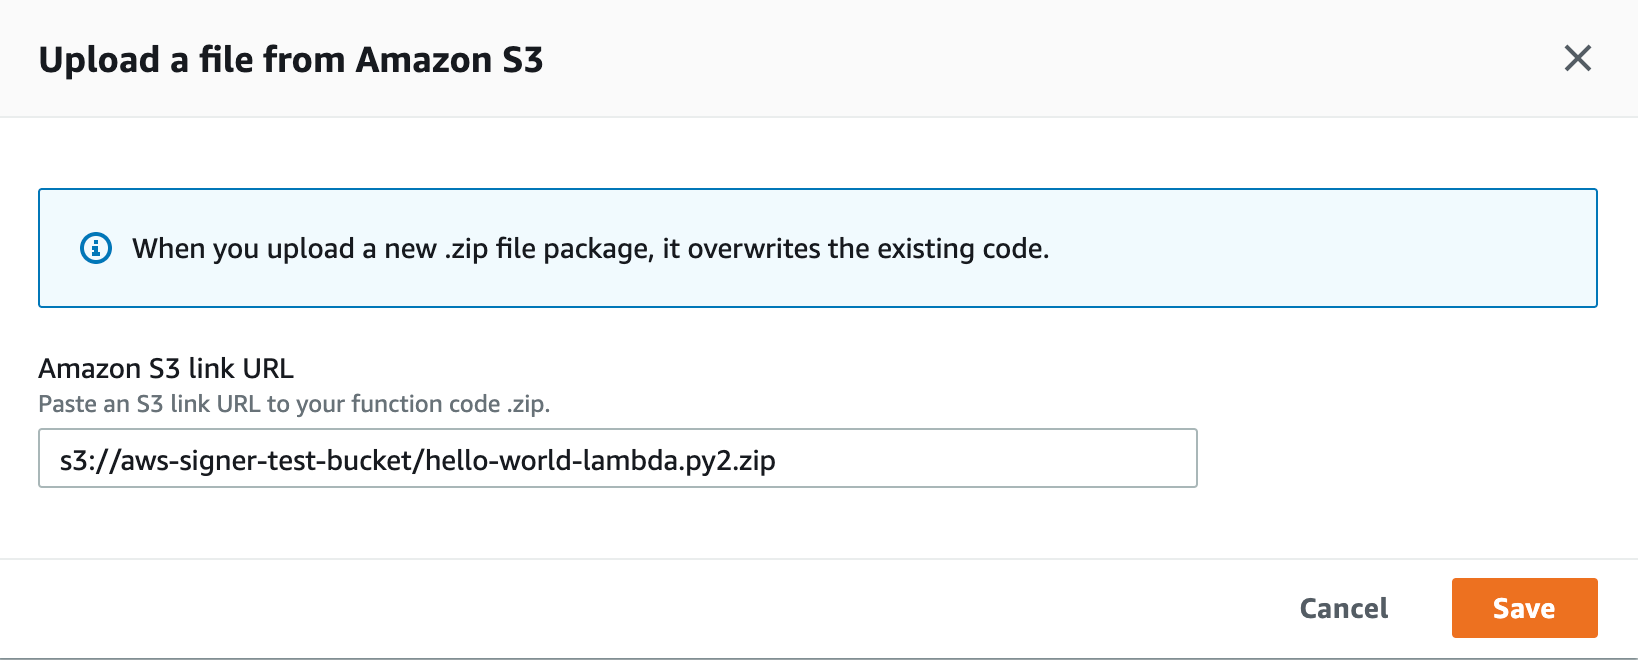
-
Get the following error message and the deploy failed.
エラー出力(デプロイの失敗)
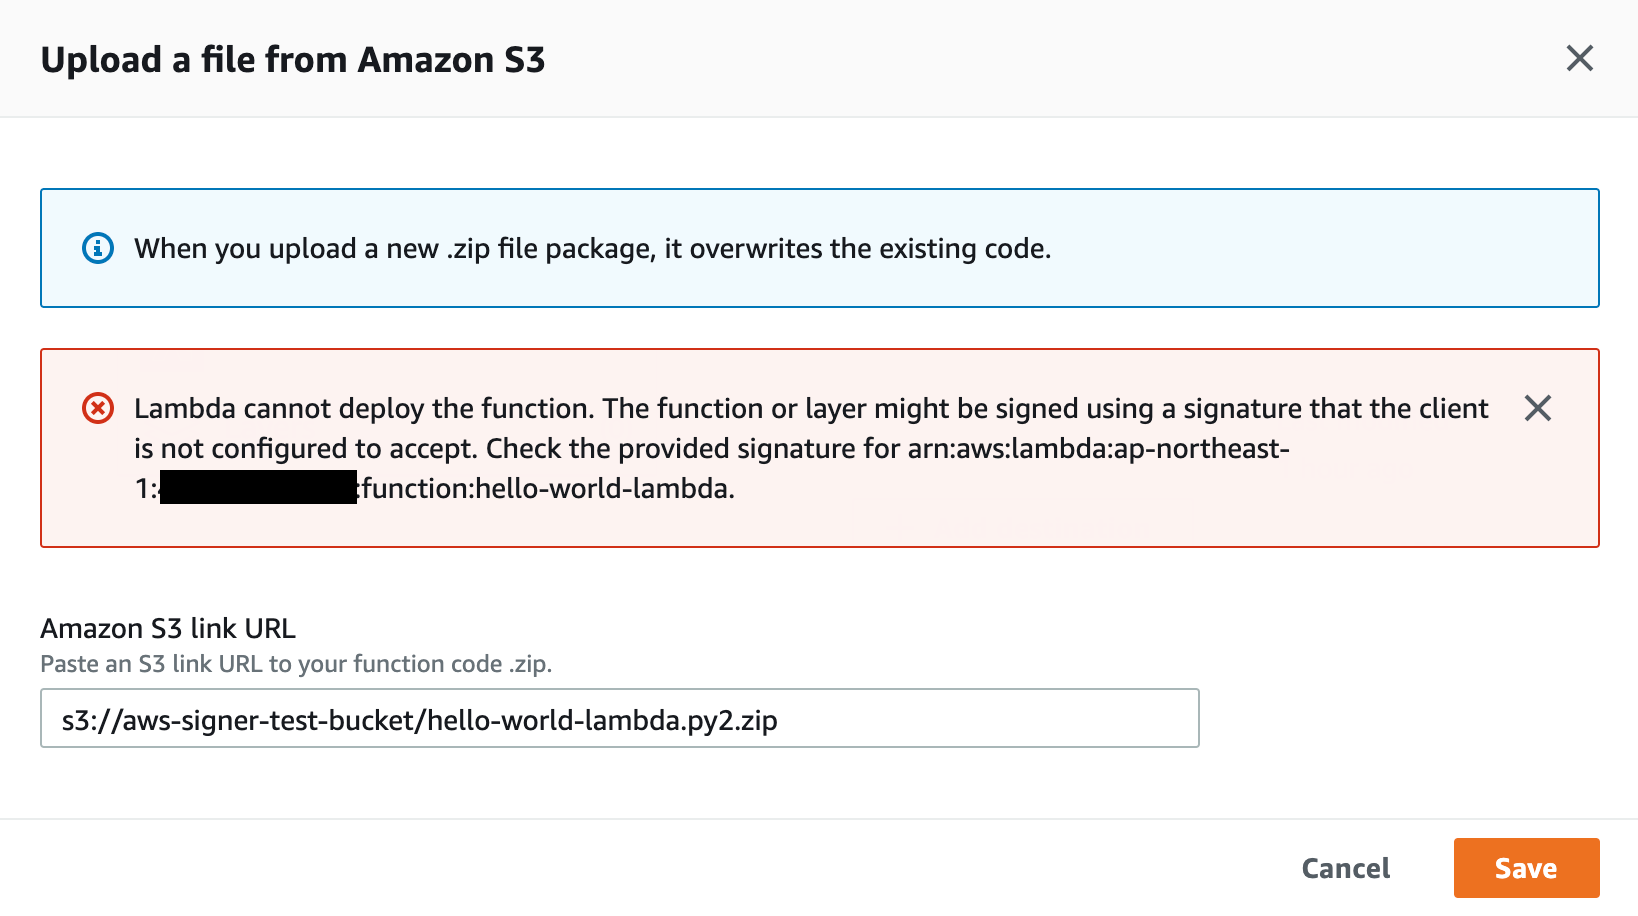
-
I could confirm the behavior of code deploy without signature.
上記の通り、署名されていないpythonコードをデプロイしたときの挙動について確認できた
8. Deployment test of signed python code / 署名されたlambdaコードのデプロイ検証
- This time I use AWS-CLI command for code signing, the command is below.
先ほどは、マネジメントコンソールにて、署名を実施したが、今回は、AWS-CLIにてpythonコードに対して署名を実施
[root@ip-10-0-0-74 ~]# aws signer start-signing-job --source 's3={bucketName=aws-signer-test-bucket, key=hello-world-lambda.py2.zip, version=_Ejjr1hvZqpShVUz0l3_sNn38C8aRZz8}' --destination 's3={bucketName=aws-signer-test-bucket, prefix=signed-lambda-/signed-}' --profile-name signing_profile_for_lambda
{
    "jobId": "a67fcaf9-0e91-4c55-8a6f-2365de41d6f5"
}
[root@ip-10-0-0-74 ~]#
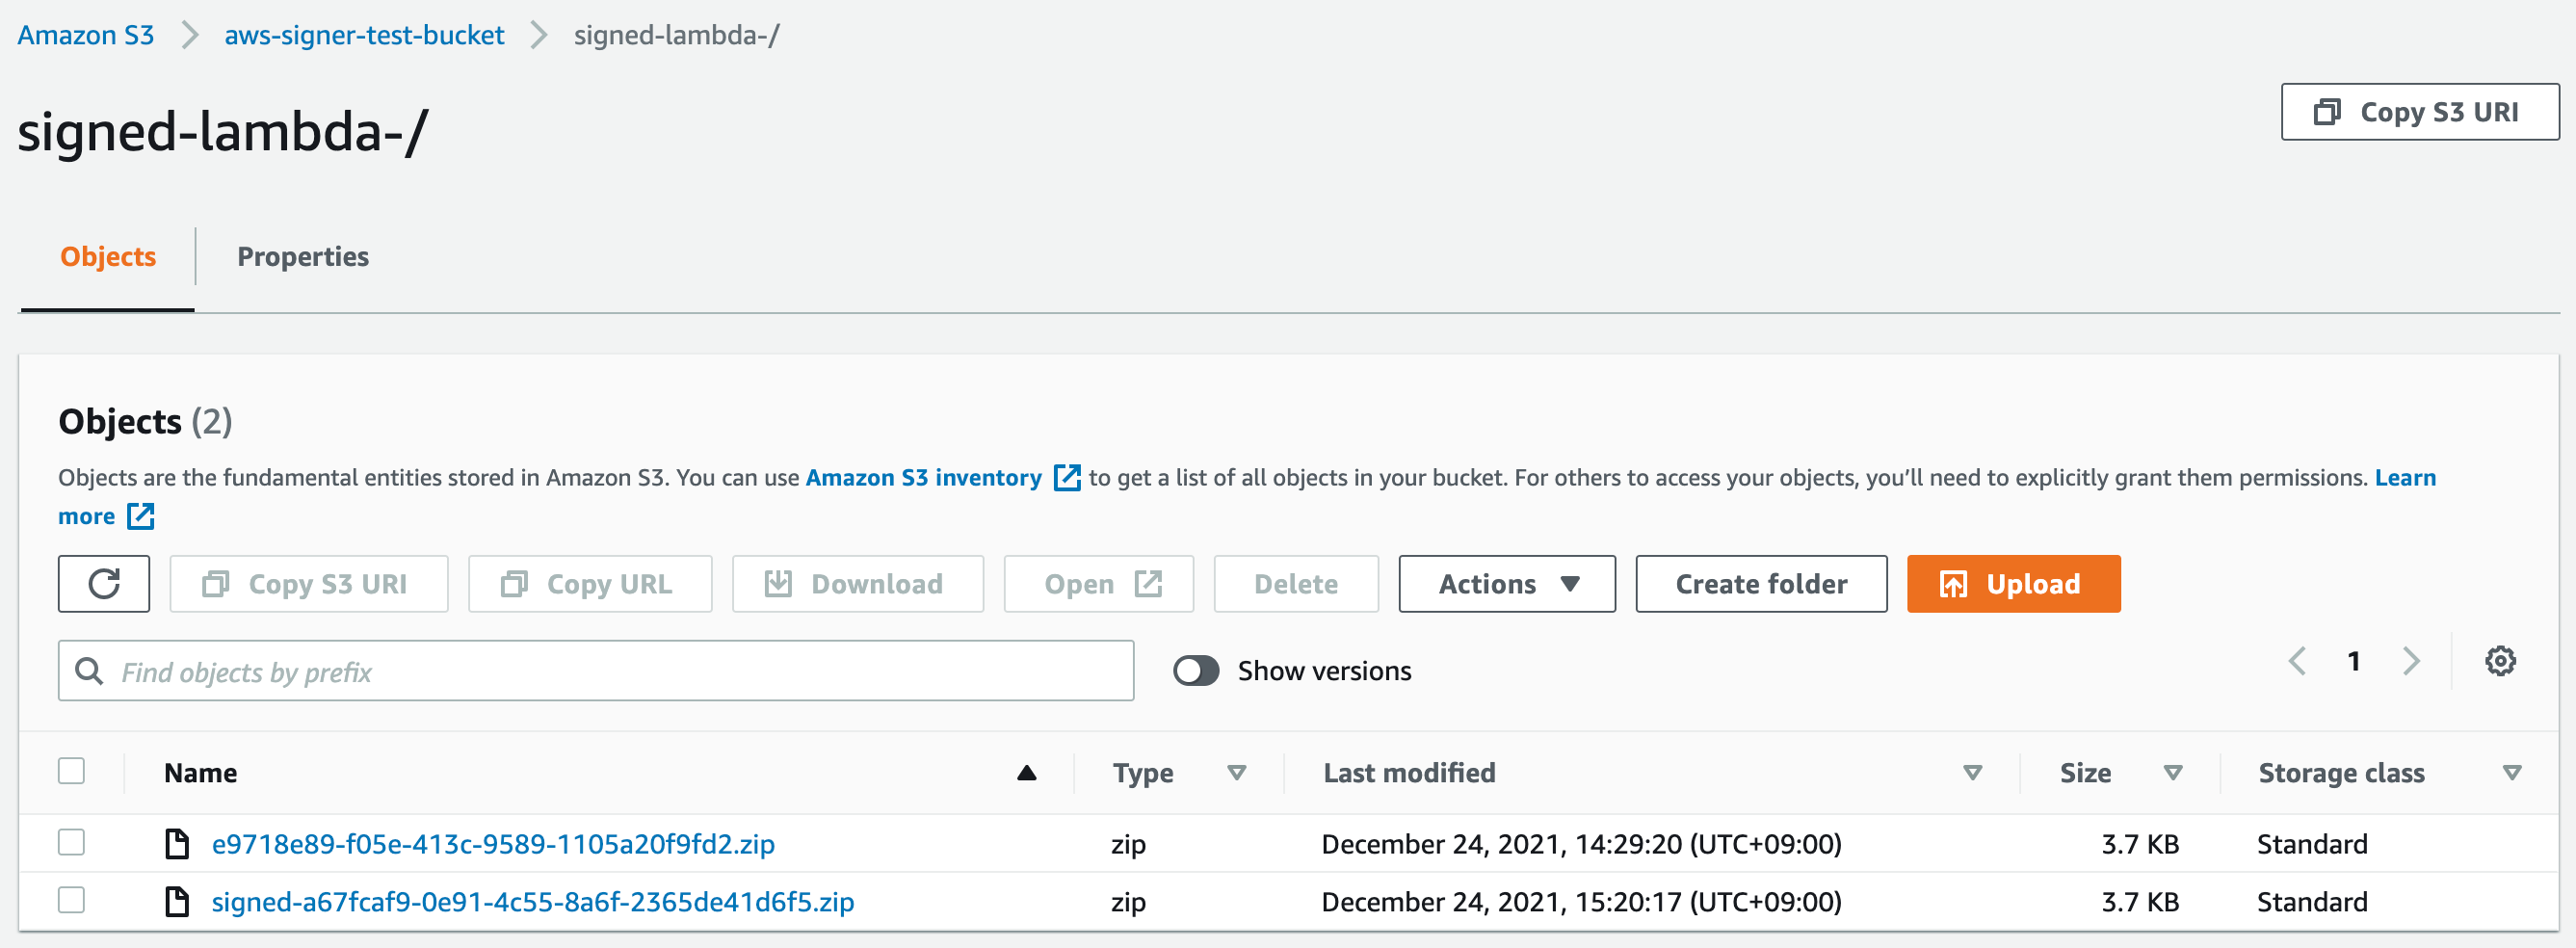
- The signed python code was generated in S3 bucket which you set in the AWS-CLI command.
署名されたpythonコードは、CLIコマンドで指定した、S3バケットの中に格納される - The python code name which was signed by AWS Signer is "prefix + jobID".
署名されたpythonコードの名前は、CLIで指定したprefix + JobID
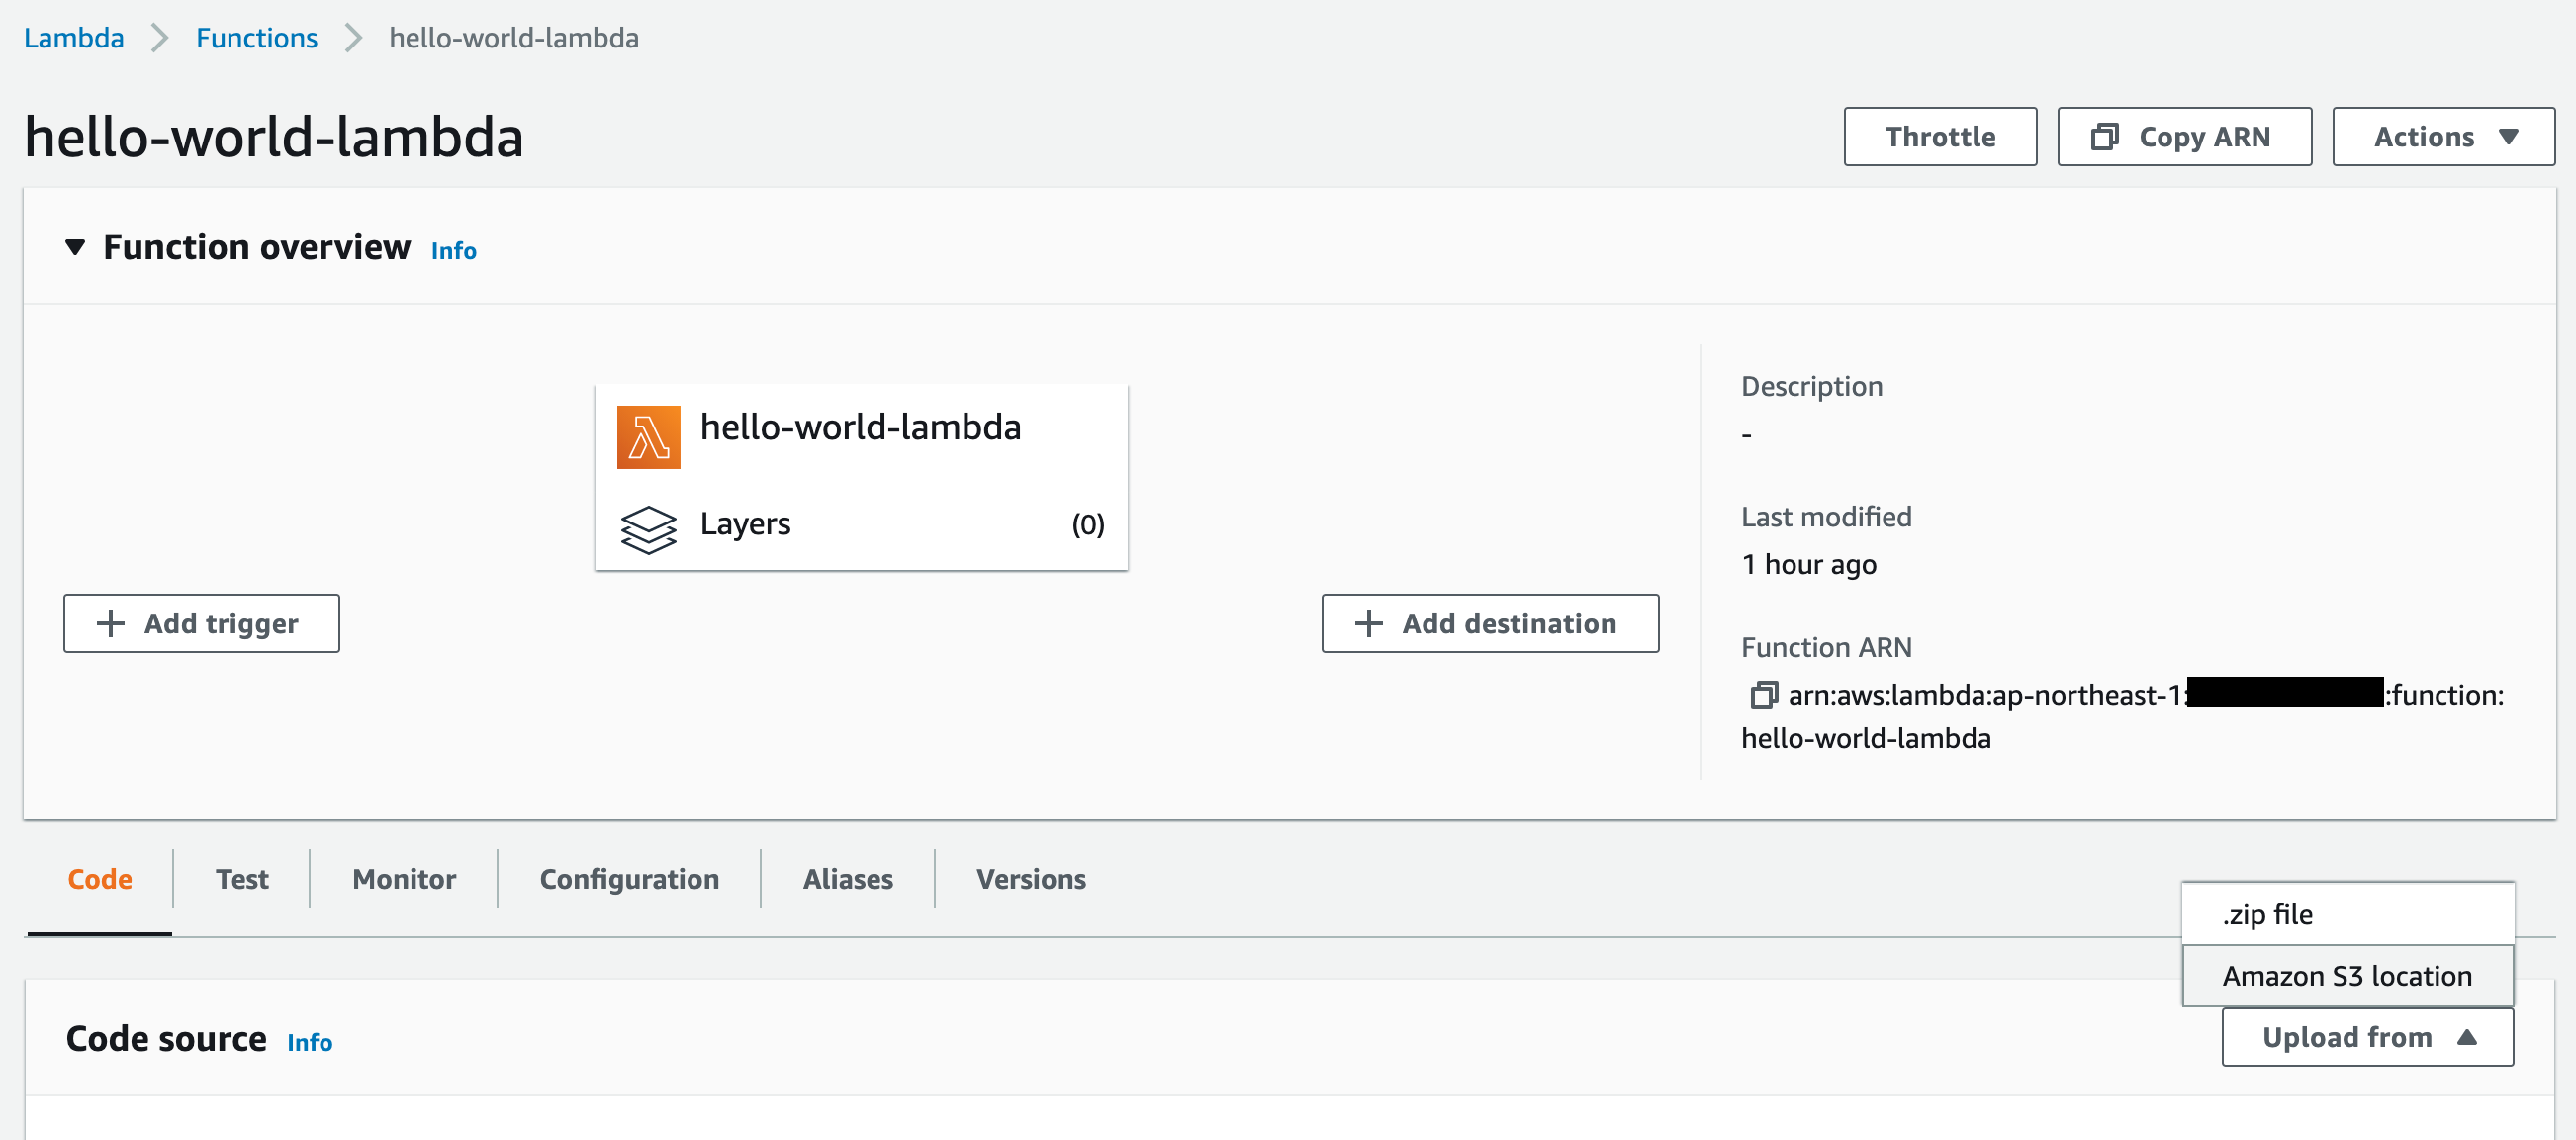
-
Try to deploy the signed python code which was created above step from the lambda console page.
署名されたpythonコードをlambda関数のページからデプロイ
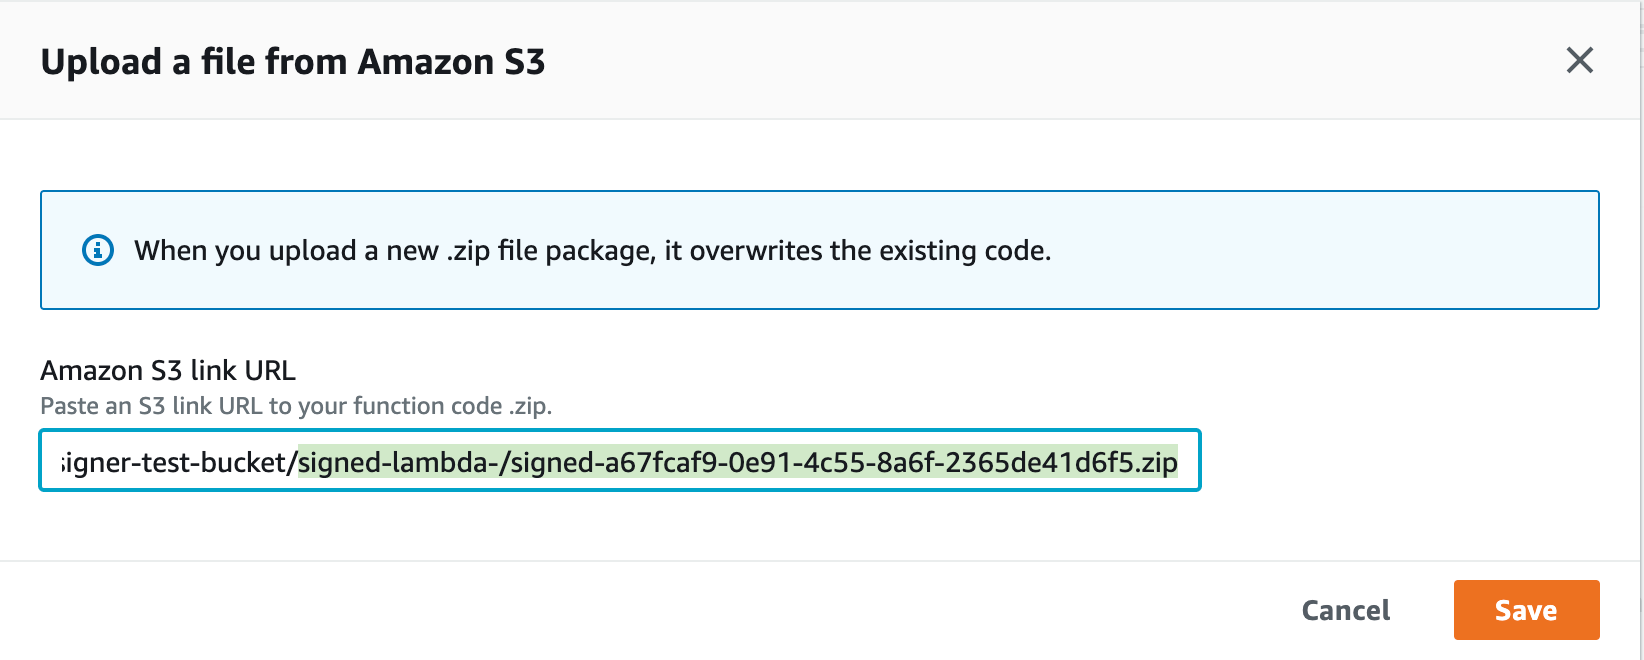
-
Deploy succeed.
デプロイ成功
9. Summary of AWS Signer / まとめ
- To configure the lambda function setting, we can enforce to deploy only the python code which singed by AWS Signer.
lambda関数の設定により、AWS Signerにより署名されたコードのみのデプロイを強制させることが可能。 - Using the AWS Signer it ensure that the code is not change after signing.
AWS Signerを利用することで、署名された後は、コードが変更されていないことを保証することが可能。 - If our python code contains credential information, then we signed it using AWS Signer without realizing it, we can deploy it on lambda function.
もしpythonコードがクレデンシャル情報を含んでおり、かつそれに気づかずAWS Signerで署名をしてしまうと、そのままデプロイできてしまう。 - In other words, by using AWS Signer, we can be sure that the code has not been modified after being signed, but we cannot guarantee that the code does not contain any unauthorized information.
つまり、AWS Signerを利用することで、署名された後にコードが変更されていない事は確実にできるが、コードに不正な情報が入っていないことを保証できるものではない。 - Therefore, we need to consider a proper review flow and a flow to sign only the code after the review.
そのため、適切なレビューフローと、レビュー後のコードのみ署名するフローを考えなければならない。 - In addition, We have to separate the lambda user role(development / update) and lambda administrator role(create function/ modify configuration). Because if the developer change the lambda signing configuration, they can deploy the python code which is not signed.
加えて、Lambdaのユーザ権限(開発/更新権限)と、Lambdaの管理者権限(新規作成/設定変更権限)を分ける必要がある。もし分けない場合は、ユーザがlambdaの署名設定の変更を実施することで、署名されていないコードがデプロイ可能となってしまう為。 - If you want to give users the authority to create lambda functions, you need to create a script to ensure that the "Enable Code Signing (Enforce)" setting is turned on.
もし利用者に、lambda関数の作成権限を付与したい場合は、スクリプトなどを作成することで、コード署名を有効化(Enforce)の設定が必ずONになるようにする必要がある。
Reference / 参考
AWS Signer Developer Guide
https://docs.aws.amazon.com/signer/latest/developerguide/Welcome.html
AWS Signer API Reference
https://docs.aws.amazon.com/signer/latest/api/Welcome.html