Red Hat Enterprise Linux 8 を個人利用の開発目的でVirtual Box上に無料でセットアップする方法のまとめを記載。
本記事の内容
- RHELの無償利用について
- Red Hat Developerサイトでのアカウント作成
- 必要なモジュールの準備
- VirtualBox上にRHEL8環境の構築
- ホストOS(MacOS)からゲストOS(VirtualBox上のRHEL8)へのSSH接続設定
前提情報
- ホストOS:macOS Catalina 10.15.1
- 仮想化ソフト:VirtualBox Version 6.1.0 r135406
- ゲストOS:Red Hat Enterprise Linux release 8.0 (Ootpa)
- ゲストOSカーネル:4.18.0-80.el8.x86_64
1. RHELの無償利用について
以下記事ご参照。
デベロッパーサブスクリプションにより、ローカルアプリケーションの開発目的であれば無償で利用可能。
Red Hat、Red Hat Developer Programを拡張し無料のRed Hat Enterprise Linuxデベロッパーサブスクリプションを追加
オープンソースソリューションのプロバイダーとして世界をリードするRed Hat, Inc.(NYSE:RHT、以下Red Hat)は本日、Red Hat Developer Programの一環として、無料のRed Hat Enterprise Linuxサブスクリプションの提供を開始したことを発表しました。Red Hat Enterprise Linux Developer Suiteは、自己サポート、非実運用のデベロッパーサブスクリプションとして提供されます。これにより、エンタープライズグレードのアプリケーションを構築するためのより安定した開発プラットフォームを提供し、クラウド、物理、仮想、およびコンテナ中心のインフラストラクチャに渡る、ミッションクリティカルなデプロイメントへの明確な経路を提示します。
DevNation 2015で発表されたRed Hat Developer Programは、エンタープライズ開発者の需要への対応に貢献するために進化を続けており、エンタープライズ開発者がRed Hat製品をさらに活用できるようにするコンテンツ、ツール、およびリソースへのシンプル化されたアクセスを提供します。現在このリソースのカタログには、Red Hat Enterprise Linux Developer SuiteおよびRed Hat JBoss Middlewareポートフォリオへのアクセスが含まれており、いずれも無料のデベロッパーサブスクリプションを通して利用可能です。これらのサブスクリプションによって、開発者はRed Hatのエンタープライズグレードテクノロジーにより容易にアクセスし、ローカルアプリケーション開発にのみ利用できます。実運用には、有料のサブスクリプションレベルが必要です。
2. Red Hat Developerサイトでのアカウント作成
上記デベロッパーサブスクリプションを利用する為に、「Red Hat Developer」サイトにて、開発者用アカウントを作成。
Red Hat Developer
3. 必要なモジュールの準備
今回は、無償の仮想化ソフトとしてVirtual Boxを利用。
- Virtual Box のダウンロード&インストール
Oracle VM VirtualBox
https://www.oracle.com/virtualization/technologies/vm/downloads/virtualbox-downloads.html
Mac OS X → 「dmg Image」
- インストール時に以下のエラーが出た場合は、「システム環境設定」を変更の上、再実行


- Red Hat Enterprise Linux 8 のダウンロード
Red Hat Developer


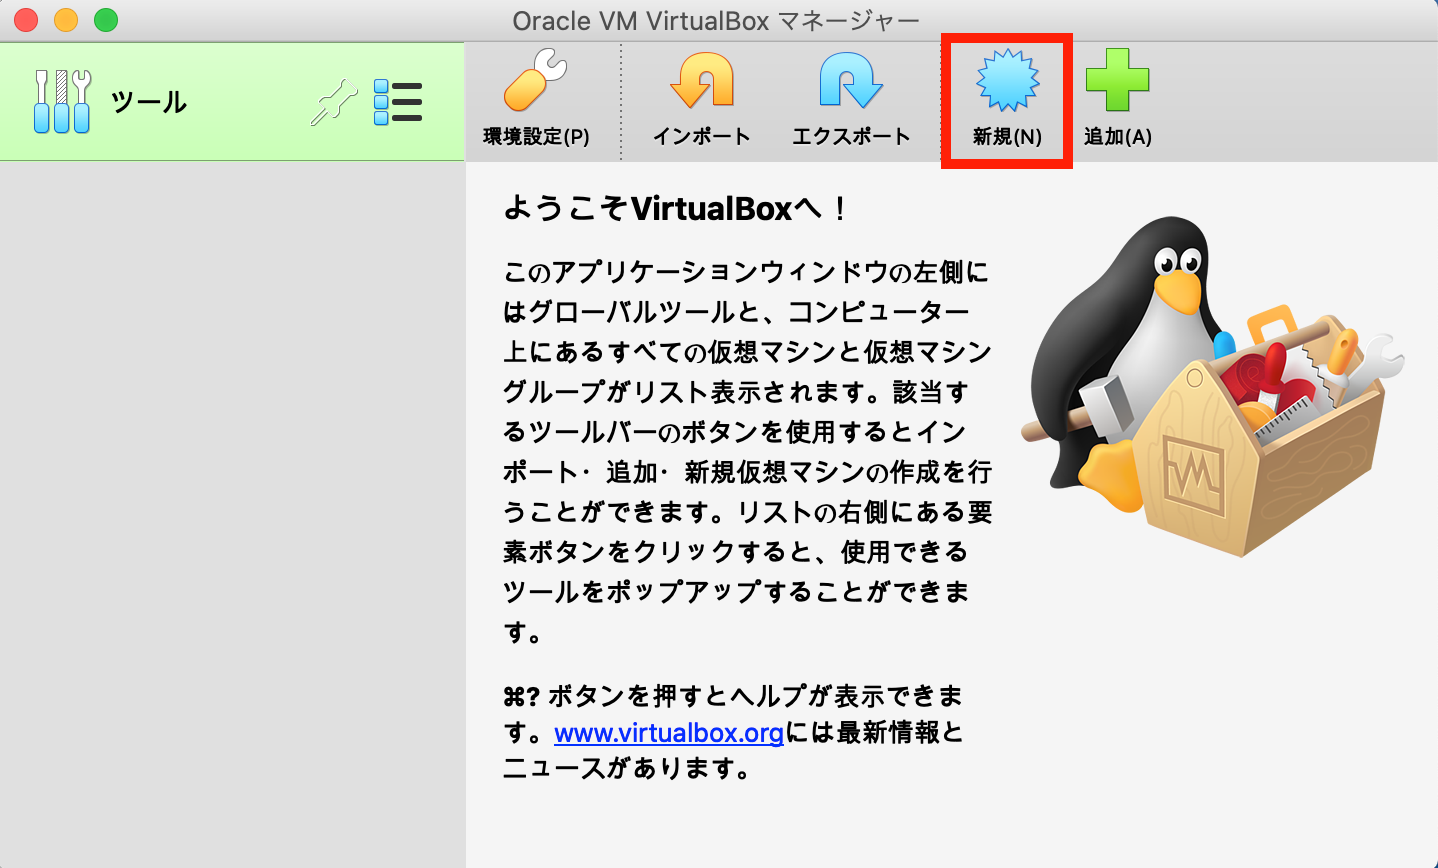
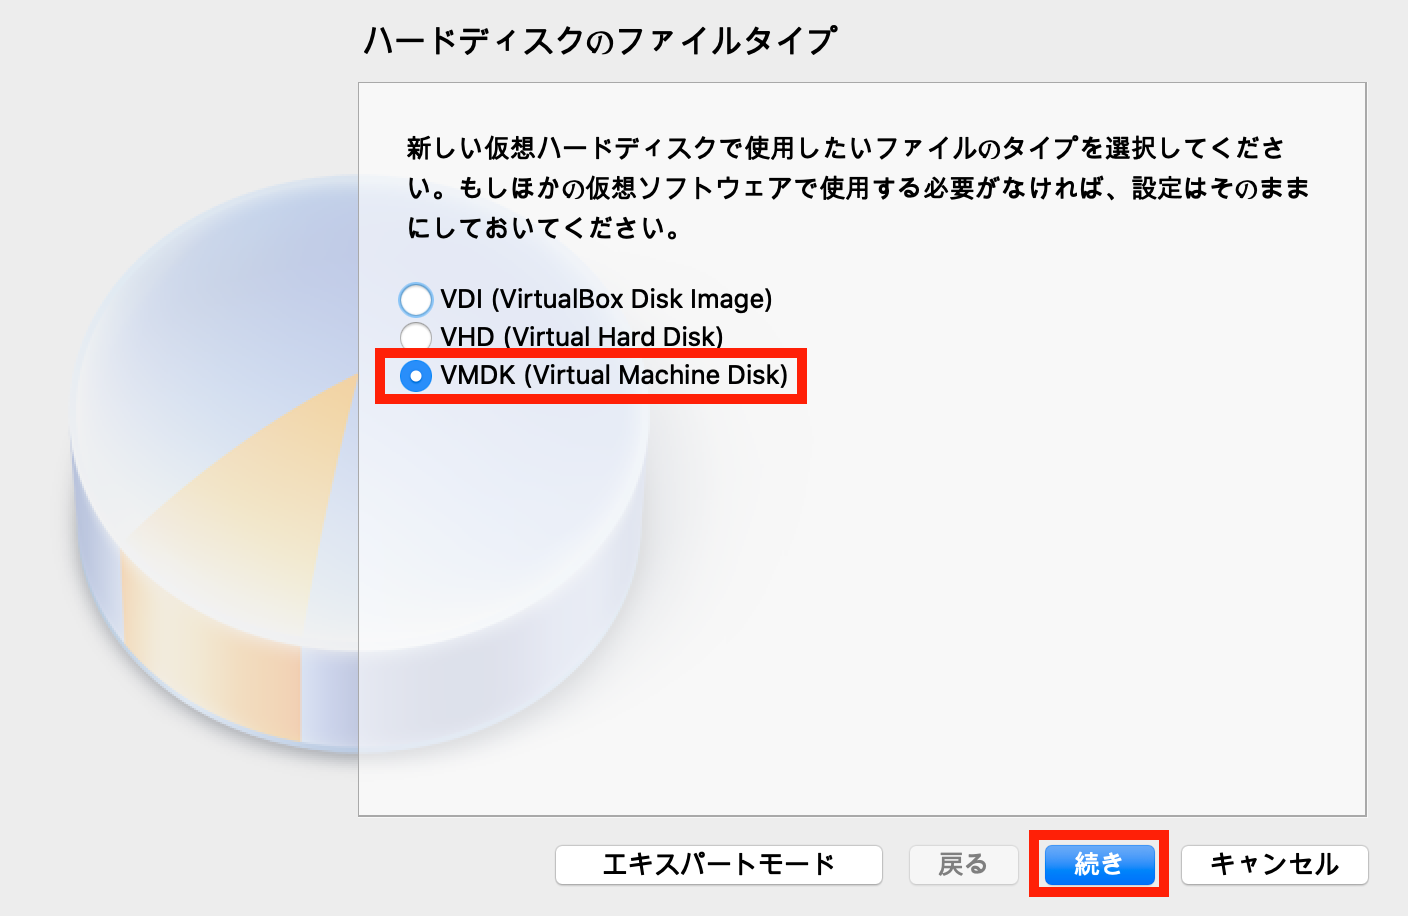
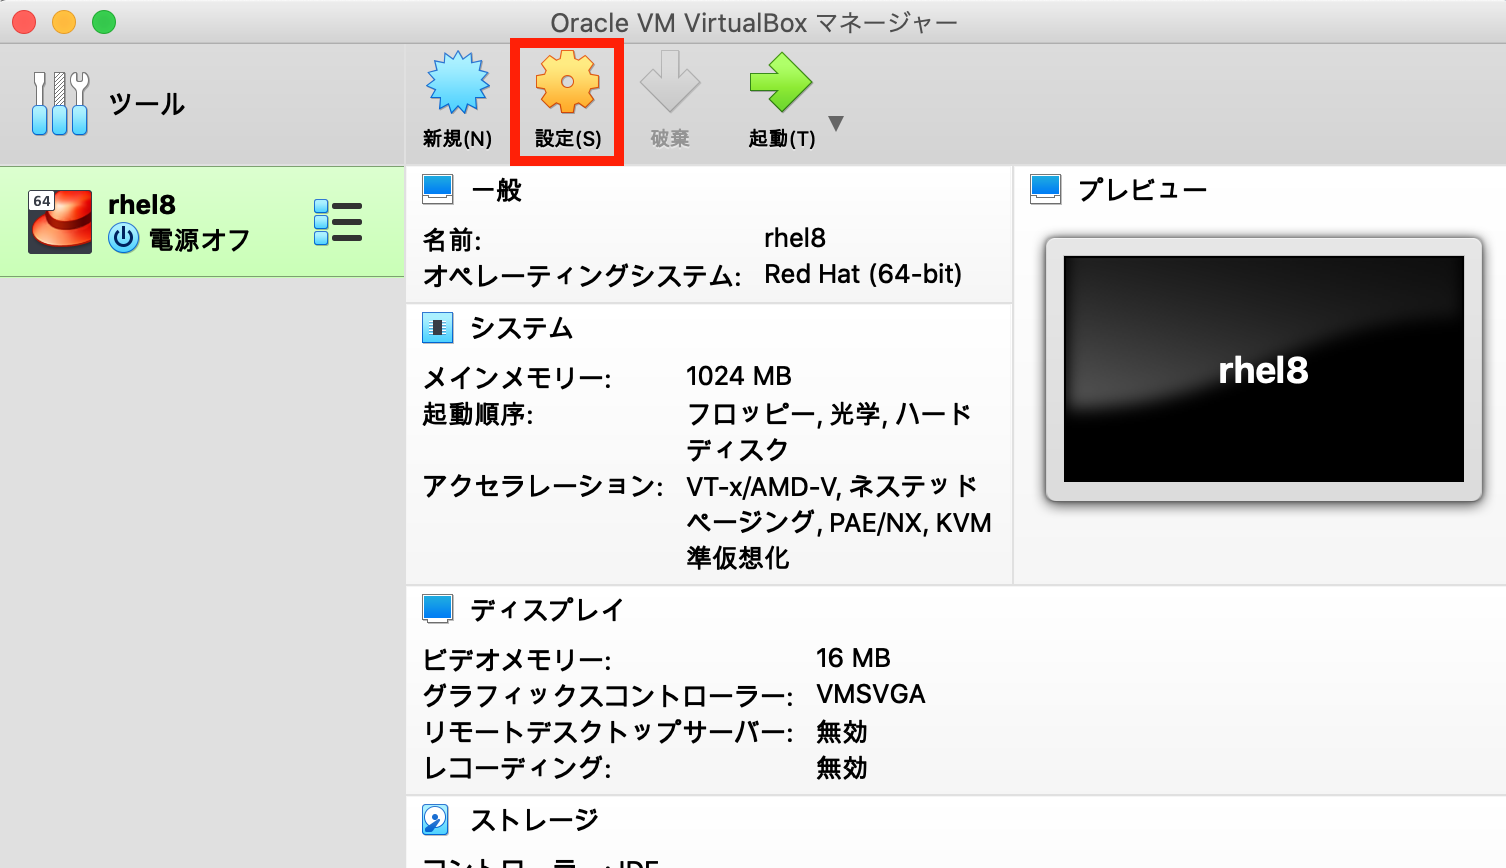
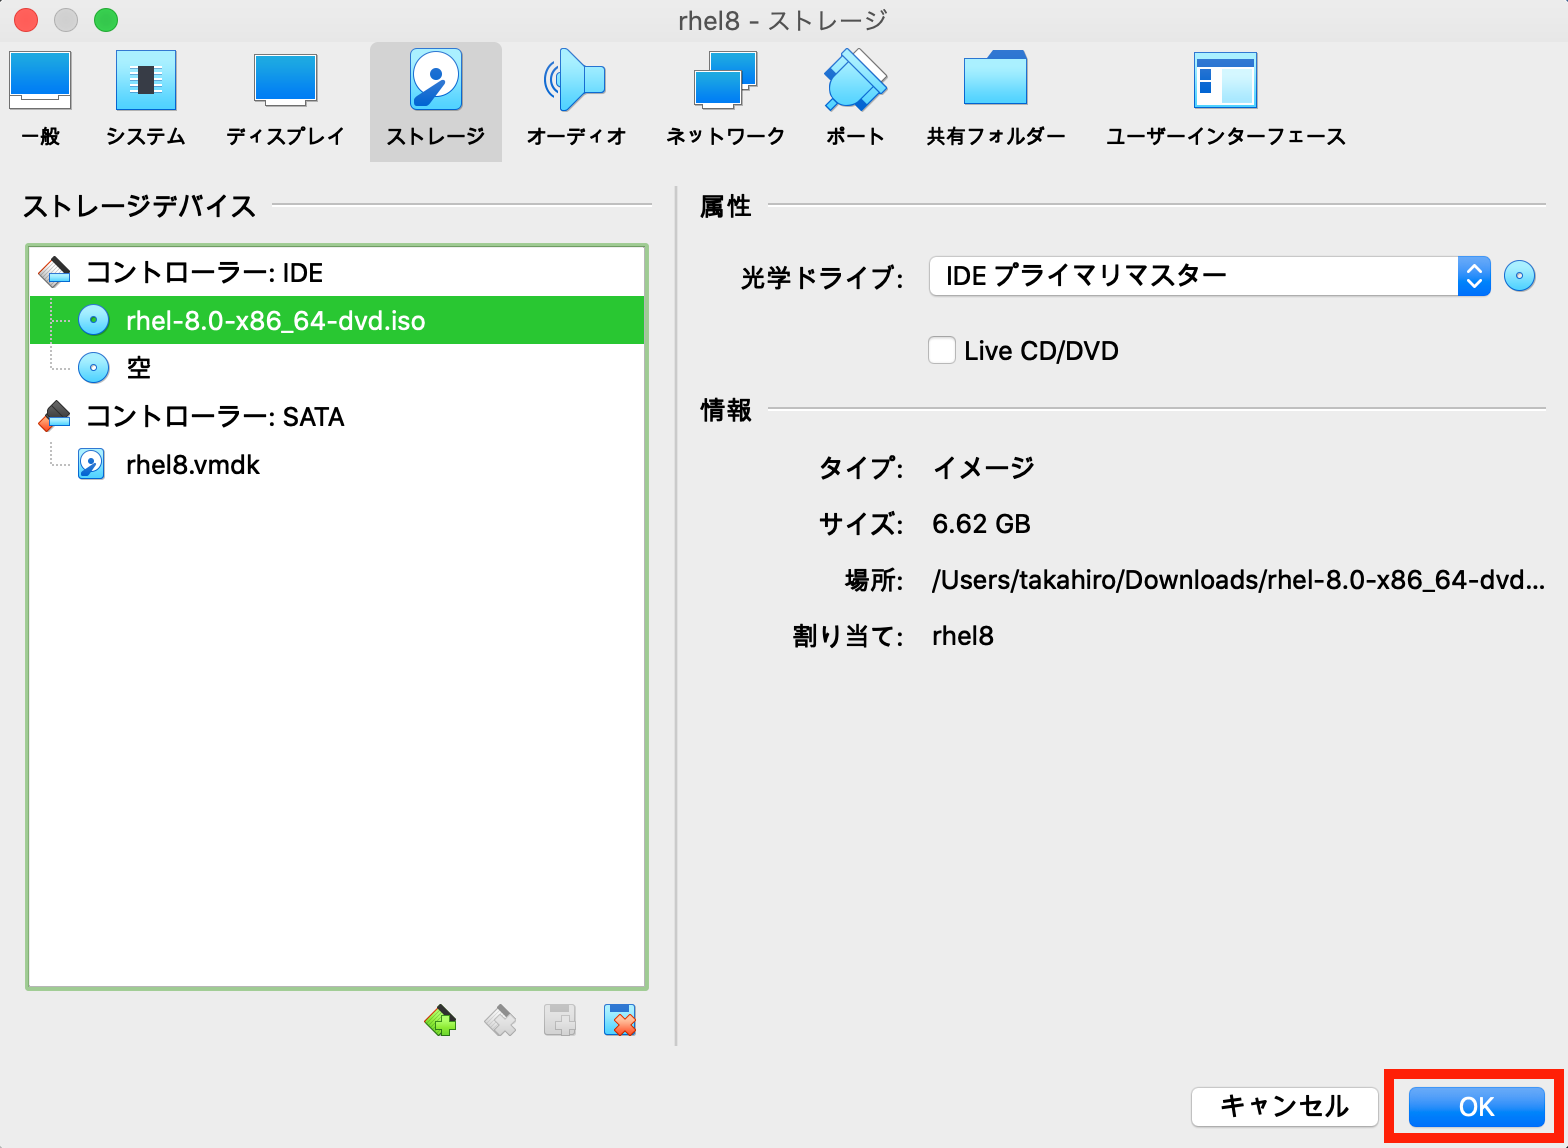
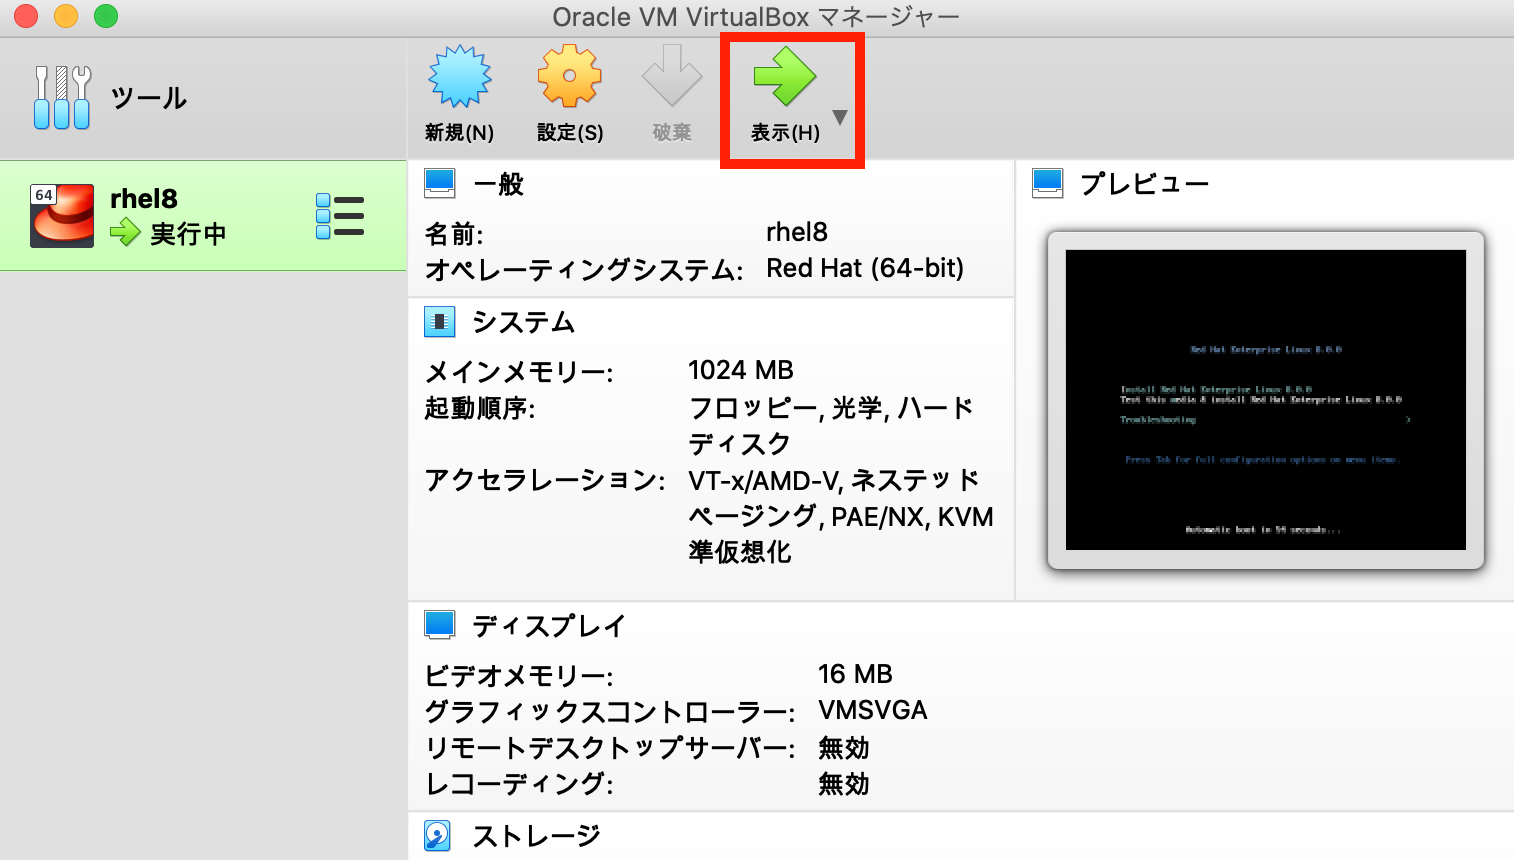
4. VirtualBoxでのRHEL8環境の構築
- 基本的にはデフォルト設定のまま作成


- 今回はVMDK形式を選択


- Red Hat Developer サイトにてダウンロードしたRHEL8のISOファイルを選択


- 「起動」を押下
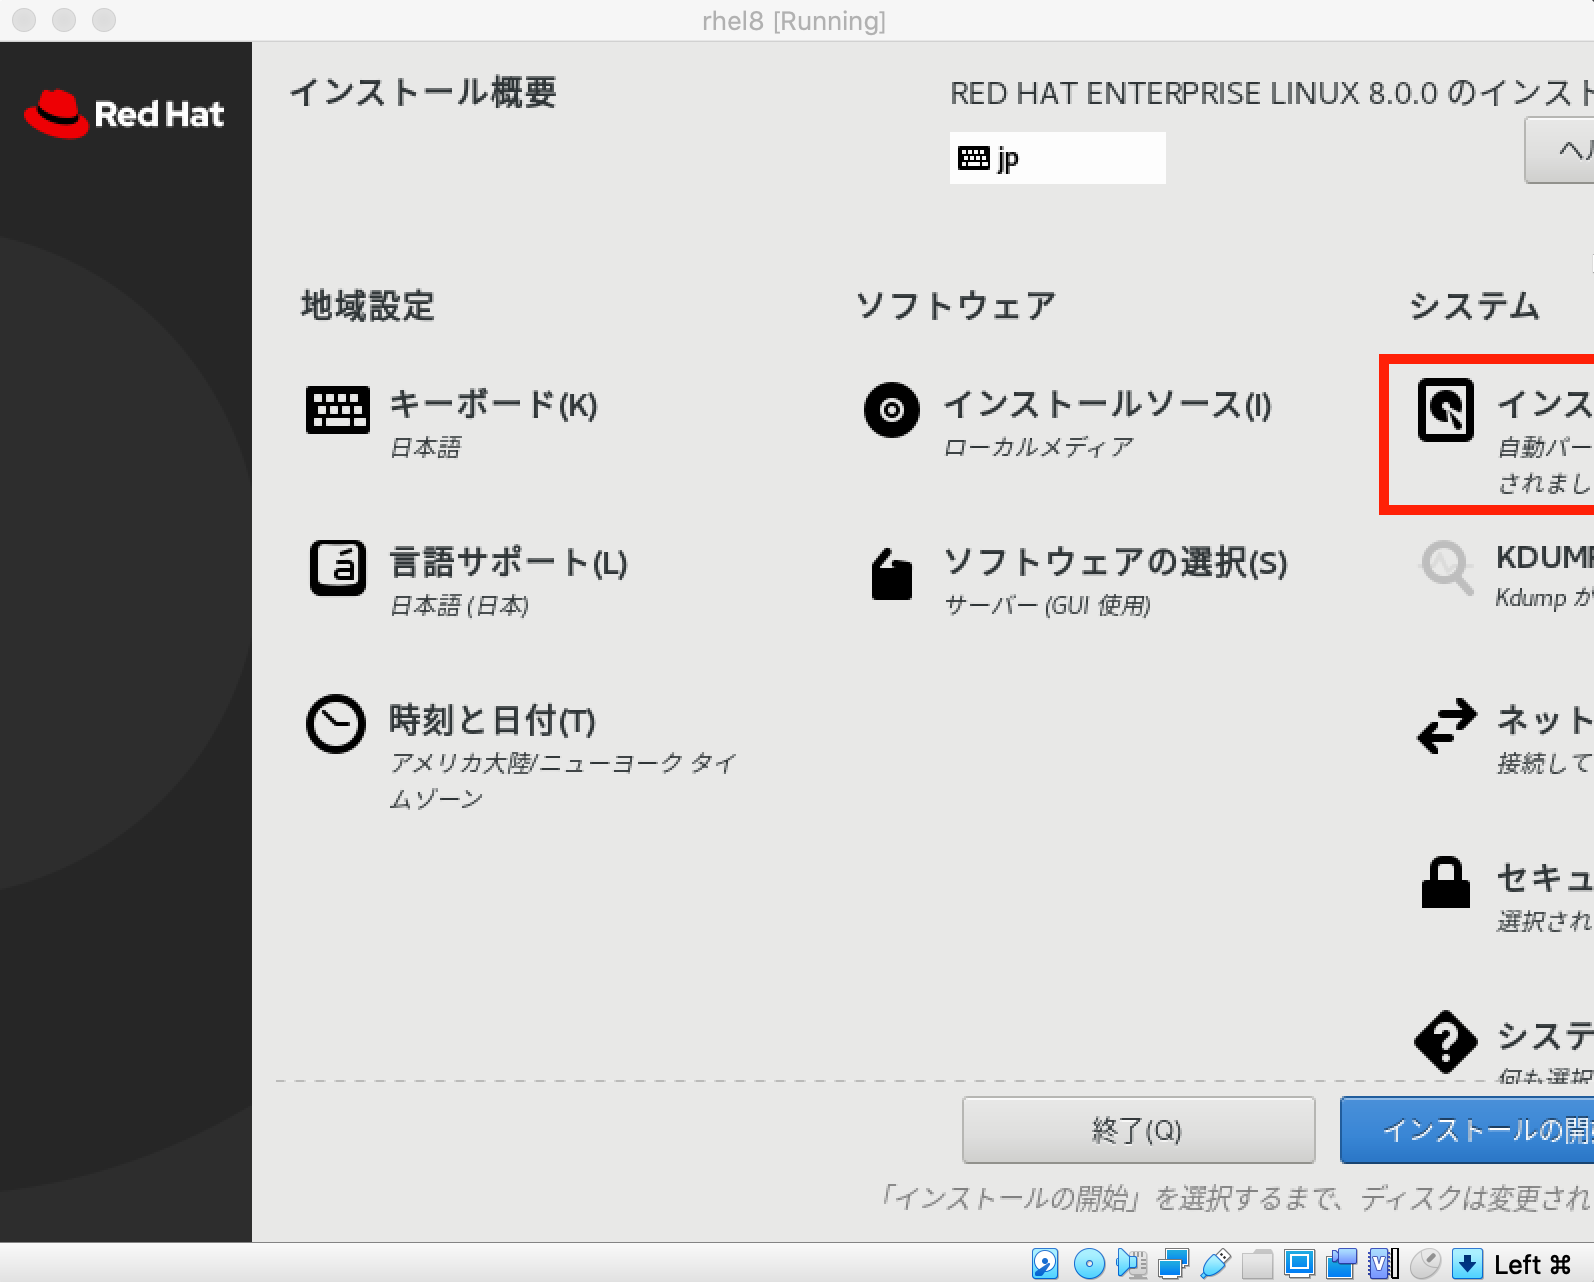
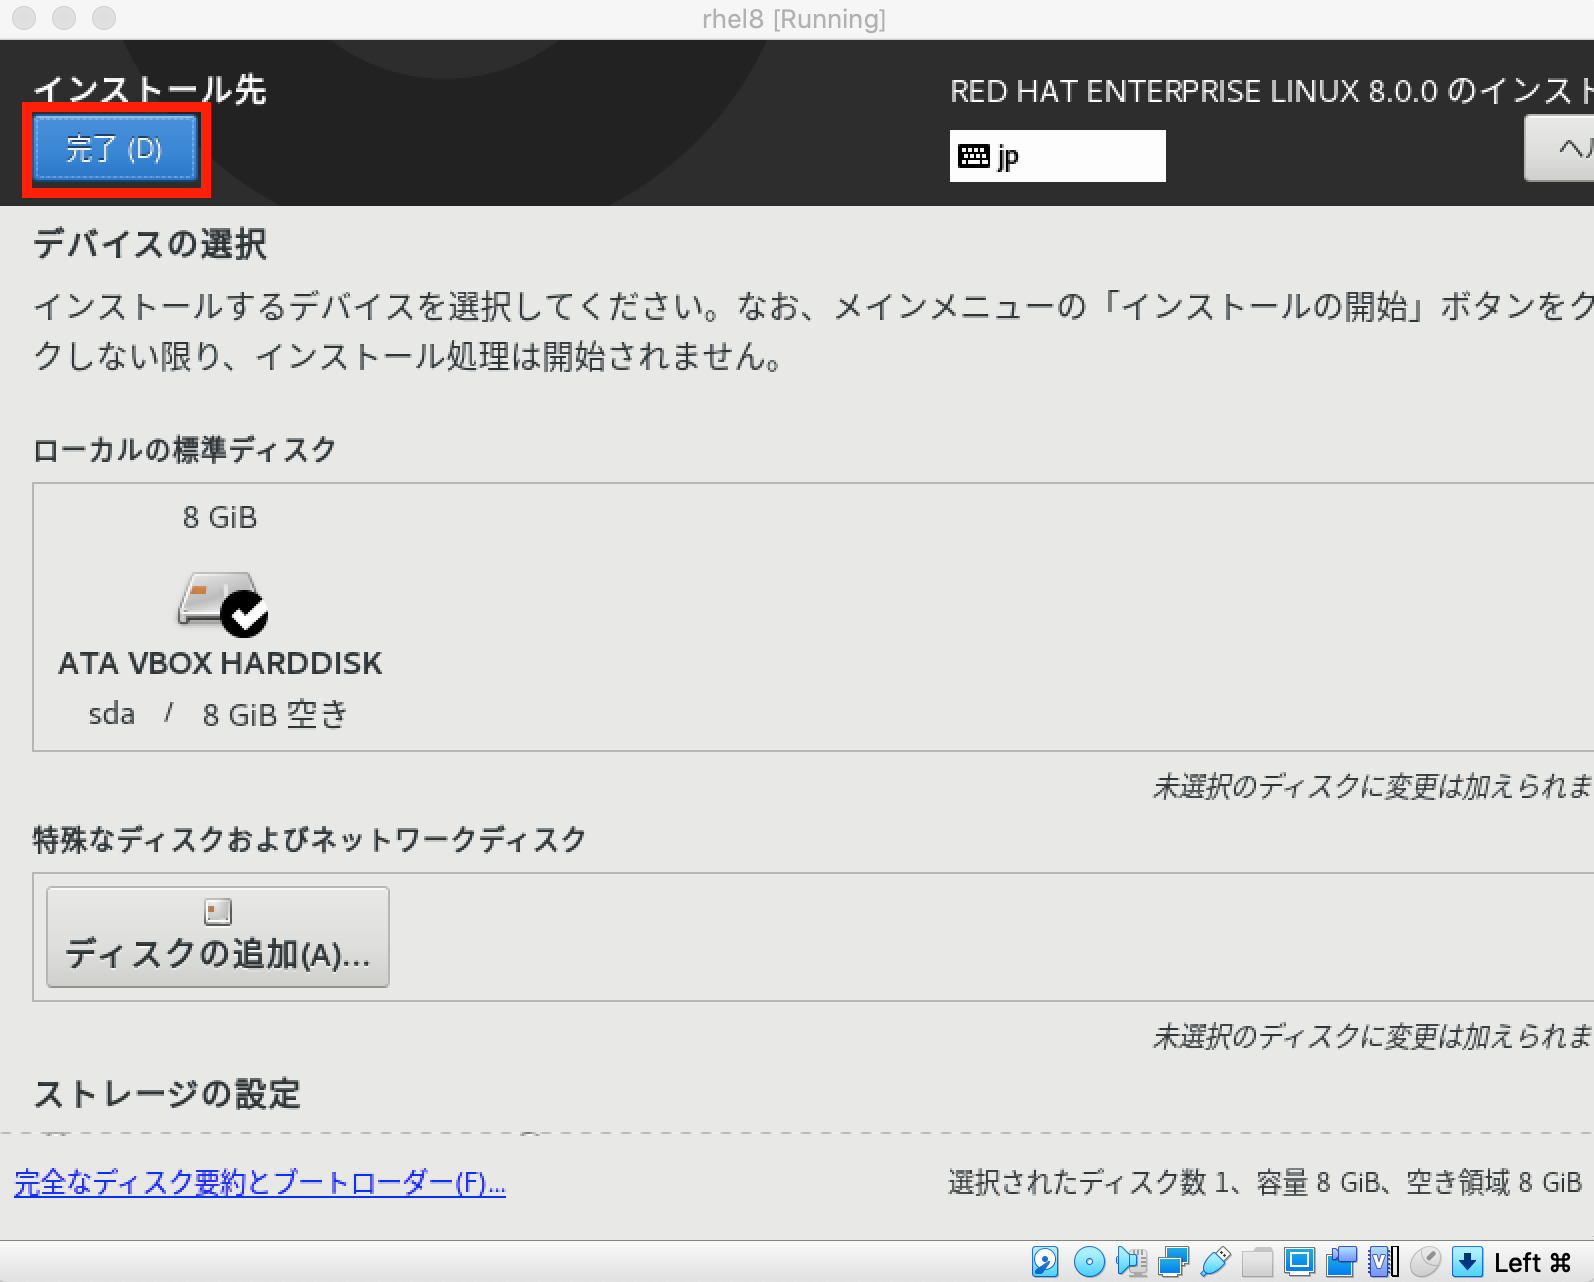
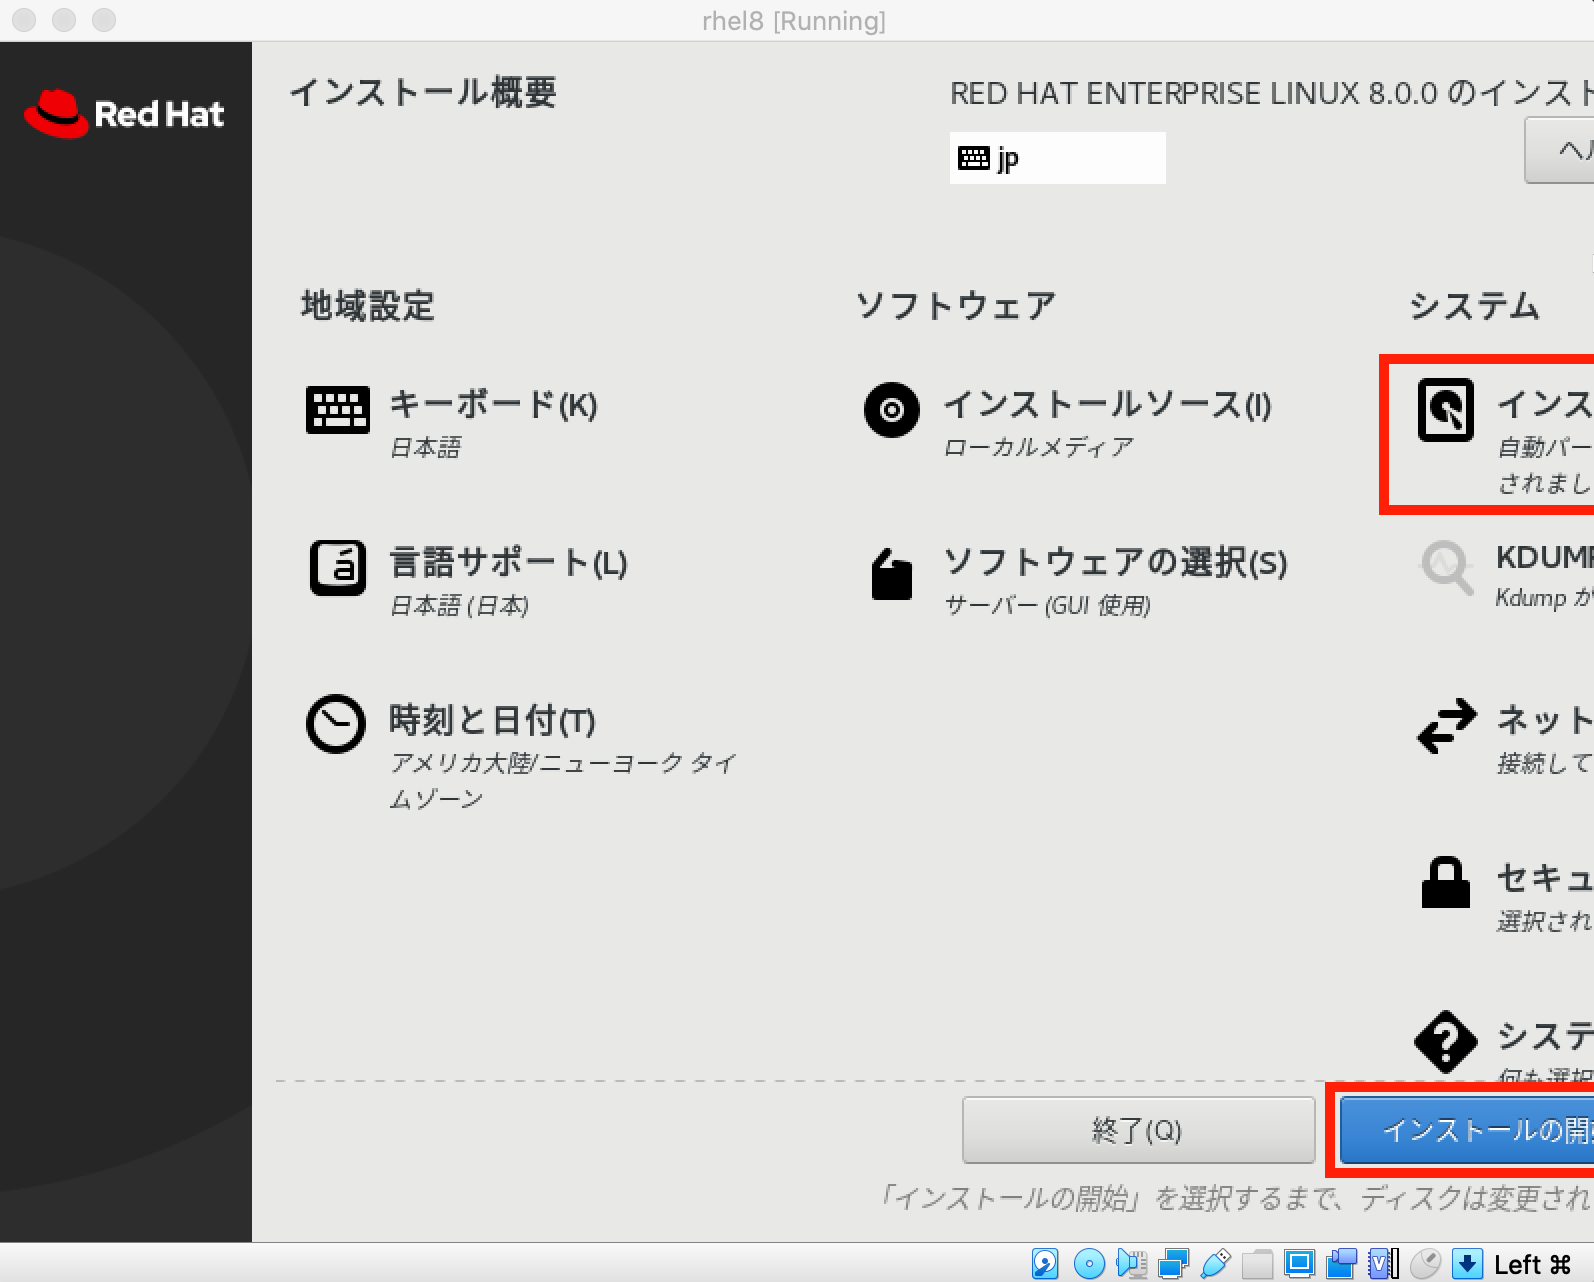
- 「Install Red Hat Enterprise Linux 8.0.0」を選択


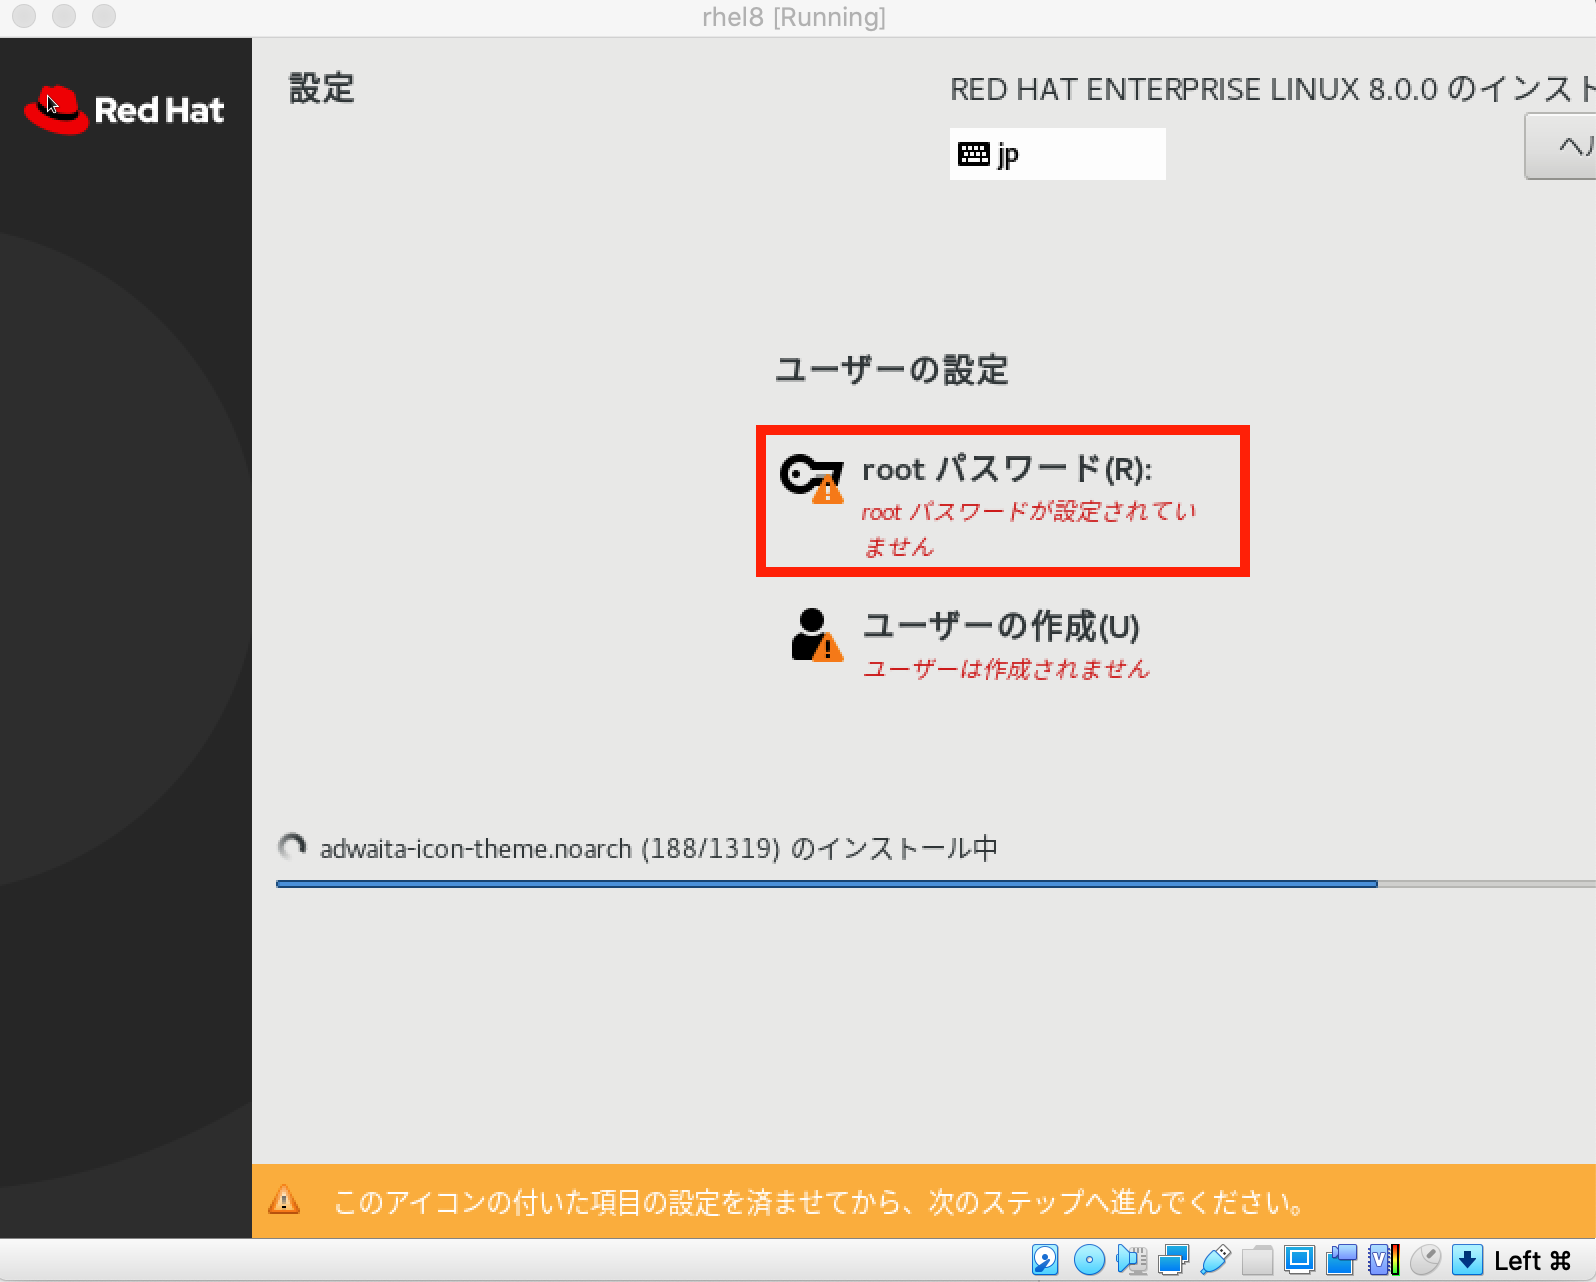
- rootユーザのパスワードを設定

- 一般ユーザ「login00」を作成

- インストール後再起動を実施

- 再起動後の初期セットアップ


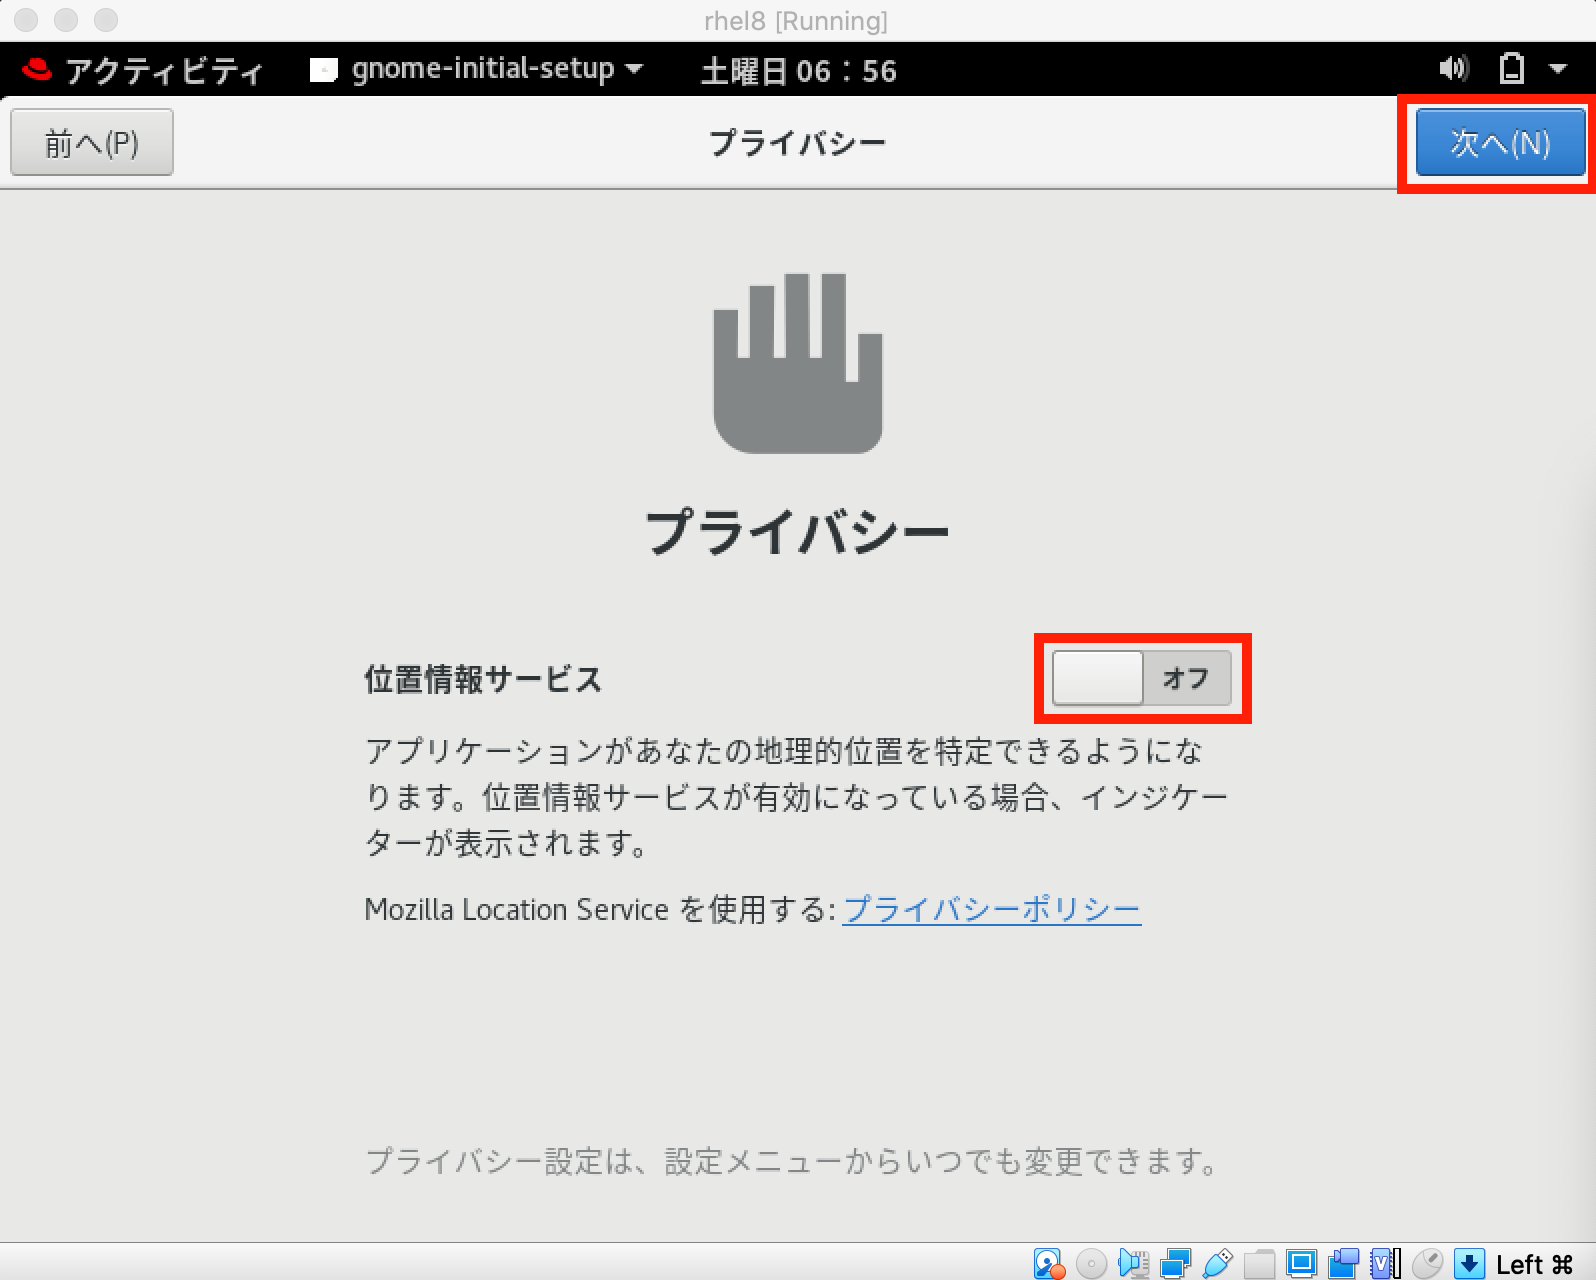
- 位置情報サービスは使わない為「OFF」に変更

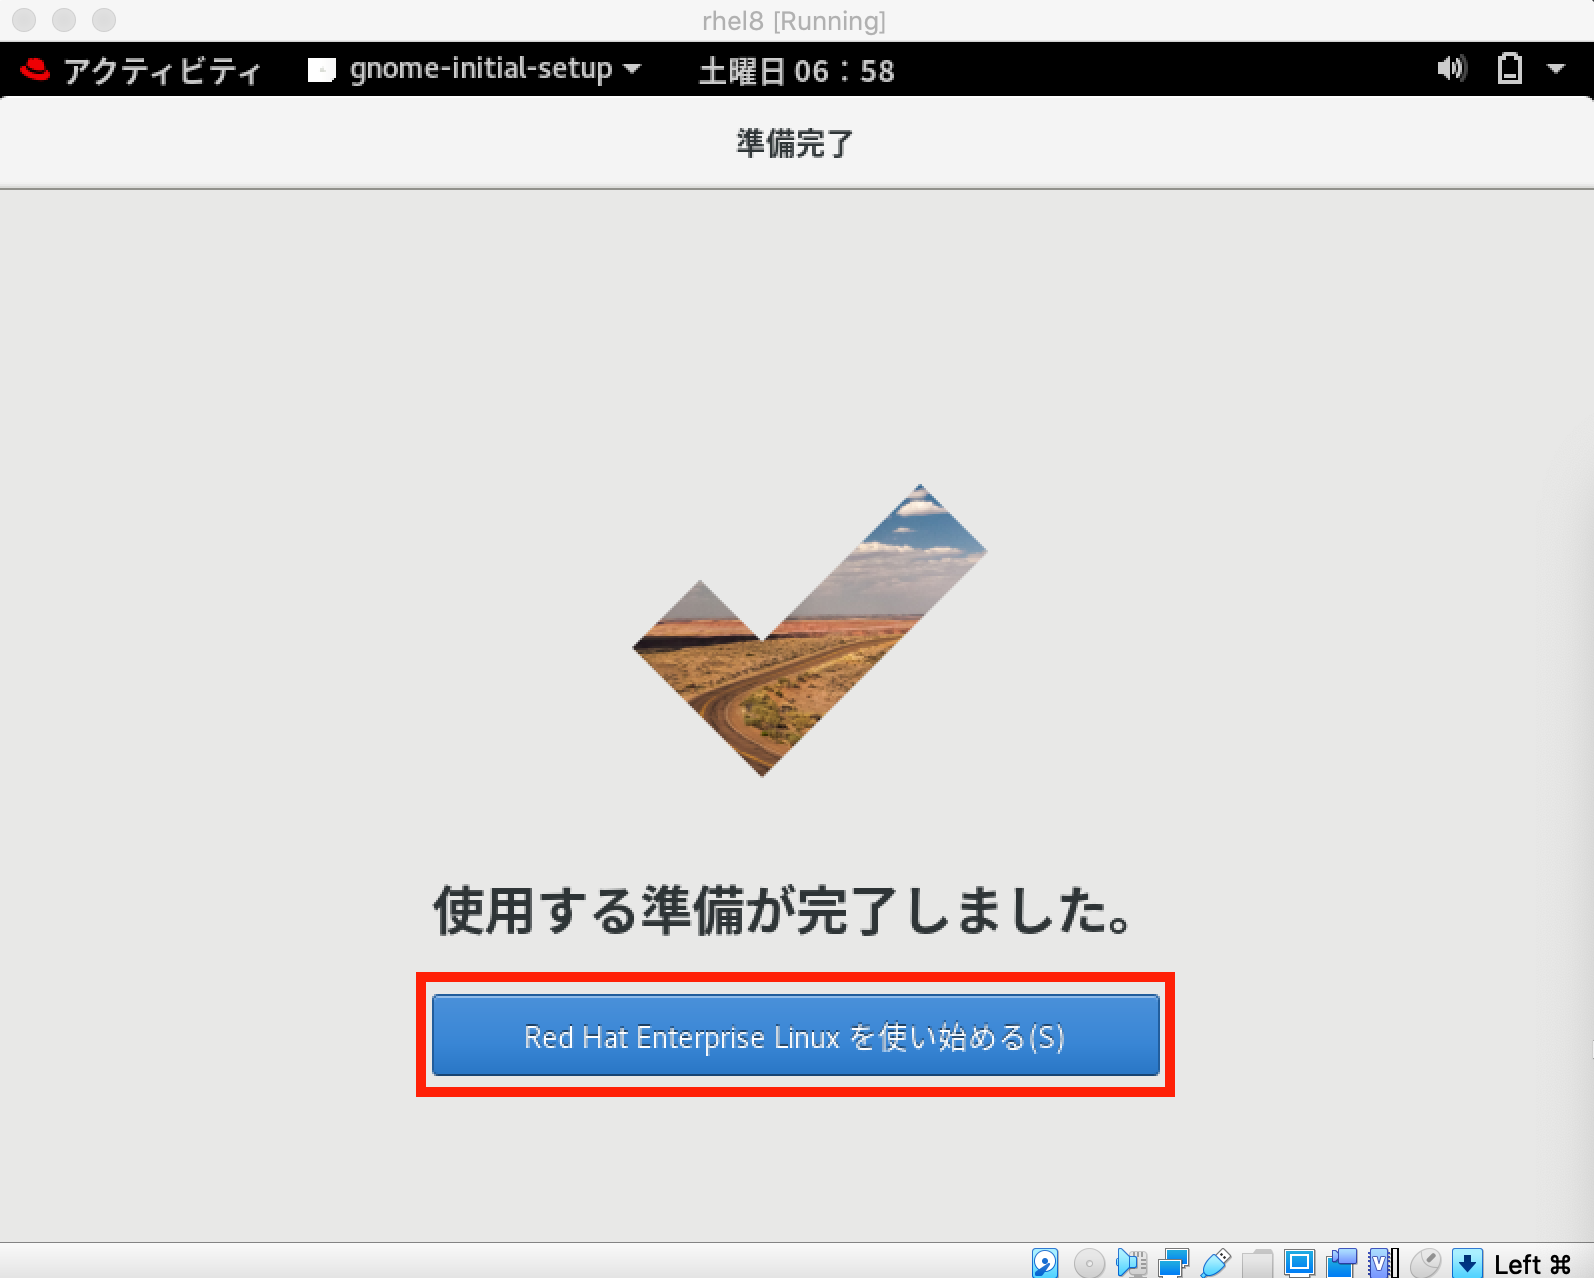
- Red Hat Enterprise Linux 8 へのGUIログイン完了

- ネットワーク設定を実施する為シャットダウン

- Virtual Boxの管理コンソールよりインストールに使用したISOの割当の除去(これを実施しないと、次回起動時もインストール画面が表示されてしまう)

5. ホストOS(MacOS)からゲストOS(VirtualBox上のRHEL8)へのSSH接続設定
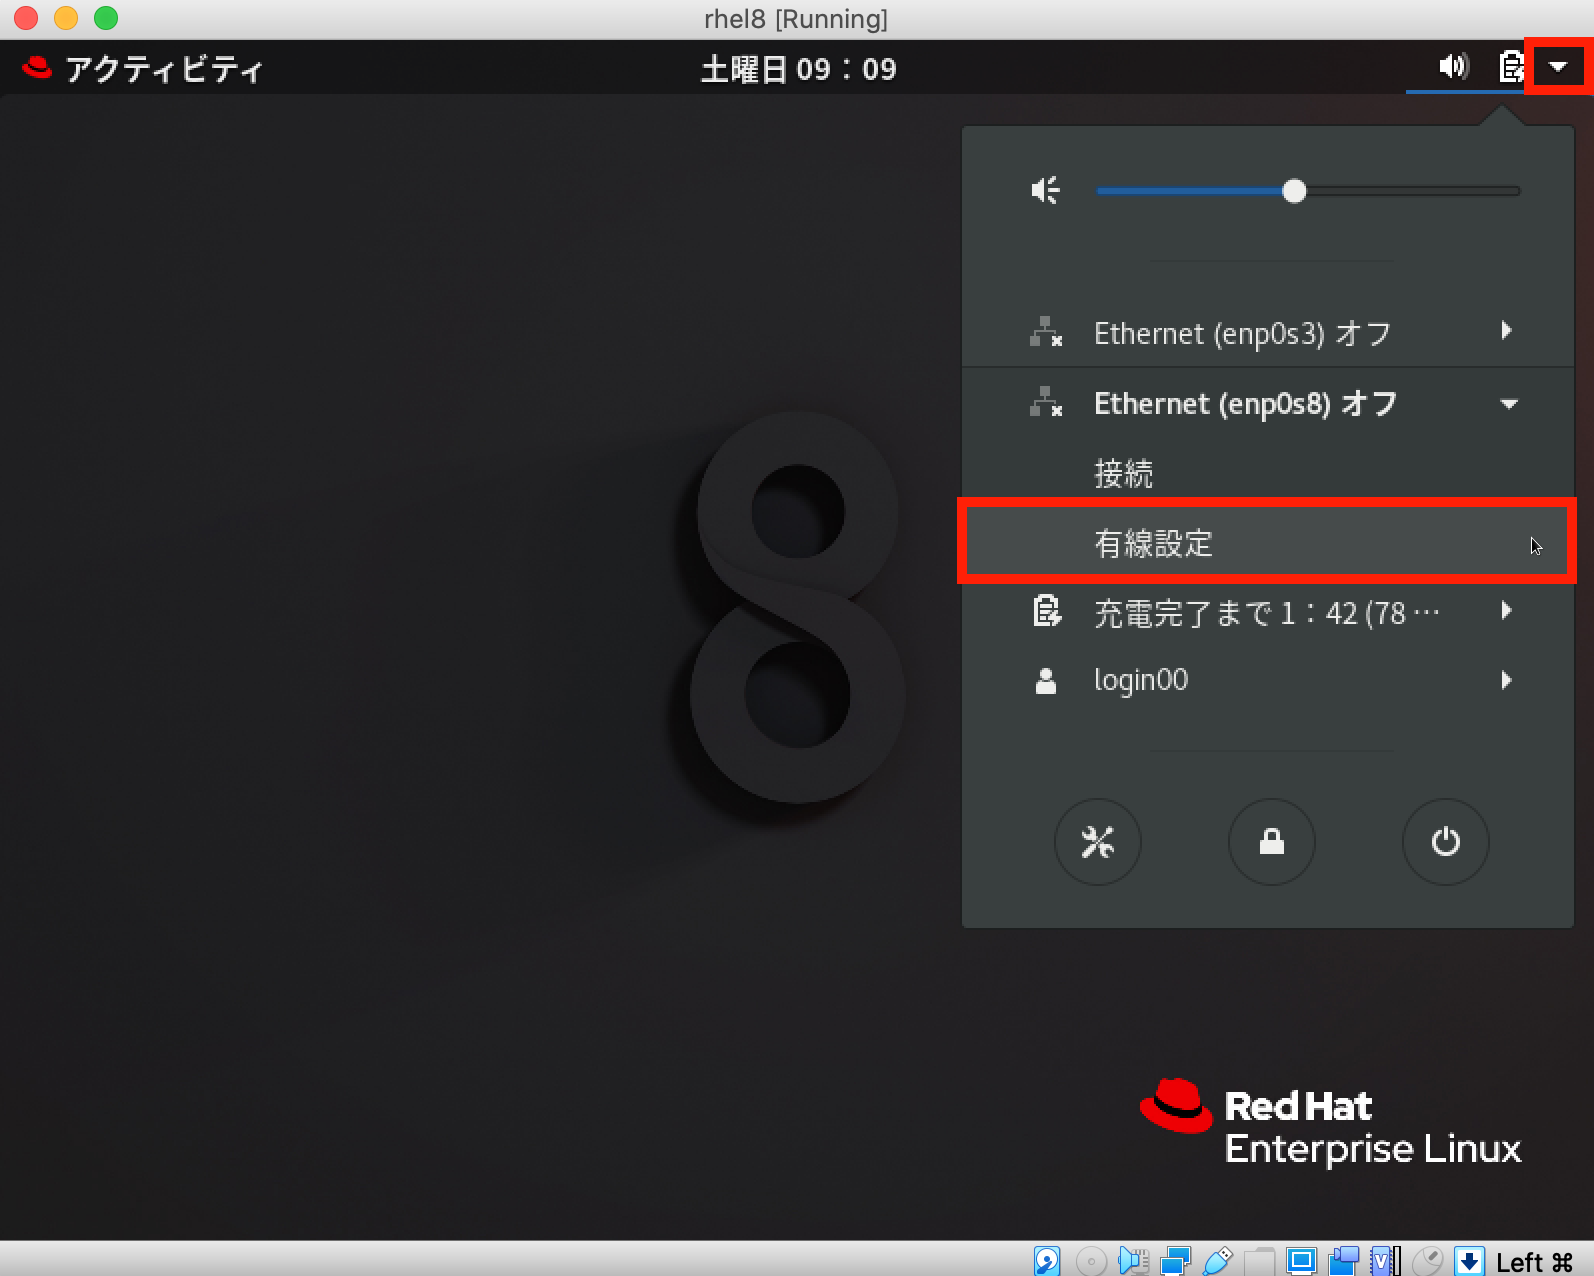
- ネットワーク設定を実施

- ネットワークアダプターの作成

- 作成を押下すると自動的に生成される

- 情報の確認

- ホストオンリーアダプターの設定(ホストOS(MacOS)から、VM上のRHEL8に接続できるようにするための設定)


- VM(RHEL8)の起動

- ログイン後ネットワークの設定

- ここでは、固定IPアドレスとして「192.168.56.100」を設定

- 設定後「オン」に変更

- デスクトップから「端末」を起動させ、IPアドレスが正しく反映されているか確認


- MacOS上のターミナルから接続確認
[root@MacOS ~]# ssh login00@192.168.56.100
The authenticity of host '192.168.56.100 (192.168.56.100)' can't be established.
ECDSA key fingerprint is SHA256:e8qM9h+dOaDkGhhjqPdFpv9+WImxufYd8sGJYaCaAks.
Are you sure you want to continue connecting (yes/no)? yes
Warning: Permanently added '192.168.56.100' (ECDSA) to the list of known hosts.
login00@192.168.56.100's password:
Activate the web console with: systemctl enable --now cockpit.socket

Last login: Sat Dec 21 08:20:22 2019
[login00@localhost ~]$
- RHELのバージョン確認
[login00@localhost ~]$ cat /etc/redhat-release
Red Hat Enterprise Linux release 8.0 (Ootpa)
[login00@localhost ~]$
[login00@localhost ~]$ uname -a
Linux localhost.localdomain 4.18.0-80.el8.x86_64 #1 SMP Wed Mar 13 12:02:46 UTC 2019 x86_64 x86_64 x86_64 GNU/Linux
[login00@localhost ~]$
- RHEL8.0デフォルトインストール時のパーティション構成
[root@rhel8 ~]# lsblk
NAME          MAJ:MIN RM  SIZE RO TYPE MOUNTPOINT
sda             8:0    0    8G  0 disk
├─sda1          8:1    0    1G  0 part /boot
└─sda2          8:2    0    7G  0 part
  ├─rhel-root 253:0    0  6.2G  0 lvm  /
  └─rhel-swap 253:1    0  820M  0 lvm  [SWAP]
sr0            11:0    1 1024M  0 rom
[root@rhel8 ~]#
[root@rhel8 ~]# df -h
ファイルシス          サイズ  使用  残り 使用% マウント位置
devtmpfs                396M     0  396M    0% /dev
tmpfs                   411M     0  411M    0% /dev/shm
tmpfs                   411M  6.3M  405M    2% /run
tmpfs                   411M     0  411M    0% /sys/fs/cgroup
/dev/mapper/rhel-root   6.2G  4.0G  2.3G   64% /
/dev/sda1              1014M  169M  846M   17% /boot
tmpfs                    83M   28K   83M    1% /run/user/42
tmpfs                    83M  4.0K   83M    1% /run/user/1000
[root@rhel8 ~]#