今回はjoystickを使って、オブジェクトの操作とジャンプボタンを作る機能についてまとめていきます!
使用PC: MacBook Pro (13-inch, M1, 2020)
OSバージョン: 11.5.2
Unityバージョン:2021.3.2f1
実際にプレイすると
こんな感じになったら完成です!
サンプル動画では
①Sphere→Rigidbodyを加えておく
②Plane
③Material(緑色)→Planeにつける
④joystick→unityにインポートしておく
⑤Canvas
をアセットとして使用しています。
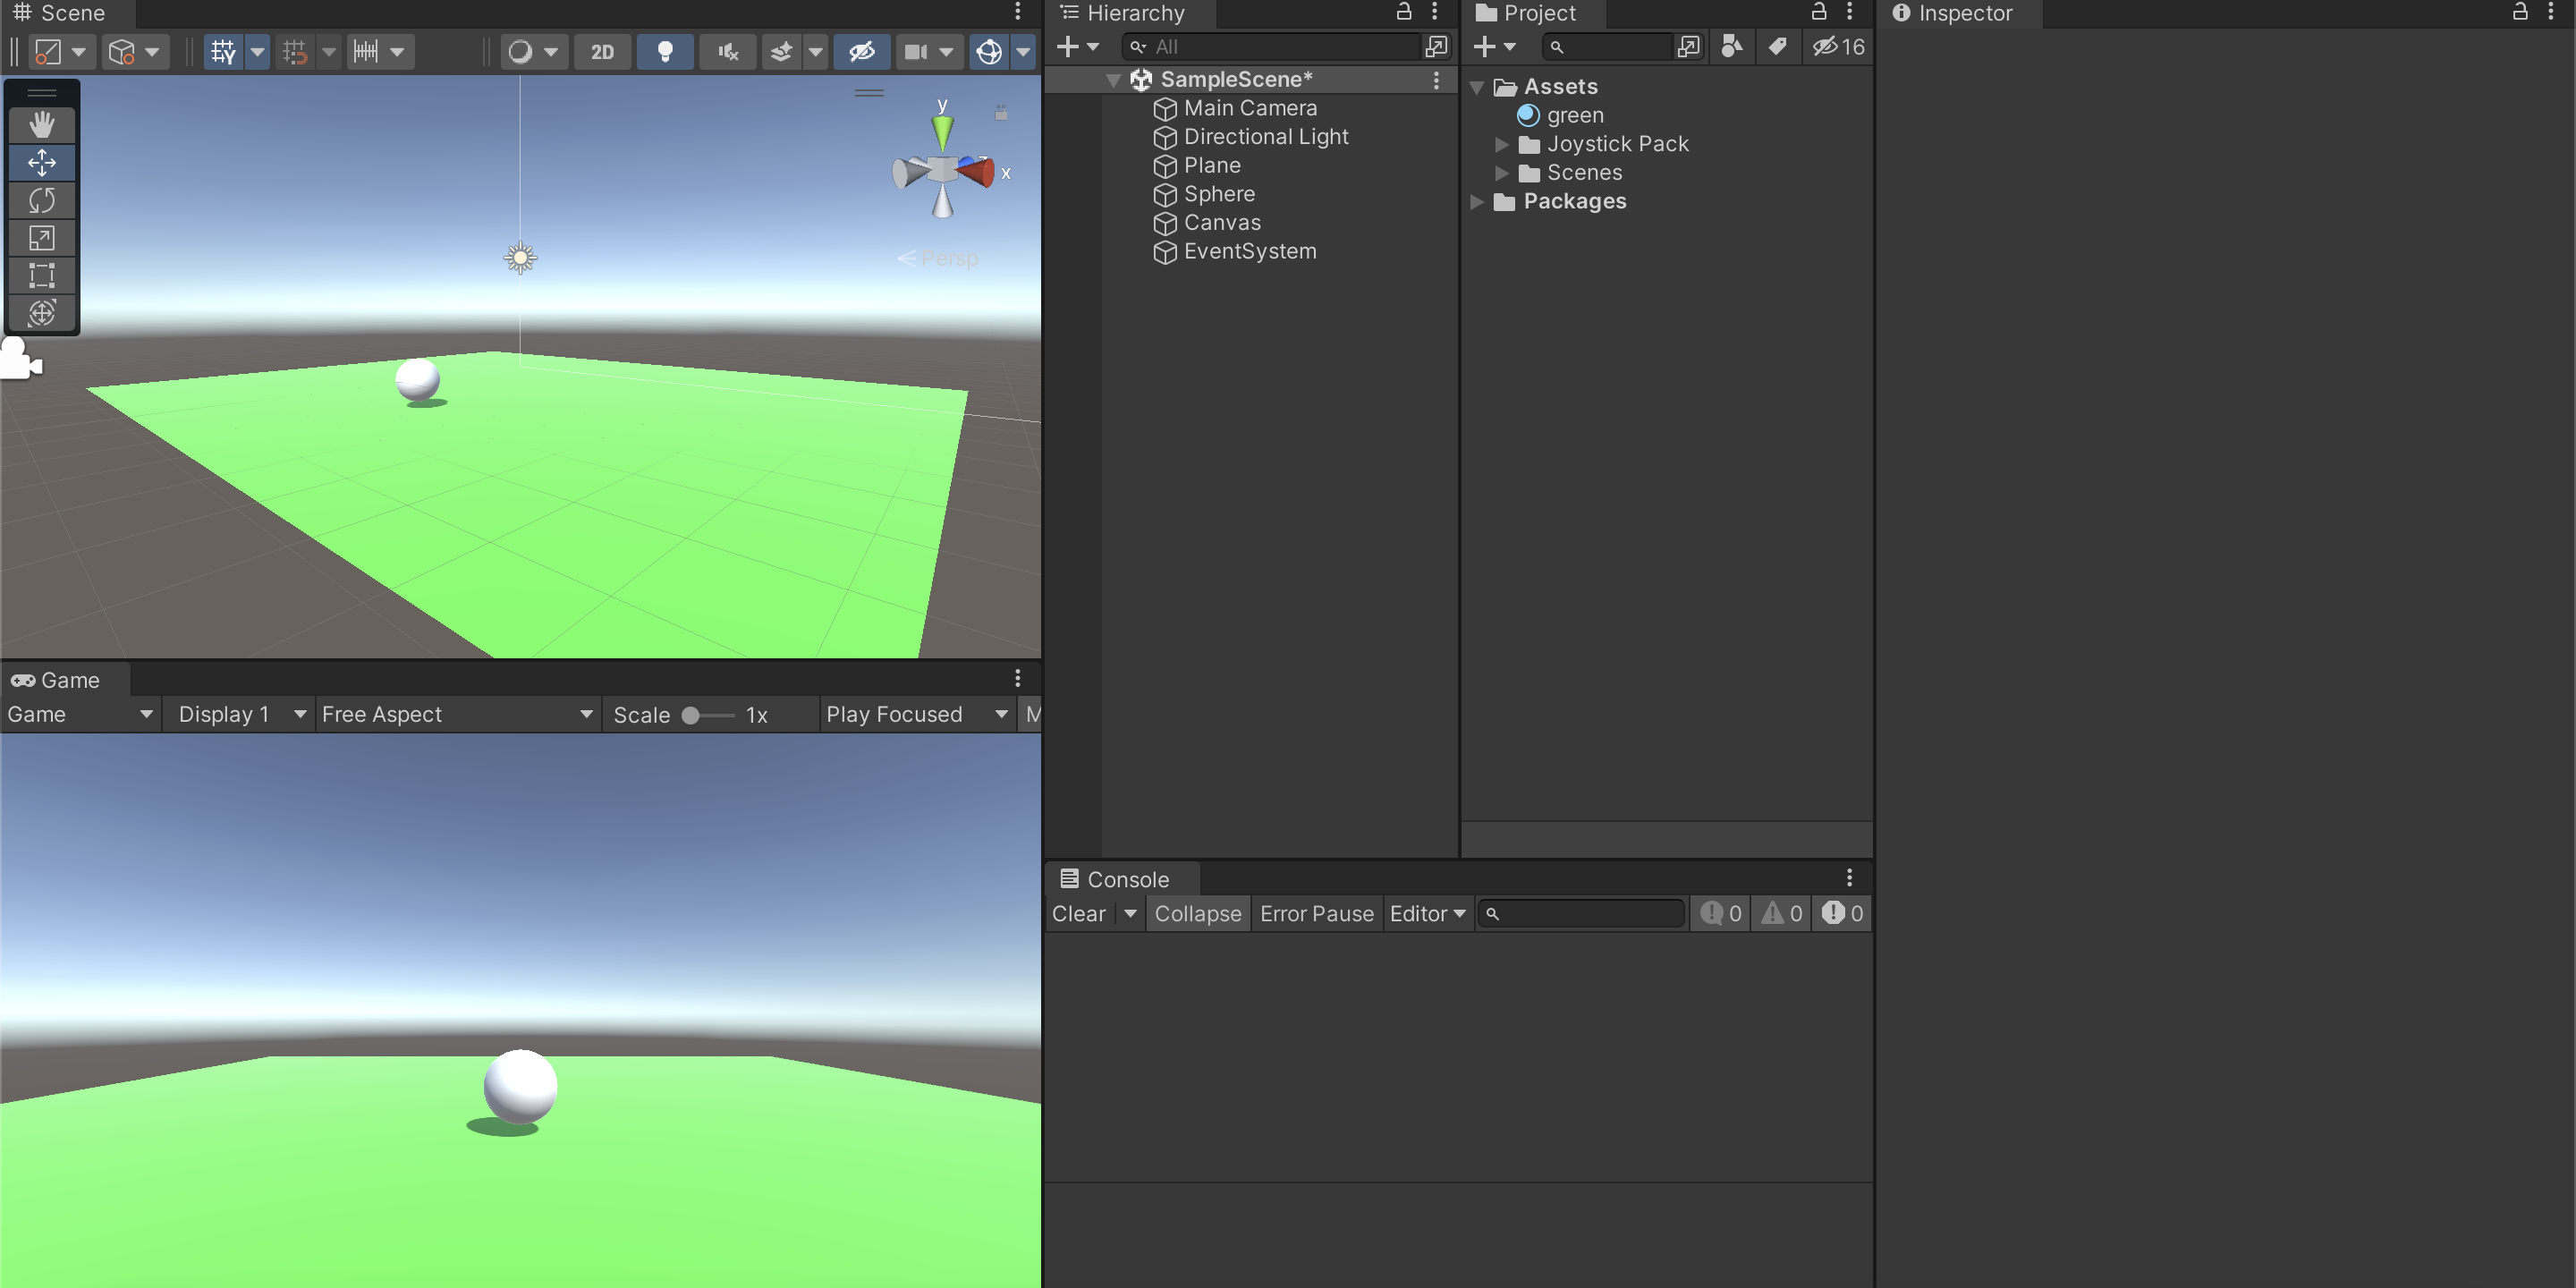
オブジェクトの準備
オブジェクトを画面のようにいい感じに収まるように配置します。笑
移動用のjoystickとジャンプ用のボタンを作成
①canvasにjoystickを入れる
今回はFixed Joystickを使います。
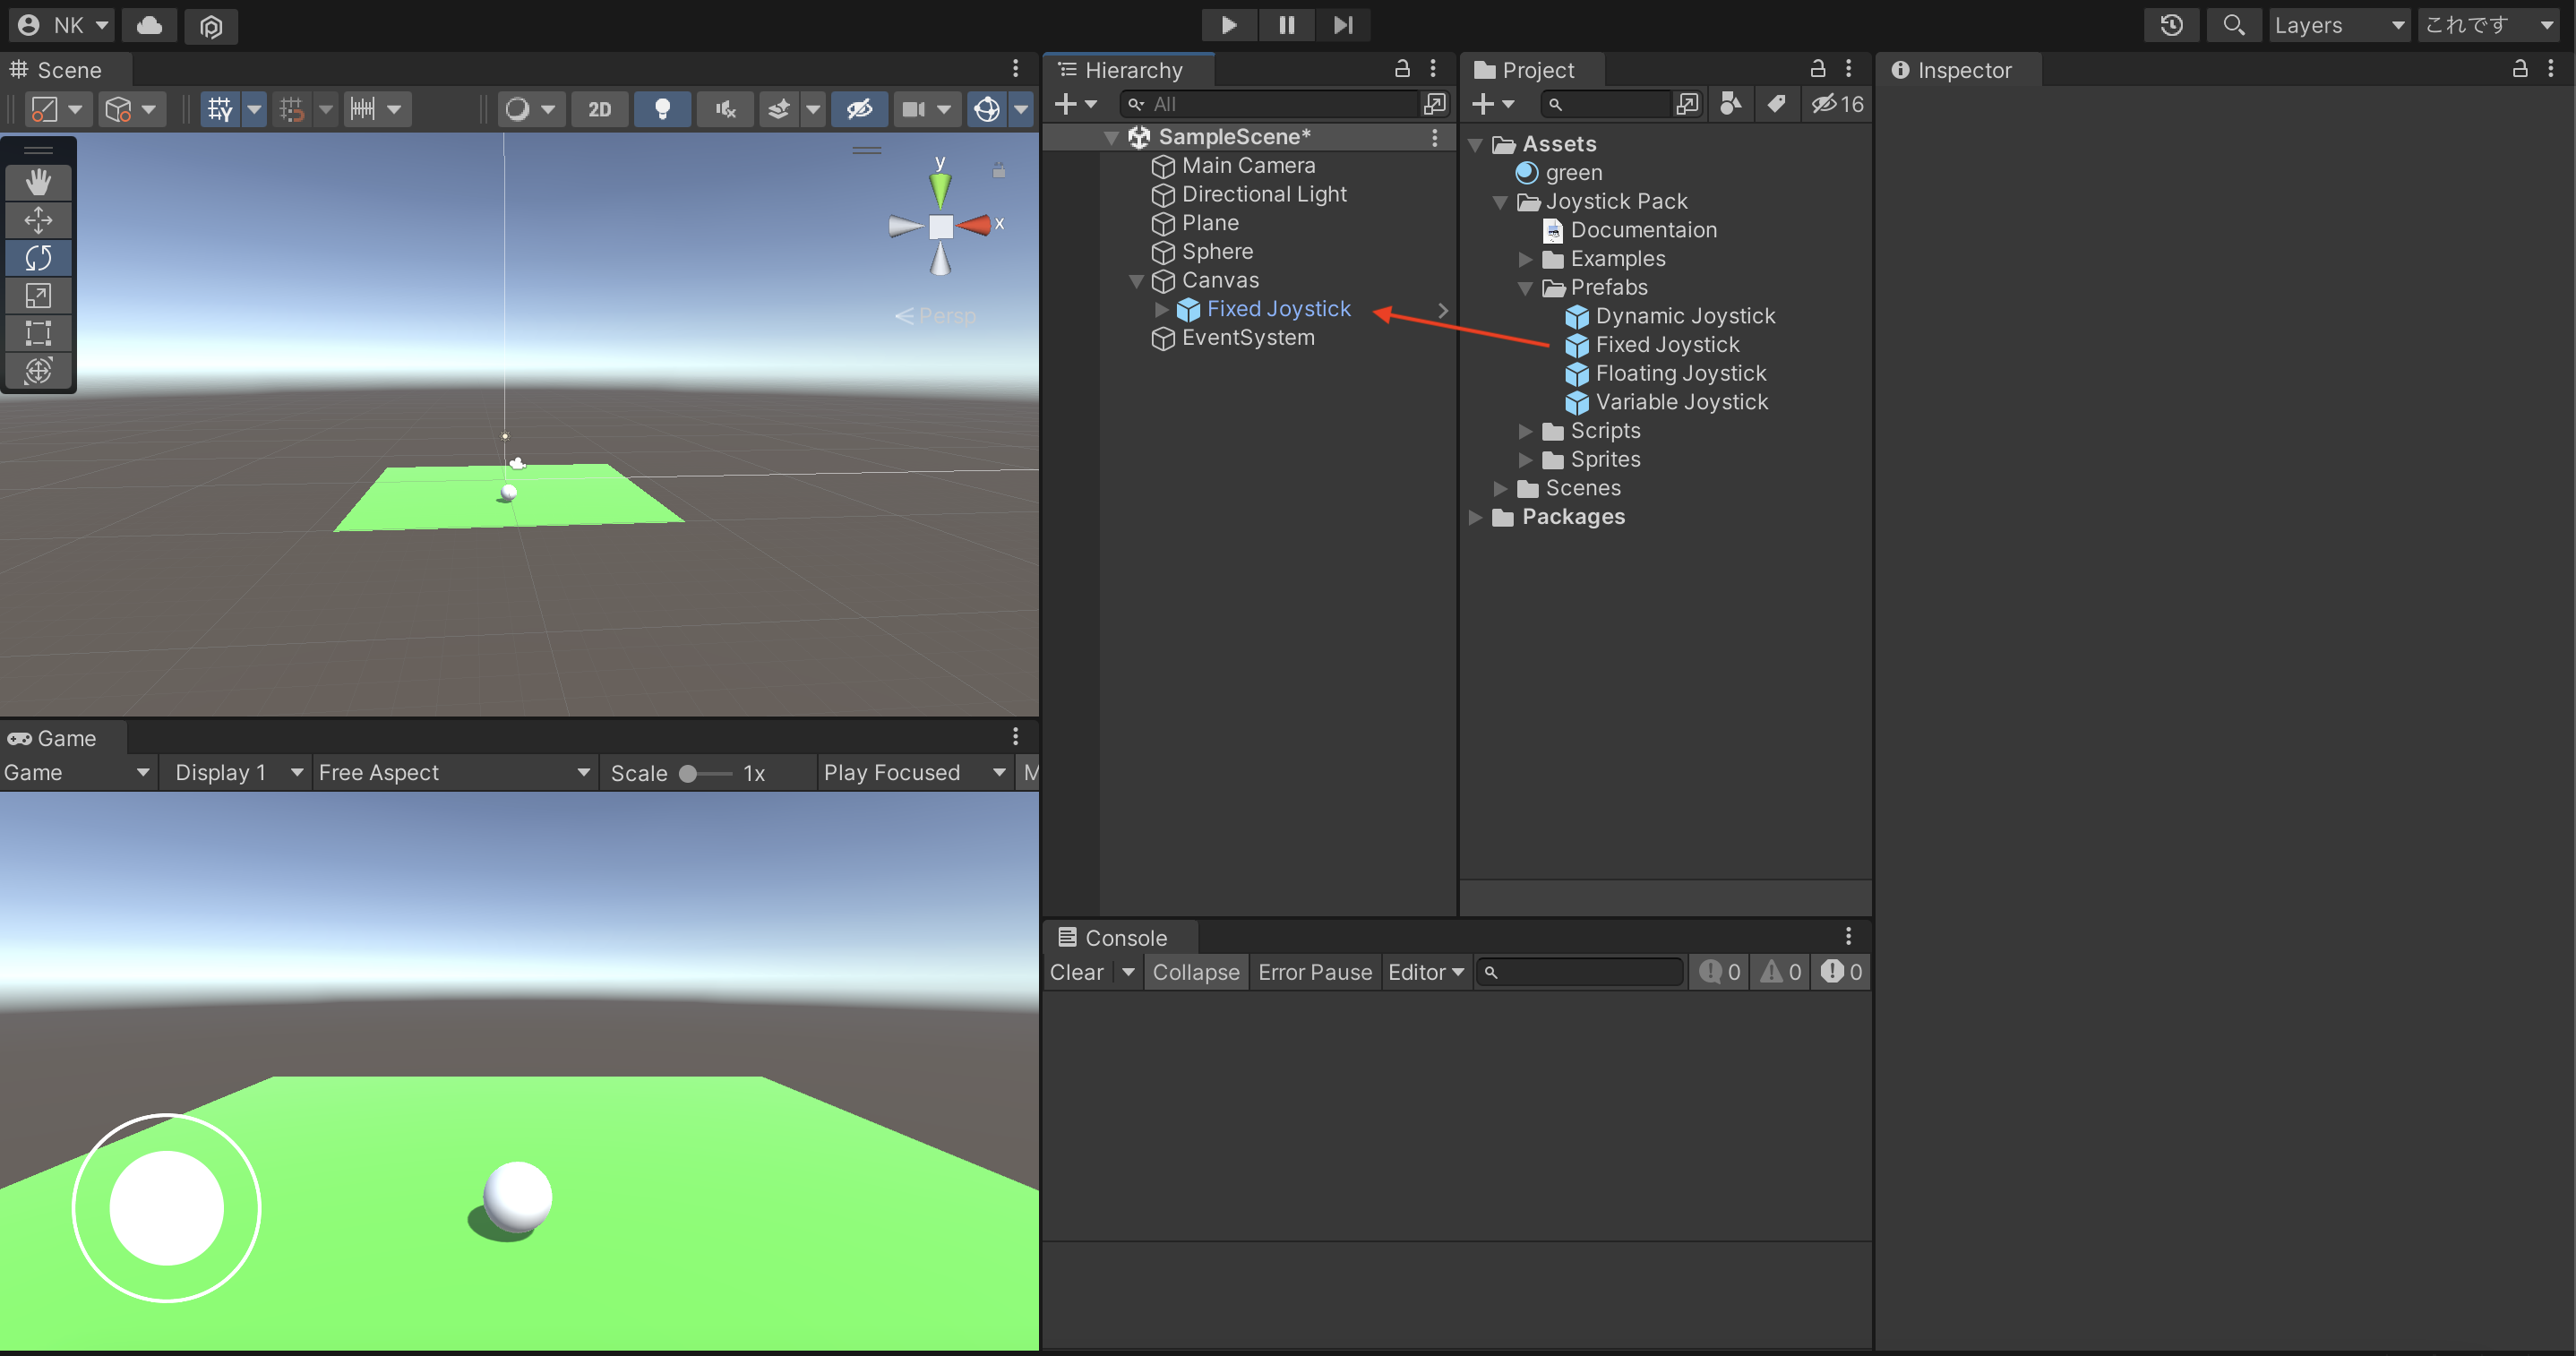
joystickのパッケージの中からFixed joystickをcanvasの中にドラッグ&ドロップします。
画面左側にいい感じの位置になるように調整します。
②ボタンの作成
Hierarchyビューから、Create→UI→Imageを作成し、こちらも画面右側にいいな感じになるように調整します。今回は名前をFixed Joystickにしました。
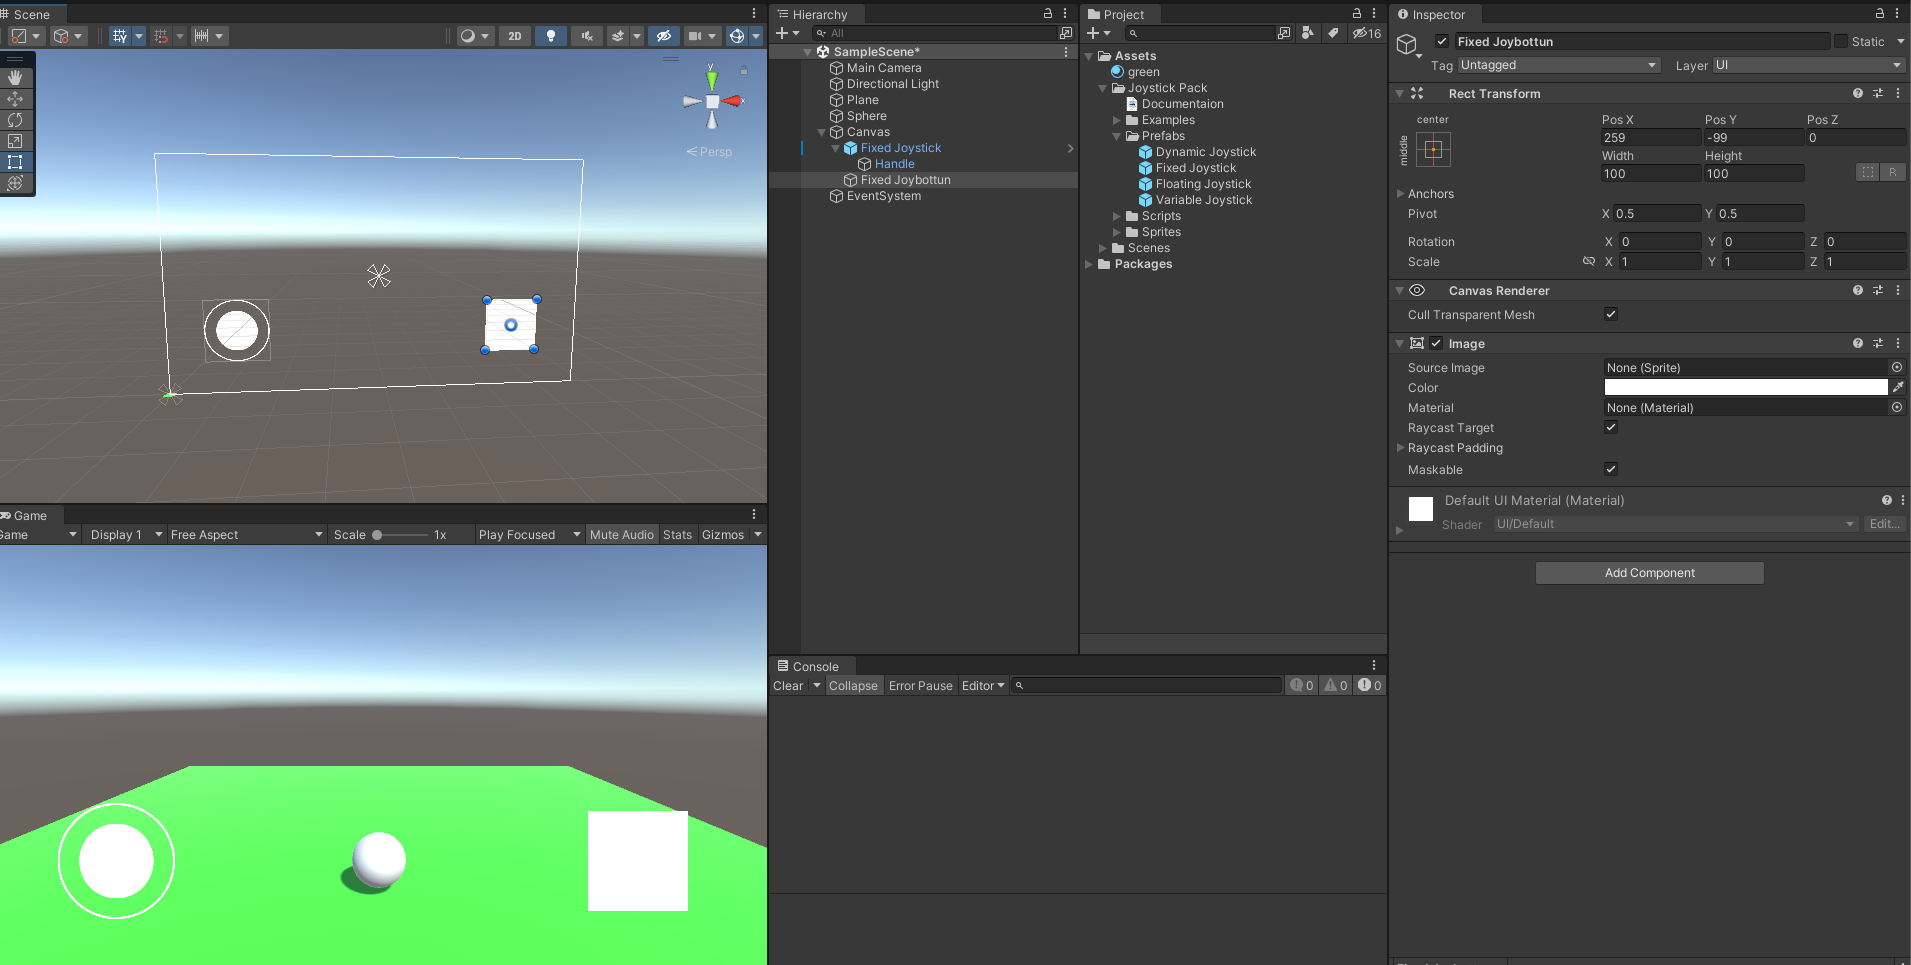
Source ImageにはJoystickのパックに付属しているものを使用します。
ここは以下の動画を参考にして、お好きなものを選択してください!

スクリプトの作成
MyScriptとJoybuttonの二つのスクリプトを作成し、それぞれ以下のコードを入力します。
MyScriptはSphereにアタッチします。
using System.Collections;
using System.Collections.Generic;
using UnityEngine;

public class MyScript : MonoBehaviour
{
    protected Joystick joystick;
    protected Joybutton joybutton;

    protected bool jump;

    // Start is called before the first frame update
    void Start()
    {
        joystick = FindObjectOfType<Joystick>();
        joybutton = FindObjectOfType<Joybutton>();
    }

    // Update is called once per frame
    void Update()
    {
        var rigidibody = GetComponent<Rigidbody>();

        rigidibody.velocity = new Vector3(joystick.Horizontal * 10f, rigidibody.velocity.y, joystick.Vertical * 10f);

        if(!jump && joybutton.Pressed)
        {
            jump = true;
            rigidibody.velocity += Vector3.up * 10f;
        }

        if(jump && !joybutton.Pressed)
        {
            jump = false;
        }
    }
}
JoybuttonはImageのFixed Joystickにアタッチします。
using System.Collections;
using System.Collections.Generic;
using UnityEngine;
using UnityEngine.EventSystems;

public class Joybutton : MonoBehaviour, IPointerUpHandler, IPointerDownHandler
{
    public bool Pressed;

    // Start is called before the first frame update
    void Start()
    {

    }

    // Update is called once per frame
    void Update()
    {

    }

    public void OnPointerDown(PointerEventData eventData)
    {
        Pressed = true;
    }

    public void OnPointerUp(PointerEventData eventData)
    {
        Pressed = false;
    }
}