今回はあるオブジェクトの一定範囲にPlayerが入ったときに、そのオブジェクトが追いかけてくるという機能を作っていきます!
使用PC: MacBook Pro (13-inch, M1, 2020)
OSバージョン: 11.5.2
Unityバージョン:2021.3.2f1
今回使用したアセットは以下になります!参考にどうぞ😊
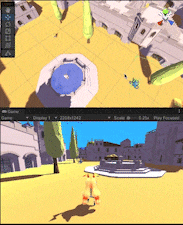
実際にプレイすると
(動画ちょっとわかりづらくてごめんなさい)
基本は徘徊してて,,,
一定距離に近づくとプレイヤーに近づいてきて衝突したらゲームオーバーシーンに遷移する!

目次
1.オブジェクトの準備
2.追跡・徘徊機能の構成
3.エネミーの設定
4.スクリプトの作成
5.徘徊用の目的地をランダムに生成する
6.最後の仕上げ!
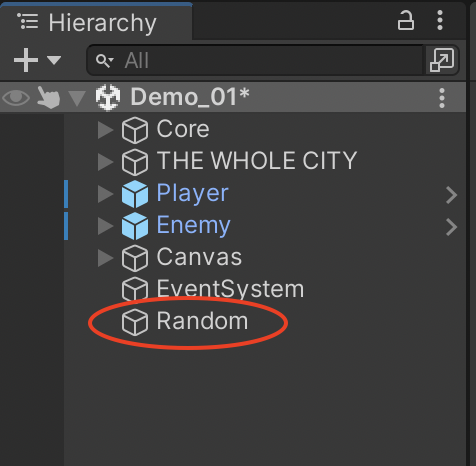
オブジェクトの準備
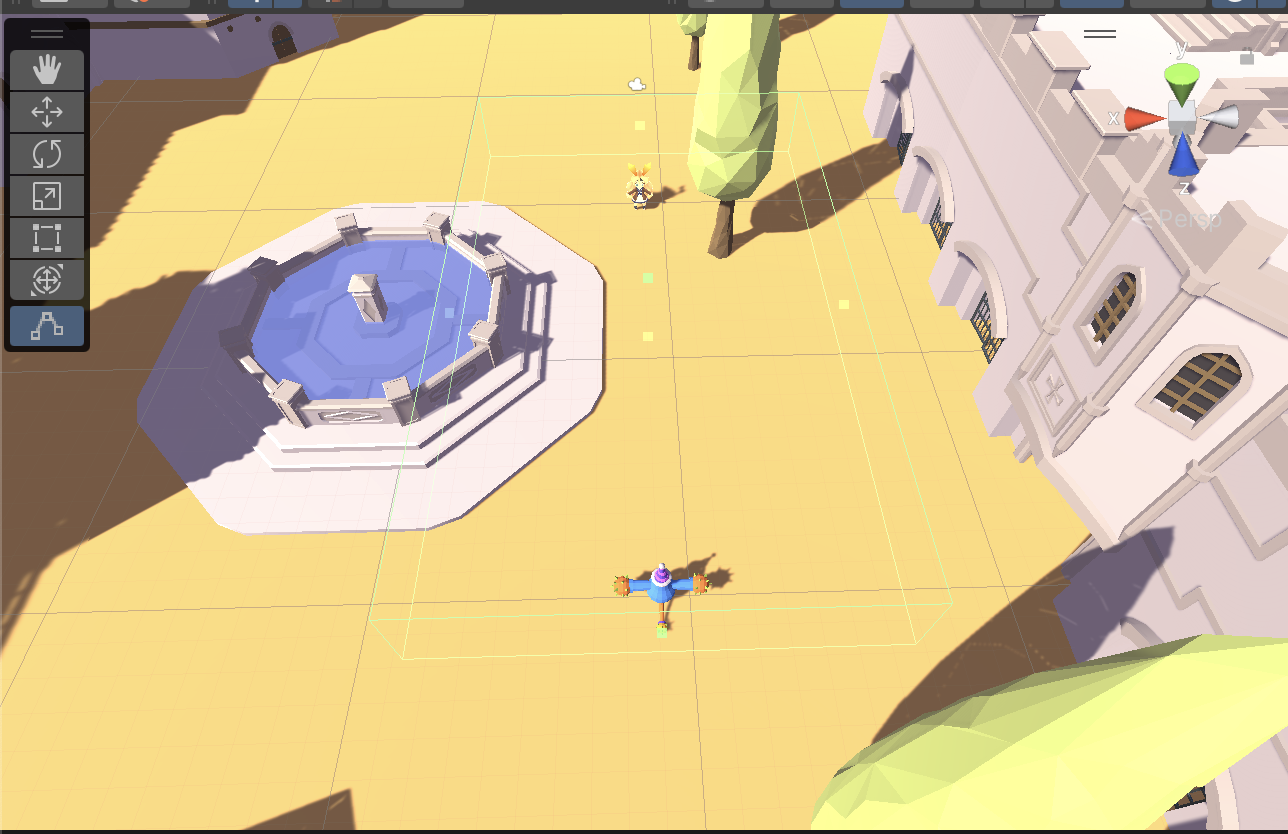
今回は画像のようにオブジェクトを配置しました。

プレイヤーはJoyStickで動くように事前に実装しました。
→やり方はこちら
エネミー本体とプレイヤーにCollider(種類はなんでも)とRigidbodyをComponentとして付け加えておいてください!
追跡・徘徊機能の構成
今回は「一定距離に近づいたら」という処理を、当たり判定を使用してセンサーのように動かしていきたいと思います。
当たり判定が起動した場合に対象物を追跡し、起動していない場合はフィールドを自由徘徊する仕様にします。
追跡
センサー内にPlayerがいる場合、その範囲内でEnemyの方向をプレイヤーに向けさせ、そっちに進む感じです!
⏬イメージ図

徘徊
逆にセンサー外にPlayerがいる時は、向かう目的地を一定時間おきにランダムでフィールド上に生成することによって自由徘徊をしているように見える実装をします。
⏬イメージ図

エネミーの設定
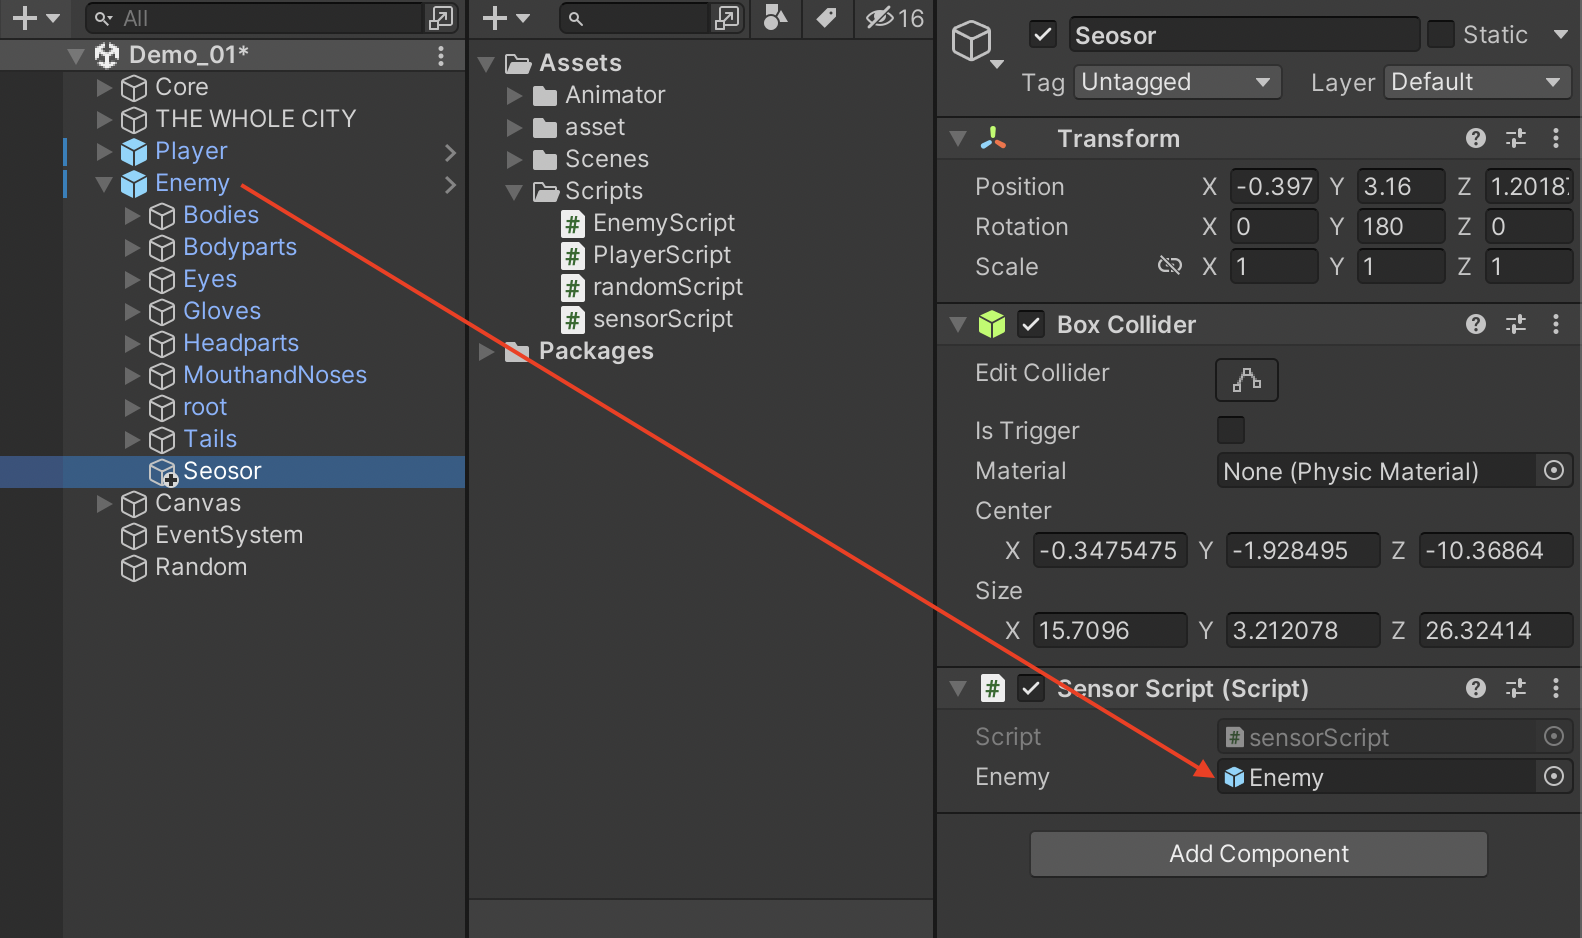
センサーの設置
①HierarchyビューからCreate→Create Emptyで作成
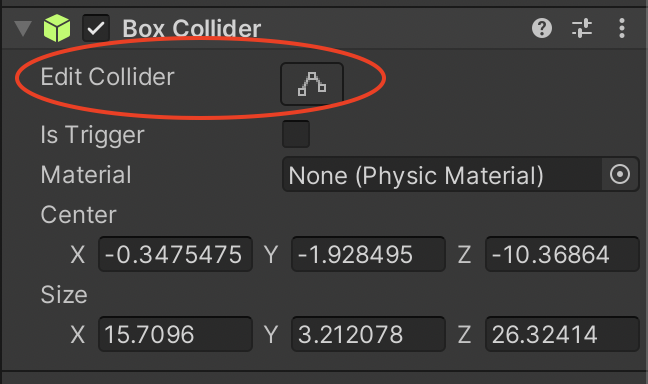
②Emptyオブジェクトの名前をsensorなどに変更し、Enemyの子オブジェクトにする。InspectorビューのAdd ComponentからBox Colliderを選択する。

③Box ColliderのEdit Colliderのボタンをクリックして、Sceneビューの方でちょうど良い形にColliderの大きさを変更する。
画像だとわかりづらいのですが、私はこんな感じの大きさにしました!薄ーい緑の線がColliderの大きさです。
④Box Colliderのis Triggerにチェックを入れる。

NavMeshの設定
①Enemy本体にInspectorビューのAdd ComponentからNav Mesh Agentを加える。
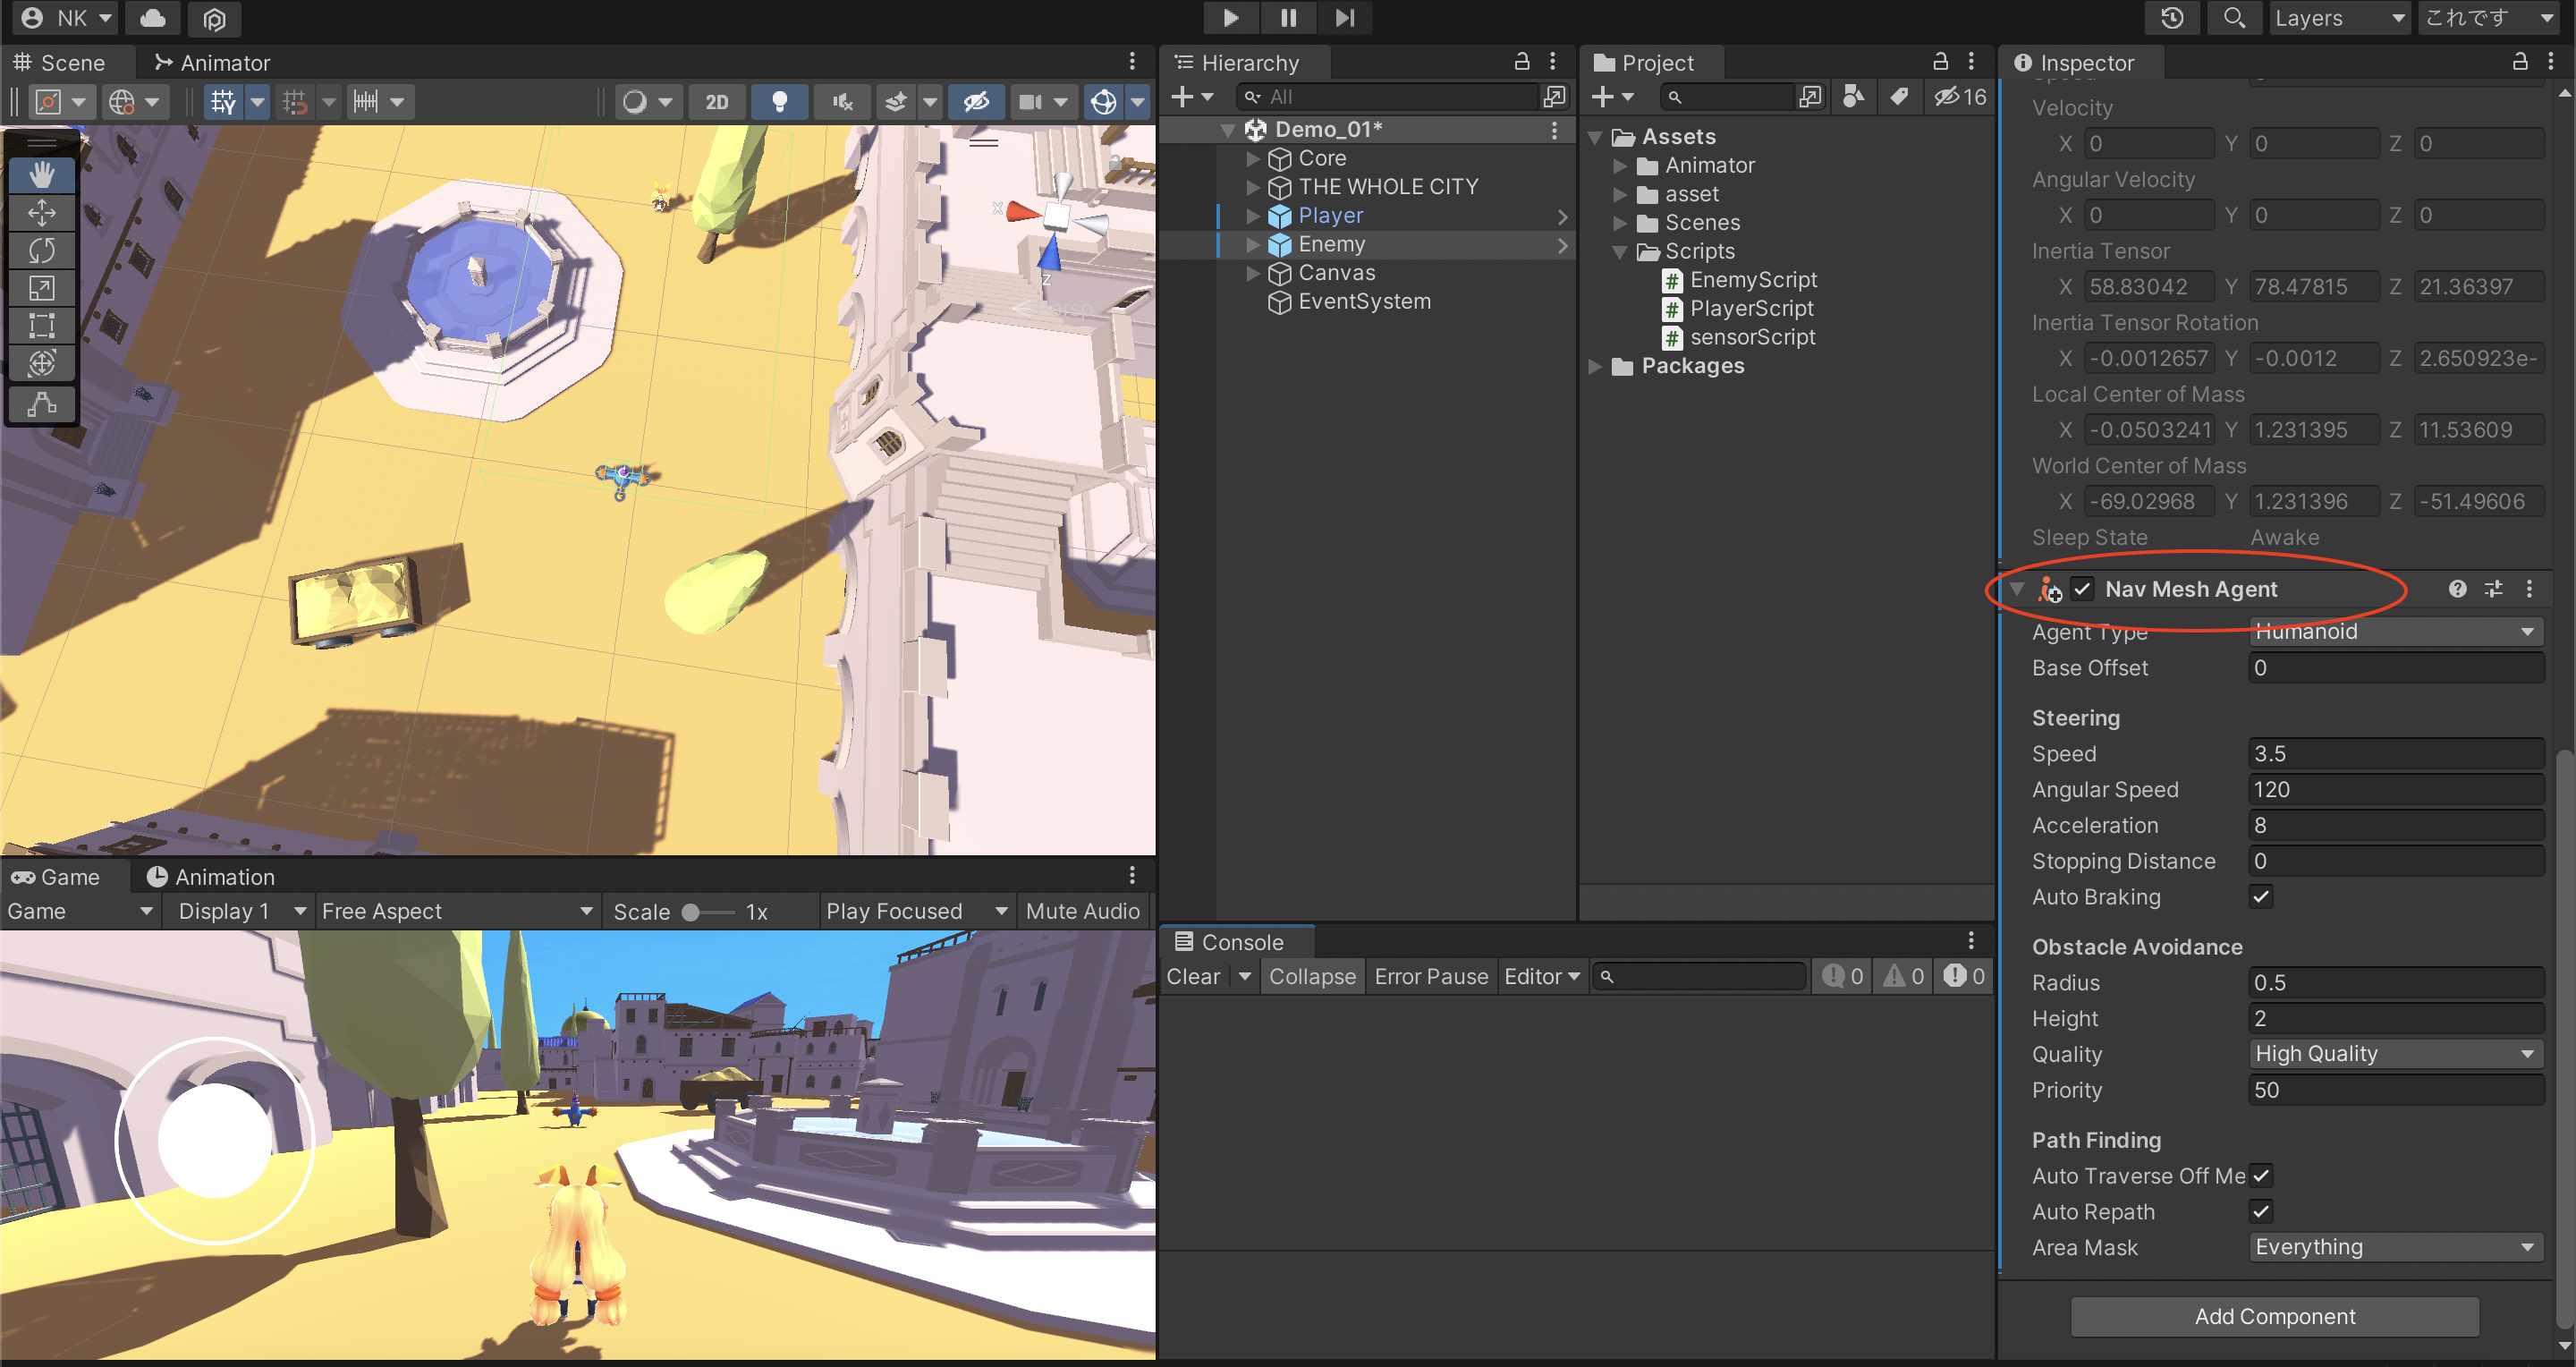
②地面に当たるGameObjectのStaticをNavigation Staticにする

(なければWindow→AI→Navigationを選択し、ウィンドウを表示する)

③NavigationウィンドウのBakeタブの底のBakeボタンをクリックする。

(右下のBake NavMeshが消えたら完了!少し時間がかかるかも,,,)
Bakeが終わったら青い移動できる範囲が示されます!
エネミーのスクリプトの作成
ProjectビューからCreate→C# ScriptでEnemyScriptとsensorScriptの二つを作成する。
エネミー本体のスクリプト
EnemyScriptに以下全文コピペ!
using System.Collections;
using System.Collections.Generic;
using UnityEngine;
using UnityEngine.AI;
using UnityEngine.SceneManagement;

public class EnemyScript : MonoBehaviour
{
    public Transform Target;
    public Transform random;
    NavMeshAgent agent;
    bool sensor;
    public float speed;

    // Start is called before the first frame update
    void Start()
    {
        agent = GetComponent<NavMeshAgent>();
    }

    // Update is called once per frame
    void Update()
    {
        if(sensor == false)
        {
            agent.destination = random.transform.position;
        }
        else
        {
            agent.destination = Target.transform.position;
        }
    }

    public void tuiseki()
    {
        sensor = true;
    }

    public void haikai()
    {
        sensor = false;
    }

    private void OnCollisionEnter(Collision col)
    {
        if (col.gameObject.tag == "Player" )
        {
            SceneManager.LoadScene("GameOver");
        }
    }
}
センサー用のスクリプト
sensorScriptに以下全文コピペ!
using System.Collections;
using System.Collections.Generic;
using UnityEngine;

public class sensorScript : MonoBehaviour
{
    public GameObject enemy;
    EnemyScript encs;

    // Start is called before the first frame update
    void Start()
    {
        encs = enemy.GetComponent<EnemyScript>();
    }

    void OnTriggerStay(Collider other)
    {
        if (other.gameObject.tag == "Player")
        {
            encs.tuiseki();
        }
    }

    void OnTriggerExit(Collider other)
    {
        if (other.gameObject.tag == "Player")
        {
            encs.haikai();
        }
    }
}
①それぞれにスクリプトをアタッチする

②Enemyに必要なオブジェクトをアタッチして、Speedを好きな数字を入れる。

③sensorにEnemyをアタッチする。
徘徊用の目的地をランダムに生成する
①ランダムオブジェクトをHierarchyビューからCreate→Create Emptyで作成し、名前をrandomとかにする。
②Projectビューから、ランダムオブジェクト用のスクリプトを作成する。
今回はコルーチンという機能を使って、ワープ処理を繰り返し行うように実装しました。
⏬スクリプト全文
using System.Collections;
using System.Collections.Generic;
using UnityEngine;

public class randomScript : MonoBehaviour
{
    void Start()
    {
        StartCoroutine(Warp());
    }

    private IEnumerator Warp()
    {
        while (true)
        {
            // 10秒後ごとにワープ移動する。
            yield return new WaitForSeconds(10f);

            // ランダムな値を取得する。
            float posX = Random.Range(- 120, 120);
            float posZ = Random.Range(-200, 200);

            transform.position = new Vector3(posX, 0, posZ);
        }
    }
}
③スクリプトをHierarchtビューのRandomにアタッチする

最後の仕上げ!
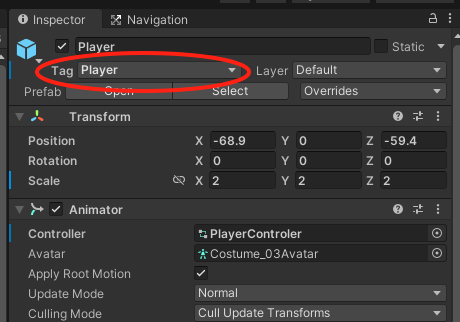
①PlayerにPlayerタグを追加する
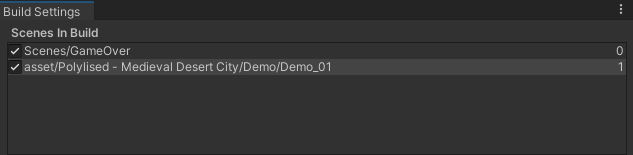
②ProjectビューからCreate→SceneでGameOverのシーンを作成
③File→Build Settingsを開き、Scenes in Buildに遷移で使うシーンを入れる。