マーケットプレイスの Terraform 化
Akamai のクラウドコンピューティング・サービスが提供するマーケットプレイスでは、人気があり需要の高いソフトウェアをワンクリックアプリケーションとして提供しています。執筆時点で 100 以上のアプリケーションを選択でき、インストールに関するノウハウを取得しなくても容易にアプリケーションの構築ができます。
Web インタフェースで必要項目を入力した後、ワンクリックで Linux 仮想マシン上にアプリケーションをインストールし、初期設定された環境を手に入れられます。CLI/API でも同様なことができますが、本記事では Terraform を使った例を紹介します。API で作成したサンプルを元にすれば容易に Terraform の構成ファイルも作成できます。
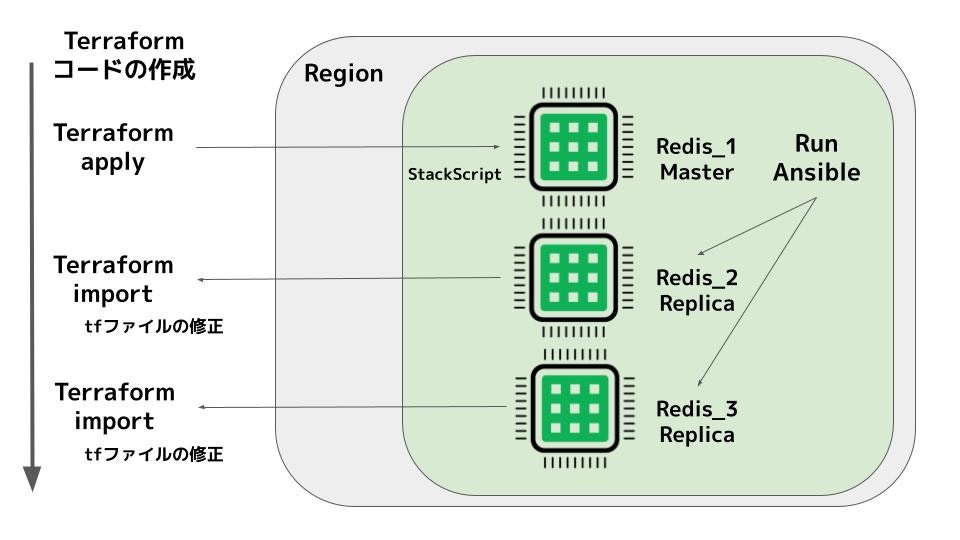
本記事ではクラスタ化されたシステムの構成例を扱います。クラスタ化されたシステムをマーケットプレイスのように構成するには、terraform import が必要になります。マーケットプレイスで構成される複数のノードは、最初に1つ目のノードが作成された後、StackScript を介して2つ目、3つ目のノードを構成しているからです。Terraform を使って全てのノードを作成していないため、作成時点で全てのノードが Terraform の管理下に置かれていません。そのため、terraform import にて、追加されたノードを管理化に置く必要があります。
一般的な Terraform を使ったインスタンスの作成については下記のページなどを参考にしてください。
テンプレートの入手
Terraform に必要な情報を得るには Linode API のサンプルを使うのが楽です。マーケットプレイスのアプリを作成するコマンドのサンプルは下記のページを参照してください。
Terraform 化
今回の例では3つの .tf ファイルを使って作成していきます。
variable.tf
variable "token" {
  default = "{Linode CLI のトークン}"
}
terraform.tf
terraform {
        required_providers {
                linode = {
                        source  = "linode/linode"
                }
        }
}

provider "linode" {
        token = "${var.token}"
}
linode.tf
Linode API (cURL) で渡される値を参考に作成します。stackscript_id と stackscript_data のデータの受け渡しはほぼ類似しています。label はこの後の操作でも重要となります。
# Create a boot disk
resource "linode_instance" "wp-1" {
    image = "linode/ubuntu22.04"
    label = "RedisSentinel1"
    group = "Redis"
    tags = [ "redis-terraform" ]
    region = "ap-northeast"
    type = "g6-standard-1"
    authorized_users = [ "{Your_User_Name}" ]
    root_pass = "{Root_Password}"
    stackscript_id = 1132204
    stackscript_data = {
        "sslheader": "Yes",
        "ca_common_name": "Redis CA",
        "common_name": "Redis Server",
        "clusterheader": "Yes",
        "add_ssh_keys": "yes",
        "cluster_size": "3",
        "token_password" = "{Your_Token}"
        "sudo_username" = "{User_Name}"
        "country_name": "JP",
        "state_or_province_name": "Tokyo",
        "locality_name": "Chuo",
        "organization_name": "Akamai Technologies",
        "email_address" = "{Your_Email_Address}"
    }
}
Terraform の実行
用意した variable.tf、 terraform.tf、linode.tf が問題なければ、以下の3つのコマンドの実行で Redis Sentinel の 3 ノード環境が作成されます。
terraform init
terraform plan
terraform apply
以下は terraform apply 実行時のコンソール出力例です。
Do you want to perform these actions?
  Terraform will perform the actions described above.
  Only 'yes' will be accepted to approve.

  Enter a value: yes

random_string.password: Creating...
random_string.password: Creation complete after 0s [id=u2L9p4MY*Bs]
linode_instance.wp-1: Creating...
linode_instance.wp-1: Still creating... [10s elapsed]
linode_instance.wp-1: Still creating... [20s elapsed]
linode_instance.wp-1: Still creating... [30s elapsed]
linode_instance.wp-1: Still creating... [40s elapsed]
linode_instance.wp-1: Still creating... [50s elapsed]
linode_instance.wp-1: Still creating... [1m0s elapsed]
linode_instance.wp-1: Still creating... [1m10s elapsed]
linode_instance.wp-1: Still creating... [1m20s elapsed]
linode_instance.wp-1: Creation complete after 1m21s [id=47583565]

Apply complete! Resources: 2 added, 0 changed, 0 destroyed.
25 分ほど待つと複数のインスタンスが作成されました。Cloud Manager では次のように表示されます。
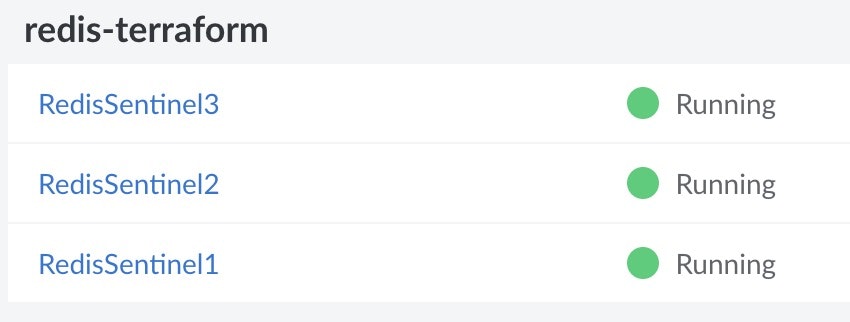
RedisSentinel に加えて 1、2、3がついた名称が作成されています。Terraform の label は RedisSentinel に該当します。
マーケットプレイスのアプリケーションが正しく動作していることを確認します。正しく動作しているのですが、この状態では terraform destroy コマンドを実行しても、RedisSentinel1 は削除できますが、RedisSentinel2 と RedisSentinel3 は削除できません。これは、用意していた linode.tf の中でこの2つのリソースの管理がされていないからです。
この記事では、terraform import を使って 3 つのノードを全て管理できるようにします。
Terraform 環境にインポートする
以下に公式のドキュメントが用意されています。
このページに従って実践してみます。RedisSentine2 と RedisSentinel3 は個別に設定していきます。
RedisSentinel2
Linode-CLI を使って、登録された Linode のリストが得られるか確認します。認証エラーなどが表示された場合は、問題を解決します。
linode-cli linodes list --json --pretty
JQuery を使って、RedisSentinel2 の情報を取得します。
linode-cli linodes list --json --pretty | jq .'[]' | jq 'select(.label == "RedisSentinel2")'
Linode の ID が必要となるので、以下のコマンドを実行します。
linode-cli linodes list --json --pretty | jq .'[]' | jq 'select(.label == "RedisSentinel2")' | jq .id
取得できた ID が以下だとします。
47583591
linode_redis_sentinel_2.tf を作成し、ファイルの中身は以下のようにします。
resource "linode_instance" "redis_sentinel_2" {}
次に terraform import linode_instance.redis_sentinel_2 linodeID を実行します。linodeID には先程取得した 47583591 を使います。linode_instance.redis_sentinel_2 は定義したリソース名です。
terraform import linode_instance.redis_sentinel_2 47583591
以下は出力例です。
linode_instance.redis_sentinel_2: Importing from ID "47583591"...
linode_instance.redis_sentinel_2: Import prepared!
  Prepared linode_instance for import
linode_instance.redis_sentinel_2: Refreshing state... [id=47583591]

Import successful!

The resources that were imported are shown above. These resources are now in
your Terraform state and will henceforth be managed by Terraform.
実行したコマンドは Linode の情報を含む terraform.tfstate ファイルを作成します。この情報を使って後にリソースの設定を行います。
terraform import によって作成された情報を確認するには、show コマンドを実行します。このコマンドは、インポートされた Linode インスタンスに関する情報を表すキーと値のペアのリストを表示します。
terraform show
以下は出力例です。
resource "linode_instance" "redis_sentinel_2" {
    backups            = [
        {
            available = false
            enabled   = false
            schedule  = [
                {
                    day    = ""
                    window = ""
                },
            ]
        },
    ]
    backups_enabled    = false
    boot_config_label  = "My Ubuntu 22.04 LTS Profile"
    booted             = true
    host_uuid          = "bd870ed716cf494fcc0aa6998c2bb946743a39ae"
    id                 = "47583591"
    ip_address         = "XXX.XXX.XXX.XXX"
    ipv4               = [
        "XXX.XXX.XXX.XXX",
        "XXX.XXX.XXX.XXX",
    ]
    ipv6               = "XXXX:XXXX:XXXX:XXXX:XXXX:XXXX:XXXX/128"
    label              = "RedisSentinel2"
    private_ip         = true
    private_ip_address = "XXX.XXX.XXX.XXX"
    region             = "ap-northeast"
    shared_ipv4        = []
    specs              = [
        {
            disk     = 51200
            memory   = 2048
            transfer = 2000
            vcpus    = 1
        },
    ]
    status             = "running"
    swap_size          = 512
    tags               = [
        "redis-terraform",
    ]
    type               = "g6-standard-1"
    watchdog_enabled   = true

    alerts {
        cpu            = 90
        io             = 10000
        network_in     = 10
        network_out    = 10
        transfer_quota = 80
    }

    config {
        kernel       = "linode/grub2"
        label        = "My Ubuntu 22.04 LTS Profile"
        memory_limit = 0
        root_device  = "/dev/sda"
        run_level    = "default"
        virt_mode    = "paravirt"

        devices {
            sda {
                disk_id    = 94802188
                disk_label = "Ubuntu 22.04 LTS Disk"
                volume_id  = 0
            }

            sdb {
                disk_id    = 94802189
                disk_label = "512 MB Swap Image"
                volume_id  = 0
            }
        }

        helpers {
            devtmpfs_automount = true
            distro             = true
            modules_dep        = true
            network            = true
            updatedb_disabled  = true
        }
    }

    disk {
        authorized_keys  = []
        authorized_users = []
        filesystem       = "ext4"
        id               = 94802188
        label            = "Ubuntu 22.04 LTS Disk"
        read_only        = false
        size             = 50688
        stackscript_data = (sensitive value)
        stackscript_id   = 0
    }
    disk {
        authorized_keys  = []
        authorized_users = []
        filesystem       = "swap"
        id               = 94802189
        label            = "512 MB Swap Image"
        read_only        = false
        size             = 512
        stackscript_data = (sensitive value)
        stackscript_id   = 0
    }
}
この情報のいくつかを .tf ファイルに定義する必要があります。
RedisSentinel2 の .tf ファイルを更新
linode_redis_sentinel_2.tf ファイルに、先程実行した terraform show の出力結果をコピーします。そして、不要な情報を減らします。terraform plan を実行すると不要な行を教えてくれます。以下は最終的なファイルの例です。
resource "linode_instance" "redis_sentinel_2" {
    backups_enabled    = false
    label              = "RedisSentinel2"
    private_ip         = true
    region             = "ap-northeast"
    tags               = [
        "redis-terraform",
    ]
    type               = "g6-standard-1"

    config {
        kernel       = "linode/grub2"
        label        = "My Ubuntu 22.04 LTS Profile"
        memory_limit = 0
        root_device  = "/dev/sda"

        devices {
            sda {
                disk_label = "Ubuntu 22.04 LTS Disk"
            }

            sdb {
                disk_label = "512 MB Swap Image"
            }
        }

        helpers {
            devtmpfs_automount = true
            distro             = true
            modules_dep        = true
            network            = true
            updatedb_disabled  = true
        }
    }

    disk {
        label            = "Ubuntu 22.04 LTS Disk"
        size             = 50688
    }
    disk {
        label            = "512 MB Swap Image"
        size             = 512
    }
}
terrfarom plan を実行したときに、もともと作成していたlinode.tfとステートファイルのミスマッチがあることが発見されました。
# linode_instance.wp-1 will be updated in-place
  ~ resource "linode_instance" "wp-1" {
        id                 = "47583565"
      - private_ip         = true -> null
        tags               = [
            "redis-terraform",
        ]
        # (24 unchanged attributes hidden)

        # (4 unchanged blocks hidden)
    }
問題の修正のために、linode.tf ファイルに private_ip = "true" を追記します。Redis サーバーでは Private IP を使っているので、有効にすることは問題ありません。
    group = "Redis"
    private_ip = "true"
    tags = [ "redis-terraform" ]
再度 plan コマンドを実行すると linode.tf に関するエラーは消えました。
出力例です。
% terraform plan
random_string.password: Refreshing state... [id=u2L9p4MY*Bs]
linode_instance.redis_sentinel_2: Refreshing state... [id=47583591]
linode_instance.wp-1: Refreshing state... [id=47583565]

No changes. Your infrastructure matches the configuration.

Terraform has compared your real infrastructure against your configuration and found no differences, so no changes are needed.
インポートした環境を変更する
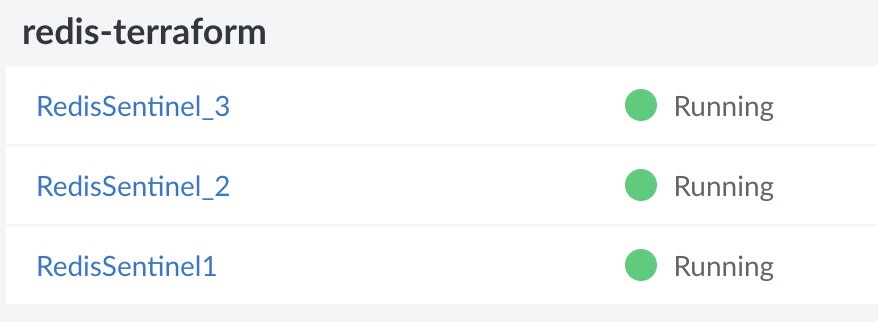
label を変更してポータル画面から名前が変わるかを検証します。今は次のように設定されています。
label = "RedisSentinel2"
以下のように変更します。
label = "RedisSentinel_2"
planコマンドを実行して事前確認します。
% terraform plan
random_string.password: Refreshing state... [id=u2L9p4MY*Bs]
linode_instance.redis_sentinel_2: Refreshing state... [id=47583591]
linode_instance.wp-1: Refreshing state... [id=47583565]

Terraform used the selected providers to generate the following execution plan. Resource actions are indicated with the following symbols:
  ~ update in-place

Terraform will perform the following actions:

  # linode_instance.redis_sentinel_2 will be updated in-place
  ~ resource "linode_instance" "redis_sentinel_2" {
        id                 = "47583591"
      ~ label              = "RedisSentinel2" -> "RedisSentinel_2"
      + resize_disk        = false
        tags               = [
            "redis-terraform",
        ]
        # (17 unchanged attributes hidden)

        # (4 unchanged blocks hidden)
    }

Plan: 0 to add, 1 to change, 0 to destroy.

──────────────────────────────────────────────────────────────────────────────────────────────────────────────────────────────────────────────────────────────────

Note: You didn't use the -out option to save this plan, so Terraform can't guarantee to take exactly these actions if you run "terraform apply" now.
問題なければ、apply コマンドを実行します。そして、ポータル画面で名称が変更されていることを確認できます。
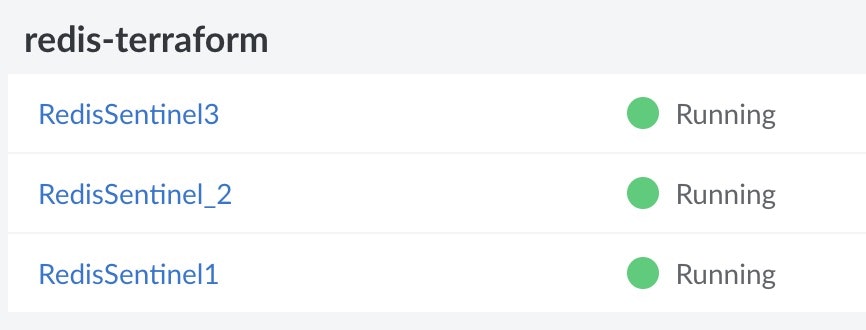
RedisSentinel3
RedisSentinel3 は RedisSentinel2 と同じように import コマンドを実行して、ステートファイルを更新し、.tf ファイルをステートファイルと同期するように変更します。
最初に Linode ID を取得します。
linode-cli linodes list --json --pretty | jq .'[]' | jq 'select(.label == "RedisSentinel3")' | jq .id
以下は取得した ID の例です。
47583602
linode_redis_sentinel_3.tf を作成します。ファイルの中身は次の一行だけです。
resource "linode_instance" "redis_sentinel_3" {}
以下のコマンドを実行します。リソース名と Linode ID を正しく設定します。
terraform import linode_instance.redis_sentinel_3 47583602
以下は実行した例です。
% terraform import linode_instance.redis_sentinel_3 47583602
linode_instance.redis_sentinel_3: Importing from ID "47583602"...
linode_instance.redis_sentinel_3: Import prepared!
  Prepared linode_instance for import
linode_instance.redis_sentinel_3: Refreshing state... [id=47583602]

Import successful!

The resources that were imported are shown above. These resources are now in
your Terraform state and will henceforth be managed by Terraform.
planコマンドでエラーがでなければ成功しています。linode_redis_sentinel_3.tf は、RadisSentinel2 とほぼ同じ設定です。リソース名と Label 名が異なるだけです。
diff linode_redis_sentinel_2.tf linode_redis_sentinel_3.tf
1c1
< resource "linode_instance" "redis_sentinel_2" {
---
> resource "linode_instance" "redis_sentinel_3" {
3c3
<     label              = "RedisSentinel_2"
---
>     label              = "RedisSentinel3"
plan コマンドを実行します。以下は実行した例です。
% terraform plan
random_string.password: Refreshing state... [id=u2L9p4MY*Bs]
linode_instance.redis_sentinel_3: Refreshing state... [id=47583602]
linode_instance.redis_sentinel_2: Refreshing state... [id=47583591]
linode_instance.wp-1: Refreshing state... [id=47583565]

No changes. Your infrastructure matches the configuration.

Terraform has compared your real infrastructure against your configuration and found no differences, so no changes are needed.
エラーも変更もない正常な状態であることを示しています。次に、以下のようにラベル名を変更してみます。
label = "RedisSentinel_3"
terraform plan、terraform apply を実行した後、ポータル画面で名称が変更されていることが確認できます。
作業は完了しています。マーケットプレイスで作成された3つのノードは Terraform 上で管理されています。
terraform 環境の削除
以下のコマンドで全ての環境を削除します。
terraform destroy
以下は出力例です。
random_string.password: Destroying... [id=u2L9p4MY*Bs]
random_string.password: Destruction complete after 0s
linode_instance.redis_sentinel_3: Destroying... [id=47583602]
linode_instance.redis_sentinel_2: Destroying... [id=47583591]
linode_instance.wp-1: Destroying... [id=47583565]
linode_instance.wp-1: Still destroying... [id=47583565, 10s elapsed]
linode_instance.redis_sentinel_2: Still destroying... [id=47583591, 10s elapsed]
linode_instance.redis_sentinel_3: Still destroying... [id=47583602, 10s elapsed]
linode_instance.redis_sentinel_3: Still destroying... [id=47583602, 20s elapsed]
linode_instance.wp-1: Still destroying... [id=47583565, 20s elapsed]
linode_instance.redis_sentinel_2: Still destroying... [id=47583591, 20s elapsed]
linode_instance.redis_sentinel_2: Destruction complete after 20s
linode_instance.wp-1: Still destroying... [id=47583565, 30s elapsed]
linode_instance.redis_sentinel_3: Still destroying... [id=47583602, 30s elapsed]
linode_instance.wp-1: Destruction complete after 32s
linode_instance.redis_sentinel_3: Still destroying... [id=47583602, 40s elapsed]
linode_instance.redis_sentinel_3: Destruction complete after 48s

Destroy complete! Resources: 4 destroyed.
Redis Sentinel を構成していた 3 台のクラスタは全て削除されました。
再設定
Terraform 上で全てのノードが管理できた状況になっていますが、StackScript を使って複数のノードが新規作成されるときは、その都度 import コマンドを実行する必要があります。
同じ環境にするためには、先程作成した RedisSentinel2 と RedisSentinel3 用のファイルを削除する必要があります。
rm linode_redis_sentinel_2.tf linode_redis_sentinel_3.tf
この状態で terraform applyを実行すれば、次のように再度クラスタ環境が作成されます。
作成したときの linode.tf の中のラベルは次のようになっていました。
label = "RedisSentinel1"
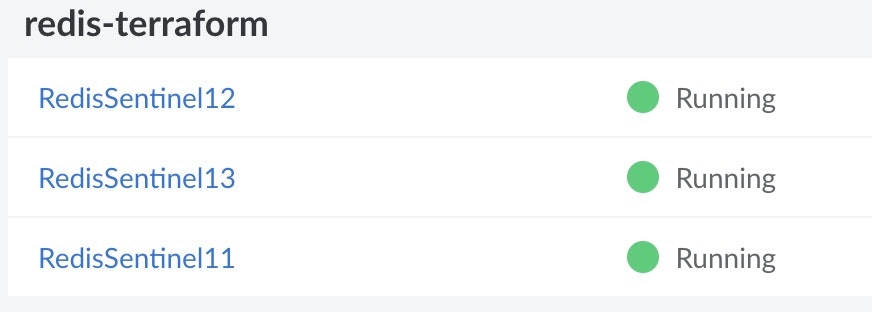
StackScriptの中で 1/2/3 を付けてラベルを付けています。
まとめ
マーケットプレイスのアプリケーションは Terraform でも管理できます。Redis Sentinel クラスタのように StackScript で複数台作成されるようなケースでは、import コマンドを使って Terraform 環境のステートファイルを更新し、追加されるノード毎にリソースを作成する必要があります。

