はじめに
RetailAI Advent Calendar 2023 の 16日目の記事です!
こんにちは、RetailAIの@long10langです。さて今日は、NEATについてちょっと試してみたいと思います。NEATってなんぞやという話ですが、いわゆる「ニート」というのは、「not in employment, education or training(職業にも学業にも職業訓練にも就いてない)」という文章の頭文字をとって「NEET」なんだそうですが、一方のNEATは、「輝くような」という語源で、「きちんとした / 整った」とか、「いいね / 素敵だね」などといった意味らしく、同じ発音なのに、なんだか意味深な違いがあるなぁと感じた次第です。
と、アホな話はさておき、とっととNEATの紹介に入っていきましょう。
目次
neatとは
生成AIの発展が加速していくと、ありとあらゆるデータが生成AIのエサとなってしまって、近い将来、生成AIは、自分の「う◯ち」を主食として、生きていかざるを得ない、嘘か真かそんな話もあります。

なにしろ、生成AIは、今のところ、類まれなる大食漢ですから、データをいっぱい食べることで能力を発揮しています。(スケール則なんていいますよね。)
でも、自分の「う◯ち」しか食べられないとなると、果たして何かしら創発は生まれるんでしょうか。そこで、進化的なアルゴリズム利用することで、何世代目かに突然変異が現れ、新たな価値を想像してくれたりしないかしら、そんな思惑でNEATをちょっと調べてみよう、そんなモチベーションです。
NEATを試してみよう
NEATを試すに当たって、いろんな実装があるわけですが、今回は、一番楽ちんな方法を選択して、pythonのNEATパッケージを使用させてもらおうと思います。
ではまず下準備から。
単純なポンゲームを容易します。
pongゲーム
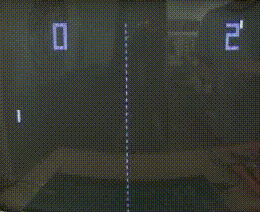
パドル(paddle): プレイヤーが操作する左側と右側のパドル。
ボール(ball): 画面上を跳ね回り、端に到達するとポイントを獲得します。
キーメソッド:
draw: ウィンドウにゲーム要素 (パドル、ボール、スコア、ディバイダ) を描画します。
move_paddle: 左側または右側のパドルを上下方向に移動します (成功した場合は True を返します)。
loop: 単一のゲーム ループを実行し、ボールの位置を更新し、衝突を処理し、ゲーム情報を返します。
reset: ゲーム要素 (スコア、ヒット数、パドルの位置) をリセットします。
この方の実装など参考にさせてもらいました。
下準備ができたところで、neat-pythonをインストールします。
!pip install neat-python
もろもろインポートします。
from pong import PongGame # <- これが下準備したポンゲーム
import pygame
import neat
import os
import time
import pickle
さて、ここでNEATを使ってAIを学習していくためのアウトラインを先に考えておきます。
主な機能としては、以下の4機能で構成されます。
① AI が Pong ゲームをプレイ
② NEAT を使って AI を自動的に進化させる
③ 人間プレイヤーとの対戦テスト
④ 最優秀の AI ネットワークを保存
最初に、クラス PongGame を用意して、下準備したポンゲームを行い、その結果NEATによって進化させていきます。
- PongGameクラスで、ゲームの基本要素 (ウィンドウ、パドル、ボール) を管理します。
- GAMEで必要な関数
- test_ai: 人間プレイヤーと対戦する AI テスト
- train_ai: 2つの NEAT ニューラルネットワークを対戦させ、より良い成績のネットワークを進化させる AI トレーニング
- move_ai_paddles: 各ネットワークの出力を基に、AI パドルを移動させる
- calculate_fitness: ゲーム結果と時間を基に、ネットワークの適合度を計算
- NEATで必要な関数
- eval_genomes:トレーニング中のすべての世代に対して、個々の NEAT ネットワーク間の対戦を行い、適合度を計算する
- run_neat:NEAT アルゴリズムによる反復トレーニングを実行し、最優秀のネットワークを保存する
- test_best_network:保存された最優秀のネットワークを使って、人間プレイヤーと対戦する
それでは、PongGameクラスを示します。
class PongGame:
    def __init__(self, window, width, height):
        # 各種初期化

    def test_ai(self, net):
        """
        NEATニューラルネットワークをパスすることで、AIを人間プレーヤーとテストする。
        """
        clock = pygame.time.Clock()
        run = True
        while run:
            clock.tick(60)
            game_info = self.game.loop()

            for event in pygame.event.get():
                if event.type == pygame.QUIT:
                    run = False
                    break

            output = net.activate((self.right_paddle.y, abs(
                self.right_paddle.x - self.ball.x), self.ball.y))
            decision = output.index(max(output))

            if decision == 1:  # AI moves up
                self.game.move_paddle(left=False, up=True)
            elif decision == 2:  # AI moves down
                self.game.move_paddle(left=False, up=False)

            keys = pygame.key.get_pressed()
            if keys[pygame.K_w]:
                self.game.move_paddle(left=True, up=True)
            elif keys[pygame.K_s]:
                self.game.move_paddle(left=True, up=False)

            self.game.draw(draw_score=True)
            pygame.display.update()

    def train_ai(self, genome1, genome2, config, draw=False):
        """
        2つのNEATニューラルネットワークとNEATconfigを渡してAIをトレーニングする。
        これらのAIは互いに対戦してfitnessを決定する。
        """
        run = True
        start_time = time.time()

        net1 = neat.nn.FeedForwardNetwork.create(genome1, config)
        net2 = neat.nn.FeedForwardNetwork.create(genome2, config)
        self.genome1 = genome1
        self.genome2 = genome2

        max_hits = 50

        while run:
            for event in pygame.event.get():
                if event.type == pygame.QUIT:
                    return True

            game_info = self.game.loop()

            self.move_ai_paddles(net1, net2)

            if draw:
                self.game.draw(draw_score=False, draw_hits=True)

            pygame.display.update()

            duration = time.time() - start_time
            if game_info.left_score == 1 or game_info.right_score == 1 or game_info.left_hits >= max_hits:
                self.calculate_fitness(game_info, duration)
                break

        return False

    def move_ai_paddles(self, net1, net2):
        """
        左右のパドルを制御する2つのニューラルネットワークに基づいて、左右のパドルをどこに動かすかを決定する。
        それを制御する2つのニューラルネットワークに基づいて、左右のパドルを動かす場所を決定する。
        """
        players = [(self.genome1, net1, self.left_paddle, True), (self.genome2, net2, self.right_paddle, False)]
        for (genome, net, paddle, left) in players:
            output = net.activate(
                (paddle.y, abs(paddle.x - self.ball.x), self.ball.y))
            decision = output.index(max(output))

            valid = True
            if decision == 0:  # 動かさない
                genome.fitness -= 0.01  # we want to discourage this
            elif decision == 1:  # 上げる
                valid = self.game.move_paddle(left=left, up=True)
            else:  # 下げる
                valid = self.game.move_paddle(left=left, up=False)

            if not valid:  ## もしパドルが画面の外に出てしまったら、AIはペナルティ。
                genome.fitness -= 1

    def calculate_fitness(self, game_info, duration):
        # 適合度の計算
        self.genome1.fitness += game_info.left_hits + duration
        self.genome2.fitness += game_info.right_hits + duration
次に、eval_genomes関数を定義します。この関数は、トレーニング中のすべての世代に対して、個々の NEAT ネットワーク間の対戦を行い、適合度を計算する関数です。
関数の引数は、以下のとおりです。
genomes: 評価する NEAT ネットワークのリスト
config: NEAT の設定オブジェクト
具体的な処理としては、まず、ゲームウィンドウを作成して、タイトルを設定します。次に、各世代の各ネットワークを、互いに 1 回ずつ対戦させ、対戦の結果、勝ったネットワークの適合度を 1 点、負けたネットワークの適合度を 0 点とします。すべての対戦が終了したら、関数を終了します。
def eval_genomes(genomes, config):
    """
    それぞれのgenomeを1回ずつ対戦させ、fitnessを決定する。
    """
    width, height = 700, 500
    win = pygame.display.set_mode((width, height))
    pygame.display.set_caption("Pong")

    for i, (genome_id1, genome1) in enumerate(genomes):
        print(round(i/len(genomes) * 100), end=" ")
        genome1.fitness = 0
        for genome_id2, genome2 in genomes[min(i+1, len(genomes) - 1):]:
            genome2.fitness = 0 if genome2.fitness == None else genome2.fitness
            pong = PongGame(win, width, height)

            force_quit = pong.train_ai(genome1, genome2, config, draw=True)
            if force_quit:
                quit()
そして、いよいよメインのNEATアルゴリズム実行の実装です。NEAT アルゴリズムを用いて反復トレーニングを実行し、最優秀のネットワークを保存する関数を定義します。
関数の引数は、config: NEAT の設定オブジェクトのみです。
関数の具体的な手順としては、まず、NEAT の Population() クラスのインスタンスを作成します。続いて、StdOutReporter()、StatisticsReporter()、Checkpointer() の各レポートを追加します。
eval_genomes() 関数を呼び出して、評価を行います。(今回は、3 世代のトレーニングを実行しています。)
最優秀のネットワークを best.pickle ファイルに保存しています。
def run_neat(config):
    """
    アルゴリズムによる反復トレーニングを実行し、最優秀のネットワークを保存する
    """
    #p = neat.Checkpointer.restore_checkpoint('neat-checkpoint-85')
    p = neat.Population(config)
    p.add_reporter(neat.StdOutReporter(True))
    stats = neat.StatisticsReporter()
    p.add_reporter(stats)
    p.add_reporter(neat.Checkpointer(1))

    winner = p.run(eval_genomes, 3)
    with open("best.pickle", "wb") as f:
        pickle.dump(winner, f)
そして、最後に、人間プレイヤーとの対戦です。処理としては、まず、上記の関数によって保存されたbest.pickle ファイルから、最優秀のネットワークを読み込みます。そして、neat.nn.FeedForwardNetwork() 関数を使って、ネットワークをオブジェクトへと変換します。
さてここで、再びゲームウィンドウを作成して、PongGame() クラスのインスタンスを作成し、test_ai() 関数を使って、最優秀のネットワークと人間プレイヤーとの対戦を行います。ワクワクしますね!
def test_best_network(config):
    """
    保存された最優秀のネットワークを使って、人間プレイヤーと対戦する
    """
    with open("best.pickle", "rb") as f:
        winner = pickle.load(f)
    winner_net = neat.nn.FeedForwardNetwork.create(winner, config)

    width, height = 700, 500
    win = pygame.display.set_mode((width, height))
    pygame.display.set_caption("Pong")
    pong = PongGame(win, width, height)
    pong.test_ai(winner_net)
実行するときには、事前に用意したconfig.txtを読み込みPongGameクラスなどの初期化を行います。色々とチューニングすることで強さを変化させられます。
[NEAT]
fitness_criterion     = max
fitness_threshold     = 400
pop_size              = 50
reset_on_extinction   = False

[DefaultStagnation]
species_fitness_func = max
max_stagnation       = 20
species_elitism      = 2

[DefaultReproduction]
elitism            = 2
survival_threshold = 0.2

[DefaultGenome]
# node activation options
activation_default      = relu
activation_mutate_rate  = 1.0
activation_options      = relu

# node aggregation options
aggregation_default     = sum
aggregation_mutate_rate = 0.0
aggregation_options     = sum

# node bias options
bias_init_mean          = 3.0
bias_init_stdev         = 1.0
bias_max_value          = 30.0
bias_min_value          = -30.0
bias_mutate_power       = 0.5
bias_mutate_rate        = 0.7
bias_replace_rate       = 0.1

# genome compatibility options
compatibility_disjoint_coefficient = 1.0
compatibility_weight_coefficient   = 0.5

# connection add/remove rates
conn_add_prob           = 0.5
conn_delete_prob        = 0.5

# connection enable options
enabled_default         = True
enabled_mutate_rate     = 0.01

feed_forward            = True
initial_connection      = full_direct

# node add/remove rates
node_add_prob           = 0.2
node_delete_prob        = 0.2

# network parameters
num_hidden              = 2
num_inputs              = 3
num_outputs             = 3

# node response options
response_init_mean      = 1.0
response_init_stdev     = 0.0
response_max_value      = 30.0
response_min_value      = -30.0
response_mutate_power   = 0.0
response_mutate_rate    = 0.0
response_replace_rate   = 0.0

# connection weight options
weight_init_mean        = 0.0
weight_init_stdev       = 1.0
weight_max_value        = 30
weight_min_value        = -30
weight_mutate_power     = 0.5
weight_mutate_rate      = 0.8
weight_replace_rate     = 0.1

[DefaultSpeciesSet]
compatibility_threshold = 3.0
そして、mainメソッドをconfigファイルからNEATコンフィグオブジェクトを生成し、run_neat関数を実行します。google colab環境だと3世代でも2時間くらいかかりました。
if __name__ == '__main__':
    config_path = os.path.join('config.txt')

    config = neat.Config(neat.DefaultGenome, neat.DefaultReproduction,
                         neat.DefaultSpeciesSet, neat.DefaultStagnation,
                         config_path)

    run_neat(config)
    test_best_network(config)
実行結果は、こんなような感じで、NEATネットワークに結果がチェックポイントファイルとして保存されていきます。

まとめ
いかがでしたでしょうか?NEAT思ってたより簡単に実装できました。世代を増やしてみないと、突然変異には出会える確率は低いでしょうけど、今後生成AIで作ったエージェントを進化させたりして、「う◯ち」主食時代が到来しても、創発が期待できるように何かしら備えが必要ですねー!
参考文献