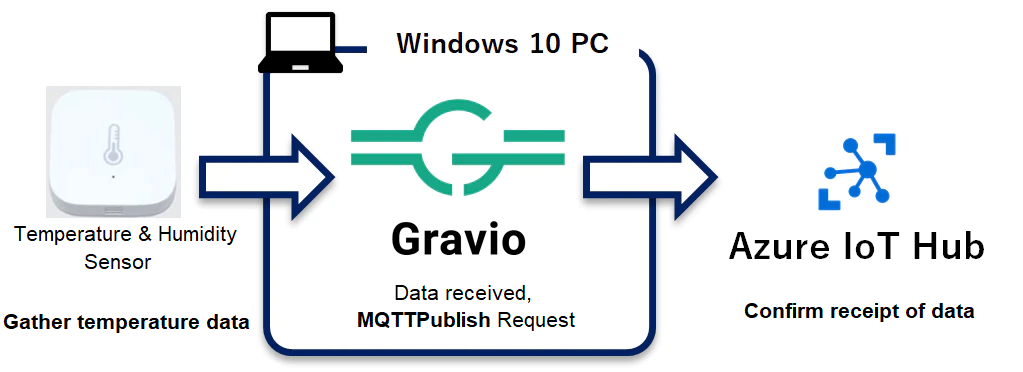
In this post, we will explore using Gravio to publish temperature sensor data to Azure IoT Hub via the MQTT protocol.
This post will use the CreateRecord component. A sibling post does the same thing with the SensorDataDb component.
Prerequisites
Hardware
Windows 10 (minimum version 1809)
Gravio Client Sensor (e.g., Temperature Sensor)
Software
- Gravio Studio (minimum version 3.8)
- Gravio Server (minimum version 3.8)
Azure IoT Explorer - This tutorial is using version 0.10.18 (Preview)
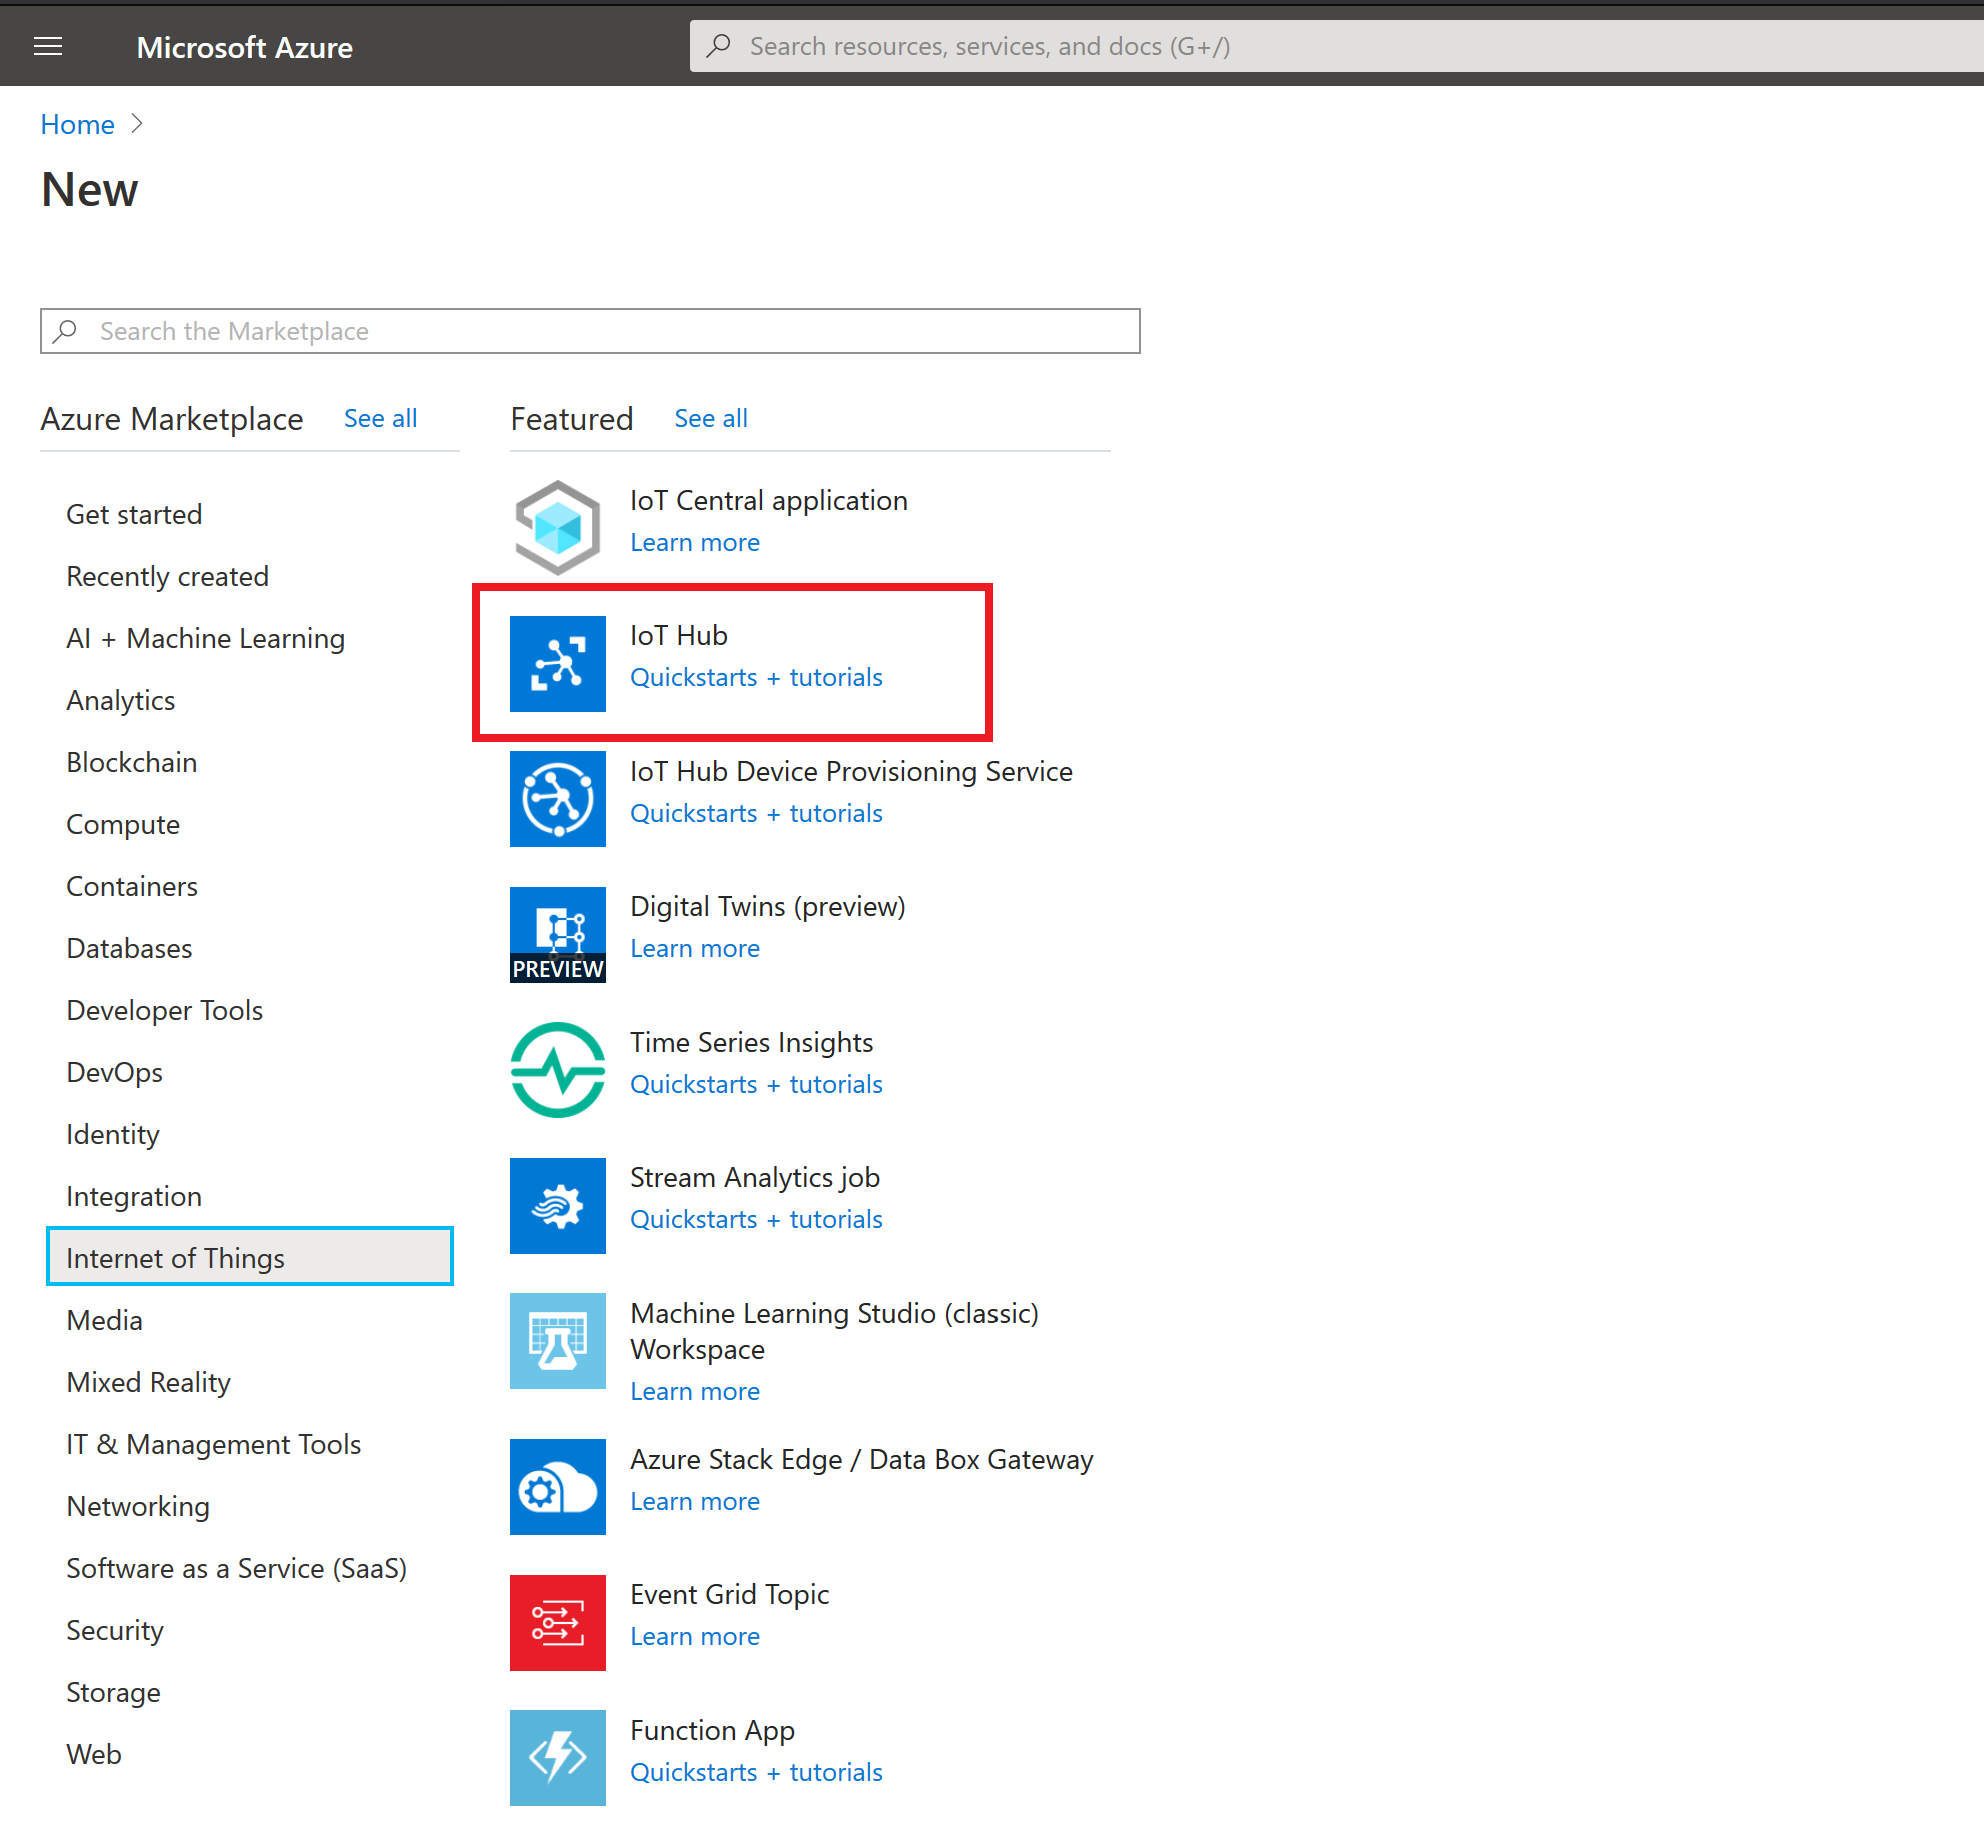
Azure IoT Hub Setup
Resource Creation
First we need to create an IoT Hub Resource in Azure.
Resource Assignment
We need to fill in some required information. You can consult the following table for the values we will use:
| Item | Value |
|---|---|
| Subscription | Pay as you go |
| Resource Group | Your choice of group. If none, create a new one |
| Region | Your choice of region. This tutorial will use East US
|
| IoT Hub Name | Your choice of name. This tutorial will use gravio-demo. |

Network Settings
Next we will select the network settings. Make sure that Public Endpoint is selected.

Size and Scale
Select F1: Free Tier

Tags
Any tags you want can be added here. This is an optional step. We're using GravioDemo:TemperatureSensorDemo.

Review and Create
Review the settings before creating our new IoT Hub.

Deployment in Progress
After clicking Create, you may have to wait a few minutes while Azure provisions your new resource:

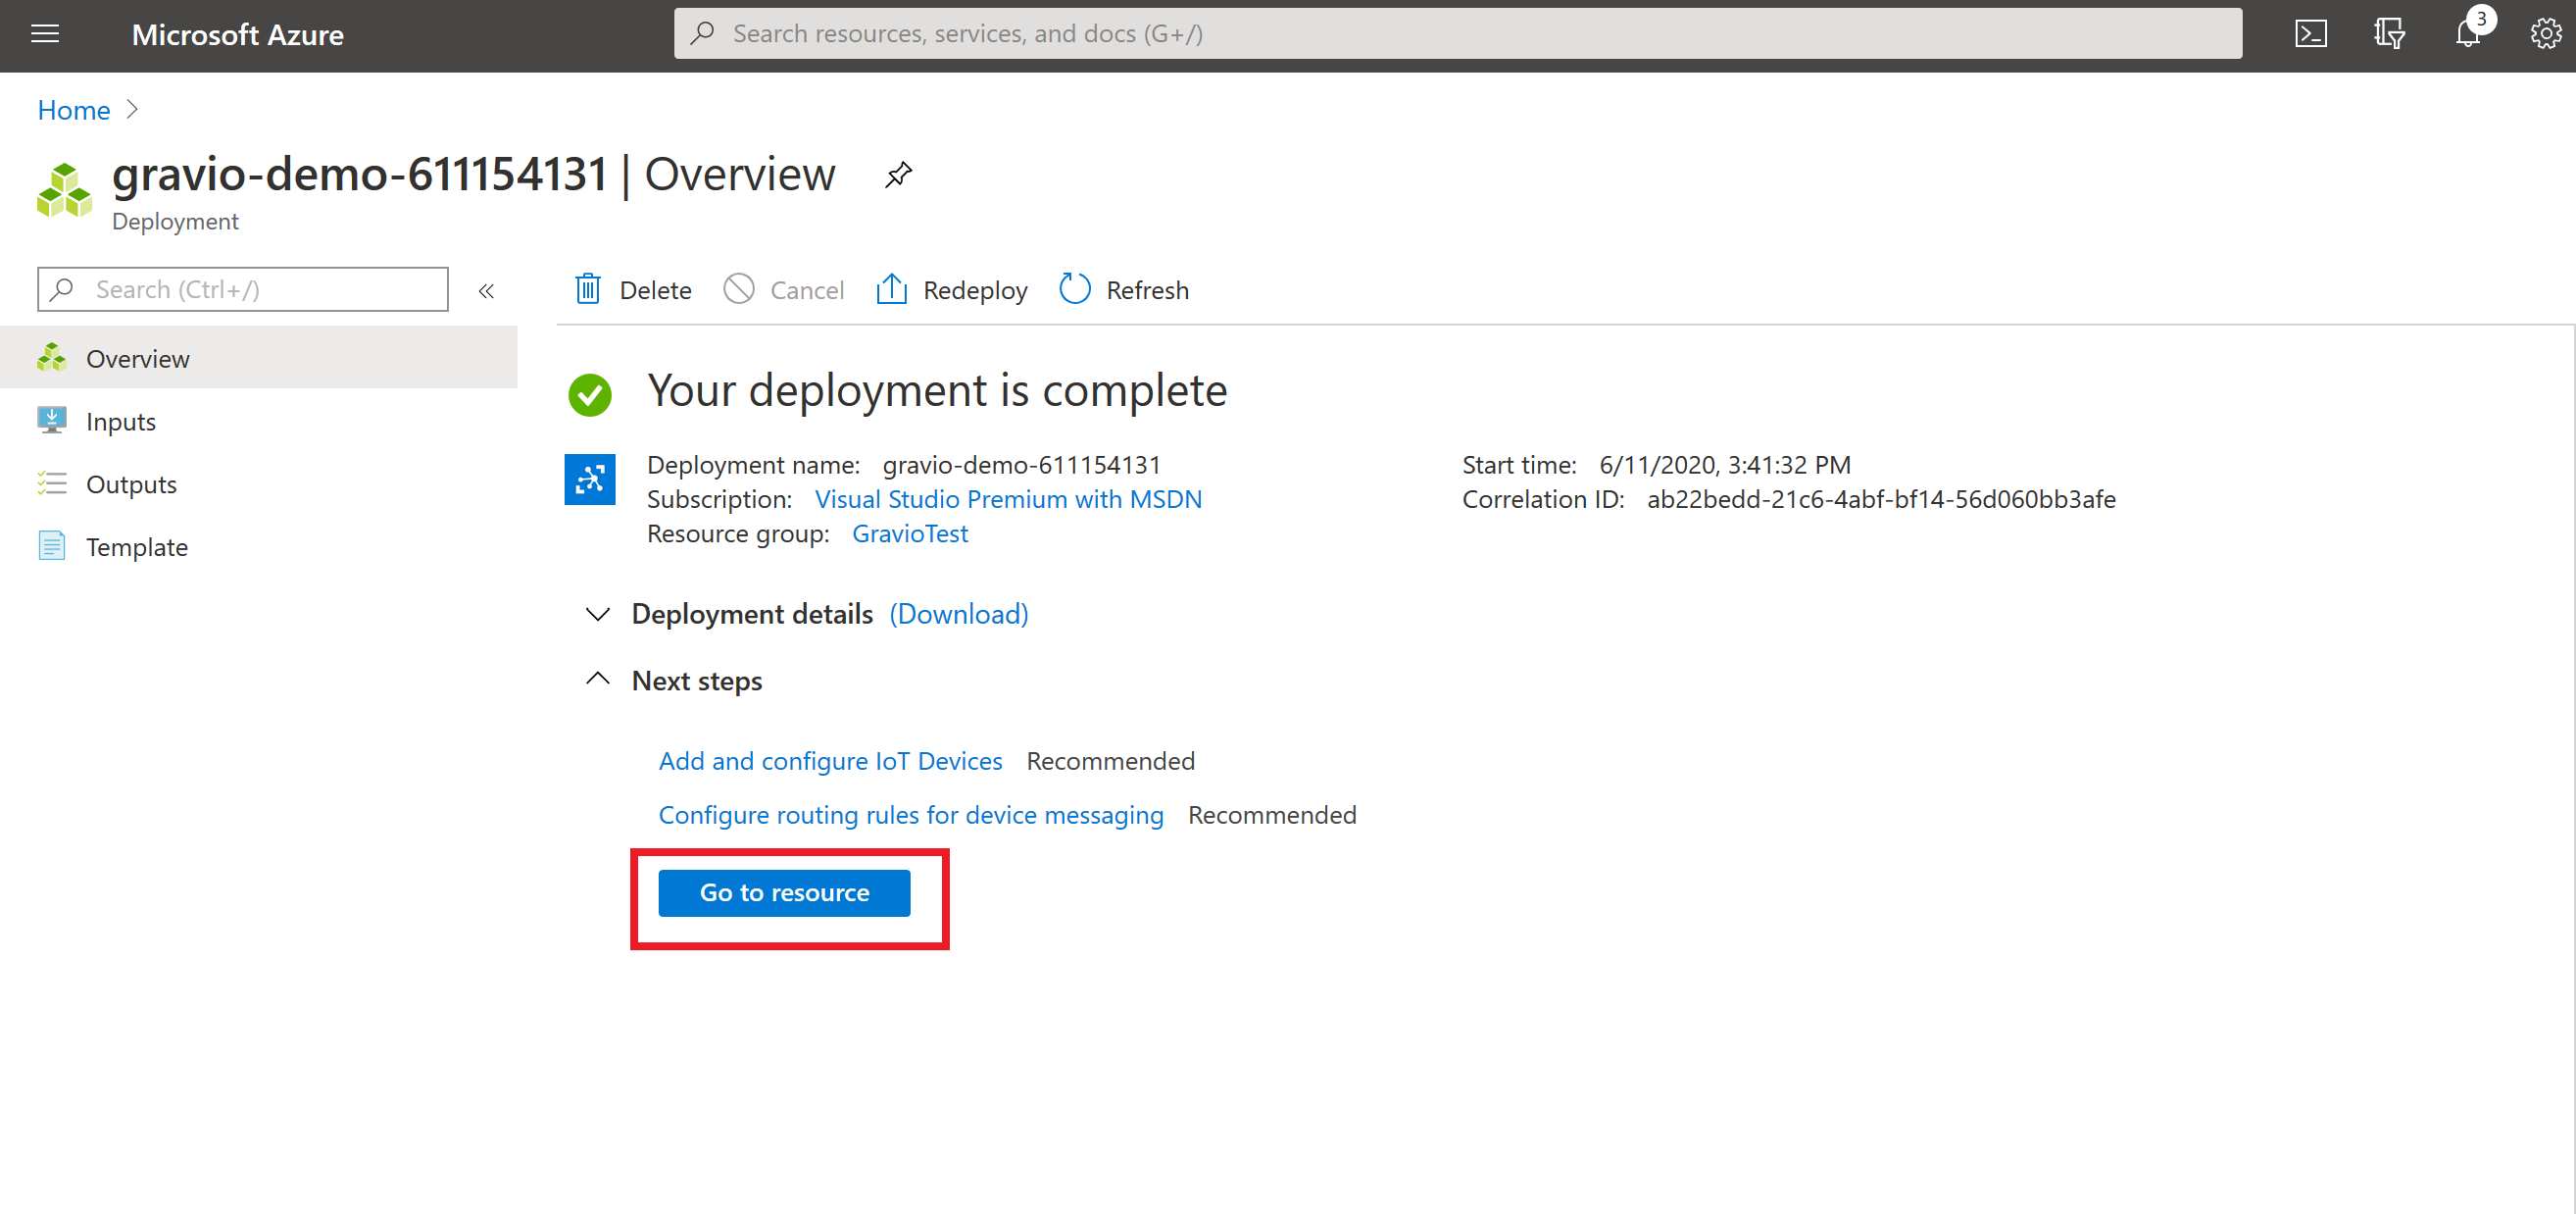
Deployment Complete
Once the deployent finishes, click on Go to resource
Device Assignment
Click on IoT Devices, then + New to create a new IoT Device linked to this IoT Hub:

Device Creation
The choice of name for your new device is up to you. We will use TemperatureSensor. Leave the default choices as is:
| Item | Value |
|---|---|
| Authentication Type | Symmetric key |
| Auto-Generate Keys | Checked |
| Connect this device to an IoT Hub | Enable |

Access Settings
From the side menu, select Shared access policies, click iothubowner, and copy the Connection string - primary key field:
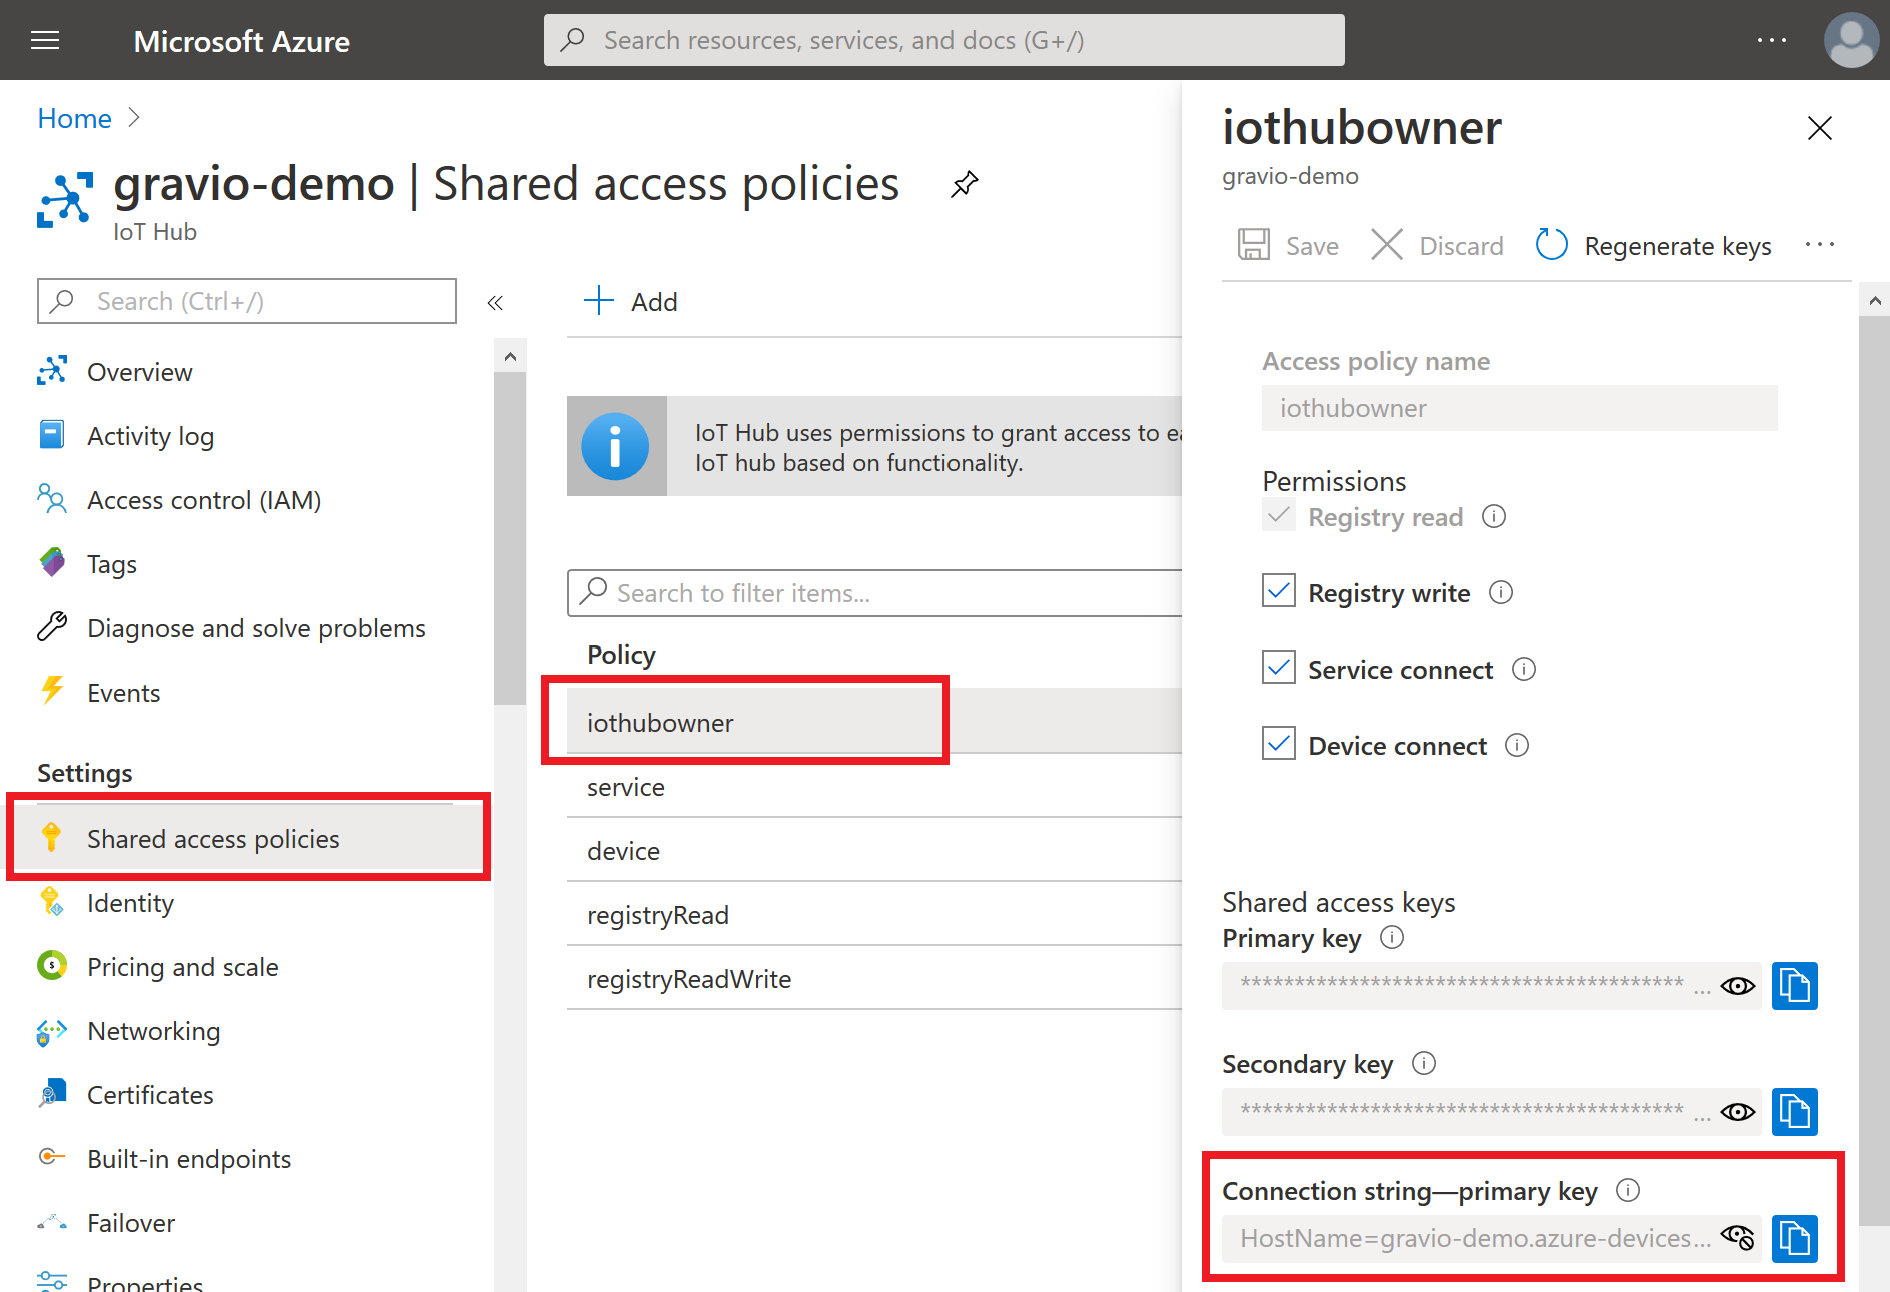
We'll use this connection string in the following section.
Azure IoT Explorer
Connect to the IoT Hub
Using the Azure IoT Explorer, paste in the connection string from earlier, then connect to the IoT Hub.

Select the IoT Device
Select the IoT Device we made earlier.

SAS Token Acquisition
Select Device Identity and scroll down to Connection string with SAS Token. We'll use the following settings:
| Item | Value |
|---|---|
| Symmetric Key | Primary key |
| Expiration (minutes) | Your choice. Default is 5, this tutorial will use 60. |
Then click Generate.

The generated key will look like this.
SharedAccessSignature sr=gravio-iot-demo.azure-devices.net%2Fdevices%2FTemperatureSensor&sig=xxxxxxxxxxxxxxxxxxxxxxxxxxxxxxxxxxx%3D&se=1591932352```
The important part is the highlighted section:
`SharedAccessSignature sr=gravio-iot-demo.azure-devices.net%2Fdevices%2FTemperatureSensor&sig=xxxxxxxxxxxxxxxxxxxxxxxxxxxxxxxxxxx%3D&se=1591932352`
This is the actual SAS Token. Keep this token in mind for the next section.
**Be aware that these keys have a limited lifetime. You will need to regenerate them frequently!**
## Live Monitoring of Data
Click the `Telemetry` tab, then `Start` to begin monitoring data sent to our IoT Device. In the next section, we will set up Gravio to send data to this device.

# Gravio Setup
Now we can begin to use Gravio to send data over to Azure.
## Sensor Setup
For pairing and setting up the sensor in Gravio, please refer to this article:
[Setting up a temperature sensor to send data to Excel with Gravio (Japanese)](https://qiita.com/mikawan/items/3d93543566680afda868#step1%E3%82%BB%E3%83%B3%E3%82%B5%E3%83%BC%E3%81%AE%E8%A8%AD%E5%AE%9A)
## Action Setup
Our action will use the single most recent record from the CreateRecord component.
On the Action Creation screen, we'll use the following component flow:
CreateRecord > MQTTPublish
### (1) CreateRecord
The create record component is an unusual component because it has no properties. Its use is to create and propagate a record to another component. You can think of it as a plumbing component
### Step Variable Creation
We'll send over a subset of the data recorded by the sensor:
1. The actual Sensor Data (av.Data)
2. the area the sensor is located in (av.AreaName)
3. the timestamp of the recording (av.Timestamp)

Create the following variables under Step Results:
|Output Field Name|Type|Expression Formula|
|-----------------|----|------------------|
|Area|String|av.AreaName|
|Data|Int|av.Data|
|Timestamp|Datetime|av.Timestamp|
For `Data`, you can set the `Type` to `Int` if you want the mqtt service to record sensor data as numeric.

After you finish, you should have 3 Step Variables that look like this:

That's all we need to do to set up the SendRecord component.
### (2) MQTTPublish
#### Property Setup
We'll use the following settings for our MQTT Publish component:
NB: The quotes around some fields (`""`) are not optional and must be included.
|Property|Description|Example|
|--------|-----------|-----|
|Broker Hostname|IoT Hub Hostname|<span>gravio-iot-demo.azure-devices.net</span>|
|Broker Port||8883|
|Client ID|Device Id|TemperatureSensor|
|MQTT Username|"\<IoT Hub Hostname>/\<Device ID>/api-version=2019-03-31"|"<span>gravio-iot-demo.azure-devices.net/TemperatureSensor/api-version=2019-03-31</span>"|
|MQTT Password|The generated SAS Token|SharedAccessSignature sr=gravio-iot-demo.azure-devices.net%2Fdevices%2FTemperatureSensor&sig=xxxxxxxxxxxxxxxxxxxxxxxxxxxxxxxxxxx%3D&se=1591932352|
|Topic|"devices/\<Device ID>/messages/events"|"devices/TemperatureSensor/messages/events"|
|Data Format||JSON|
|QoS|Anything below QoS2|QoS 1 (At most once)|
|Secure Connection||Checked|
|Client Certificate File*|||
|Client Certificate Password*|||
|CA Certificate File*|||
\* Leave blank
After setting up the properties, the component screen should look like this:

#### Step Results
Because this is an Output type component, we must set the data to send to the next component. In our case, there is no next component. Nevertheless, this step is still required.
This time, instead of copying from `Step Variables`, we'll copy from `Step InFields`:

## Running the Action
Click the Run button to run the component. If things were set up properly, we should have a successfully run action:

# Viewing the Data
Going back to the Telemetry view of the Azure IoT Explorer, we can see the data that was sent to it:

# Automatic Trigger Settings
## Settings
We'll set up a Trigger to send sensor data to our MQTT service whenever new data is received by the temperature sensor.
Here's the basic settings we'll use:
|Property|Value|
|-----|-----|
|Area|Demo*|
|Layer|Temperature*|
|Action Name|MQTT Test*|
|Interval|5|
|Use Threshold Trigger|Unchecked|
|Temperture|Any 0|
\* Use whatever area and layer has your Temperature sensor, as well the name of whatever action you created earlier.

## Enable the Trigger
Make sure to enable the trigger after creating it:

# Trigger Confirmation
Using the Azure IoT Explorer's telemetry screen from before, you can see the the data being sent to the IoT Hub.
The trigger is configured to send all data it records to the MQTT service.
# Conclusion
Gravio makes it easy to send data to services like Microsoft Azure, even for relative newcomers to both technologies.