2
2

Delete article

Deleted articles cannot be recovered.

Draft of this article would be also deleted.

Are you sure you want to delete this article?

More than 5 years have passed since last update.

PythonからOpenCVのcontribを使用する

Last updated at Posted at 2019-08-30

背景

macOSではOpenCVをbrew経由でインストール可能だが、SIFTなどcontribに含まれる機能を使うことはできない(昔はcontribもインストールできたが今はできなくなってしまった)。
contribの機能を使うには自前でOpenCVをビルドしなければならない。
自分の作業メモ的に記録しておく。
この記事ではOpenCV4(4.1.0)のインストールを想定している。

1. OpenCVのダウンロード

下記URLからOpenCVのソースコードをダウンロード
https://github.com/opencv/opencv/releases
適当な場所に解凍する

2. OpenCV contribのダウンロード

下記URLからOpenCV contribのソースコードをダウンロード
https://github.com/opencv/opencv_contrib/releases
適当な場所に解凍する。OpenCVの解凍して出てきたフォルダ直下に適当な名前で解凍しておくとよい(contribなど)。

3. cmakeの設定

ついでにcmakeもインストール
https://cmake.org/download/
OpenCVのビルドのために必要。

4. OpenCVのビルド

cmakeを起動し、ビルドの設定を行う。

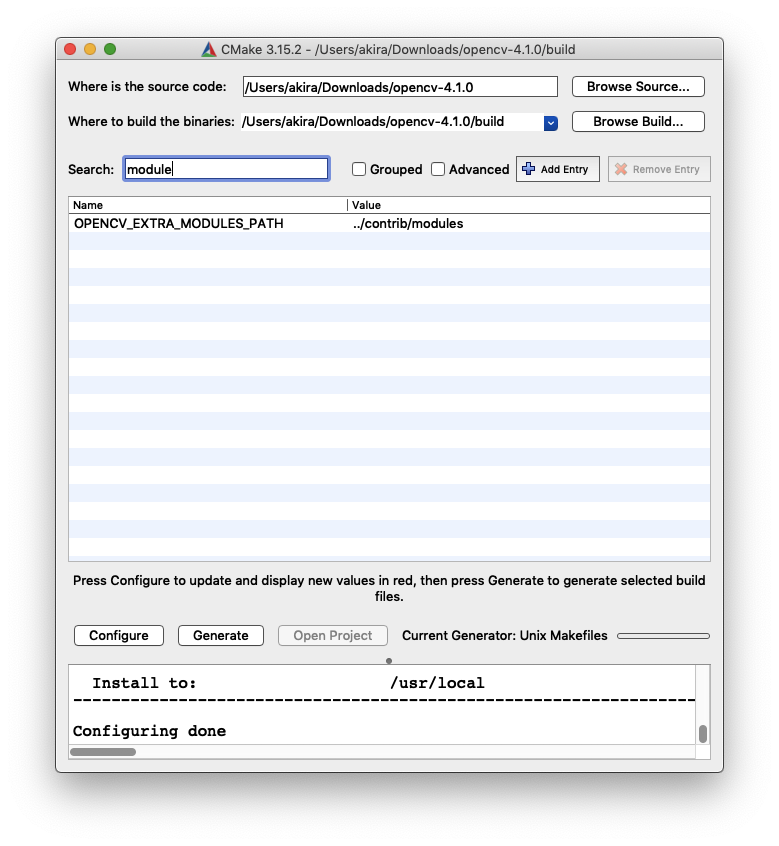
    1. contribのモジュールも一緒にビルドするためにOPENCV_EXTRA_MODULES_PATHにステップ2でダウンロードしたOpenCV contribの保存場所を指定する。
      Screen Shot 2019-08-30 at 14.16.14.png
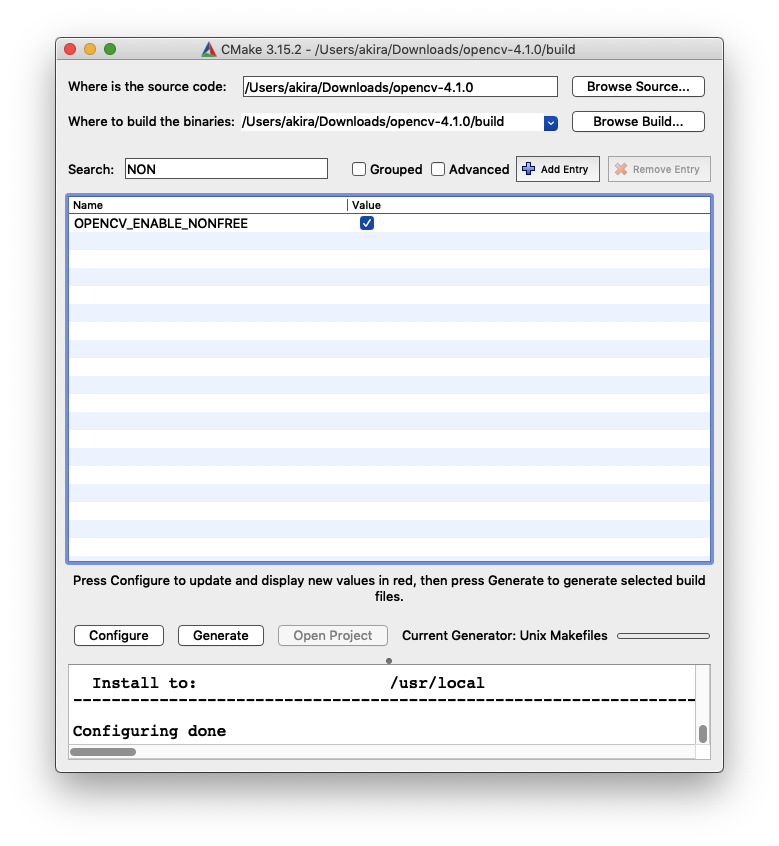
    1. 著作権で保護された機能(SIFTなど)を使うためにOPENCV_ENABLE_NONFREEにチェックを入れる
      Screen Shot 2019-08-30 at 14.19.28.png
    1. Configure、Generateをクリックしてmakeファイルを生成
    1. コマンドラインからmake、ビルドが終わったらmake installを実行する

5. opencv-python, opencv-contrib-pythonをインストール

Python経由でOpenCVを触るために下記のソフトをpipでインストール
6. ビルド結果をpythonのパッケージにコピーする

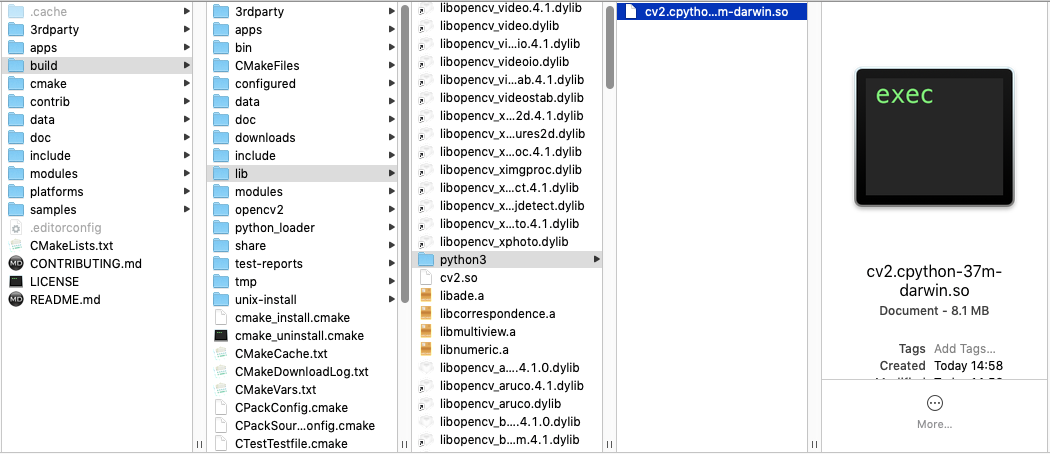
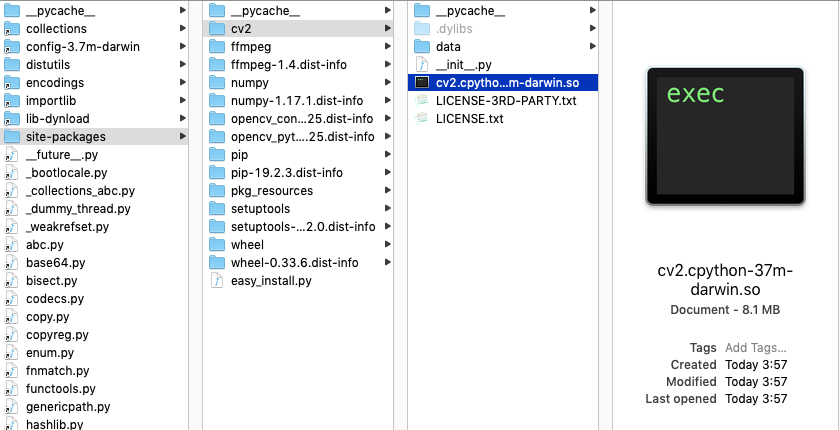
下記ファイル(cv2.cpython-37m-darwin.so)をPythonのcv2のパッケージにコピーする
Screen Shot 2019-08-30 at 15.28.46.png
Screen Shot 2019-08-30 at 15.30.35.png

2
2
0

Register as a new user and use Qiita more conveniently

  1. You get articles that match your needs
  2. You can efficiently read back useful information
  3. You can use dark theme
What you can do with signing up
2
2

Delete article

Deleted articles cannot be recovered.

Draft of this article would be also deleted.

Are you sure you want to delete this article?