はじめに
機械学習、画像認識の学習をするべく、初心者でも使いやすく、サンプルデータとしてもよく利用されている「MNIST(エムニスト)」の画像データを使って画像文字判定モデルを作ってみようと思います。
★ゴールは以下の通り
・MNISTの画像判定モデル作成
・適当に選んだMNISTの数字画像データを作成したモデルに食わせて、判定結果の表示する。
用語
・SageMaker:AWSが提供する完全マネージド型の機械学習サービスです。機械学習モデルを構築する上で必要なリソースや機能が簡単に用意できます。
参照:https://docs.aws.amazon.com/ja_jp/sagemaker/latest/dg/whatis.html
・Keras:機械学習をより簡単に使うためのライブラリで、TensorFlowやTheanoのような他のライブラリより、簡単にプログラムを書くことができる。(KerasとTensorFlowの記事も多く、ここでもTensorFlowは一部で使用します。)
MNIST学習モデルを作るまでの手順
1.AWS SageMakerで機械学習用のノートブックインスタンスを立ち上げる。
2.立ち上げたインスタンでJupyter Notebookを起動。
3.MNISTデータのダウンロード~モデル作成処理。
結果:先に作成たモデルを評価
「MNISTデータのダウンロード~モデル作成処理」までかなり実行するPGが多いので、先に作成したモデル実行した結果を記載し、作成過程はこのあとに記載します。

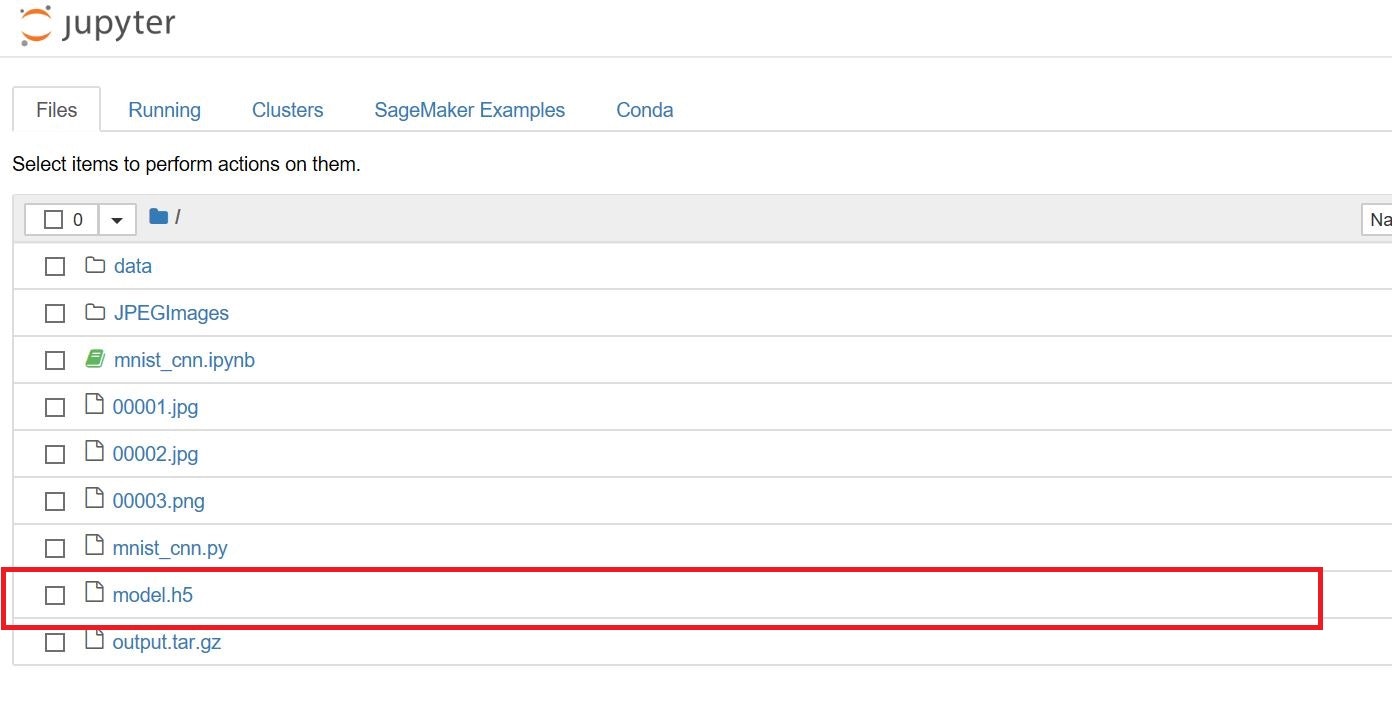
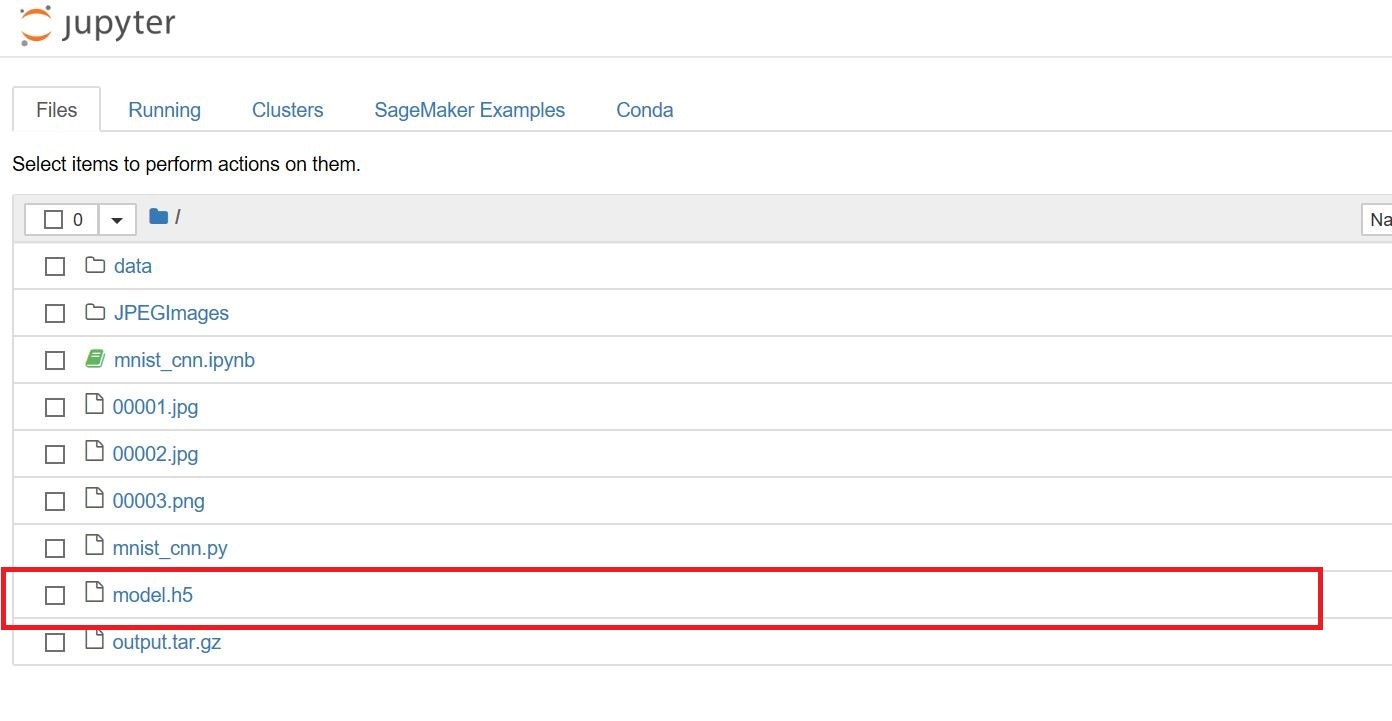
「model.h5」が今回作成したMNISTの学習モデルになります。
このモデルに画像(00001.jpg、00002.jpg)をそれぞれ食わせて結果を吐き出させます。実行結果は以下の通り
画像 00001.jpg (モデルと同じ階層に置いています。)

画像 00002.jpg (同じくモデルと同じ階層に置いています。)


プログラム
from keras.models import load_model
import numpy as np
from keras.preprocessing.image import img_to_array, load_img
import cv2

# 学習済みモデルの読込
model=load_model('./model.h5')

test_img =  cv2.imread('<JPG画像のファイルパス>', 0)
test_img_array = img_to_array(test_img)

test_data = test_img_array.reshape(28, 28, 1)
img_nad = test_data[None, ...]

print(model.predict(img_nad))
print(model.predict_classes(img_nad))
※Keras以外に画像の読み込みにOpenCVを使ってます。
結果として、
00001.jpgの画像は5の文字画像ですが、ちゃんと5と判定しています。
結果の出し方は2通りで
パターン1:print(model.predict(img_nad))
[[0. 0. 0. 0. 0. 1. 0. 0. 0. 0.]] ←0から9までの羅列で0から数えて5番目のフラグが立っています。
パターン2:print(model.predict_classes(img_nad))
[5] ← 判定した結果をダイレクトに表示
以上が結果の部分になります。続いて、飛ばしていたMNIST学習モデルを作るまでの手順を書いていきます。
1.AWS SageMakerで機械学習用のノートブックインスタンスを立ち上げる。
AWSにログインし、サービスメニュー → SageMakerをクリック
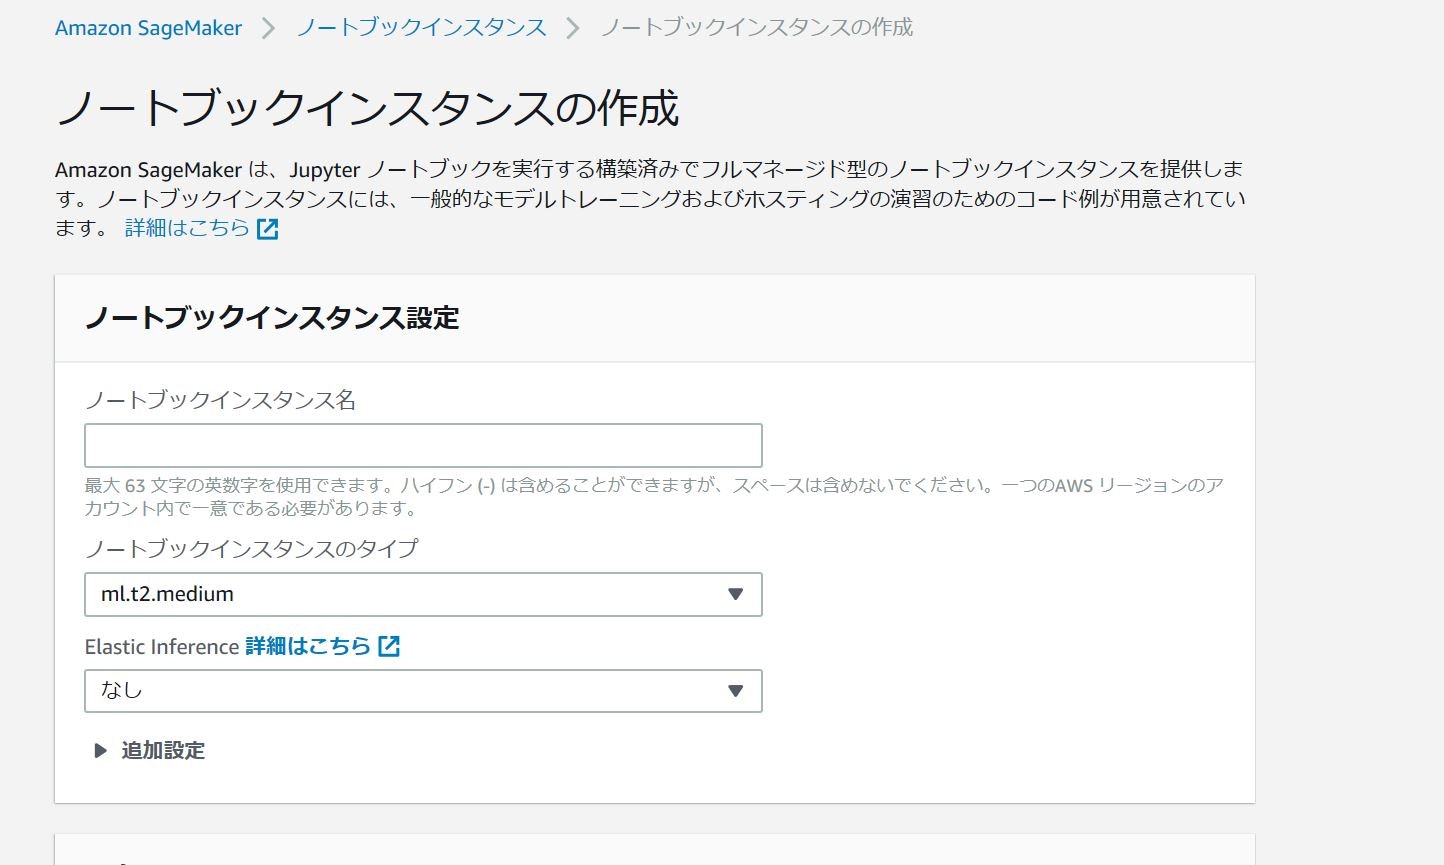
「ノートブックインスタンスの作成」ボタンをクリックし、ノートブックインスタンスを作成していきます。

ノートブックインスタンス名は任意で、IAMロールを作成すればあとはデフォルトで良いので、「ノートブックインスタンスの作成」ボタンをクリックします。
※インスタンスが起動するまで10分ほどかかるので暫く待機します。
2.立ち上げたインスタンでJupyter Notebookを起動。
 起動が完了すると「Jupyterを開く」のリンクが表示されるのでクリックし、Jupyter Notebookの画面を表示。ここでPGの実行を行っていきます。
 SageMaker Examplesから「Sagemaker Python SDK」を選択し、一覧の中から1つを選び「USE」をクリックし使用します。
3.MNISTデータのダウンロード~モデル作成処理。
・MNISTデータのダウンロードとpickle化
import os
import pickle

import keras
from keras.datasets import mnist

os.makedirs('data', exist_ok=True)
fout = open('data/mnist.pickle','wb')
pickle.dump(mnist.load_data(),fout)

→実行

・S3へデータをアップロード
・S3へアップロード完了後のトレーニング
import sagemaker
from sagemaker.tensorflow import TensorFlow

session = sagemaker.Session()
bucket_name = session.default_bucket()
inputs = session.upload_data(path='data', bucket=bucket_name, key_prefix='data')

role = sagemaker.get_execution_role()
tf_estimator = TensorFlow(
  entry_point='mnist_cnn.py',
  role=role,
  train_instance_count=1,
  train_instance_type='ml.p2.xlarge',
  framework_version='1.12.0',
  py_version='py3',
  script_mode=True)

tf_estimator.fit(inputs)

→実行

・modelの取り出し
import os
import tarfile
import boto3

job_name = tf_estimator.latest_training_job.name
s3 = boto3.resource('s3')
bucket = s3.Bucket('sagemaker-us-west-2-208161522588')

bucket.download_file(os.path.join(job_name, 'output/output.tar.gz'), 'output.tar.gz')

→実行


(しばらく待って、notebookにgzファイルがあることを確認)


import tarfile
import keras

tarfile.open('output.ta.gz', 'r:gz').extractall()
model = keras.models.load_model('model.h5')

# mnist データをダウンロード
(train_images, train_labels), (test_images, test_labels) = mnist.load_data()

# 画像データとラベルの要素数を表示
print("画像データの要素数", train_images.shape)
print("ラベルデータの要素数", train_labels.shape)

# ラベルと画像データを表示 5の表示
print("ラベル", train_labels[0])
plt.imshow(train_images[0].reshape(28, 28), cmap='Greys')
plt.show()

→実行

・mnist画像ダウンロード
import keras
from keras.datasets import mnist
import numpy as np
from PIL import Image, ImageOps
import os

def save_image(filename, data_array):
    im = Image.fromarray(data_array.astype('uint8'))
    im_invert = ImageOps.invert(im)
    im_invert.save(filename)

# Load MNIST Data
(x_train, y_train), (x_test, y_test) = mnist.load_data()

DIR_NAME = "JPEGImages"
if os.path.exists(DIR_NAME) == False:
    os.mkdir(DIR_NAME)

# Save Images
i = 1
for li in [x_train, x_test]:
    for x in li:
        filename = "./{0:05d}.jpg".format(i)
        print(filename)
        save_image(filename, li[0])
        i += 1
        break
→実行
すべて実行が完了し終わったら、作成したmodel.h5ファイルに食わせるMNISTの画像ファイル(00001.jpg,00002,jpg)をアップロードすれば、Jupyter Notebook上で、実行結果を確認することができます。

まとめ
SageMakerが機械学習の環境を用意してくれるので、環境自体は初めてでは非常にとっつきにくい部分はありますが、慣れれば非常に便利なものでした。
個人的には画像の食わせる部分でかなり時間を要しため、もっとpythonの処理や、ライブラリの特徴を理解していく必要があると感じました。