みんな大好きInstagram
Instagramに投稿したデータを取得してみたかったので、まとめました。(今更感)
今回は、SandBoxの機能を使って実装。
Instagram API
Instagram APIは2016年6月に仕様が変更され、Instagram APIを使うにはInstagramの承認が必要になる。(ただ、審査がとても厳しいらしい。。)
SandBox
- 未承認の場合に制限付きでAPIが使える
- 読み込めるデータは最新20件
- 最新20件まで取得
アカウント作成
アプリをダウンロードし、アカウントを作成する
※今回、作成方法は省略します
アプリケーション登録
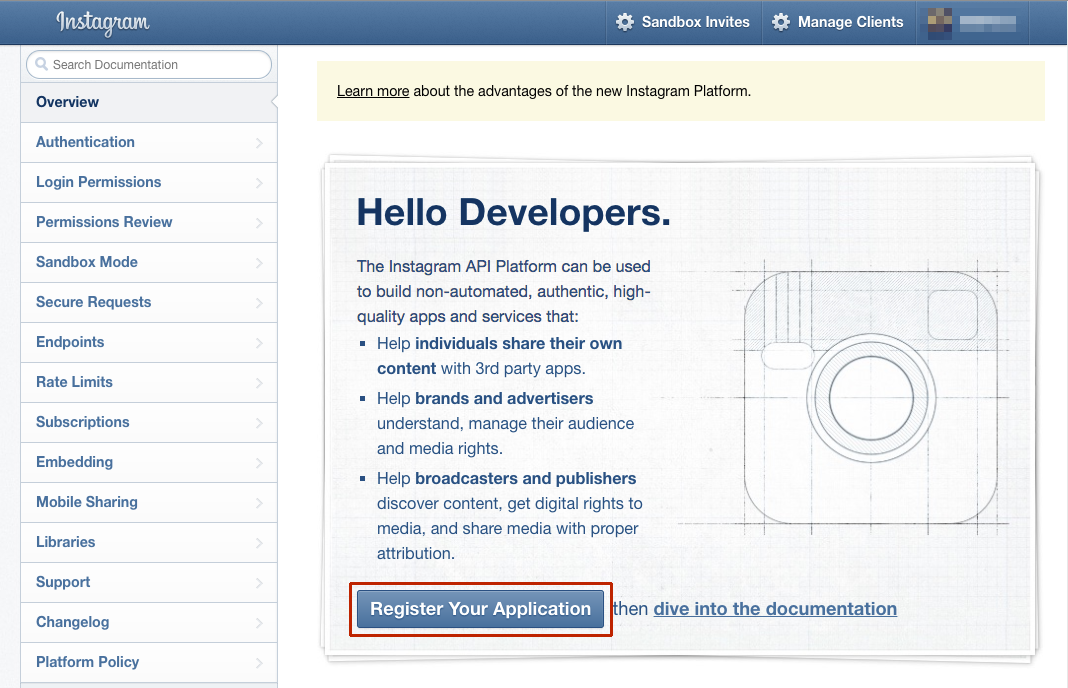
https://www.instagram.com/developer/ へアクセス
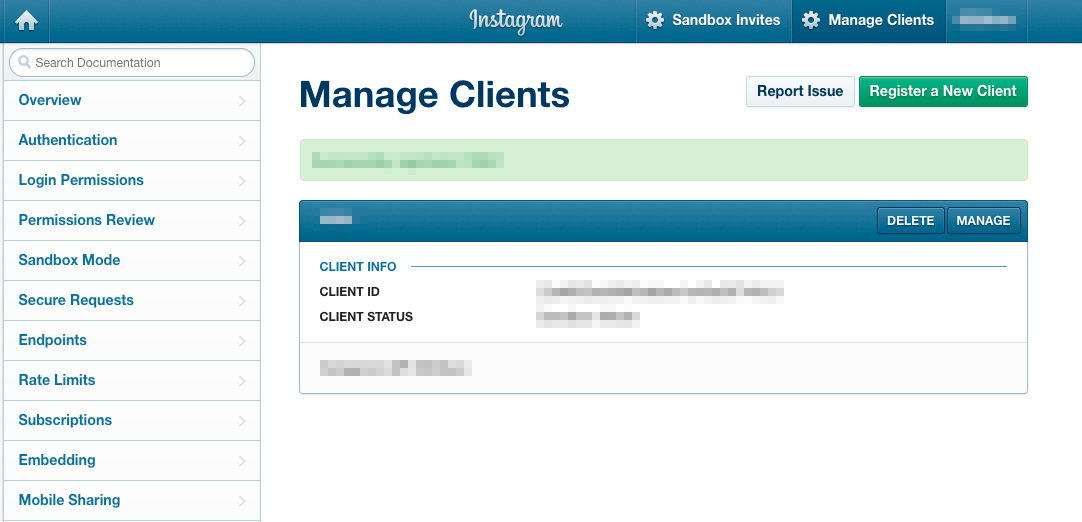
- Register Your Application をクリック
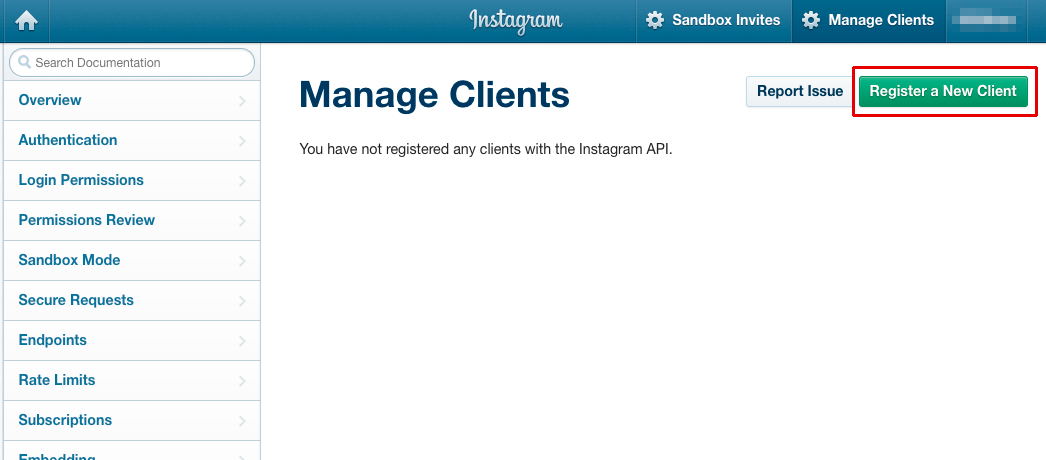
- Register a New Client をクリック
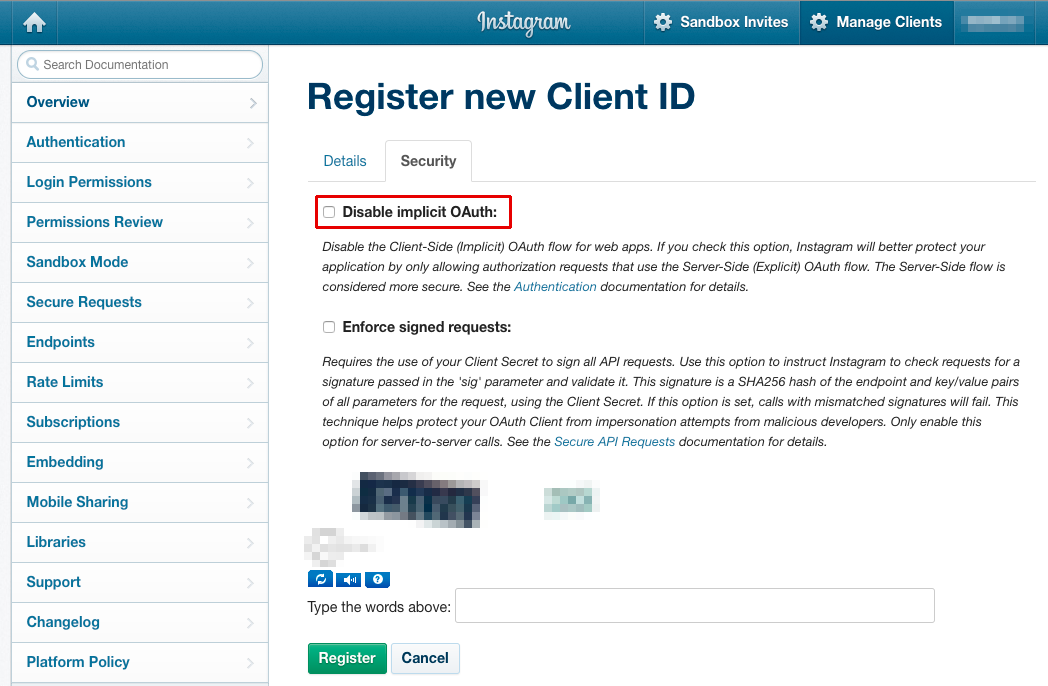
- Security タブをクリック
- Disable implicit OAuth: チェックを外す
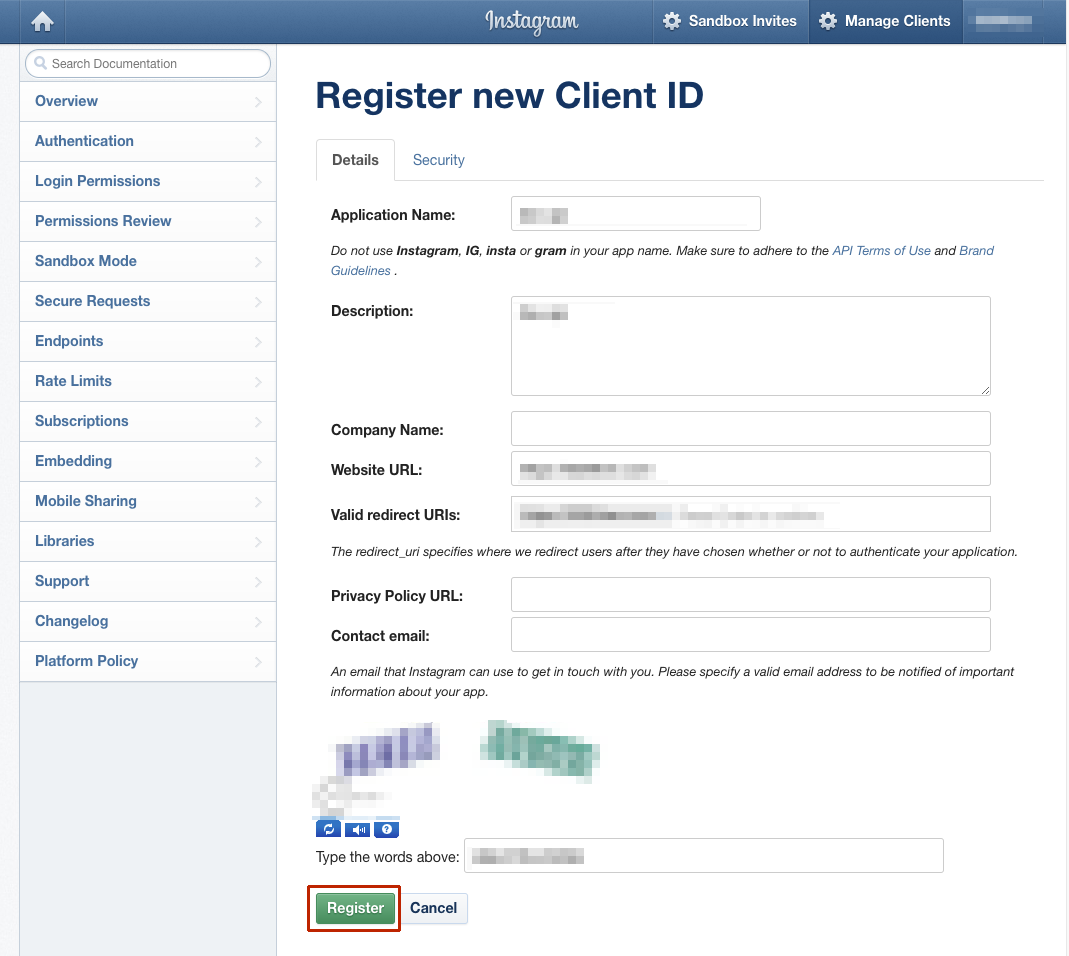
- 必要な項目を入力後、Register をクリック
* Application Name : アプリケーション名
* Description : アプリケーション説明
* Company Name : 会社名(任意ですので、空欄で大丈夫)
* Website URL : WebサイトURL
* Valid redirect URIs : 認証リダイレクトURL(Website URLと同じ)
* Privacy Policy URL : 個人情報保護方針のURL(任意ですので、空欄で大丈夫)
* Contact email : 連絡先メールアドレス
※ 後から、内容の編集可能。
- こちらで登録完了
アクセストークン取得
https://instagram.com/oauth/authorize/?client_id=「取得したCLIENT ID」&redirect_uri=「設定したValid redirect URIs」&response_type=token
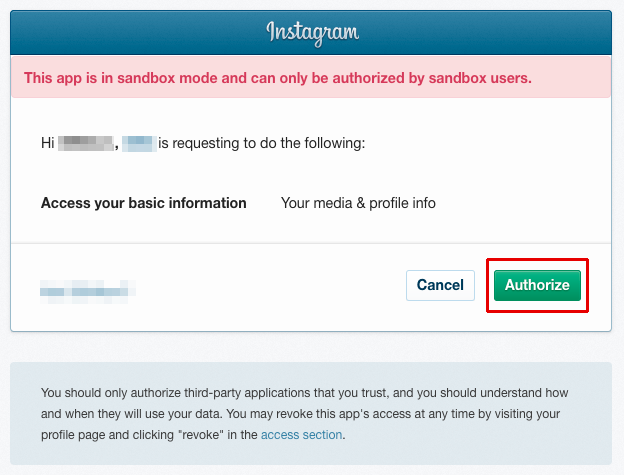
- 上記URLに「取得したCLIENT ID」と「設定したValid redirect URIs」を記述し、アクセスする
- Authorize」をクリック
http://リダイレクトURL.com/#access_token=XXXXXXXX.XXXXXXX.XXXXXXXXXXXXXXXXXXXXXXXXXXXXXXXX
- リダイレクトURLで指定したページに遷移、アクセストークンが表示される
https://api.instagram.com/v1/users/self/media/recent?access_token=取得したアクセストークン
- 上記のURLで自分のアカウントのJSONデータを取得できる
Webページに表示する
JavaScriptのみでも表示できますがセキュリティを考えてPHPを使います。(javascriptアクセストークンがみえてしまうので。。)
※html,CSSは良しなに調整してください。
HTML
index.html
<!DOCTYPE html>
<html>
<head>
  <meta charset="utf-8">
  <meta http-equiv="X-UA-Compatible" content="IE=edge">
  <title>Instagtam API 0084</title>
  <link href="//netdna.bootstrapcdn.com/font-awesome/4.0.3/css/font-awesome.min.css" rel="stylesheet">
  <link rel="stylesheet" href="common/instagram.css">
</head>
<body>
  <h1><i class="fa fa-instagram fa-fw"></i>Instagtam API 0084</h1>
  <ul class="instagram"></ul>
  <script src="https://code.jquery.com/jquery.min.js"></script>
  <script src="common/instagram.js"></script>
</body>
</html>
PHP
instagram.php
<?php
//POSTリクエストの場合のみ受付
if($_SERVER['REQUEST_METHOD'] == 'POST'){
    //アクセストークン
    $access_token = "XXXXXXXX.XXXXXXX.XXXXXXXXXXXXXXXXXXXXXXXXXXXXXXXX"; //取得したアクセストークンを設置
    //JSONデータを取得して出力
    echo @file_get_contents("https://api.instagram.com/v1/users/self/media/recent/?access_token={$access_token}");
    //終了
    exit;
}
?>
JavaScript
instagram.js
$(function(){
    var $container = $(".instagram");
    var html = "";

    $.ajax({
        url: "common/instagram.php",//PHPファイルURL
        type:"POST",
        dataType: "json"
    }).done(function(data){
        //通信成功時の処理
        $.each(data.data,function(i,item){
            var imgurl = item.images.low_resolution.url; //低解像度の画像のURLを取得
            var link = item.link; //リンクを取得
            html += "<li><a href='" + link + "' target='_blank'><img src='" + imgurl + "'></a></li>";
        });
    }).fail(function(){
        //通信失敗時の処理
        html = "<li>画像を取得できまへん。</li>";
    }).always(function(){
        //通信完了時の処理
        $container.html(html);
    });
});
-
"XXXXXXXX.XXXXXXX.XXXXXXXXXXXXXXXXXXXXXXXXXXXXXXXX"の箇所に取得したアクセストークンを設置する
CSS
instagram.css
body {
  margin: 0;
  padding: 0;
}

h1 {
  text-align: center;
}

.instagram {
  width: 90%;
  margin: 0 auto 20px;
  padding: 0;
  display: flex;
  flex-wrap: wrap;
  justify-content: space-between;
  list-style: none;
}

.instagram li {
  padding: 20px;
}

.instagram li img {
  width: 320px;
  height: auto;
}

@media screen and (max-width: 47.9375em) {
  .instagram li {
    width: 40%;
    padding: 10px;
  }

  .instagram li img {
    width: 100%;
  }
}
