申し込み
詳細はこちら
さくらのVPS契約方法
登録完了後、メールに記載されている必要事項を控えておく。
- IPアドレス
- ユーザー名
- パスワード
- 会員ID
コントロールパネルにログイン
コントロールパネル:https://secure.sakura.ad.jp/vpscontrol/
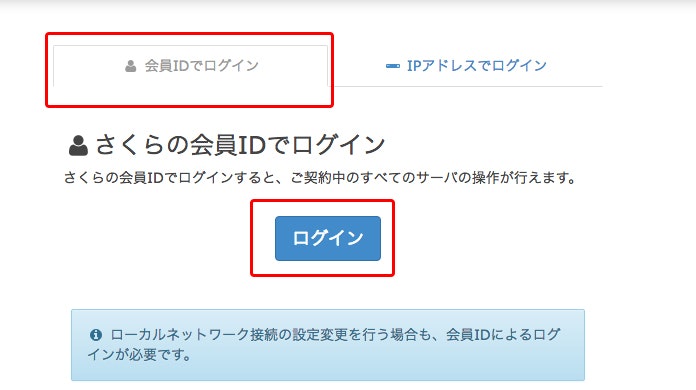
会員IDでログインのタブを選択し、ログインボタンをクリック。
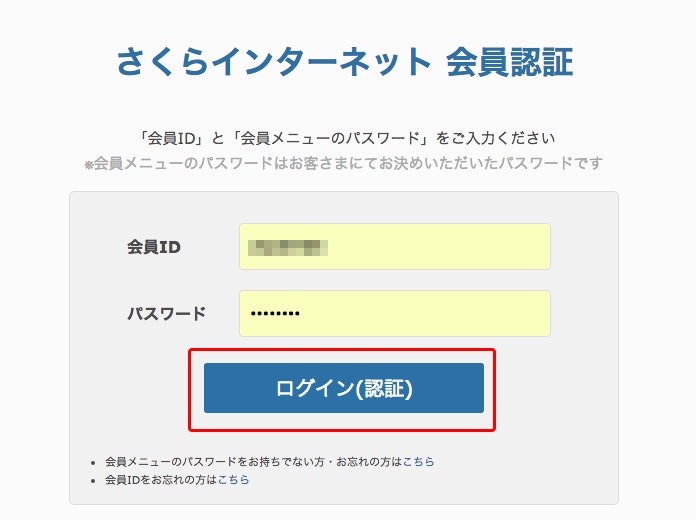
メールに記載されている、会員IDとパスワードを入力し、ログイン(認証)をクリック。
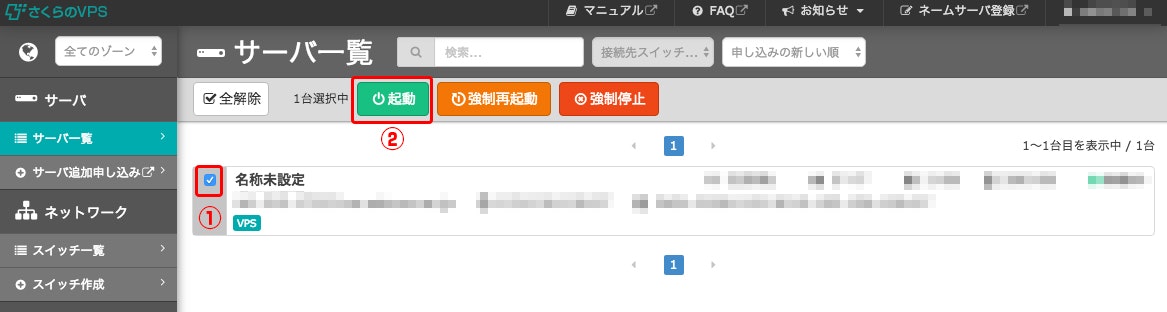
起動させるサーバを選択(①)し、起動をクリック
サーバが稼働中になれば、サーバが立ち上がってる状態になる。(結構時間がかかりますので、長い目で見てください。)
rootユーザーでログインしてみる
サーバが起動したら、VPSに接続する。
※ここからは、コマンドラインの作業になるので、ターミナルを使用。
$ ssh root@IPアドレス
The authenticity of host 'IPアドレス (IPアドレス)' can't be established.
RSA key fingerprint is *******************
Are you sure you want to continue connecting (yes/no)?
yes を選択
Warning: Permanently added 'IPアドレス' (RSA) to the list of known hosts.
root@IPアドレス's password: (メールに記載されているパスワード)

SAKURA Internet [Virtual Private Server SERVICE]
パスワードを入力。(※セキュリティ上、画面には表示されない)
接続に成功すると SAKURA Internet [Virtual Private Server SERVICE] のメッセージが表示される。
yum update
yumとは
アプリケーションを最新にする。
# yum update
初期状態は、何も更新されないが、もしあれば yes を打ち更新する。
日本語化の設定
デフォルトでは、日本語になっていないので設定する。
# vim /etc/sysconfig/i18n
LANG="C"
↓
LANG="ja_JP.UTF-8"
作業用ユーザーを設定
ユーザーとパスワードを作成する。
※パスワードは、強度が弱かったり短いとドヤされます。
# useradd (ユーザー名)
# passwd (任意のパスワード)
作成したユーザーにroot権限を与える
wheelグループにユーザーを追加する。
# usermod -G wheel (作成したユーザー名)
sudoコマンドを使えるようにするため、ファイルの編集
# visudo
/wheel で検索。
n を押して、行を探す。
x を2回押して、#を削除。
escキー を押して、:wqで保存。
## Allows people in group wheel to run all commands

# %wheel   ALL    ALL

↓

## Allows people in group wheel to run all commands

%wheel   ALL    ALL
ターミナル別でタブを開いて、作業用ユーザーでログインできるか確認。
$ ssh hoge@IPアドレス
(ユーザー名)@IPアドレス's password:  ユーザーのパスワード

SAKURA Internet [Virtual Private Server SERVICE]

[hoge@ ~]$
SSH鍵認証の設定
セキュリティ強化のため、SSH鍵認証でログインできるよう設定する。
VPSに鍵を格納するディレクトを作成
ホームディレクトリの直下に鍵を格納するディレクトリを作成し、パーミッションを700に設定。
$ mkdir ~/.ssh
$ chmod 700 ~/.ssh
Mac側で鍵を作成
ssh-keygen -t rsa -v
- id_rsa(秘密鍵。PCに保管)
- id_rsa.pub(公開鍵)
公開鍵のパーミッションを変更する。
chmod 600 .ssh/id_rsa.pub
鍵をVPSへ転送
$ scp ~/.ssh/id_rsa.pub (ユーザー名)@(IPアドレス):~/.ssh/authorized_keys
(ユーザー名)@(IPアドレス)'s password: ユーザーのパスワード
id_rsa.pub                                                            100%
転送されているか確認する。
$ ls -la .ssh

..........
..........
..........
authorized_keys
authorized_keys というメッセージが表示されてたら転送完了。
鍵認証でログイン
ログインできるかの確認。
ssh -i ~/.ssh/id_rsa (ユーザー名)@(IPアドレス)
SSHの設定
rootユーザーでの、ログイン禁止やポート番号の変更などをして、セキュリティをさらに高める。
作業用ユーザーからrootユーザーに切り替える。
-
$一般ユーザー -
#root権限
[hoge@ ~]$ sudo -s

We trust you have received the usual lecture from the local System
Administrator. It usually boils down to these three things:

    #1) Respect the privacy of others.
    #2) Think before you type.
    #3) With great power comes great responsibility.

[sudo] password for hoge: 作業用ユーザーのパスワード
設定ファイルのバックアップ。(なにかあってからでは、遅い。)
# cp /etc/ssh/sshd_config /etc/ssh/sshd_config.org
設定ファイルをVimで編集する。
# vim /etc/ssh/sshd_config
Port番号の変更
/Portで検索。
# を削除。(x で削除)
デフォルトでは「22」になってるので、この部分を「1024 ~ 65535」の番号に変える。
Port 番号
変更したら一旦、escキー で抜ける。
パスワードログインの禁止
/PasswordAuthenticationで検索。
PasswordAuthentication yes

↓

PasswordAuthentication no
変更したら一旦、escキー で抜ける。
rootログインの禁止
/PermitRootLoginで検索。
# PermitRootLogin yes

↓

PermitRootLogin no
すべて変更が完了したら、escキー で抜け、:wq で保存。
設定を反映する
# service sshd restart
sshd を停止中:                                          [  OK  ]
sshd を起動中:                                          [  OK  ]
設定が反映しているか確認する
$ ssh -p ポート番号 hoge@IPアドレス

SAKURA Internet [Virtual Private Server SERVICE]
Firewallの設定
Firewallとは
他のコンピューターネットワークとの通信を制御するもので、変な攻撃などを防ぐための設定。
設定
vimで新規ファイルを立ち上げる。
vim /etc/sysconfig/iptables
下記をコピペする。
※■■■■自分の使ってるSSHのPort番号■■■■ は自分の使用してるPort番号を指定する。
*filter
:INPUT    DROP    [0:0]
:FORWARD  DROP    [0:0]
:OUTPUT   ACCEPT  [0:0]
:SERVICES -       [0:0]
-A INPUT -i lo -j ACCEPT
-A INPUT -p icmp --icmp-type echo-request -m limit --limit 1/s --limit-burst 4  -j ACCEPT
-A INPUT -p tcp -m state --state ESTABLISHED,RELATED -j ACCEPT
-A INPUT -p tcp -m state --state NEW -j SERVICES
-A INPUT -p udp --sport 53 -j ACCEPT
-A INPUT -p udp --sport 123 --dport 123 -j ACCEPT
-A SERVICES -p tcp --dport ■■■■自分の使ってるSSHのPort番号■■■■ -j ACCEPT
-A SERVICES -p tcp --dport 80 -j ACCEPT
-A SERVICES -p tcp --dport 443 -j ACCEPT
COMMIT
設定を反映する
# service iptables start
iptables: ファイアウォールルールを適用中:          [ OK ]
設定が反映しているか確認する
iptables -L
Chain INPUT (policy DROP)
target     prot opt source               destination
ACCEPT     all  --  anywhere             anywhere
ACCEPT     icmp --  anywhere             anywhere            icmp echo-request limit: avg 1/sec burst 4
ACCEPT     tcp  --  anywhere             anywhere            state RELATED,ESTABLISHED
SERVICES   tcp  --  anywhere             anywhere            state NEW
ACCEPT     udp  --  anywhere             anywhere            udp spt:domain
ACCEPT     udp  --  anywhere             anywhere            udp spt:ntp dpt:ntp

Chain FORWARD (policy DROP)
target     prot opt source               destination

Chain OUTPUT (policy ACCEPT)
target     prot opt source               destination

Chain SERVICES (1 references)
target     prot opt source               destination
ACCEPT     tcp  --  anywhere             anywhere            tcp dpt:■■■■自分の使ってるSSHのPort番号■■■■
ACCEPT     tcp  --  anywhere             anywhere            tcp dpt:http
ACCEPT     tcp  --  anywhere             anywhere            tcp dpt:https
WEBサーバーの設定
Apacheをインストール
yum install httpd
[y/N] と聞かれたら、y を押す。
自動起動の設定
Apacheの再起動時などで、自動起動するための設定
chkconfig httpd on
Apacheの設定
設定ファイルのバックアップ。(なにかあってからでは、遅い。何度でも言う。)
cp /etc/httpd/conf/httpd.conf /etc/httpd/conf/httpd.conf.org
httpd.confを編集する。
vim /etc/httpd/conf/httpd.conf
/ServerTokensで検索。
ServerTokens OS

↓

ServerTokens Prod
変更したら一旦、escキー で抜ける。
/ServerSignatureで検索。
ServerSignature ON

↓

ServerSignature Off
変更したら一旦、escキー で抜ける。
/Options Indexesで検索。
いくつか検索に引っかかるが<Directory "/var/www/html"> の下にある箇所を編集。
Indexes 前に- を付ける。
<Directory "/var/www/html">

#
# Possible values for the Options directive are "None", "All",
# or any combination of:
#   Indexes Includes FollowSymLinks SymLinksifOwnerMatch ExecCGI MultiViews
#
# Note that "MultiViews" must be named *explicitly* --- "Options All"
# doesn't give it to you.
#
# The Options directive is both complicated and important.  Please see
# http://httpd.apache.org/docs/2.2/mod/core.html#options
# for more information.
#
    Options Indexes FollowSymLinks

↓

<Directory "/var/www/html">

#
# Possible values for the Options directive are "None", "All",
# or any combination of:
#   Indexes Includes FollowSymLinks SymLinksifOwnerMatch ExecCGI MultiViews
#
# Note that "MultiViews" must be named *explicitly* --- "Options All"
# doesn't give it to you.
#
# The Options directive is both complicated and important.  Please see
# http://httpd.apache.org/docs/2.2/mod/core.html#options
# for more information.
#
    Options -Indexes FollowSymLinks
すべて変更が完了したら、escキー で抜け、:wq で保存。
設定を起動する
反映されているかのテスト。
# service httpd configtest
Syntax OK
反映されてるのがOKであれば起動する。
service httpd start
おわりに
これで、大体の初期設定は、完了したかと思います。
VirtualHostの設定やPHP、MySQLの設定も随時していこうかと思います。