要約
FlutterアプリのFirebase設定ファイルをgitリポジトリに含めず、Codemagicでflutterfire configureを自動実行してビルドする方法を解説します。
はじめに
Flutterアプリ開発でFirebaseを使う際、GoogleService-Info.plistやgoogle-services.json、firebase_options.dartなどの設定ファイルをgitリポジトリに含めるべきか悩んだことはありませんか?
複数環境(dev / staging / prod)の切り替えやチームへの配布を考えると、設定ファイルを直接コミットせずにCI/CDで自動生成したいケースがあります。この記事では、Codemagicでflutterfire configureを自動実行して設定ファイルを生成する方法を紹介します。
これらの設定ファイルに含まれるFirebaseのAPIキーは、プロジェクトを識別するための識別子であり秘密情報ではありません(公式ドキュメント)。そのため本来リポジトリにコミットしても問題なく、Firebaseのセキュリティは Security Rules と App Check で担保します。本当に秘密として扱うべきなのは、CIで使うサービスアカウントキーのほうです。
対象読者
- FlutterでFirebaseを使用している人
- CodemagicでCI/CDを構築したい人
- Firebase設定ファイルの管理に悩んでいる人
FlutterFire CLIとは
FlutterFireは、FlutterアプリをFirebaseに接続するプラグインセットです。FlutterFire CLIは、FlutterプロジェクトのFirebase設定を自動化するコマンドラインツールです。
flutterfire configureコマンドの役割
このコマンドは、Firebase プロジェクトの設定情報を取得し、以下のファイルを自動生成します:
-
firebase_options.dart- プロジェクト固有の設定情報 - プラットフォーム固有の設定ファイル(
GoogleService-Info.plist、google-services.jsonなど)
開発メンバーは各自のローカル環境でflutterfire configureを実行することで、開発用のFirebase設定ファイルを生成することができます。
実装手順
1. .gitignoreの設定
CIで生成する構成にするため、自動生成ファイルをgit管理から除外します。
# Firebase
GoogleService-Info.plist
google-services.json
firebase_options*.dart
既存のプロジェクトでこれらのファイルがgitに含まれている場合は、git rm --cachedで一度追跡から外してからcommitしてください。
2. Firebaseサービスアカウントキーの準備
サービスアカウントキーの取得
- Firebase Console → プロジェクト設定 → サービスアカウント
- 「新しい秘密鍵の生成」をクリック
- JSONファイルをダウンロード
サービスアカウントキーは管理者権限を持つ本物の秘密鍵です。絶対にリポジトリにコミットせず、CIには環境変数として渡してください。
Base64エンコード
サービスアカウントキーファイルはCodemagic上に直接配置できないため、Base64エンコードして環境変数として設定します。
ローカル環境で以下のコマンドを実行してエンコードします。
# macOS/Linux
base64 -i path/to/firebase-service-account.json

# Windows
certutil -encode path/to/firebase-service-account.json encoded.txt
エンコード結果は改行を含まない一行の文字列として保存してください。
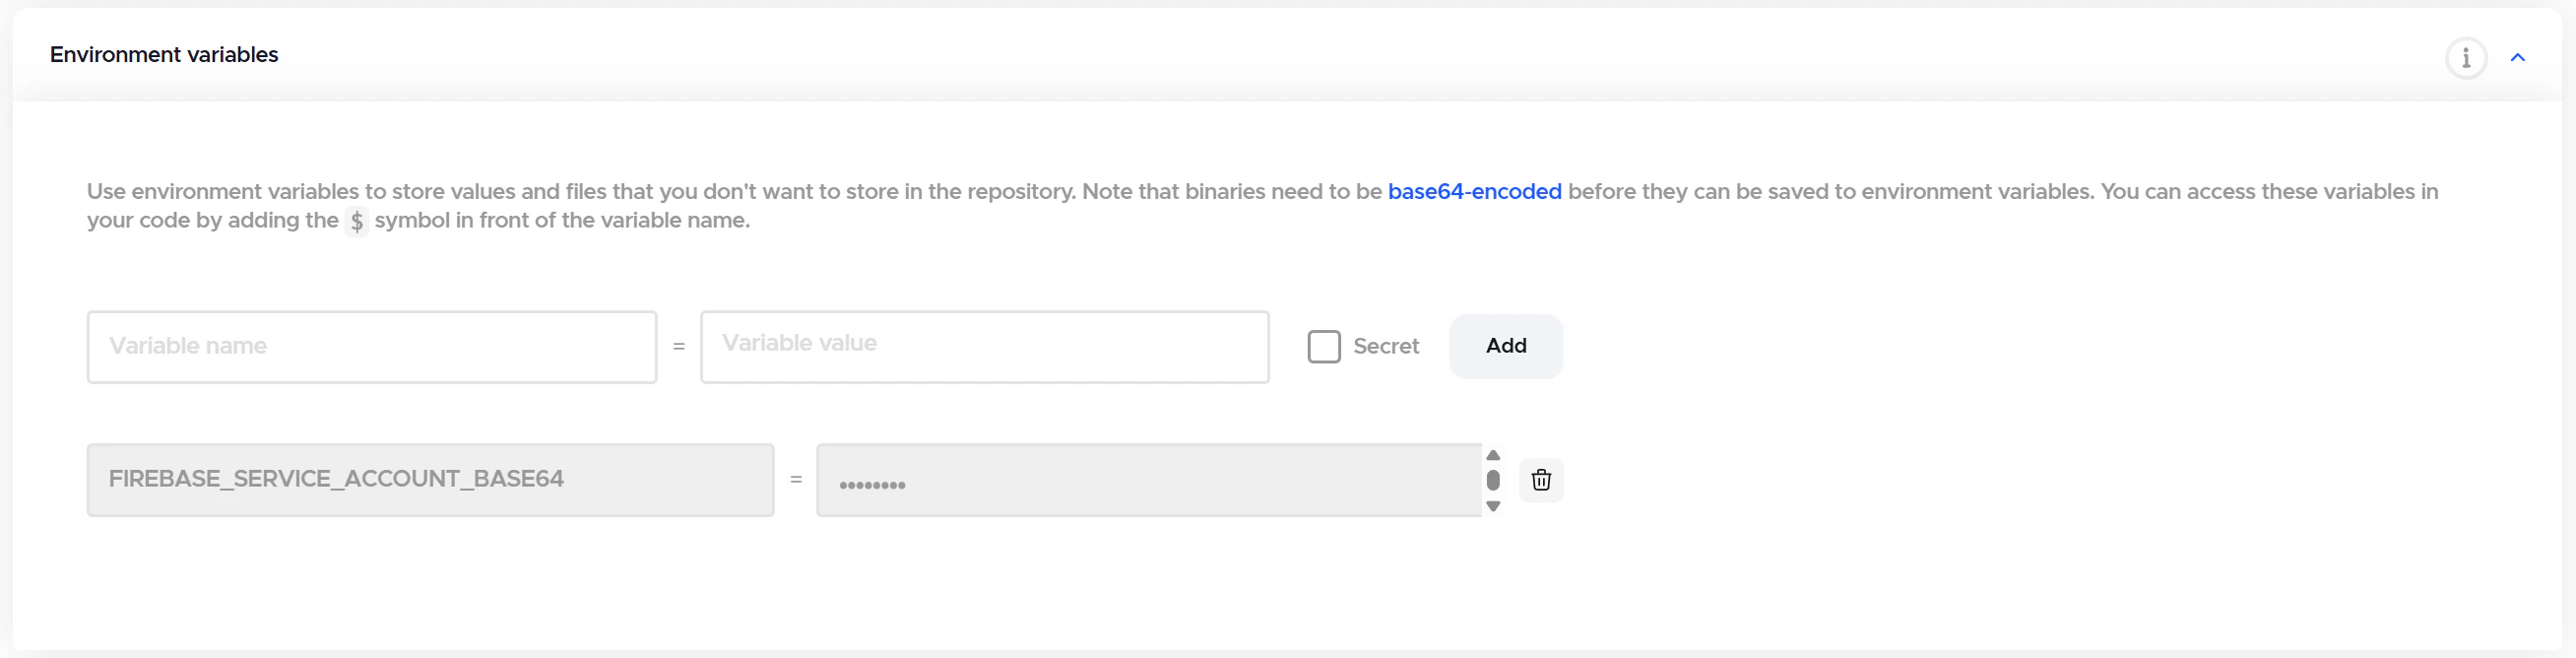
3. CI環境での環境変数設定
Codemagicでの設定例
- プロジェクト → Settings → Environment variables
- 以下の環境変数を追加:
FIREBASE_SERVICE_ACCOUNT_BASE64: [base64エンコードした内容]
環境変数は必ず「Secure」にチェックを入れて、ログに出力されないようにしてください。
4. CI実行スクリプトの実装
CodemagicのPre-build scriptに以下を記述します:
echo $FIREBASE_SERVICE_ACCOUNT_BASE64 | base64 --decode > firebase-service-account.json
export GOOGLE_APPLICATION_CREDENTIALS="firebase-service-account.json"

dart pub global activate flutterfire_cli
flutterfire configure --project=your-project-id --platforms=android,ios --yes
your-project-idの部分は実際のFirebaseプロジェクトIDに置き換えてください。
スクリプトの詳細解説
ポイント1: --yesフラグ
対話式プロンプトをスキップして、CI環境での自動実行を可能にします。
ポイント2: GOOGLE_APPLICATION_CREDENTIALS
The FlutterFire CLI depends on the underlying Firebase CLI.
CLI | FlutterFire
FlutterFire CLIは内部でFirebase CLIに依存しており、Firebase CLIがGOOGLE_APPLICATION_CREDENTIALS環境変数を使用してサービスアカウントキーファイルの場所を特定します。そのため、CI環境でFlutterFire CLIを動作させるには、この環境変数の設定が必要です。
実行結果
このスクリプトを実行すると、以下のファイルが自動生成されます:
lib/firebase_options.dart-
android/app/google-services.json(Androidの場合) -
ios/Runner/GoogleService-Info.plist(iOSの場合)
生成されたファイルはビルド用に一時的に生成されるものなので、CI実行後は破棄されます。
まとめ
この方法により、以下を実現できます:
- 設定ファイル管理の簡素化: 自動生成ファイルをコミットせず、環境ごとにCIで生成
- 運用効率化: CodemagicでのFirebase設定の自動生成
- サービスアカウントキーの安全な取り扱い: 本物の秘密は環境変数として管理