Spring Security は 5.4 以降、設定の書き方に大幅な変更が入っています。
詳しくは @suke_masa さんの Spring Security 5.7でセキュリティ設定の書き方が大幅に変わる件 - Qiita を参照してください。
基礎・仕組み的な話
認証・認可の話
Remember-Me の話
CSRF の話
レスポンスヘッダーの話
メソッドセキュリティの話
CORS の話
Run-As の話
ACL の話
テストの話
MVC, Boot との連携の話
番外編
Spring Security にできること・できないこと
同時セッション数の制御
デフォルトだと、同じユーザーで複数のセッションをつくることができる。
つまり、同じユーザーで異なる端末からいくつでもログインすることができることになっている。
設定を変更すると、同時セッション数を制限したり、もしくは複数ログインを全くできないようにすることができる。
同時セッション数を制限する
実装
namespace
<?xml version="1.0" encoding="UTF-8"?>
<web-app xmlns="http://xmlns.jcp.org/xml/ns/javaee"
         xmlns:xsi="http://www.w3.org/2001/XMLSchema-instance"
         xsi:schemaLocation="http://xmlns.jcp.org/xml/ns/javaee
         http://xmlns.jcp.org/xml/ns/javaee/web-app_3_1.xsd"
         version="3.1">

    <filter>
        <filter-name>springSecurityFilterChain</filter-name>
        <filter-class>org.springframework.web.filter.DelegatingFilterProxy</filter-class>
    </filter>

    <filter-mapping>
        <filter-name>springSecurityFilterChain</filter-name>
        <url-pattern>/*</url-pattern>
    </filter-mapping>

    <listener>
        <listener-class>org.springframework.web.context.ContextLoaderListener</listener-class>
    </listener>

    <listener>
        <listener-class>org.springframework.security.web.session.HttpSessionEventPublisher</listener-class>
    </listener>
</web-app>
<?xml version="1.0" encoding="UTF-8"?>
<beans xmlns="http://www.springframework.org/schema/beans"
       xmlns:sec="http://www.springframework.org/schema/security"
       xmlns:xsi="http://www.w3.org/2001/XMLSchema-instance"
       xsi:schemaLocation="
         http://www.springframework.org/schema/beans
         http://www.springframework.org/schema/beans/spring-beans-3.0.xsd
         http://www.springframework.org/schema/security
         http://www.springframework.org/schema/security/spring-security.xsd">

    <sec:http>
        <sec:intercept-url pattern="/login" access="permitAll" />
        <sec:intercept-url pattern="/**" access="isAuthenticated()" />
        <sec:form-login />
        <sec:logout />

        <sec:session-management>
            <sec:concurrency-control max-sessions="1" />
        </sec:session-management>
    </sec:http>

    <sec:authentication-manager>
        <sec:authentication-provider>
            <sec:user-service>
                <sec:user name="hoge" password="hoge" authorities="" />
            </sec:user-service>
        </sec:authentication-provider>
    </sec:authentication-manager>
</beans>
Java Configuration
package sample.spring.security;

import org.springframework.security.web.context.AbstractSecurityWebApplicationInitializer;

public class MySpringSecurityInitializer extends AbstractSecurityWebApplicationInitializer {
    public MySpringSecurityInitializer() {
        super(MySpringSecurityConfig.class);
    }

    @Override
    protected boolean enableHttpSessionEventPublisher() {
        return true;
    }
}
package sample.spring.security;

import org.springframework.beans.factory.annotation.Autowired;
import org.springframework.security.config.annotation.authentication.builders.AuthenticationManagerBuilder;
import org.springframework.security.config.annotation.web.builders.HttpSecurity;
import org.springframework.security.config.annotation.web.configuration.EnableWebSecurity;
import org.springframework.security.config.annotation.web.configuration.WebSecurityConfigurerAdapter;

import java.util.Collections;

@EnableWebSecurity
public class MySpringSecurityConfig extends WebSecurityConfigurerAdapter {

    @Override
    public void configure(HttpSecurity http) throws Exception {
        http.authorizeRequests()
                .antMatchers("/login").permitAll()
                .anyRequest().authenticated()
                .and()
                .formLogin()
                .and()
                .sessionManagement().maximumSessions(1);
    }

    @Autowired
    public void configure(AuthenticationManagerBuilder auth) throws Exception {
        auth.inMemoryAuthentication()
            .withUser("hoge")
            .password("hoge")
            .authorities(Collections.emptyList());
    }
}
動作確認
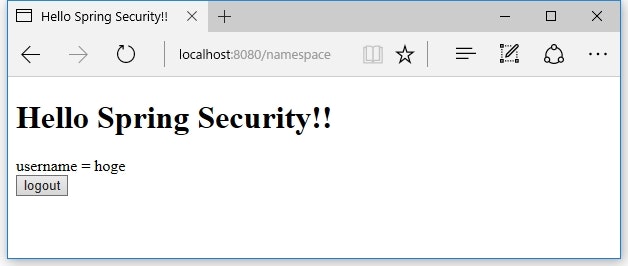
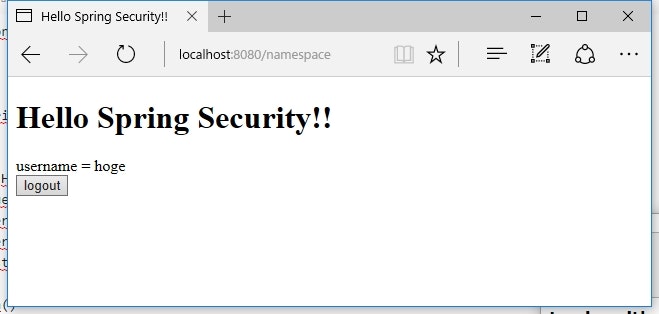
1つ目のブラウザでログイン。
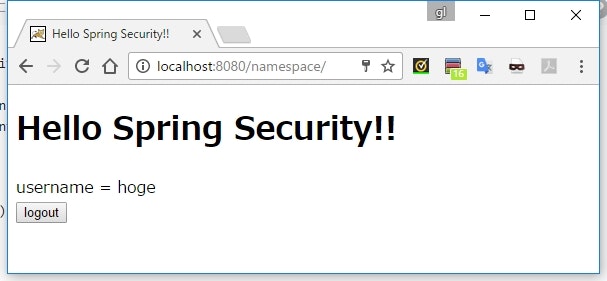
別のブラウザで、同じユーザでログイン。
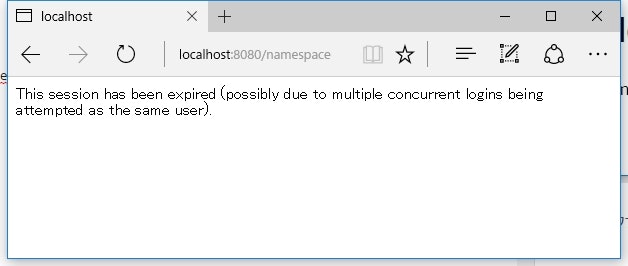
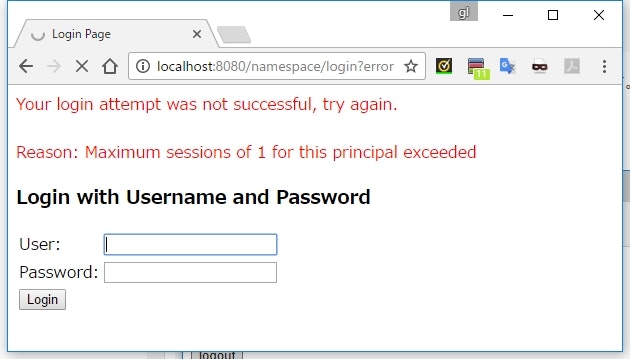
1つ目のブラウザを再表示させると、エラーメッセージが表示される。
説明
    <listener>
        <listener-class>org.springframework.security.web.session.HttpSessionEventPublisher</listener-class>
    </listener>
    @Override
    protected boolean enableHttpSessionEventPublisher() {
        return true;
    }
- セッションが新たに作成されたことを Spring Security が検知できるようにするため、
HttpSessionEventPublisherをリスナーとして登録する必要がある -
web.xmlを使っているなら、普通に<listener>で宣言する。 -
WebApplicationInitializerを利用しているなら、enableHttpSessionEventPublisher()メソッドをオーバーライドしてtrueを返すようにすると、HttpSessionEventPublisherをリスナーをとして登録してくれる。
<?xml version="1.0" encoding="UTF-8"?>
<beans xmlns="http://www.springframework.org/schema/beans"
       xmlns:sec="http://www.springframework.org/schema/security"
       ...>

    <sec:http>
        ...

        <sec:session-management>
            <sec:concurrency-control max-sessions="1" />
        </sec:session-management>
    </sec:http>

    ...
</beans>
-
<session-management>タグを追加し、<concurrency-control>タグを追加、max-sessions属性で最大セッション数を指定する。
...

@EnableWebSecurity
public class MySpringSecurityConfig extends WebSecurityConfigurerAdapter {

    @Override
    public void configure(HttpSecurity http) throws Exception {
        http.authorizeRequests()
                ...
                .and()
                .sessionManagement().maximumSessions(1);
    }

    ...
}
-
sessionManagement().maximumSessions(int)で指定する。
エラー画面を指定する
デフォルトだとエラーメッセージしか表示されない画面になってしまうので、指定のページ(例えばログインページ)に飛ばすようにする。
namespace
<?xml version="1.0" encoding="UTF-8"?>
<beans xmlns="http://www.springframework.org/schema/beans"
       xmlns:sec="http://www.springframework.org/schema/security"
       ...>

    <sec:http>
        ...

        <sec:session-management >
            <sec:concurrency-control max-sessions="1" expired-url="/login" />
        </sec:session-management>
    </sec:http>

    ...
</beans>
-
expired-url属性に URL, パスを指定する。
Java Configuration
...

@EnableWebSecurity
public class MySpringSecurityConfig extends WebSecurityConfigurerAdapter {

    @Override
    public void configure(HttpSecurity http) throws Exception {
        http.authorizeRequests()
                ...
                .and()
                .sessionManagement().maximumSessions(1).expiredUrl("/login");
    }

    ...
}
-
expiredUrl(String)メソッドで指定する。
エラー時の処理を実装で指定する
package sample.spring.security.session;

import org.springframework.security.web.DefaultRedirectStrategy;
import org.springframework.security.web.session.SessionInformationExpiredEvent;
import org.springframework.security.web.session.SessionInformationExpiredStrategy;

import javax.servlet.ServletException;
import java.io.IOException;

public class MySessionInformationExpiredStrategy implements SessionInformationExpiredStrategy {

    @Override
    public void onExpiredSessionDetected(SessionInformationExpiredEvent event) throws IOException, ServletException {
        DefaultRedirectStrategy redirectStrategy = new DefaultRedirectStrategy();
        redirectStrategy.sendRedirect(event.getRequest(), event.getResponse(), "/login");
    }
}
-
SessionInformationExpiredStrategyを実装したクラスを作る。 -
onExpiredSessionDetected()メソッドで、エラー時の処理を実装する。- ここでは、
/loginにリダイレクトさせている。
- ここでは、
namespace
<?xml version="1.0" encoding="UTF-8"?>
<beans xmlns="http://www.springframework.org/schema/beans"
       xmlns:sec="http://www.springframework.org/schema/security"
       ...>

    <bean id="sies" class="sample.spring.security.session.MySessionInformationExpiredStrategy" />

    <sec:http>
        ...

        <sec:session-management >
            <sec:concurrency-control max-sessions="1" expired-session-strategy-ref="sies" />
        </sec:session-management>
    </sec:http>

    ...
</beans>
-
expired-session-strategy-refで、SessionInformationExpiredStrategyの Bean を指定する。
Java Configuration
...

import sample.spring.security.session.MySessionInformationExpiredStrategy;

@EnableWebSecurity
public class MySpringSecurityConfig extends WebSecurityConfigurerAdapter {

    @Override
    public void configure(HttpSecurity http) throws Exception {
        http.authorizeRequests()
                ...
                .and()
                .sessionManagement()
                    .maximumSessions(1)
                    .expiredSessionStrategy(new MySessionInformationExpiredStrategy());
    }

    ...
}
-
expiredSessionStrategy(SessionInformationExpiredStrategy)メソッドで登録する。
上限を超えてログインできないようにする
max-sessions (maximumSessions) を指定しただけだと、上限を超えてログインした場合は古いセッションから破棄されていく。
逆に、上限を超えてログインしようとしたら新しくセッションを作ろうとしたほうをエラーにすることもできる。
ただし、この設定を有効にした場合、古いセッションが切れるか明示的にログアウトするまで新しいログインができなくなる可能性があるので注意。
namespace
<?xml version="1.0" encoding="UTF-8"?>
<beans xmlns="http://www.springframework.org/schema/beans"
       xmlns:sec="http://www.springframework.org/schema/security"
       ...>

    <sec:http>
        ...

        <sec:session-management >
            <sec:concurrency-control max-sessions="1" error-if-maximum-exceeded="true" />
        </sec:session-management>
    </sec:http>

    ...
</beans>
-
error-if-maximum-exceededにtrueを指定する。
Java Configuration
...

@EnableWebSecurity
public class MySpringSecurityConfig extends WebSecurityConfigurerAdapter {

    @Override
    public void configure(HttpSecurity http) throws Exception {
        http.authorizeRequests()
                ...
                .and()
                .sessionManagement()
                    .maximumSessions(1)
                    .maxSessionsPreventsLogin(true);
    }

    ...
}
-
maxSessionsPreventsLogin(boolean)メソッドでtrueを渡す。
動作確認
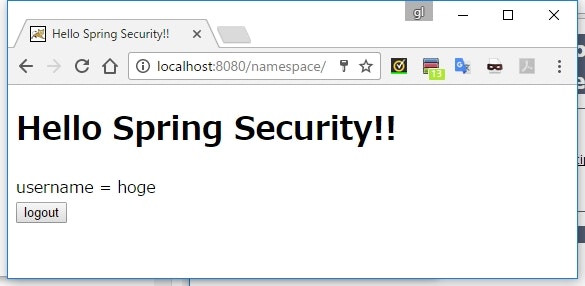
1つ目のブラウザでログインする。
2つ目のブラウザで、同一ユーザでログインしようとすると、エラーになる。
エラー時の遷移先を指定する
実装
<%@page contentType="text/html" pageEncoding="UTF-8"%>
<!DOCTYPE html>
<html>
    <head>
        <meta charset="UTF-8" />
        <title>Max Session</title>
    </head>
    <body>
        <h1>セッション数が上限に達しています</h1>

        <%@page import="org.springframework.security.core.AuthenticationException" %>
        <%@page import="org.springframework.security.web.WebAttributes" %>
        <%
            AuthenticationException e = (AuthenticationException)session.getAttribute(WebAttributes.AUTHENTICATION_EXCEPTION);
            pageContext.setAttribute("errorMessage", e.getMessage());
        %>

        <h2 style="color: red;">${errorMessage}</h2>
    </body>
</html>
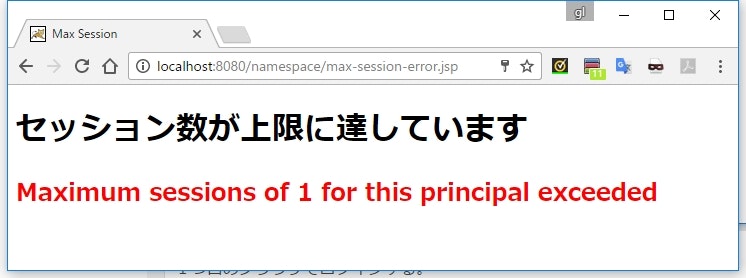
遷移先にするページ。
エラーメッセージを表示させている。
namespace
<?xml version="1.0" encoding="UTF-8"?>
<beans xmlns="http://www.springframework.org/schema/beans"
       xmlns:sec="http://www.springframework.org/schema/security"
       ...>

    <sec:http>
        <sec:intercept-url pattern="/login" access="permitAll" />
        <sec:intercept-url pattern="/max-session-error.jsp" access="permitAll" />
        <sec:intercept-url pattern="/**" access="isAuthenticated()" />
        <sec:form-login authentication-failure-url="/max-session-error.jsp" />
        <sec:logout />

        <sec:session-management>
            <sec:concurrency-control max-sessions="1" error-if-maximum-exceeded="true" />
        </sec:session-management>
    </sec:http>

    ...
</beans>
Java Configuration
...

@EnableWebSecurity
public class MySpringSecurityConfig extends WebSecurityConfigurerAdapter {

    @Override
    public void configure(HttpSecurity http) throws Exception {
        http.authorizeRequests()
                .antMatchers("/login").permitAll()
                .antMatchers("/max-session-error.jsp").permitAll()
                .anyRequest().authenticated()
                .and()
                .formLogin()
                    .failureUrl("/max-session-error.jsp")
                .and()
                .sessionManagement()
                    .maximumSessions(1)
                    .maxSessionsPreventsLogin(true);
    }

    ...
}
動作確認
1つ目のブラウザでログインする。
2つ目のブラウザでログインすると、指定したエラーページ(max-session-error.jsp)に遷移する。
説明
        <sec:intercept-url pattern="/login" access="permitAll" />
        <sec:intercept-url pattern="/max-session-error.jsp" access="permitAll" />
        <sec:intercept-url pattern="/**" access="isAuthenticated()" />
        <sec:form-login authentication-failure-url="/max-session-error.jsp" />
- セッション数が上限を超えて Form ログインしようとした場合のエラーページは、 Form ログインの設定である
<form-login>タグのauthentication-failure-url属性で行うことになる。 - 当然、普通にパスワードなどをミスって飛ばされるエラーページもここで指定したページになってしまう。
- なので、実際はログイン画面の URL を指定して、ログイン画面側(もしくはログイン画面のコントローラ)でエラーを識別してメッセージを切り替えるようなことが必要になりそう。
- もしくは
authentication-failure-handler-refでAuthenticationFailureHandlerを指定することで、認証エラーをハンドリングするという選択もある(AuthenticationFailureHandlerについてはこちら) - セッション上限エラーの場合は、
SessionAuthenticationExceptionがスローされる。
なんで Form ログインの設定になる?
UsernamePasswordAuthenticationFilter でチェックが行われている
セッション上限数チェックでエラーになったときの遷移先の指定が、なぜ <form-login> タグの設定になるのか?
        <sec:session-management>
            <sec:concurrency-control max-sessions="1" error-if-maximum-exceeded="true" />
        </sec:session-management>
-
<session-management>タグを追加すると、SessionManagementFilterという Filter が追加される。 - この Filter が持つ
SessionAuthenticationStrategyというクラスで、同時セッション数のチェックなどが行われる。- 具体的には
ConcurrentSessionControlAuthenticationStrategy。
- 具体的には
- ところが、この
SessionAuthenticationStrategyは、 Form ログイン処理を実行するUsernamePasswordAuthenticationFilterも持っている。- 厳密には、親クラスの
AbstractAuthenticationProcessingFilterが持ってる。
- 厳密には、親クラスの
-
UsernamePasswordAuthenticationFilterでの認証が成功すると、SessionAuthenticationStrategyにセッションに関する認証処理が委譲される。 - そして、そのときに同時セッション数のチェックが行われる。
- ここで上限数オーバーのエラーになった場合、エラーをハンドリングするのは当然
UsernamePasswordAuthenticationFilterになる。-
SessionManagementFilterは、UsernamePasswordAuthenticationFilterの後で待ち構えている。
-
- よって、セッション上限数オーバーのエラーページ指定は Form ログインの設定の方が採用されることになる。
じゃあ SessionManagementFilter はいつ仕事する?
-
SessionManagementFilterは、非対話型の認証処理でログインされた場合のときの処理を担当している。 - 非対話型の認証処理で典型的なのは、 Remember-Me 認証による自動ログイン。
Form ログインのときも SessionManagementFilter に処理を託せないのか?
これは個人的な推測で、正しいかどうかは分かっていません
- Form ログインに成功すると、 Filter の連鎖はそこで中断し、ログイン後のページにリダイレクトする処理が行われる。
- つまり、
UsernamePasswordAuthenticationFilterより後ろにいる Filter は実行されない。 -
SessionManagementFilterはUsernamePasswordAuthenticationFilterより後ろにいる Filter なので、 Form ログインのときのセッションチェックをSessionManagementFilterに託すことはできない。 -
SessionManagementFilterをUsernamePasswordAuthenticationFilterより前に置いたらどう? と思ったが、ログインが成功した後のチェックをするはずのSessionManagementFilterをログイン処理が行われるUsernamePasswordAuthenticationFilterの前に置くのは本末転倒なので、こうなっているのかもしれない。
Remember-Me と組み合わせられない?
Remember-Me の自動ログインでセッション数オーバーになった場合
実装
<?xml version="1.0" encoding="UTF-8"?>
<beans xmlns="http://www.springframework.org/schema/beans"
       xmlns:sec="http://www.springframework.org/schema/security"
       ...>

    <sec:http>
        <sec:intercept-url pattern="/login" access="permitAll" />
        <sec:intercept-url pattern="/**" access="isAuthenticated()" />
        <sec:form-login />
        <sec:remember-me />
        <sec:logout />

        <sec:session-management>
            <sec:concurrency-control max-sessions="1" error-if-maximum-exceeded="true" />
        </sec:session-management>
    </sec:http>

    ...
</beans>
動作結果
Remember-Me を有効にしてログインする(ブラウザA)。
しばらく放置して、セッションがタイムアウトするのを待つ(Remember-Me トークンの期限は切れていない前提)。
別のブラウザ(ブラウザB)でログインし、タイムアウトしたブラウザ(ブラウザA)で画面を再描画する。
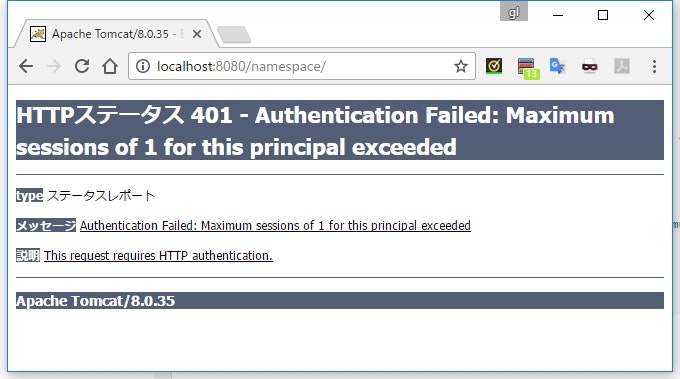
401 エラー画面に飛ばされる(ブラウザA)。
エラー時のパスを指定した場合
デフォルトだと、 Remember-Me でセッション上限オーバーのエラーが発生すると、上記のように 401 エラーになってサーバーのエラーページに飛ばされてしまう。
任意のパスに飛ばすには、リファレンスでは <session-management> タグの session-authentication-error-url 属性を指定すればいいと書いてある。
If the second authentication takes place through another non-interactive mechanism, such as "remember-me", an "unauthorized" (401) error will be sent to the client.
If instead you want to use an error page, you can add the attribute session-authentication-error-url to the session-management element.
(訳)
もし2回目の認証が他(Formログイン以外)の非対話型メカニズム(例えば Remember-Me)によって行われる場合、 401 unauthorized エラーがクライアントに送信されます。
もし代わりにエラーページを使いたい場合、session-management要素にsession-authentication-error-url属性を追加することができます。
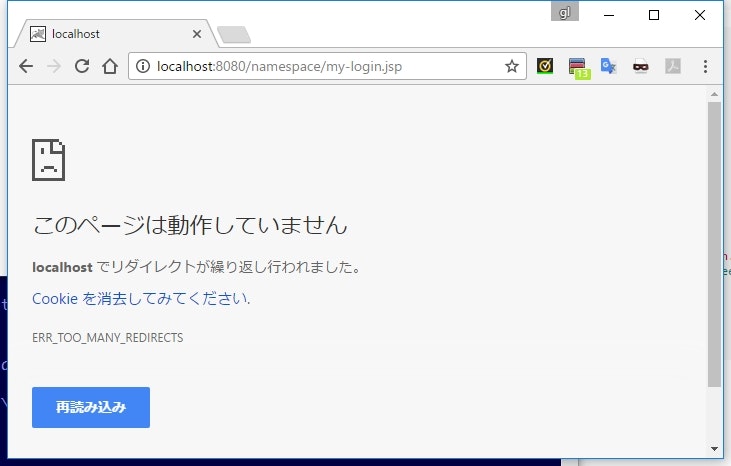
しかし、実際にそのパスを指定すると、リダイレクトループが発生してしまう。
実装
<%@taglib prefix="c" uri="http://java.sun.com/jsp/jstl/core" %>
<%@page contentType="text/html" pageEncoding="UTF-8"%>
<!doctype html>
<html>
    <head>
        <meta charset="utf-8" />
        <title>My Login Page</title>
    </head>
    <body>
        <h1>My Login Page</h1>

        <c:url var="loginUrl" value="/login" />
        <form action="${loginUrl}" method="post">
            <div>
                <label>ユーザー名: <input type="text" name="username" /></label>
            </div>
            <div>
                <label>パスワード: <input type="password" name="password" /></label>
            </div>
            <div>
                <label>Remember-Me : <input type="checkbox" name="remember-me"></label>
            </div>
            <input type="submit" value="login" />
            <input type="hidden" name="${_csrf.parameterName}" value="${_csrf.token}" />
        </form>
    </body>
</html>
<?xml version="1.0" encoding="UTF-8"?>
<beans xmlns="http://www.springframework.org/schema/beans"
       xmlns:sec="http://www.springframework.org/schema/security"
       ...>

    <sec:http>
        <sec:intercept-url pattern="/login" access="permitAll" />
        <sec:intercept-url pattern="/my-login.jsp" access="permitAll" />
        <sec:intercept-url pattern="/**" access="isAuthenticated()" />
        <sec:form-login login-page="/my-login.jsp" />
        <sec:remember-me />
        <sec:logout />

        <sec:session-management session-authentication-error-url="/my-login.jsp">
            <sec:concurrency-control max-sessions="1" error-if-maximum-exceeded="true" />
        </sec:session-management>
    </sec:http>

    ...
</beans>
動作結果
なぜこんな現象が発生するのか?
Remember-Me の場合は SessionManagementFilter でセッション数のチェックが行われる。
ここで session-authentication-error-url で指定した URL にリダイレクトが行われる。
すると、 URL にリダイレクトしたときに再び一連の Filter が実行され、 Remember-Me による自動ログインと SessionManagementFilter によるセッション数のチェックが行われる。
当然、再度エラーが発生し session-authentication-error-url で指定した URL にリダイレクトが行われる。
結果、リダイレクトのループが発生する。
検索したけど、同じような話で困っているというのは見当たらなかった。
回避方法も見つけられない。
なんか勘違いしているのだろうか・・・?
ちなみにこの現象は、 Spring Security がデフォルトで生成するログインページを使用している場合は発生しない。
これは、 SessionManagementFilter より前に DefaultLoginPageGeneratingFilter が存在しているため、セッション数のチェックが繰り返されるよりも前にデフォルトのログインページに遷移させられるため回避されている。
セッション固定化攻撃対策
セッション固定化攻撃自体の説明は、 IPA の解説ページとかを参照。
対策としては、ログインの前後でセッションIDを変更するのが良いとされている。
Spring Security もデフォルトでこの対策が有効になっており、ログインの前後でセッションID(JSESSIONID)が変更されるようになっている。
動作確認
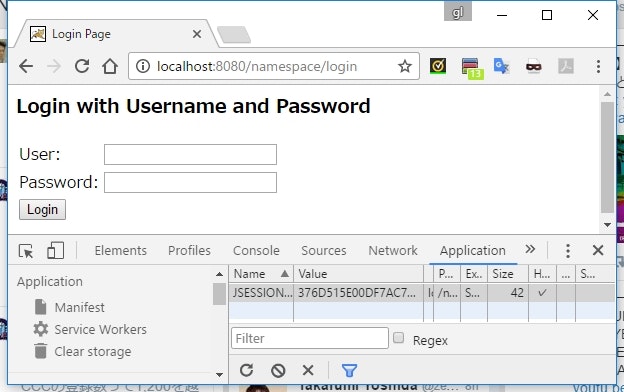
ログイン前の JSESSIONID は 376D515...
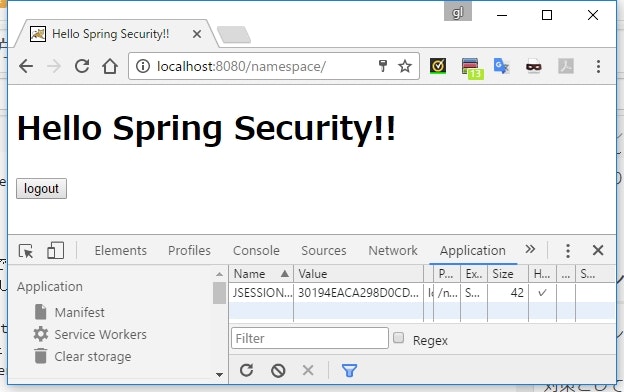
ログインする
ログイン後の JSESSIONID は 30194EA... と変わっているのが分かる。
セッションID の変更を制御する
一応、このログイン後にセッションID を変更するかどうかは、設定で変更できるようになっている。
namespace
<?xml version="1.0" encoding="UTF-8"?>
<beans xmlns="http://www.springframework.org/schema/beans"
       xmlns:sec="http://www.springframework.org/schema/security"
       ...>

    <sec:http>
        ...
        <sec:session-management session-fixation-protection="none" />
    </sec:http>

    ...
</beans>
-
<session-management>のsession-fixation-protection属性を指定 - ここでは
noneを指定して、セッションID の変更を無効にしている
Java Configuration
...

@EnableWebSecurity
public class MySpringSecurityConfig extends WebSecurityConfigurerAdapter {

    @Override
    public void configure(HttpSecurity http) throws Exception {
        http.authorizeRequests()
                ...
                .and()
                .sessionManagement()
                    .sessionFixation().none();
    }

    ...
}
-
sessionFixation().none()と設定
動作確認
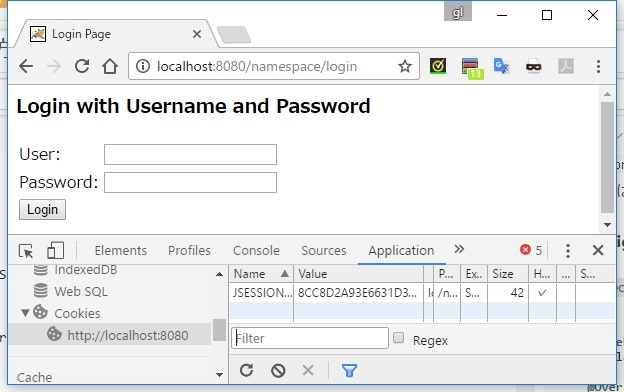
ログイン前が 8CC8D2...
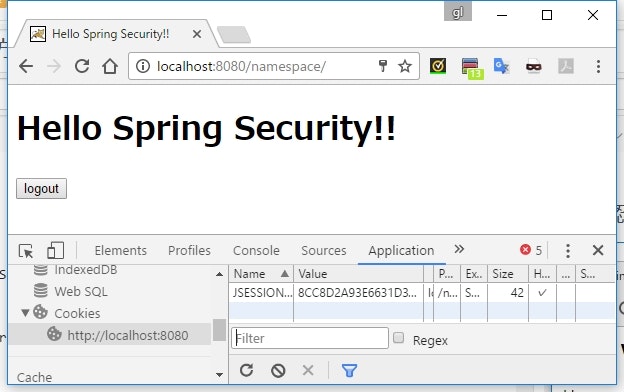
ログイン後も 8CC8D2...
変わらなくなった。
ただ、 none を指定しなければならない場面は想像できないが。。。
session-fixation-protection には次のような値を指定できる
| 値 | 説明 |
|---|---|
none |
セッションID を変更しない |
newSession |
新しいセッションを作る。Spring Security が管理する属性情報以外は破棄される |
migrateSession |
新しいセッションを作って、属性も移植する(Servlet 3.0 以下の環境ではデフォルト) |
changeSessionId |
HttpServletRequest に追加された changeSessionId() で ID を振りなおす(Servlet 3.1 以上の環境ではデフォルト) |
