前回の続きです。
前回の記事では、Devise のコントローラーを以下のように拡張しましたが、new メソッドしか実装していませんでした。その為 /users/sign_up からフォームを送信すると、また味気ない画面に戻ってしまいます。
class Users::RegistrationsController < Devise::RegistrationsController
  include Locomotive::Routing::SiteDispatcher
  include Locomotive::Render
  include Locomotive::ActionController::LocaleHelpers
  before_filter :require_site
  def new
    build_resource({})
    @page ||= self.locomotive_page('/userregistration')
    respond_to do |format|
      format.html {
         render :inline => @page.render(self.locomotive_context({ 'user' => resource}))
      }
    end
  end
  def create
    super # ←こっちを実装しなくてはならない
  end
end
createメソッドの実装
いきなり結論ですが、Devise 側の処理と LocomotiveCMS の処理を組み合わせた所、以下のようなメソッドの追加が必要になりました。
(2014/04/08追記)もしかしたら、create 部分の実装をいじる必要はなくて、単純に flash メッセージと after_sign_up_path_for を工夫すれば良い気もしてきました。どうもこの辺は気持ち悪かったんですよね。実装方法変えたらあとで更新します。
  def create
    build_resource(params.fetch(resource_name, {})) #パラメータから resource クラスを作成(Userクラスが入っている)

    resource_saved = resource.save #保存
    yield resource if block_given?
    if resource_saved   #ユーザ登録成功
      if resource.active_for_authentication?
        # メールによる確認なし
        sign_up(resource_name, resource)
        respond_with resource, location: after_sign_up_path_for(resource)
      else
        # メールによる確認あり
        @page = self.locomotive_page('/registrationconfirm')
        expire_data_after_sign_in!
        respond_to do |format|
          format.html {
             render :inline => @page.render(self.locomotive_context({}))
          }
        end
      end
    else
      # バリデーションエラー(再度入力フォームを呼び出す)
      @page ||= self.locomotive_page('/userregistration')
      clean_up_passwords resource
      respond_to do |format|
        format.html {
           render :inline => @page.render(self.locomotive_context({ 'user' => resource, 'error' => devise_error_messages! }))
        }
      end
    end
  end
  # エラーメッセージを作って返す
  def devise_error_messages!
    return "" if resource.errors.empty?

    messages = resource.errors.full_messages.map { |msg| content_tag(:li, msg) }.join
    html = <<-HTML
    <div id="error_explanation">
      <h2>エラーが発生しました</h2>
      <ul>#{messages}</ul>
    </div>
    HTML

    html.html_safe
  end
  # セッションキーの削除
  def expire_data_after_sign_in!
    # session.keys will return an empty array if the session is not yet loaded.
    # This is a bug in both Rack and Rails.
    # A call to #empty? forces the session to be loaded.
    session.empty?
    session.keys.grep(/^devise\./).each { |k| session.delete(k) }
  end
  # サインアップ後のリダイレクト先
  def after_sign_up_path_for(resource)
    '/registrationfinished'
  end
入力フォームのテンプレート修正
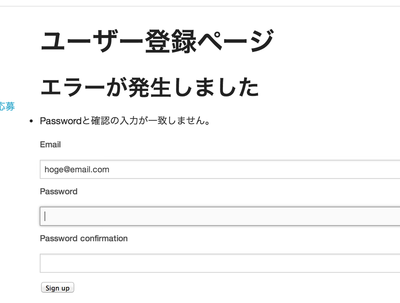
createメソッド中の render :inline => @page.render(self.locomotive_context({ 'user' => resource, 'error' => devise_error_messages! })) という行が重要で、この画面で、ユーザーモデルとエラーメッセージをセットしてテンプレートのレンダリングをしています。
前回作った registration.liquid.haml でエラーメッセージの表示と、ユーザーIDを入力画面に表示するようにしておきましょう。
---
title: ユーザー登録
slug: userregistration
listed: false
published: true
cache_strategy: none
response_type: text/html
position: 4
---
{% extends 'parent' %}
{% block main %}
.row
  .large-8.columns
    %h1 ユーザー登録ページ
    .error {{error}}
    %form#new_user.new_user{"accept-charset" => "UTF-8", :action => "/users", :method => "post"}
      .hidden
        {% csrf_param %}
        %input{:name => "utf8", :type => "hidden", :value => "✓"}/
      %div
        %label{:for => "user_email"} Email
        %br/
        %input#user_email{:autofocus => "autofocus", :keyev => "true", :mouseev => "true", :name => "user[email]", :size => "30", :type => "email", :value => "{{user.email}}"}/
      %div
        %label{:for => "user_password"} Password
        %br/
        %input#user_password{:keyev => "true", :mouseev => "true", :name => "user[password]", :size => "30", :type => "password"}/
      %div
        %label{:for => "user_password_confirmation"} Password confirmation
        %br/
        %input#user_password_confirmation{:keyev => "true", :mouseev => "true", :name => "user[password_confirmation]", :size => "30", :type => "password"}/
      %div
        %input{:name => "commit", :type => "submit", :value => "Sign up"}/
{% endblock %}
.error {{error}} と、%input#user_email の:value => "{{user.email}}" という部分が追加した部分です。それぞれエラーメッセージと入力されたメールアドレスが入ります。
しかし、このままだと {{user.email}} をパースする際に Undefined method "to_liquid" と言われてエラーになります。 liquid テンプレートから呼べるようにする為に、User クラスに Liquid::Drop を継承させます。
class User < Liquid::Drop
  include Mongoid::Document
…
end
これで、入力時のエラーが表示され、入力した内容も引き継がれるようになりました。

メールアドレス確認画面
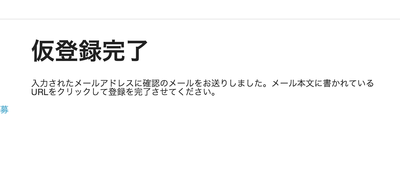
あとは、仮登録でのメールアドレス確認画面を作ります。
---
title: ユーザー登録メール送信済
slug: registrationconfirm
listed: false
published: true
cache_strategy: none
response_type: text/html
---
{% extends 'parent' %}
{% block main %}
.row
  .large-8.columns
    %h1 仮登録完了
    入力されたメールアドレスに確認のメールをお送りしました。メール本文に書かれているURLをクリックして登録を完了させてください。
{% endblock %}
これで、データ登録後、以下の画面が表示されるようになりました。
本登録完了画面
さて、あと一息です。メールで送られた本登録URLをクリックした際にも、ちゃんとしたページを表示するようにします。
本登録時に使われるコントローラーは、ConfirmationsController ですので、以下のファイルを作ります。
class Users::ConfirmationsController < Devise::ConfirmationsController
  protected
  # The path used after confirmation.
  def after_confirmation_path_for(resource_name, resource)
    if signed_in?
      '/registrationfinished'
    else
      new_session_path(resource_name)
    end
  end
end
after_confirmation_path_forをオーバーライドすることで、リダイレクト先を設定することが可能です。
確認時にこのコントローラーが呼ばれるように、routes ファイルを変更します。
  devise_for :users, :controllers => {
    :registrations => 'users/registrations',
    :confirmations => 'users/confirmations'
  }
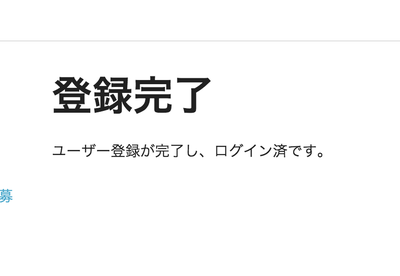
リダイレクト先となる、本登録完了画面を作成します。
---
title: ユーザー登録完了
slug: registrationfinished
listed: false
published: true
cache_strategy: none
response_type: text/html
---
{% extends 'parent' %}
{% block main %}
.row
  .large-8.columns
    %h1 登録完了
    ユーザー登録が完了し、ログイン済です。
{% endblock %}
以上で、完了です!
次は、ログイン画面を修正しましょう。
LocomotiveCMS + Devise を使って作ったログインページのデザインをCMS側でできるようにする(3)
Locomotive 関連の記事一覧:
- Locomotive Engine を Heroku で動かすまで
- LocomotiveCMS でニュース記事一覧機能を作る
- LocomotiveCMS のページにユーザー認証機能を組み込む(Engineの拡張)
- LocomotiveCMS + Devise を使って作ったログインページのデザインをCMS側でできるようにする(1)
- LocomotiveCMS + Devise を使って作ったログインページのデザインをCMS側でできるようにする(2)
- LocomotiveCMS + Devise を使って作ったログインページのデザインをCMS側でできるようにする(3)
- LocomotiveCMS で、複数の Heroku インスタンスを使う

