最近LocomotiveCMSを使い始めました。コマンドラインや好きなテキストエディタを使ってCMSを更新できる所がなかなか便利だし、Railsベースなので機能追加も便利そうです。
LocomotiveCMS は、Locomotive Engine というサーバ部分と、Wagon というコマンドラインツールの組み合わせでできています。
Wagon で作ったサイトを、サーバで動いているLocomotive Engineにpushすることでサイトを公開できる仕組みです。
LocomotiveCMSではLovomotiveHostingというサイトを公開しており、そちらを使えばわざわざEngineを自前で用意することは無いのですが、今回のプロジェクトでは色々とEngine側にもカスタマイズが入りそうだったので、Herokuで自前でホストするようにしました。
以下は、ローカルで Engine の開発環境をセットアップしてから、Heroku に登録するまでの流れです。
ほとんどが公式ドキュメント通りなのですが、作業メモ的に残しておいたのを公開します。
まず、rails をインストールしていなければインストール
gem install rails --version=3.2.16
インストールしたら、色々スキップして rails サイトを作成
bundle exec rails new mycms --skip-active-record --skip-test-unit --skip-javascript --skip-bundle
cd mycms
Gemfile に以下の3行を追加
gem 'locomotive_cms', '~> 2.4.1', :require => 'locomotive/engine'
gem 'compass-rails',  '~> 1.1.3'
gem 'unicorn'
上記の通りにやると以下のエラーが出た。
Bundler could not find compatible versions for gem "mime-types":
  In Gemfile:
    rails (= 3.2.16) ruby depends on
      mime-types (~> 1.16) ruby

    locomotive_cms (~> 2.4.1) ruby depends on
      mime-types (2.2)
うーむ。rails のバージョンを外して対応したらインストールできた。(でも結局インストールされたのは 3.2.16。?)
bundle installする
bundle install --path=vendor/bundle
mongodb を起動する。どこでもいいけど、db/mongo を作って起動した
mkdir db/mongo
mongod --dbpath=db/mongo
Locomotive Engine をインストール
bundle exec rails g locomotive:install
config/mongoid.yml を書き換える
vi config/mongoid.yml
development:
  sessions:
    default:
      database: mycms_dev
      hosts:
        - localhost:27017
  options:
    identity_map_enabled: true

test:
  sessions:
    default:
      database: mycms_test
      hosts:
        - localhost:27017
  options:
    identity_map_enabled: true

production:
  sessions:
    default:
      uri: <%= ENV['MONGOHQ_URL'] %>
あとは起動してみる。
% bundle exec unicorn_rails
I, [2014-03-25T19:39:13.983735 #37567]  INFO -- : listening on addr=0.0.0.0:8080 fd=9
I, [2014-03-25T19:39:13.983880 #37567]  INFO -- : worker=0 spawning...
I, [2014-03-25T19:39:13.985256 #37567]  INFO -- : master process ready
I, [2014-03-25T19:39:13.986196 #38022]  INFO -- : worker=0 spawned pid=38022
I, [2014-03-25T19:39:13.986635 #38022]  INFO -- : Refreshing Gem list
I, [2014-03-25T19:39:18.856479 #38022]  INFO -- : worker=0 ready
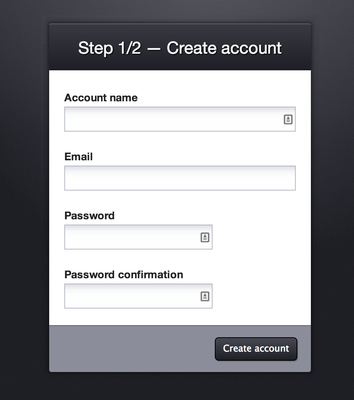
うまく起動したみたい。ブラウザで、http://localhost:8080/ にアクセス。初回アクセス時にはadminユーザーの登録画面が出てくる。
起動したので、Heroku に deploy してみる。以下の gem を Gemfile に追加
gem 'locomotive-heroku', '~> 0.1.0', :require => 'locomotive/heroku'
gem 'thin', :group => 'production'
heroku でバージョン指定の為 Gemfile のgem設定が始まる前に以下の行を追加
ruby '2.0.0'
bundle installする
bundle install
heroku 上に新規アプリ作成
git init .
heroku create <YOUR APP NAME>
heroku config:add BUNDLE_WITHOUT=development:test
mongodb をセットアップ
heroku addons:add mongohq:sandbox
config/mongid.yml の production 部分を以下のように変更(mongo hq を使う為の設定)
production:
  sessions:
    default:
      uri: <%= ENV['MONGOHQ_URL'] %>
(Heroku 上で mongohq を有効にしていなければ、heroku addons:add mongohqで有効にすること)
メール送信用に SendGrid を設定
heroku addons:add sendgrid:starter
Sendgridを使うように config/environments/production.rb を変更
config.action_mailer.delivery_method = :smtp
config.action_mailer.smtp_settings = {
  :address        => 'smtp.sendgrid.net',
  :port           => 25,
  :authentication => :plain,
  :user_name      => ENV['SENDGRID_USERNAME'],
  :password       => ENV['SENDGRID_PASSWORD'],
  :domain         => ENV['SENDGRID_DOMAIN']
}
S3の環境設定をする
S3_BUCKET_REGION については公式ドキュメントを参照のこと
heroku config:add S3_KEY_ID=<YOUR S3 KEY ID>
heroku config:add S3_SECRET_KEY=<YOUR S3 SECRET KEY>
heroku config:add S3_BUCKET=<YOUR S3 BUCKET NAME>
heroku config:add S3_BUCKET_REGION=<YOUR S3 BUCKET REGION>
config/initializers/locomotive.rbに以下の設定を追加
config.hosting = {
  :target     => :heroku,
  :api_key    => ENV['HEROKU_API_KEY'],
  :app_name   => ENV['HEROKU_APP_NAME']
}
Heroku のAPIキーとアプリ名をセットする
heroku config:add HEROKU_API_KEY=<YOUR HEROKU API KEY>
heroku config:add HEROKU_APP_NAME=<YOUR APP NAME>
デバッグをしやすいように、アセットのプリコンパイルを済ます。config/application.rb 上の initialize_on_precompile オプションをオフにする
vi config/application.rb
module YourApplication
  class Application < Rails::Application
    ...
    config.assets.initialize_on_precompile = false
    ...
  end
end
アセットのプリコンパイル実行
bundle exec rake assets:precompile
デプロイしてみる
git add .
git commit -am "launch it"
git push heroku master
エラーがでなければOK.
あとは、heroku open でサイトを確認して、上記と同じように登録画面が出てきたら登録完了!
Locomotive 関連の記事一覧:
- Locomotive Engine を Heroku で動かすまで
- LocomotiveCMS でニュース記事一覧機能を作る
- LocomotiveCMS のページにユーザー認証機能を組み込む(Engineの拡張)
- LocomotiveCMS + Devise を使って作ったログインページのデザインをCMS側でできるようにする(1)
- LocomotiveCMS + Devise を使って作ったログインページのデザインをCMS側でできるようにする(2)
- LocomotiveCMS + Devise を使って作ったログインページのデザインをCMS側でできるようにする(3)
- LocomotiveCMS で、複数の Heroku インスタンスを使う
