さて、引き続きLocomotiveCMSで色々作っています。
今回は、管理画面にニュースを投稿するフォームを作って、それをサイト上で一覧表示する機能を作ってみます。
本家の方に Making a blog という立派なチュートリアルがあるので、基本その通りやればいいわけですが。
ニュース記事のモデルを作る
さて、まずはニュース記事のモデルを作りましょう。LocomotiveCMSでは、Content Type と呼ばれています。
投入する記事は、タイトル、日付、リード文、本文を持つという形にしようかと思います。
CMS上からでも「新規モデル」というボタンからGUIで作れるのですが、Wagon というコマンドラインを使うとモデルを簡単にジェネレートできます。wagon generate content_type モデル名 属性名:型 属性名:型 ….という、いかにもRailsライクな書式ですね。
LocomotiveCMS には最初から型が色々準備されているのが面白い点です。
詳細はこちらで見ていただければと思いますが、integer, string, text, date, datetime などの普通っぽいの以外にも、tags や email といった型も使えます。
さっそく news モデルを作ってみましょう。
% bundle exec wagon generate content_type testnews title:string posted_at:date lead:text body:text
      exist
      create  app/content_types/news.yml
      create  data/news.yml
2つのYAMLファイルができました。content_types/news.yml を見てみましょう。
more content_type/news.yml
# Public name of this content type
name: News

# TODO: explain
slug: News

# Explanation for the backoffice
description: A description of the content type for the editors

# Default field (e.g title)
label_field_name: title

# Order of entries
order_by: manually # default: manually, also available: created_at or any field slug

…中略…

# Describe each field. The name shoud always be an underscored string
fields:
- title: # Name of the field
    label: Title
    type: string
    required: true
    hint: A description of the field for the editors
    localized: false

- posted_at: # Name of the field
    label: Posted at
    type: date
    required: false
    hint: A description of the field for the editors
    localized: false

…省略…
フィールド属性がYAML形式で書かれているのがわかります。
order_by: manually となっていますが、posted_at の新しい順になるように書き換えておきましょう。
order_by: posted_at
order_direction: desc
data/news.yml の方はいかがでしょうか。
~/Documents/.../locomotive/hackcamptest% more data/testnews.yml                                       dev
- "Sample 1":
    posted_at: 2014/04/04 # YYYY/MM/DD
    lead: "Atque est hic dolor nihil facilis et dolores. Vero occaecati quis aliquam rem enim quia magni deserunt. Nihil ea repellat assumenda aut. Dolorem modi aut labore debitis aspernatur eius deserunt omnis. Dolorem eum ullam aut error."
    body: "Ab quia repellat sint et dolore nesciunt. Voluptatem qui ipsam ut autem quaerat. At dolor vero dolorem qui ipsam maxime. Quis ea enim atque nobis vero est nostrum voluptatem."

- "Sample 2":
    posted_at: 2014/04/04 # YYYY/MM/DD
    lead: "Omnis eaque labore perferendis. Qui quo nulla id deserunt consectetur qui possimus. Ea est aspernatur corrupti facere pariatur. Est provident iusto ducimus itaque architecto repellat."
    body: "Quia qui rerum corporis veniam autem quis. Ipsam atque sit blanditiis dolore eum. Natus quia quaerat eaque aliquid veritatis."
サンプルデータが入っています。いったん、この Content-Type をエンジン側に push してみましょう。Content-type を反映させるには、-r オプションを使います。
% bundle exec wagon push development -r content_types
* Pushing Site
* Pushing ContentTypes
    updating News...............................................................[done]
ニュースモデルの編集
管理画面を見てみると
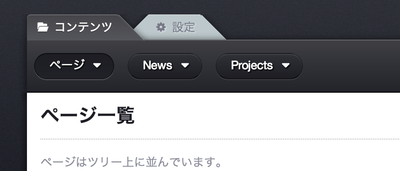
News というモデルがヘッダに出来ました。
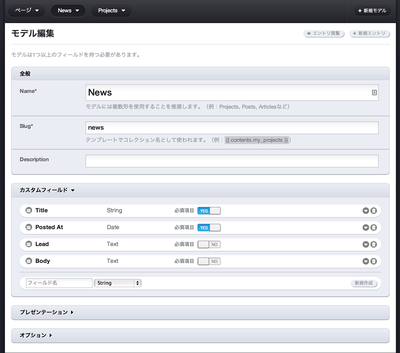
そこからモデル編集というメニューを選んでみると、こちらでもモデルが編集できるようになっています。
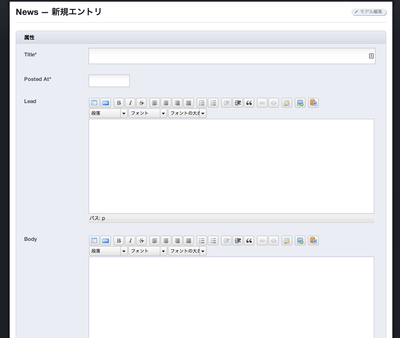
メニューから、新規エントリを作ってみましょう。入力画面が表示されます。
string 型は一行のテキストボックス、text 型はリッチテキストが書けるようになっていますね。そして Posted At 部分は、入力しようとすると自動的にカレンダーも表示されるようになっています。
適当に入力して、新規作成ボタンを押すと記事が作成されます。
次に、このニュースを一覧表示するページを作りましょう。 news という名前のページをジェネレートします。
% bundle exec wagon generate page news
Do you prefer a HAML template ? y
      create  app/views/pages/news.liquid.haml
一覧ページの作成
生成されたページを、下記のように修正します。
---
title: お知らせ
slug: content_type_template
listed: true
published: true
position: 1
---
{% extends parent %}

{% block main %}

.row
  .large-8.columns
    .news
      {% for topic in contents.news %}
      .topic
        %a{href:"/news/{{topic._slug}}"}
          %h3 {{topic.title | escape}}
        .date {{topic.posted_at | localized_date}}
        .lead {{topic.lead}}
        %a{href:"/news/{{topic._slug}}"} 詳細
      {% endfor %}

{% endblock %}
.row や .large-8.columns は、foundation というテンプレート用のクラス定義です。適宜書き換えて下さい。{% for .. in .. %} で記事分のループを回しています。
{{topic.title}}や{{topic_posted_at}}の部分が、Content Type の属性と対応しています。 localized_date というのは、日付の表示フォーマットを変更するフィルターです。(リファレンス) title はHTMLタグを含まないのでエスケープしています。
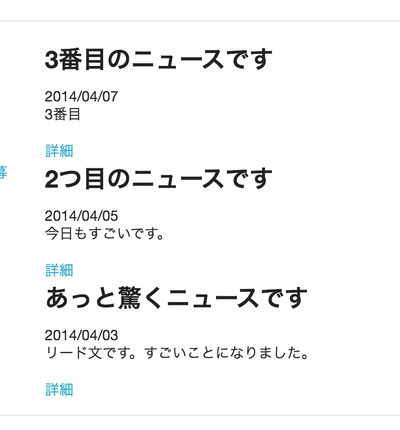
表示するとこのようになります。
これだと記事が増えていくと破綻しますので、本当はページネーションを入れるべきですが次へ進みます。ページネーションの実装は本家のチュートリアルを見ると良いでしょう。
ニュース本文ページの作成
こんどはニュースの本文ページを作ります。
% bundle exec wagon generate page news/content_type_templates
Do you prefer a HAML template ? y
    create  app/views/pages/news/content_type_templates.liquid.haml
    conflict  app/views/pages/news.liquid.haml
Overwrite /Users/hal/Documents/workspace/locomotive/hackcamptest/app/views/pages/news.liquid.haml? (enter "h" for help) [Ynaqdh] n
        skip  app/views/pages/news.liquid.haml
Content Type Template は、特定の Content Type を持ったファイルのテンプレートです。
さっき作った news.liquid.haml を上書きするか?と聞いてきますので、n にします。(先にこっちのコマンドを実行すればよかったんですね)
できあがった content_type_templates.liquid.haml を修正します。
---
title: Content type templates
slug: content_type_template
listed: false
published: true
position: 100
content_type: news
---
{% extends parent %}
{% block main %}
.row
  .large-8.columns
    .topic
      %h3 {{news.title | escape}}
      .date {{news.posted_at | localized_date}}
      .lead {{news.lead}}
      .body {{news.body}}
{% endblock %}
content_type: news という部分で、このテンプレートが、news モデルに対応したテンプレートであることを示しています。
テンプレート内で news.title などと書かれているように、news という変数が使えます。
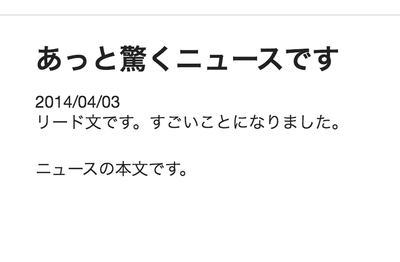
これをpushし、リストページの詳細画面からのリンクを表示すると以下のようになります。
Locomotive 関連の記事一覧:
- Locomotive Engine を Heroku で動かすまで
- LocomotiveCMS でニュース記事一覧機能を作る
- LocomotiveCMS のページにユーザー認証機能を組み込む(Engineの拡張)
- LocomotiveCMS + Devise を使って作ったログインページのデザインをCMS側でできるようにする(1)
- LocomotiveCMS + Devise を使って作ったログインページのデザインをCMS側でできるようにする(2)
- LocomotiveCMS + Devise を使って作ったログインページのデザインをCMS側でできるようにする(3)
- LocomotiveCMS で、複数の Heroku インスタンスを使う
