概説
Qiitaで「slack heroku」といったキーワードで検索すると既に同じような投稿がたくさんあり、特にまとめる必要もないかとは思いましたが、「Windows環境」にフォーカスしたものは無かったようなのでザッとまとめました。
(ま、環境が整えば全てコマンドラインでの操作となるため、Macの場合とほぼ同じなんですけどね。。。)
ここでは、Yeoman(generator-hubot)で作成したHubotをHerokuにデプロイし、Slackと連携するまでを示します。
@udzuraさんの「Hubot + CoffeeScript ではじめるやわらかプログラミング入門」を読んで、「Windowsの方へ...」というメッセージに抗ってみようと思ったのは秘密です。
前提
これより説明する手順は、以下の環境で検証しています。
- Windows 8.1 (64ビット)
- Git for Windowsがインストール済み
事前準備
Node.jsのインストール
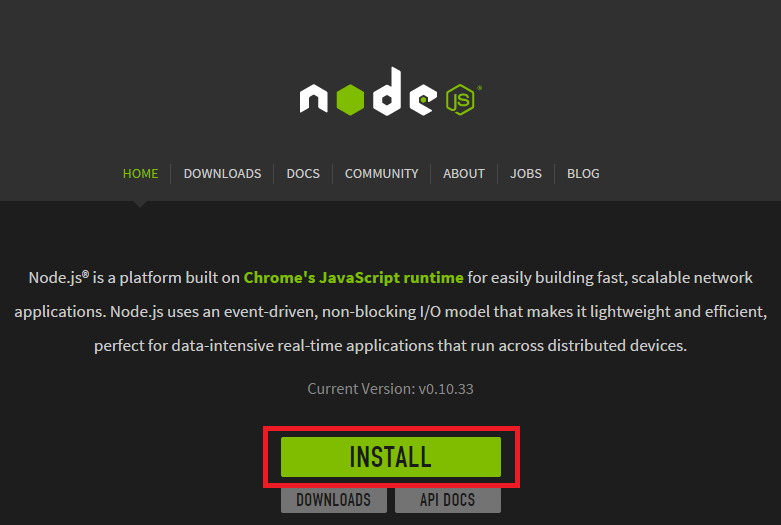
- Node.jsの公式サイトより環境に応じたパッケージ(例:node-v0.10.33-x64.msi)をダウンロードしインストールします。(2014/11/02時点ではv0.10.33が最新です)
- インストールが完了したら、スタートメニューより「Node.js command prompt」を起動後、以下のコマンドを実行し、バージョンを確認しておきます。

C:\Users\hoge>node -v
v0.10.33

C:\Users\hoge>npm -v
1.4.28
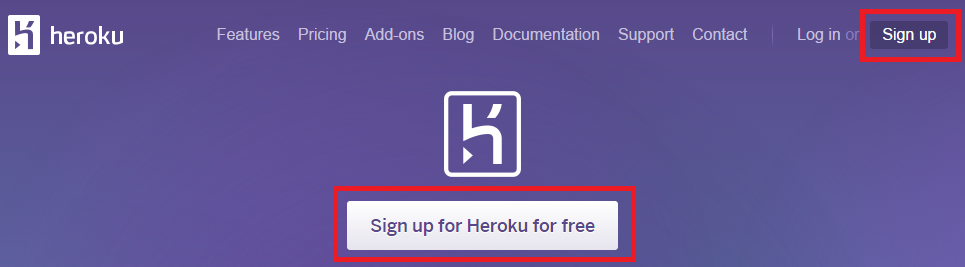
Herokuアカウントの作成
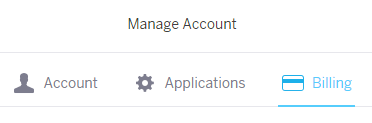
- アドオンを無料枠で利用する場合でも、クレジットカードの登録をしておかないとアドオンのインストールに失敗するため、ログイン後、DashboardよりManage Account → Billingと遷移し、クレジットカード登録を済ませておきます。(はまりポイント)
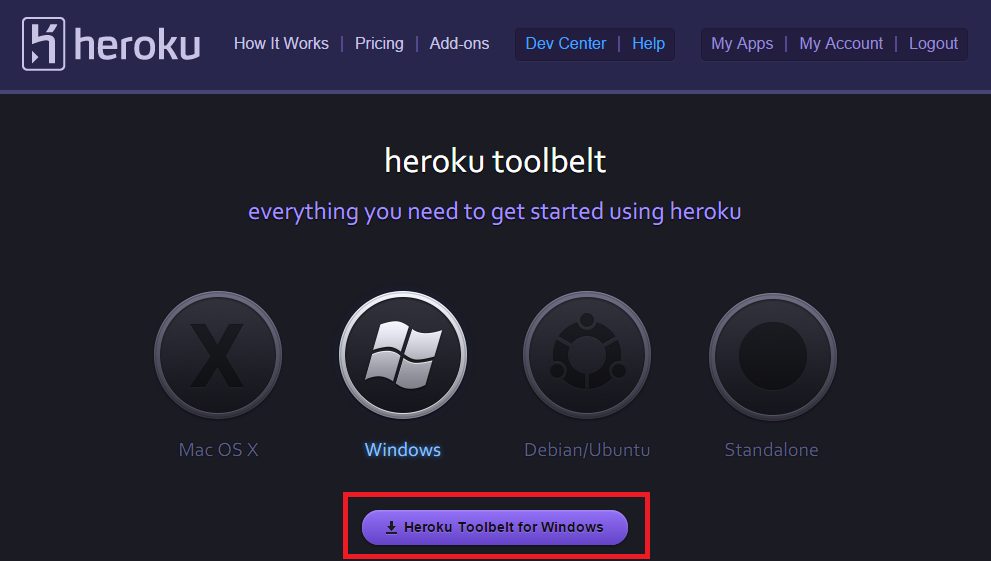
Heroku Toolbeltのインストール
- Heroku ToolbeltのWindows版であるHeroku Toolbelt for Windowsをダウンロードしインストールします。
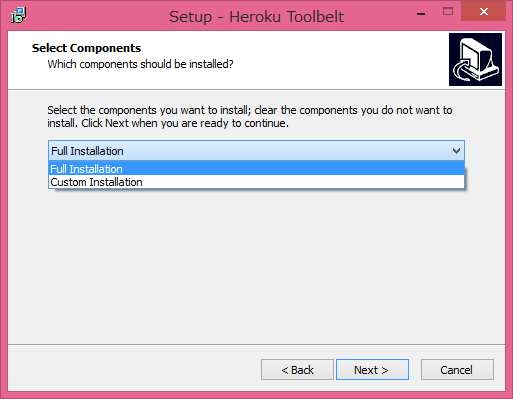
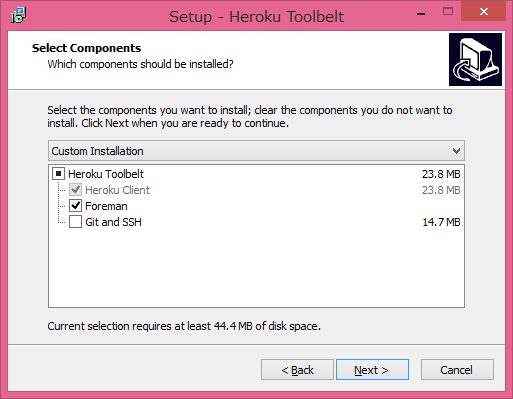
- Heroku Toolbelt for Windowsのインストールの際、Git for Windowsが既にインストール済みの場合は、「Select Components」の画面で「Custom Installation」を選択し「Git and SSH」のチェックを外します。未インストールの場合はデフォルトの「Full Installation」で構いません。
- インストールが完了したら、コマンドプロンプトより以下のコマンドを実行し、バージョンを確認しておきます。
C:\Users\hoge>heroku version
heroku/toolbelt/3.12.1 (i386-mingw32) ruby/1.9.3
秘密鍵と公開鍵の作成
- Windowsの場合はPuTTYgenを利用することが一般的ですが、Git for Windowsに付属しているGit GUIを利用すると簡単に作成できます。


Hubotアプリケーションを作成
準備が整ったので、スタートメニューよりGit Bashを起動し、以下のコマンドでHubotのインストールを行います。

$ npm install -g hubot coffee-script
Slack、Heroku、Hubotなどのキーワードで検索してヒットするHubotアプリの作成例は以下の手順がほとんどですが、実行してみると「depreated(恐らくdeprecatedのタイポ):非推奨」と表示され、代わりに「generator-hubot」を使ってくださいと記載されています。
$ hubot --create test-slack-hubot
'hubot --create' is depreated. Use the yeoman generator instead:
    npm install -g yo generator-hubot
    mkdir -p test-slack-hubot
    yo hubot
See https://github.com/github/hubot/blob/master/docs/README.md for more details on getting started.
上記のメッセージの指示に従い、Yeomanとgenerator-hubotをインストールします。
$ npm install -g yo generator-hubot
Yeomanを使って、Hubotアプリケーションを作成します。
$ mkdir -p test-slack-hubot
$ cd test-slack-hubot
$ yo hubot
                     _____________________________
                    /                             \
   //\              |      Extracting input for    |
  ////\    _____    |   self-replication process   |
 //////\  /_____\   \                             /
 ======= |[^_/\_]|   /----------------------------
  |   | _|___@@__|__
  +===+/  ///     \_\
   | |_\ /// HUBOT/\\
   |___/\//      /  \\
         \      /   +---+
          \____/    |   |
           | //|    +===+
            \//      |xx|

? Owner: YourName <example@example.com>
? Bot name: test-slack-hubot
? Description: A simple helpful robot for your Company
? Bot adapter: (campfire) slack
先ほど作成した「test-slack-hubot」ディレクトリ内のHubotアプリケーションをGitリポジトリにコミットします。
$ pwd
/c/Users/hoge/test-slack-hubot
$ git init
$ git add .
$ git commit -m "Initial commit"
Herokuへのデプロイ
Hubotアプリケーションが作成できたので、Herokuへデプロイします。
まず、Herokuへログインします。
$ heroku login
Enter your Heroku credentials.
Email: example@example.com
Password (typing will be hidden):
Authentication successful.
次にHerokuにアプリを作成します。
$ heroku create test-slack-hubot
Creating test-slack-hubot... done, stack is cedar
https://test-slack-hubot.herokuapp.com/ | git@heroku.com:test-slack-hubot.git
Git remote heroku added
Hubotの動作にはRedisが必要となるため、無料版のRedis To Goをインストールします。(はまりポイント)
$ heroku addons:add redistogo:nano
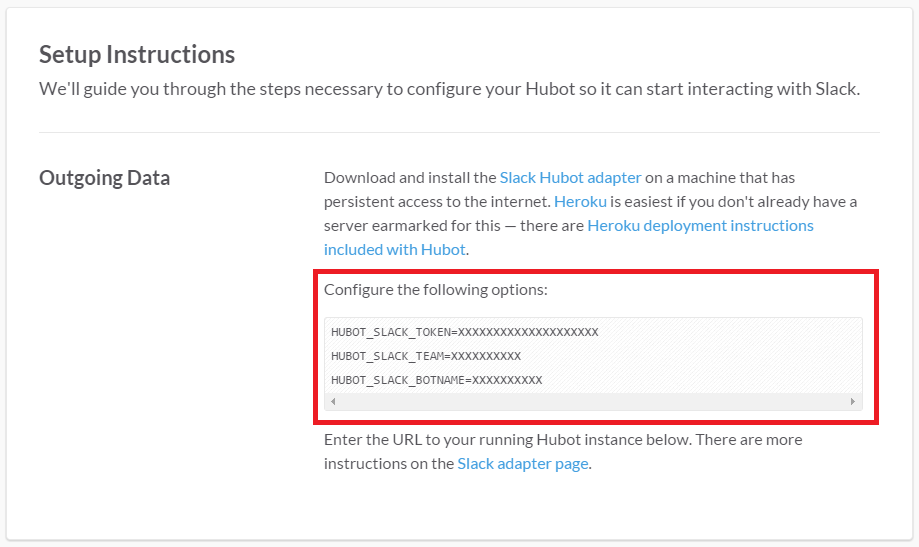
次にSlackのIntegrationsの画面で、Hubot用の設定を作成します。
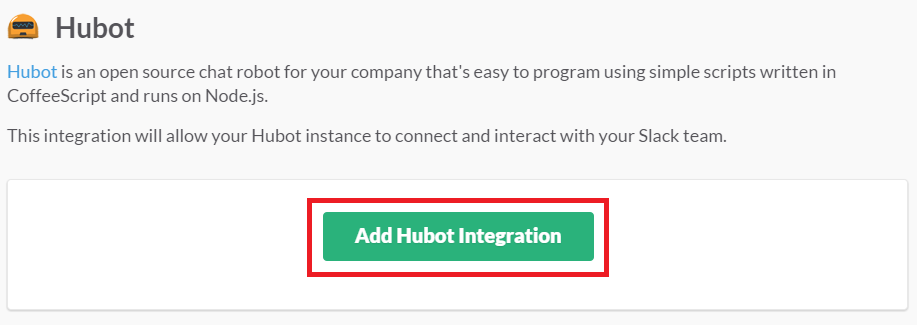
作成後、Integrationsの画面で「HUBOT_SLACK_TOKEN」、「HUBOT_SLACK_TEAM」、「HUBOT_SLACK_BOTNAME」の値を控えておきます。
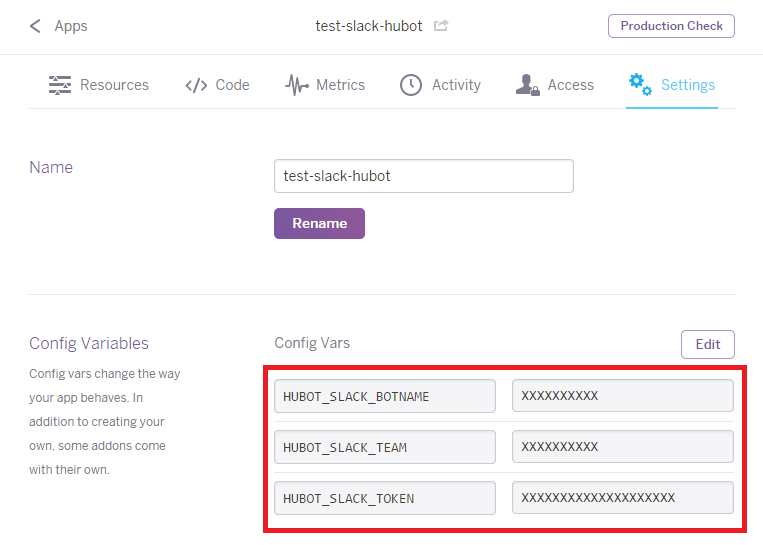
控えておいた値を設定します。
コマンド1回で設定するか、
$ heroku config:set HUBOT_SLACK_TOKEN=XXXXXXXXXXXXXXXXXXXX HUBOT_SLACK_TEAM=XXXXXXXXXX HUBOT_SLACK_BOTNAME=XXXXXXXXXX

もしくは、それぞれ個別に設定します。
$ heroku config:set HUBOT_SLACK_TOKEN=XXXXXXXXXXXXXXXXXXXX
$ heroku config:set HUBOT_SLACK_TEAM=XXXXXXXXXX
$ heroku config:set HUBOT_SLACK_BOTNAME=XXXXXXXXXX
Herokuの画面で設定内容が反映されているか確認します。
Git Bashでも設定内容を確認します。
$ heroku apps:info
=== test-slack-hubot
Git URL:       git@heroku.com:test-slack-hubot.git
Owner Email:   example@example.com
Region:        us
Stack:         cedar
Web URL:       https://test-slack-hubot.herokuapp.com/
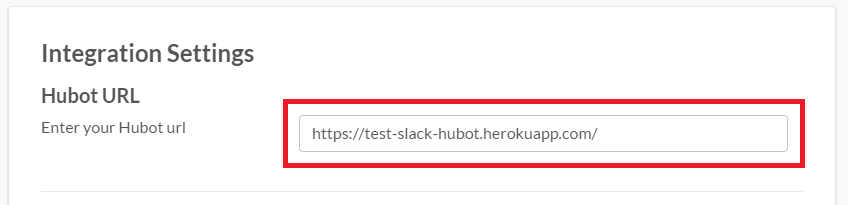
「Web URL」として表示されている値を、以下のコマンドで設定します。
このまとめによると、「HEROKU_URL」は非推奨とのことですが、一応両方とも設定しておきます。
$ heroku config:set HEROKU_URL=https://test-slack-hubot.herokuapp.com/
$ heroku config:set HUBOT_HEROKU_KEEPALIVE_URL=https://test-slack-hubot.herokuapp.com/
SlackのIntegrationsの画面で、「Web URL」と同じ値を忘れずに設定しておきます。(はまりポイント)
全ての準備が整ったので、Herokuにデプロイします。
$ git push heroku master
The authenticity of host 'heroku.com (50.19.85.154)' can't be established.
RSA key fingerprint is XX:XX:XX:XX:XX:XX:XX:XX:XX:XX:XX:XX:XX:XX:XX:XX.
Are you sure you want to continue connecting (yes/no)? yes
Warning: Permanently added 'heroku.com,50.19.85.154' (RSA) to the list of known hosts.
Enter passphrase for key '/c/Users/hoge/.ssh/id_rsa':パスワードを入力
Permission denied (publickey).
fatal: Could not read from remote repository.

Please make sure you have the correct access rights
and the repository exists.
もし上記のように「Permission denied (publickey).」が発生したら、以下のコマンドで公開鍵の送信を行い、もう一度実行してみましょう。(はまりポイント)
$ heroku keys:add
Found an SSH public key at C:/Users/hoge/.ssh/id_rsa.pub
Would you like to upload it to Heroku? [Yn] Y
Uploading SSH public key C:/Users/hoge/.ssh/id_rsa.pub... done

$ git push heroku master
Warning: Permanently added the RSA host key for IP address '50.19.85.156' to the list of known hosts.
Enter passphrase for key '/c/Users/hoge/.ssh/id_rsa':
Initializing repository, done.
Counting objects: 14, done.
Delta compression using up to 4 threads.
Compressing objects: 100% (10/10), done.
Writing objects: 100% (14/14), 4.96 KiB | 0 bytes/s, done.
Total 14 (delta 0), reused 0 (delta 0)

-----> Node.js app detected
-----> Requested node range:  0.10.x
-----> Resolved node version: 0.10.33
-----> Downloading and installing node
-----> Exporting config vars to environment
-----> Installing dependencies

・
・
省略
・
・

-----> Compressing... done, 6.8MB
-----> Launching... done, v10
       https://test-slack-hubot.herokuapp.com/ deployed to Heroku

To git@heroku.com:test-slack-hubot.git
 * [new branch]      master -> master
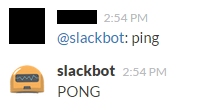
Slackで動作確認
Slackのチャンネルで「@[HUBOT_SLACK_BOTNAMEで設定した値] ping」と入力し、以下のようにPONGとメッセージが帰ってくることを確認します。
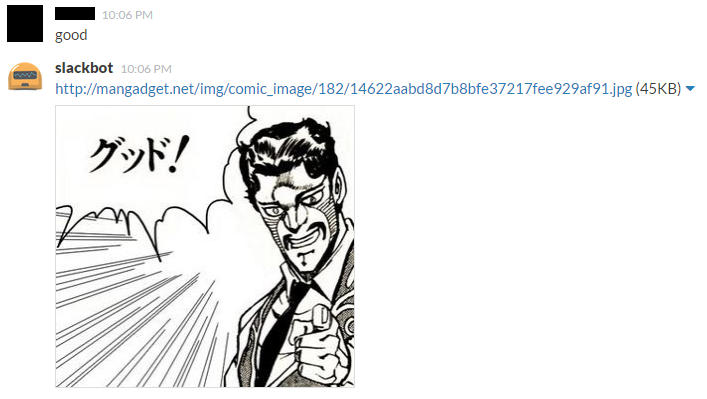
ついでに「good」と入力すると、ダービーが「グッド!」と答えてくれるボットを作ってみました。非常にグッド!です。
module.exports = (robot) ->
    robot.hear /good/i, (msg) ->
        msg.send "http://mangadget.net/img/comic_image/182/14622aabd8d7b8bfe37217fee929af91.jpg?" + (new Date().getTime())
補足
去年の12月上旬に、HubotのIntegrations設定に仕様変更があったみたいで、その時に自分が慌てていた様子を貼っておきます。
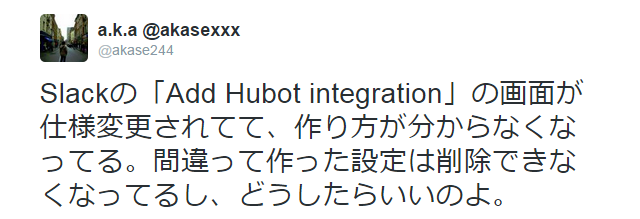
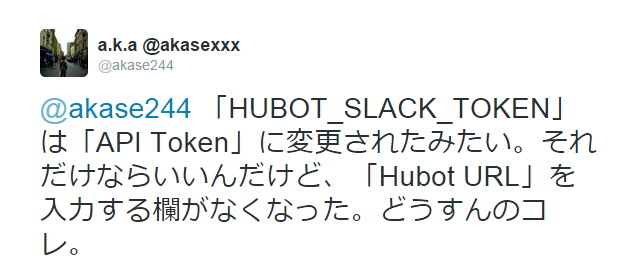
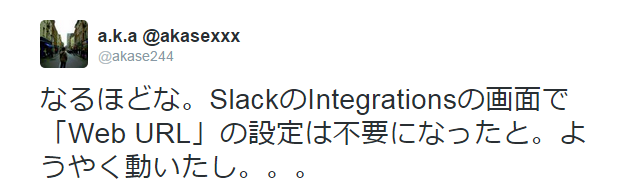
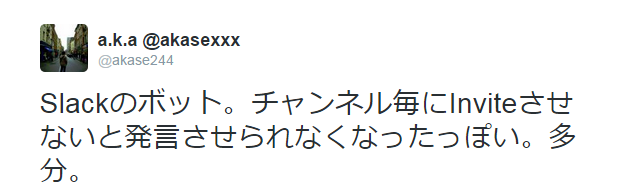
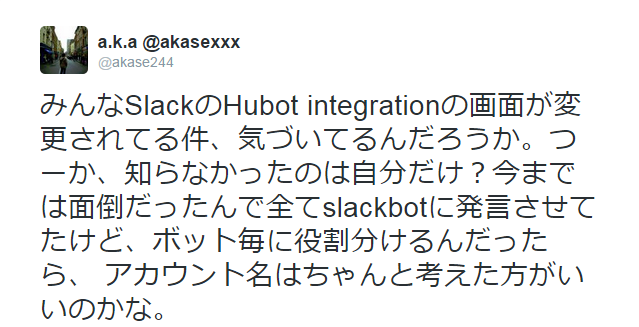
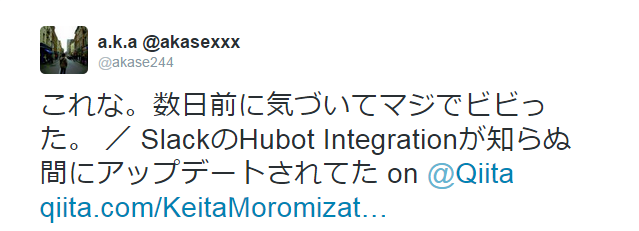
結論としては、「heroku config:set」で設定していた「HUBOT_SLACK_TEAM」と「HUBOT_SLACK_BOTNAME」が不要になったようです。
この件については、投稿内容を修正しようかと思ってたんですが、しっかりまとめてくれている方がいたので、説明はそちらに任せます。(丸投げ。。。)
参考URL
- Slack で Hubot を使えるようにする
- Yoeman で Hubot を作成して Heroku へデプロイし Slack と連携する
- Heroku上でHubotを動かす
- hubotをherokuで動かす
- herokuに入れたSlack用のhubotの簡易運用手引き
- Hubotを導入してSlackで使えるようにする
- slackにHubotを導入(Heroku経由)
- SlackのHubotを導入する際にはまったところ(Heroku経由)
- slackと連携するhubotをherokuで動かす
- Hubot + CoffeeScript ではじめるやわらかプログラミング入門
- WindowsでHerokuをセットアップする手順
- 初心者でも15分で公開できるHerokuのはじめかた
- 知っておきたい!Herokuを使う上では当たり前?の16の常識
- PuTTYgenで公開鍵/秘密鍵を作成する
- Git GUIで公開鍵(public key)を生成する方法
- GitをWindows7(64bit)にインストールしてGitLabからリポジトリをCloneする手順
- HerokuでSSH公開鍵(public key)を登録する方法(と削除して再登録する方法)