みんな大好き? Hubot ですが、GitHub チームが作ってる Yeoman の Hubot ジェネレータ があるので、これを元にボットを作成して Heroku へデプロイし、更に Slack と連携してチャット上の発言を監視、までやってみました。
1. 前提
- 作業している手元の OS は
Mac OS X 10.9.5 (Mavericks)です。- (なんか怖くて Yosemite にはしていない--;)
- 手元に Node.js および Yeoman の環境があること。
- もし無い場合は、次のように構築してください。
- ⇒ Mac で Yeoman の環境を構築する手順
- Heroku のアカウントおよびコマンドラインツールがあること。
- もし無い場合は、Railsの場合の手順を以前に書いたので、よろしければ参考にしてください。
- もしかして CoffeeScript を別途インストールする必要があるかも。
$ npm install -g coffee-script- ただ私の環境だと、無くても Hubot は動いてはいます。
ちなみに Hubot ジェネレータ(genetator-hubot) のバージョンは、現時点で 0.1.4 です。
(なんか更新が早そうなので、上手くいかない場合は GitHub 側で記載されている手順を確認してください。)
2. 環境構築の手順
① Hubot ジェネレータのインストールと起動
-
Node.js の
npmコマンドでインストールします。$ npm install -g generator-hubot -
適当なワーク用のディレクトリを作成して、ジェネレータを起動します。
$ mkdir hoge_dir $ cd hoge_dir $ yo hubot -
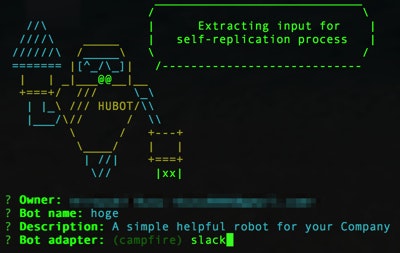
Bot nameとDescriptionを適当にいれ、Bot adapterはslackと入力します。 -
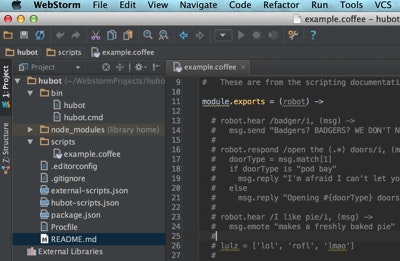
次のようにファイルが展開されます。
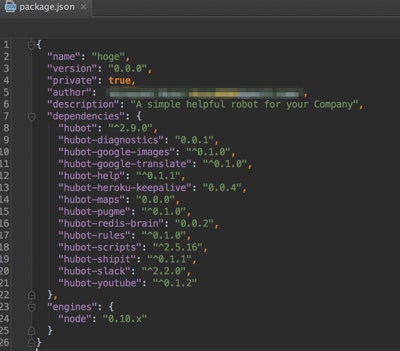
package.jsonは次のような感じ。Google の画像とか Youtube とかも連携できるのだろうか? -
ローカルで動作確認します。
 $ cd hoge_dir
 $ bin/hubot
なんか警告が出ますが、よく分らないのでスルーで^^;
Hubot のプロンプトで
hubot pingと打ちます。PONGと返ってくればOK。
② Heroku へのデプロイ
-
まずは Git でコミットします。
$ cd hoge_dir $ git init $ git add . $ git commit -m "hoge comment" -
Heroku へプッシュします。
$ heroku create $ git push heroku master -
動作確認します。
$ heroku openブラウザが開いて、次のように表示されればOK。
③ Slack 側の設定
-
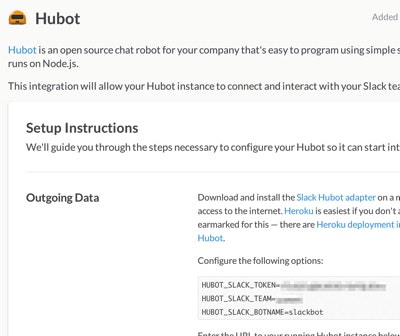
integrationメニューで、Hubot を選択します。画面に表示されている
HUBOT_SLACK_TOKENとHUBOT_SLACK_TEAMは、後で使います。Hubot URLに、先程の Heroku の トップURL を入力して保存します。 -
Heroku へ環境変数を追加します。
 $ heroku config:add HUBOT_SLACK_TOKEN=[Slackの画面で表示されたもの]
 $ heroku config:add HUBOT_SLACK_TEAM=[Slackの画面で表示されたもの]
 $ heroku config:add HUBOT_SLACK_BOTNAME=[呼びかける任意のBot名]
 $ heroku config:add HEROKU_URL=[先程の Heroku の トップURL]
ちなみに上記のようにコマンドラインからでなくても、Heroku のダッシュボードから設定してもOKです。
-
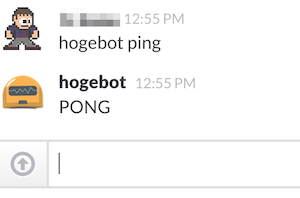
動作確認してみます。今回は、ボット名は
hogebotとしました。Slack のオープンな CHANNELS で ping してみます。(PRIVATE GROUPS では使えない。)
3. Slack の発言を監視してみる
Hubot で色々できそうなのですが、とりあえず、Slack の発言を監視して、特定の文字列が現れたら反応するようにしてみます。試しに、あいうえお という文字列を監視してみます。
module.exports = (robot) ->

  robot.hear /あいうえお/i, (msg) ->
    msg.send "呼びました?"
scriptsディレクトリに置いた任意のスクリプトファイルが自動的に読み込まれるぽい。
上記のファイルをコミット、Heroku へ反映して、Slack で発言してみます。
たったこれだけのソースで、簡単にできました^^
4. ほか
- 今回のソースは GitHub にも置きました。
- ⇒ https://github.com/hkusu/Hubot_Slack_sample
- Hubot ジェネレータ(genetator-hubot)が上手く動かない場合は、これを利用して頂いて構いません。
