// 当記事は, 以下親記事の Setup Flowの一部です.
// AWS IoT Device SDK for Ruby を使ってみた
AWS IoT : Create thing
-
Login to AWS
-
select AWS IoT
-
select [Create a resouce]
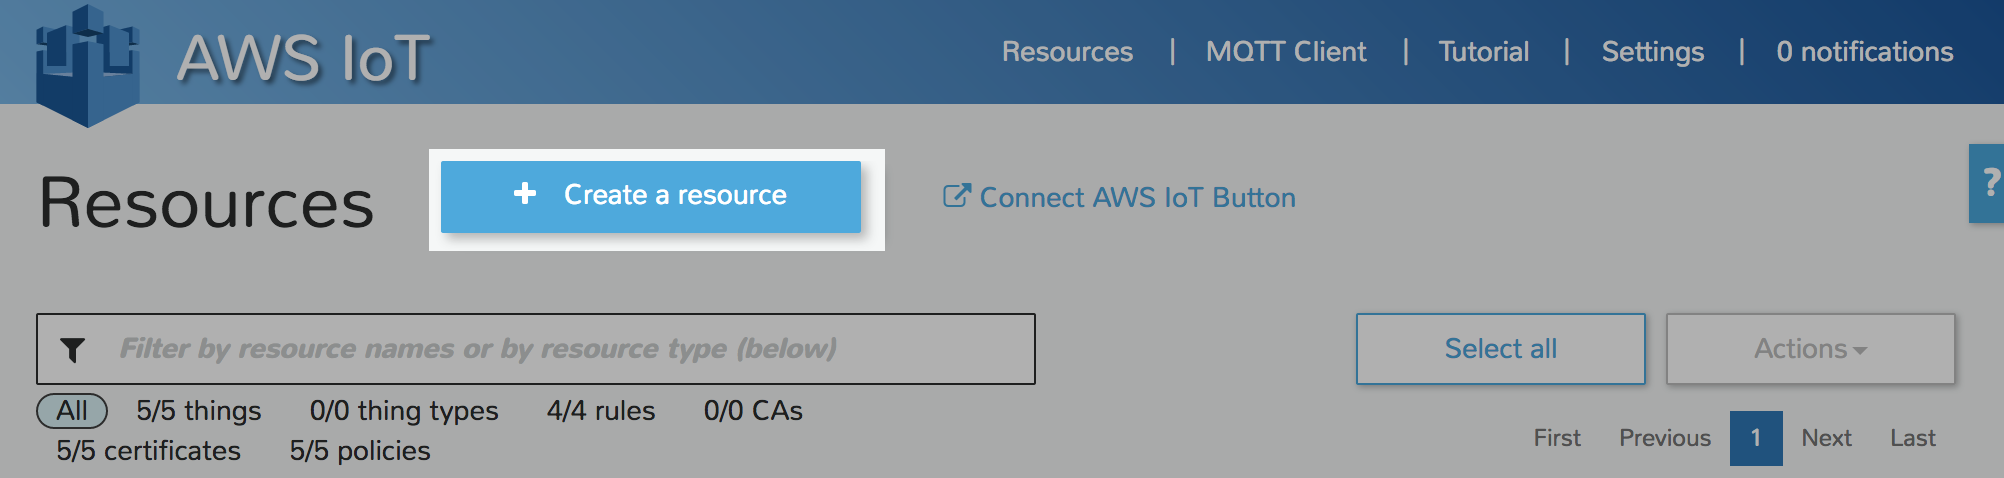
-
select [Create thing]

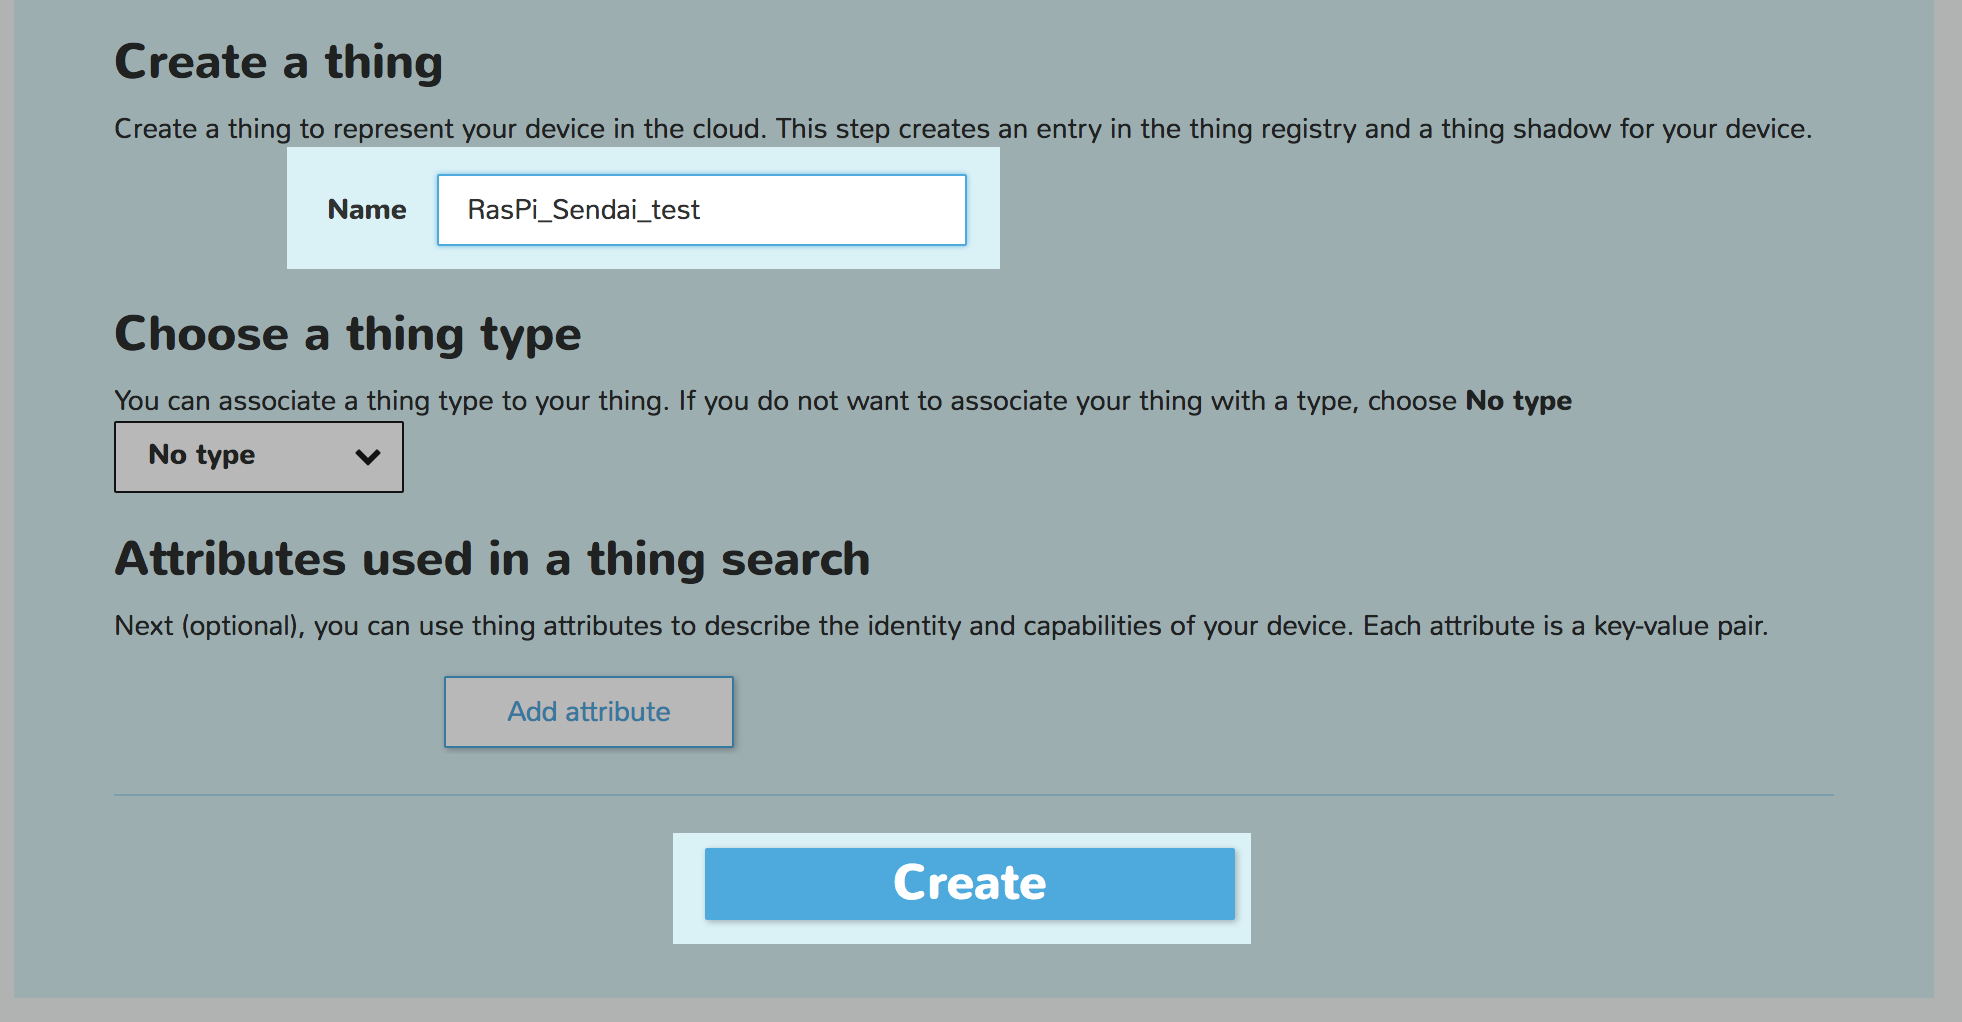
-
write name // 当値 Thing Name は後ほど使用
-
select [create]
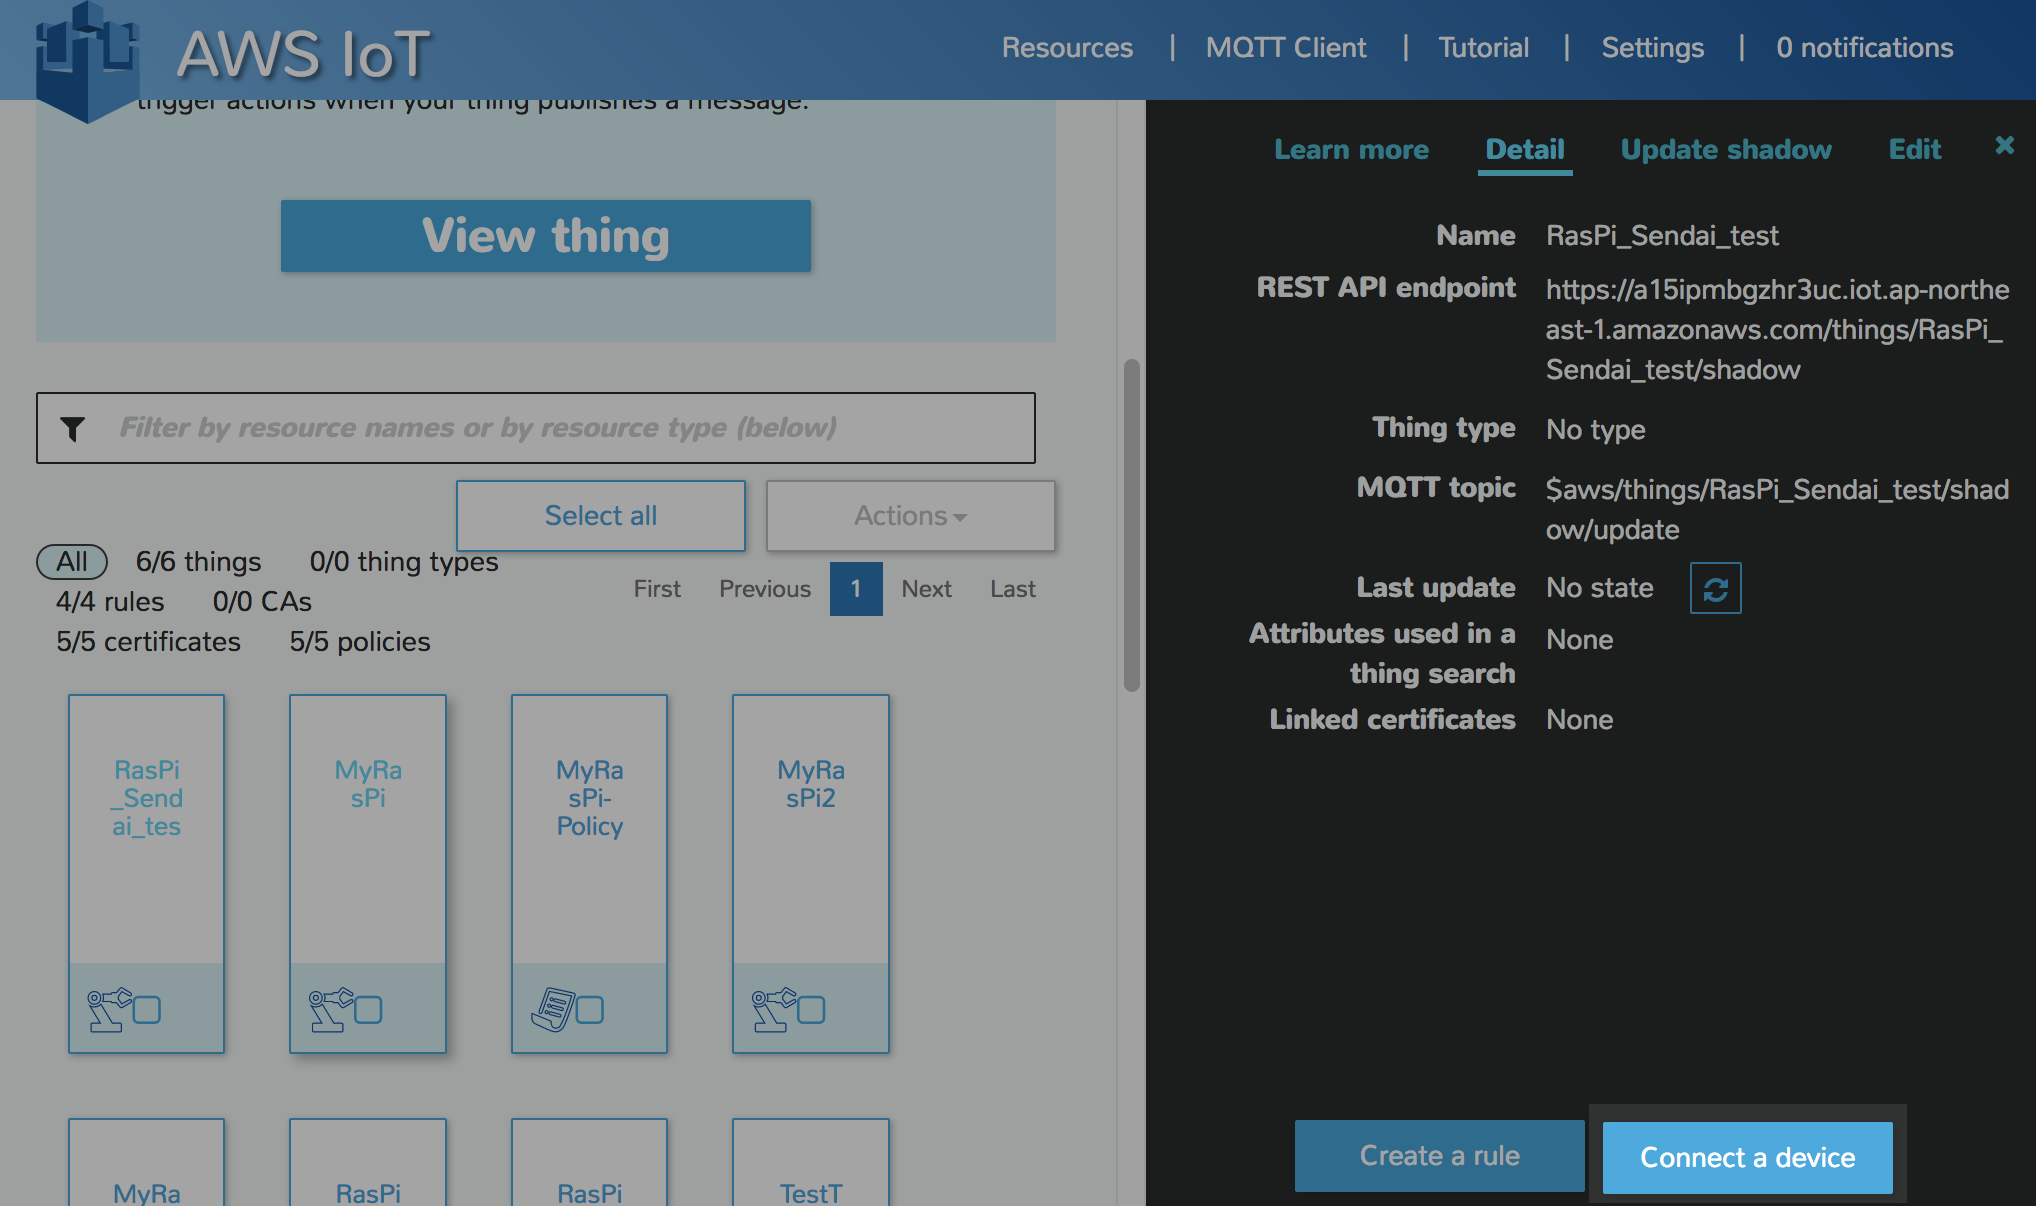
-
select [前工程で設定したthing name] icon

-
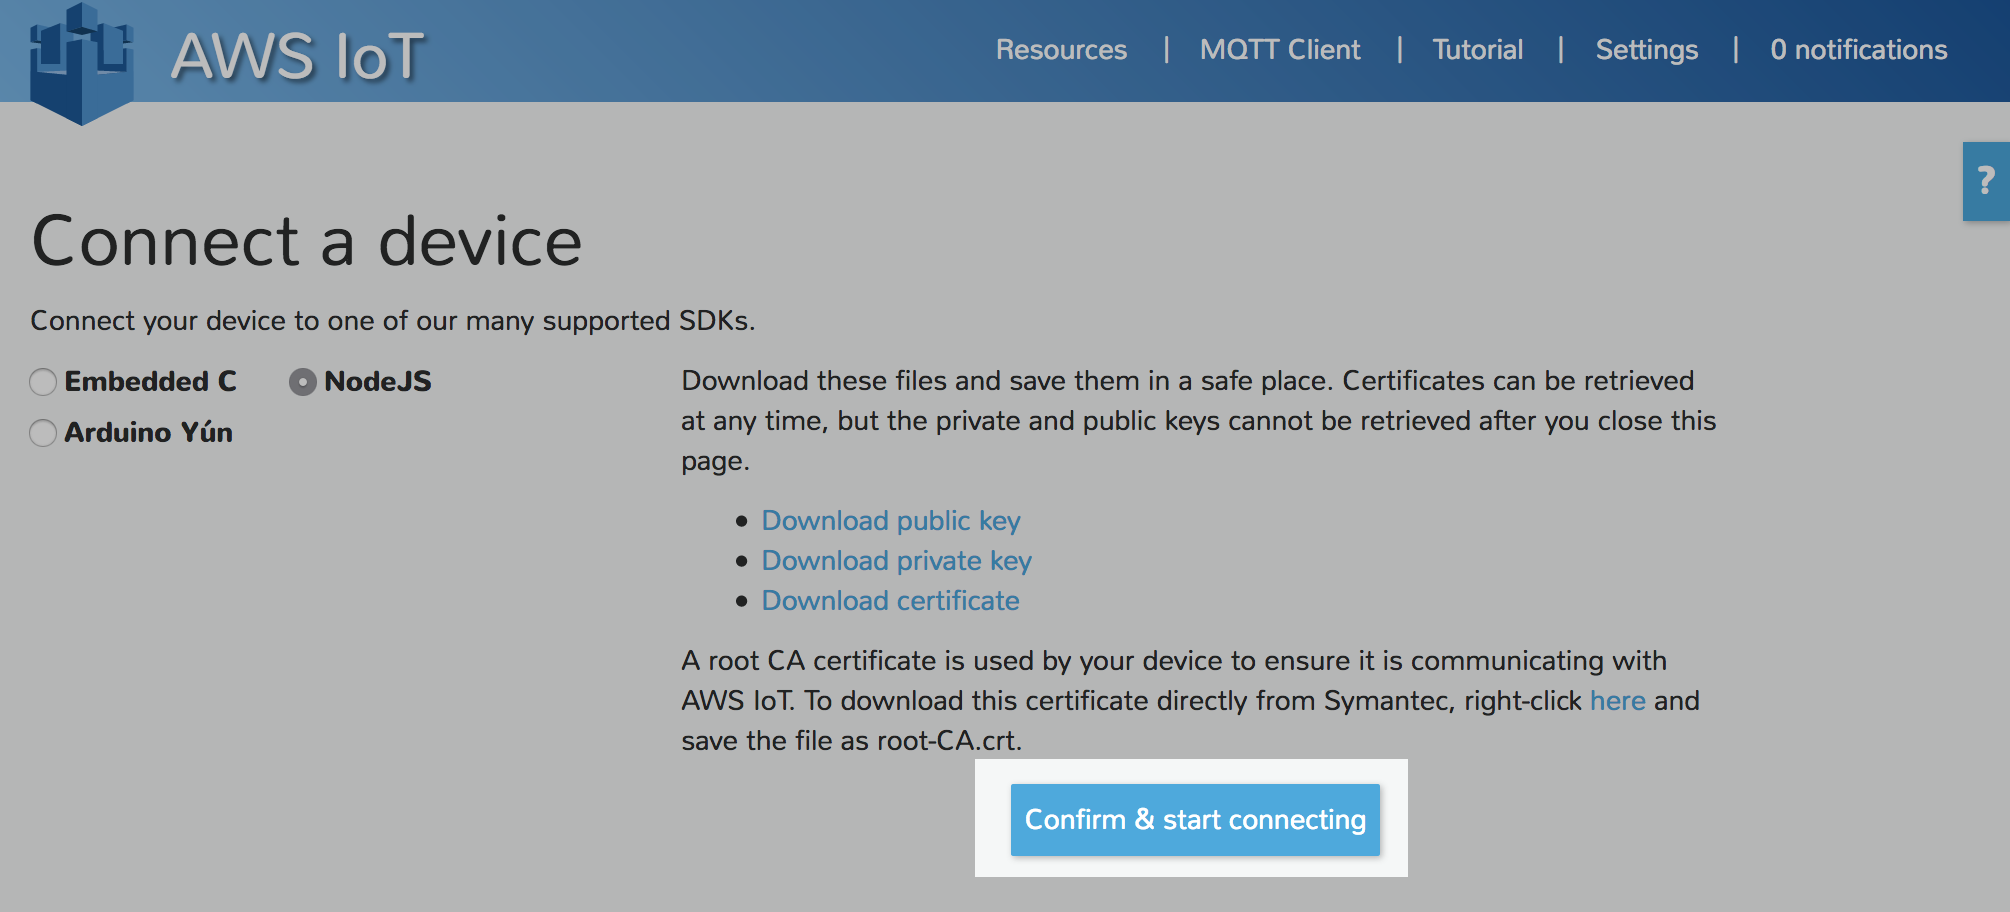
select [connect a device]
-
select [nodejs]
-
select [Generate ceritificate and policy]

-
download following access keys
-
public key
-
private key
-
certificate
// 後ほどraspberry piへ転送
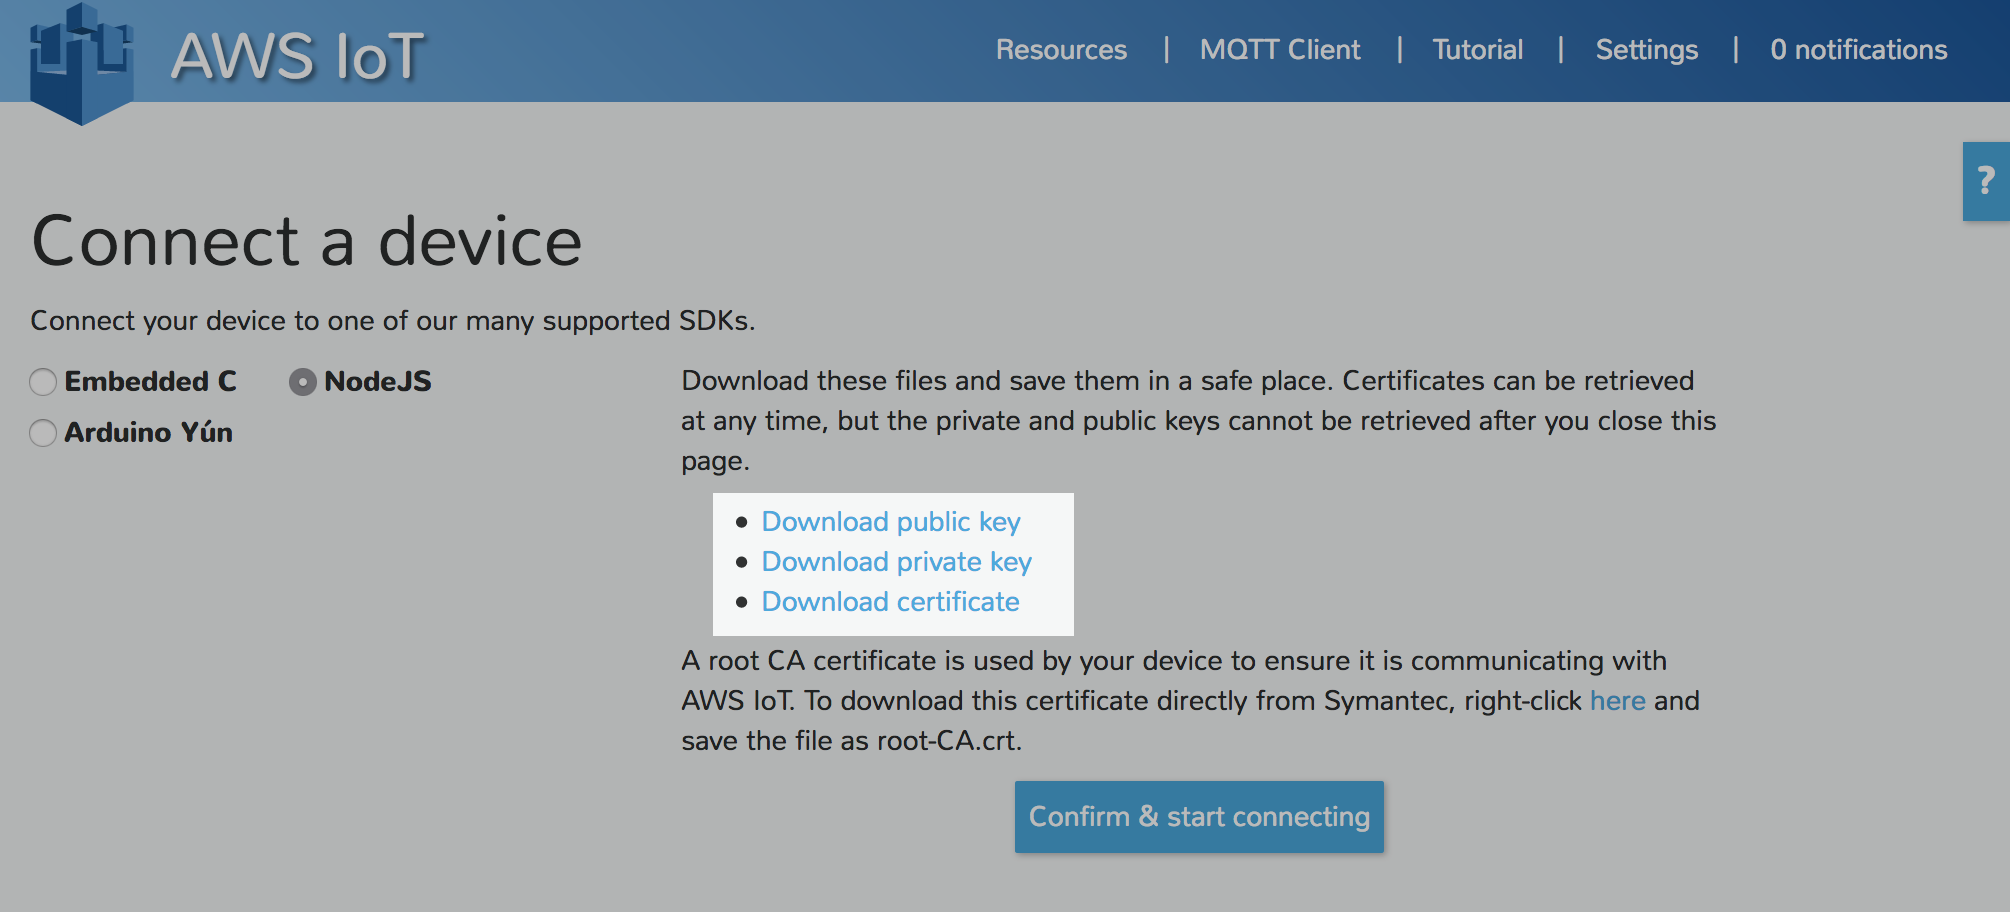
-
-
select [Confirm and start connecting]
-
変数を保存 // 設定に用いる値
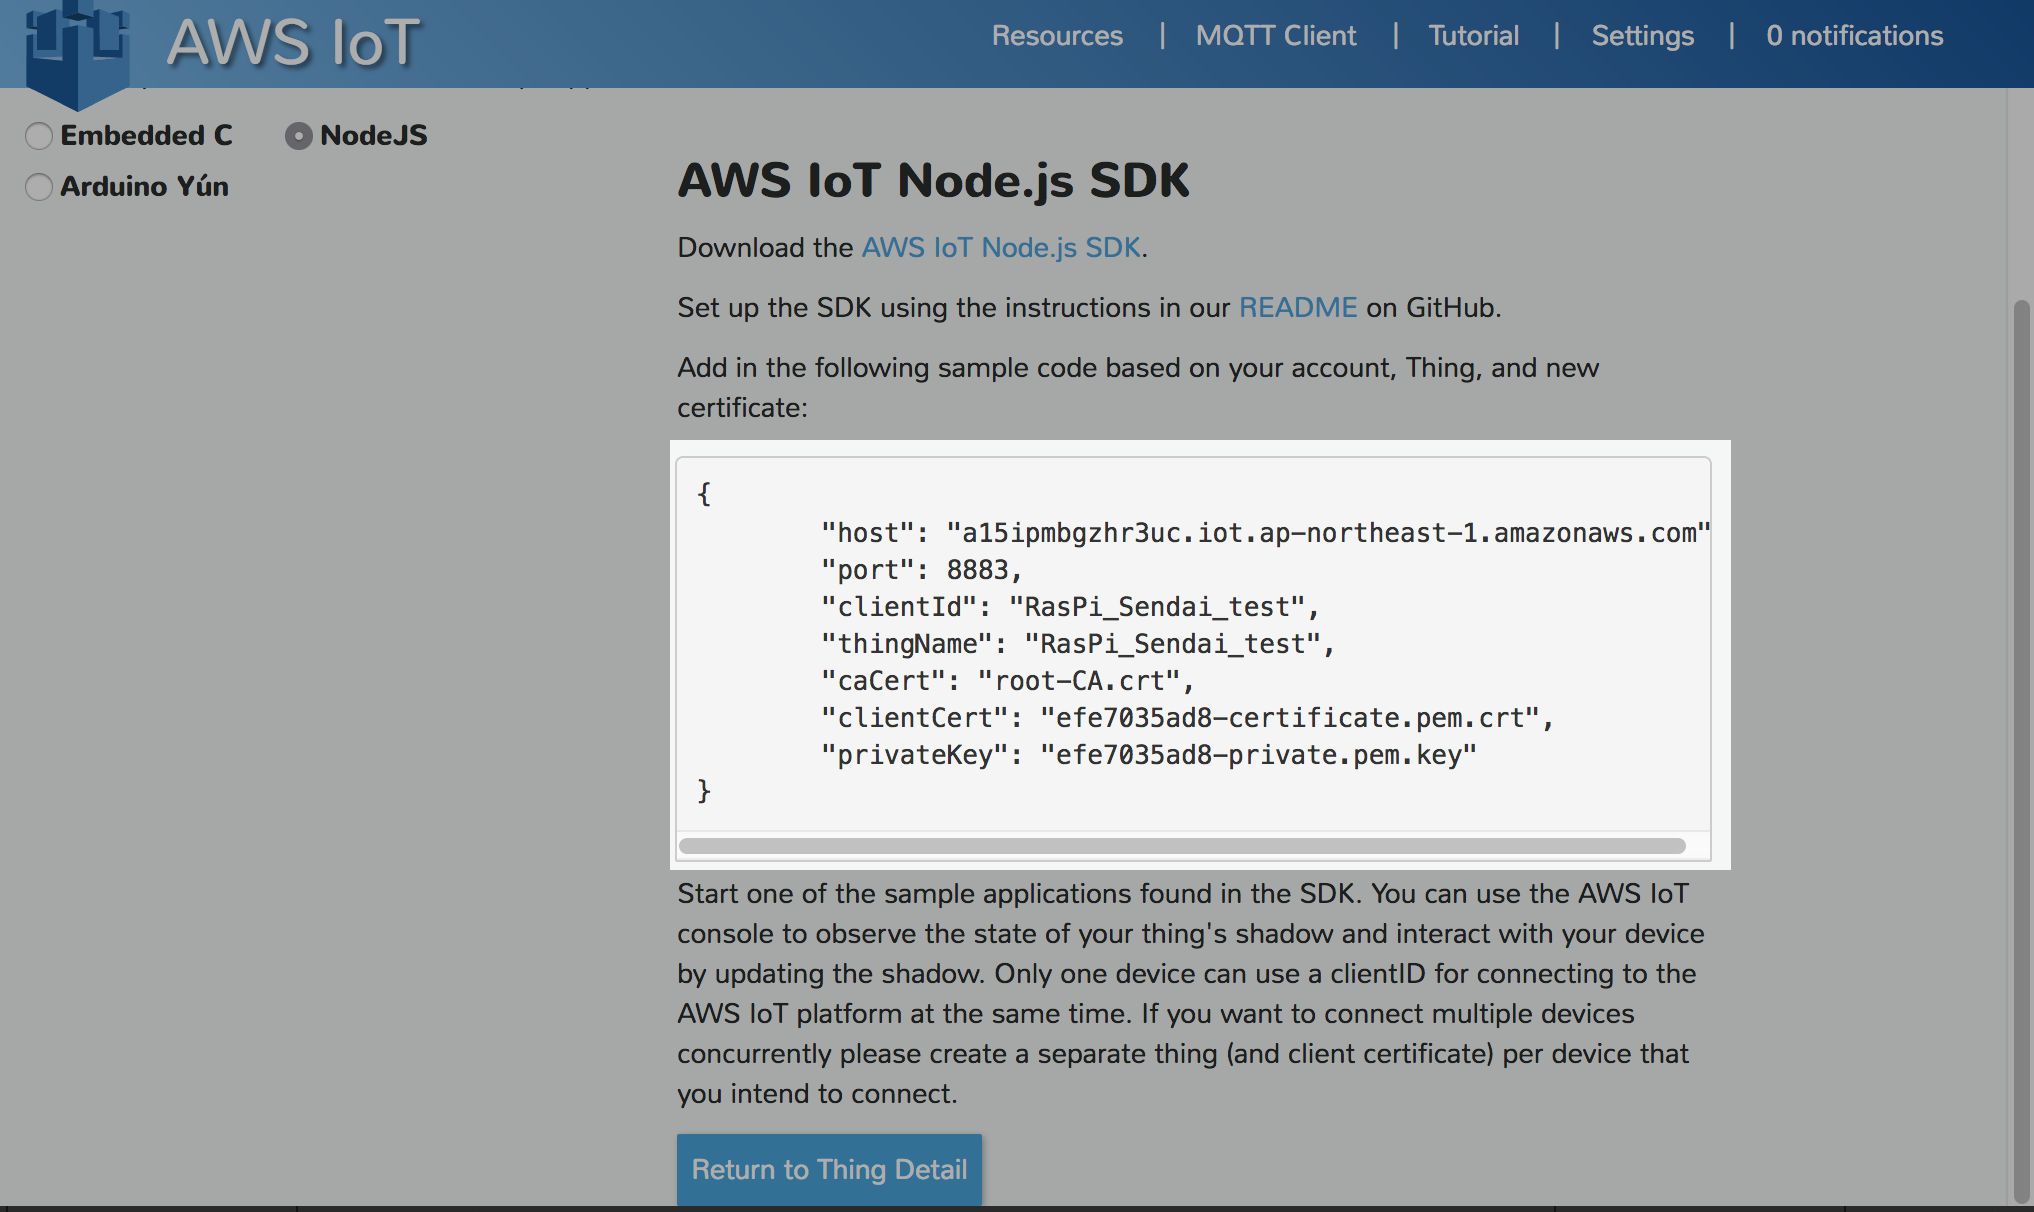
-
select [Return to Thing Detail]
-
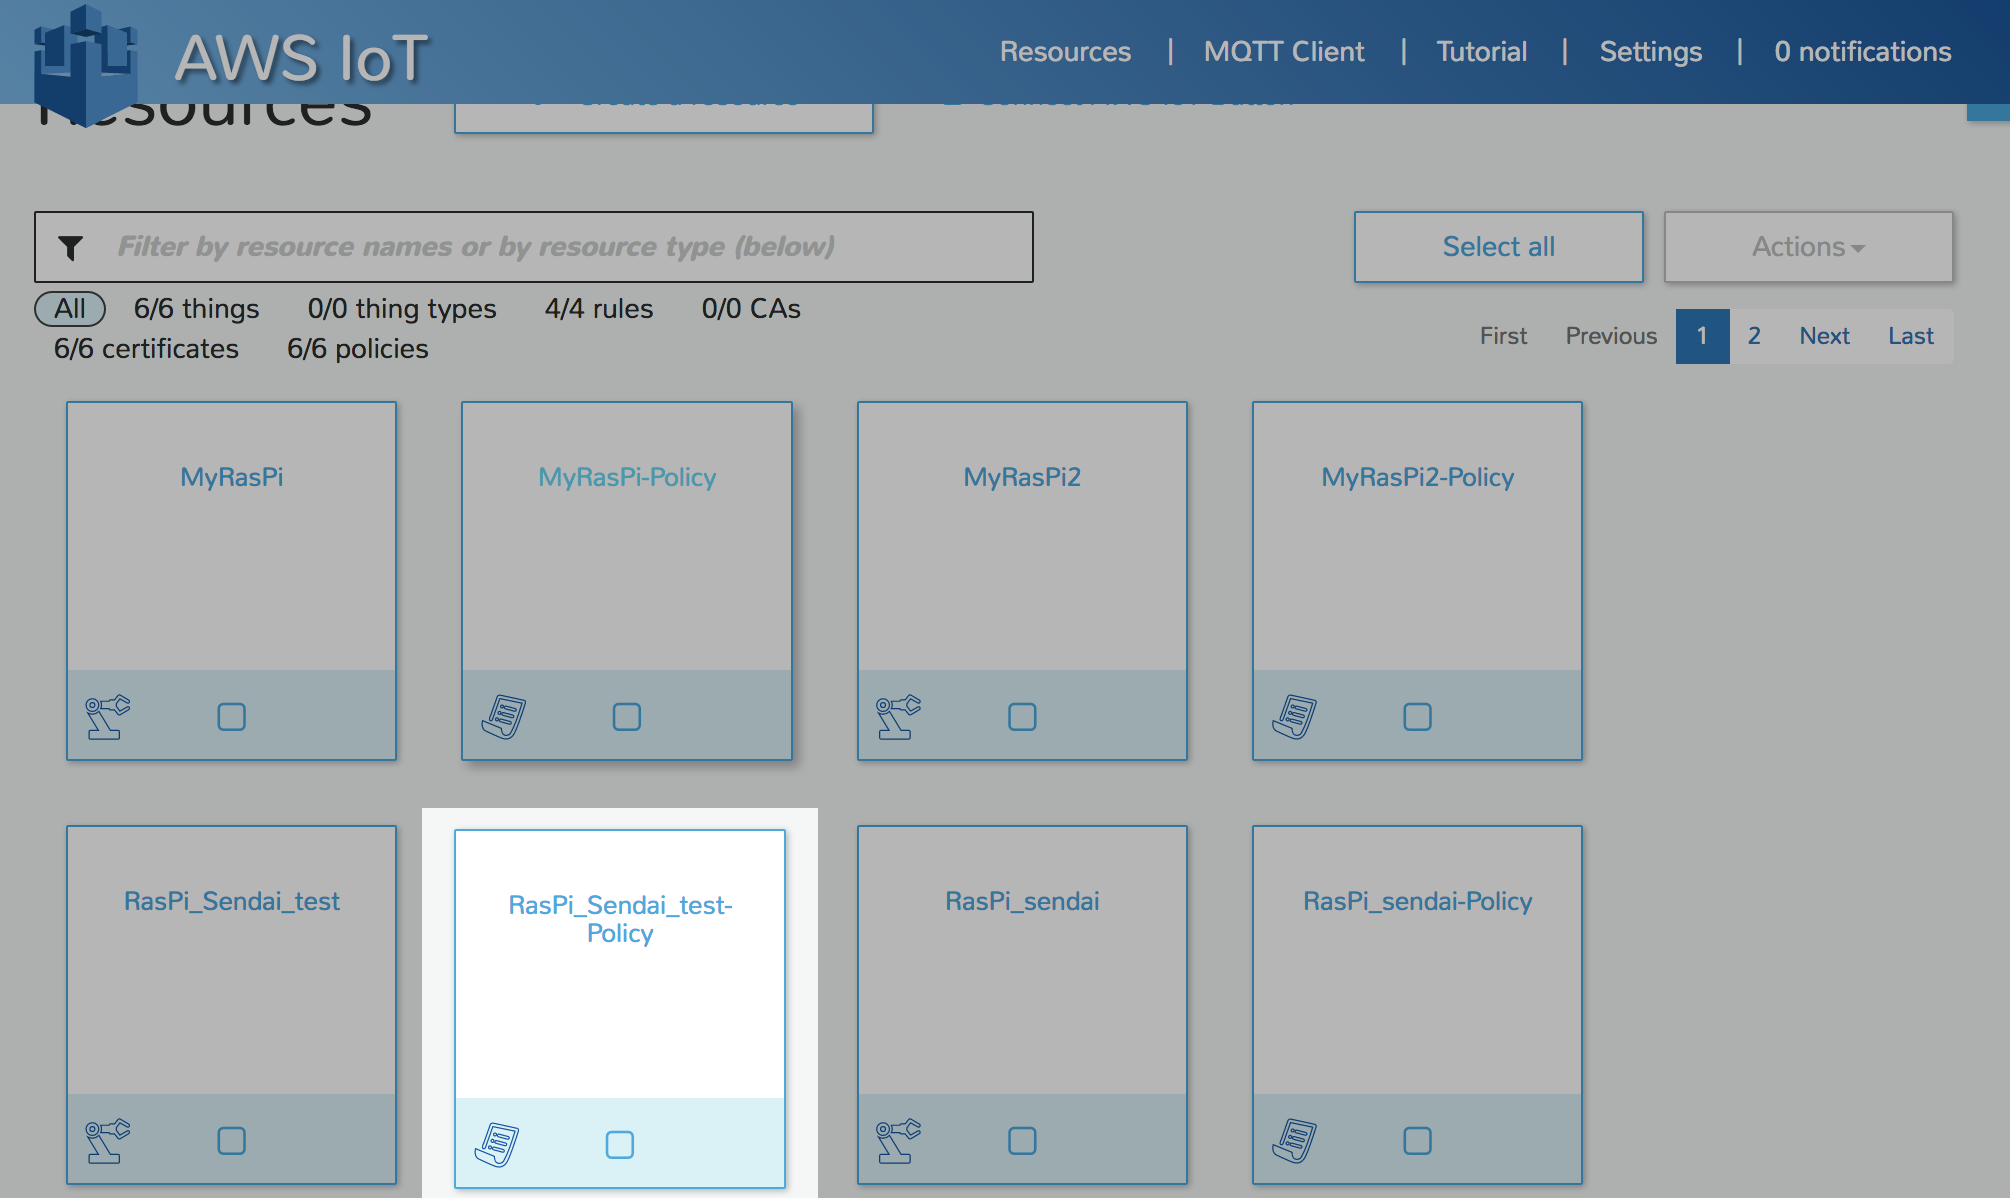
[Thing name]_policy icon が作成されている事を確認
AWS IoT : Create rule
-
select [Create a resource]
-
select [Create Rule]
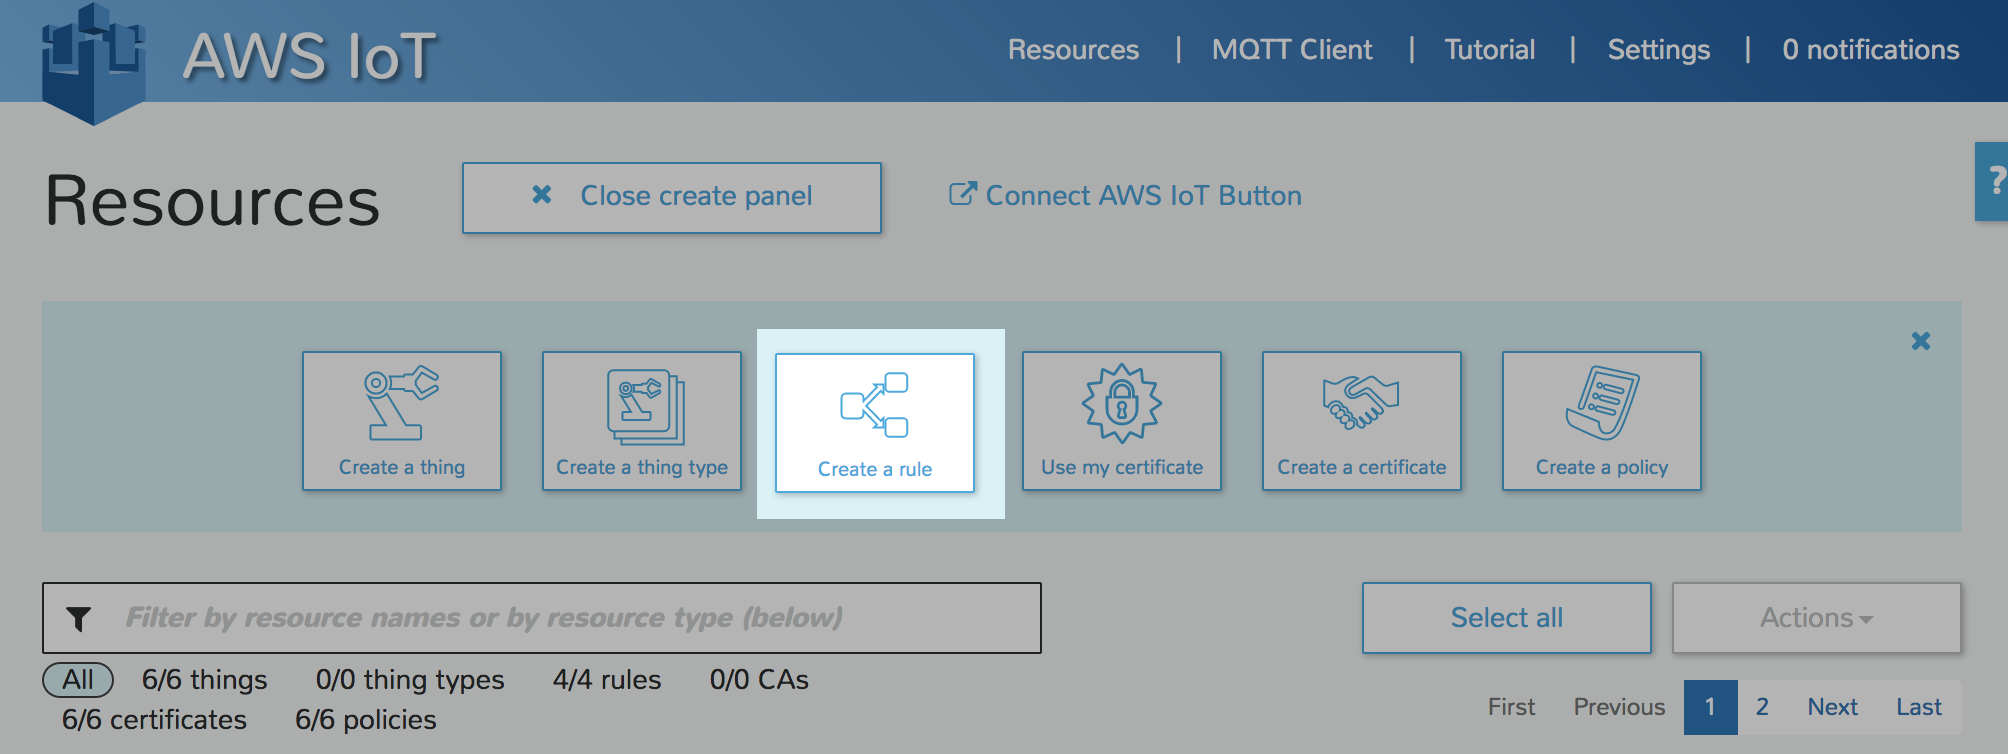
-
write Name : 適当な名前
-
write attribute : 下記をそのまま書き込み
state.reported.temperature, state.reported.humidity -
write topic filter : 下記の[Thing name]部分をを前工程で作成した、thing nameへ変更し書き込み
$aws/things/[Thing name]/shadow/update/accepted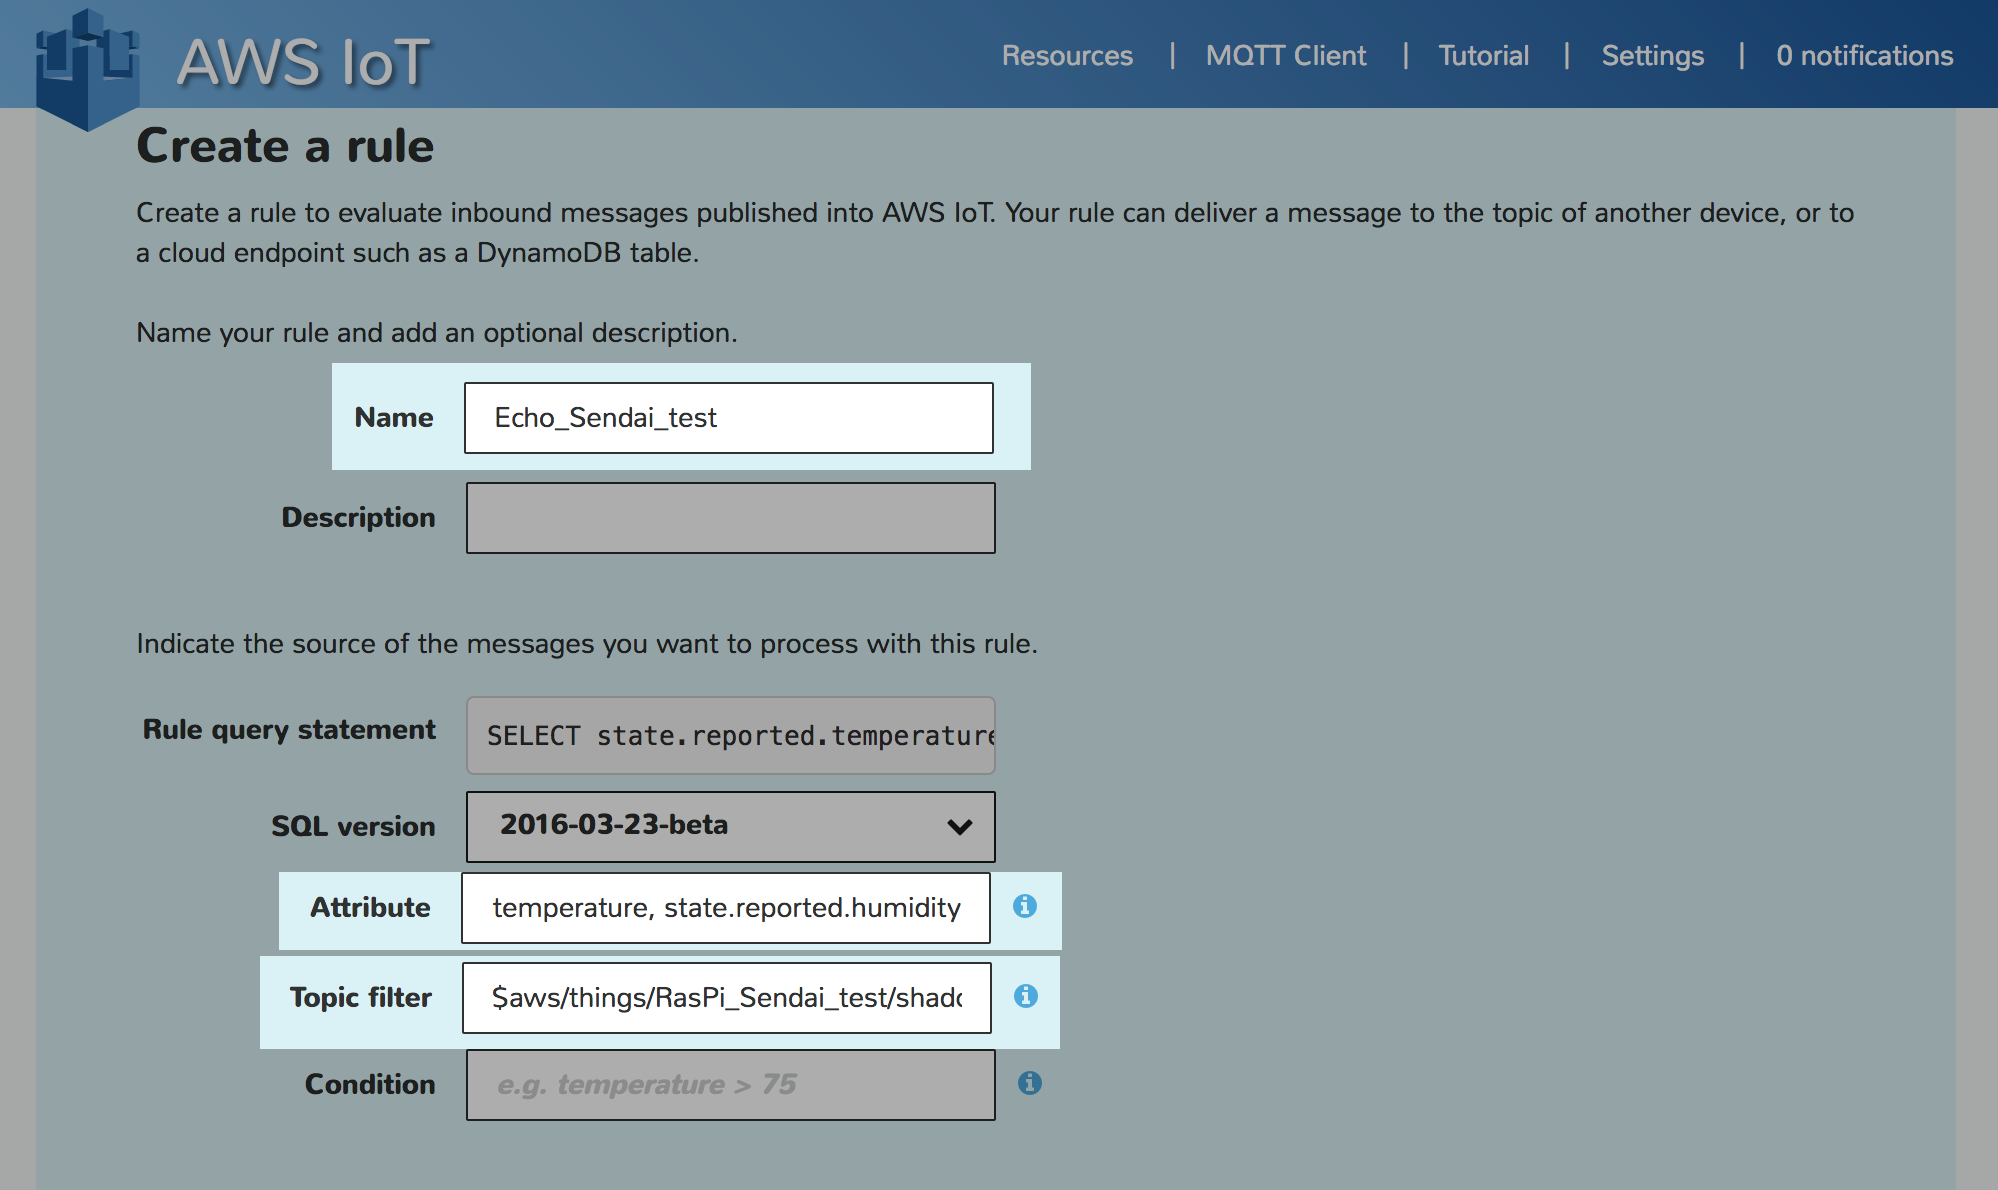
-
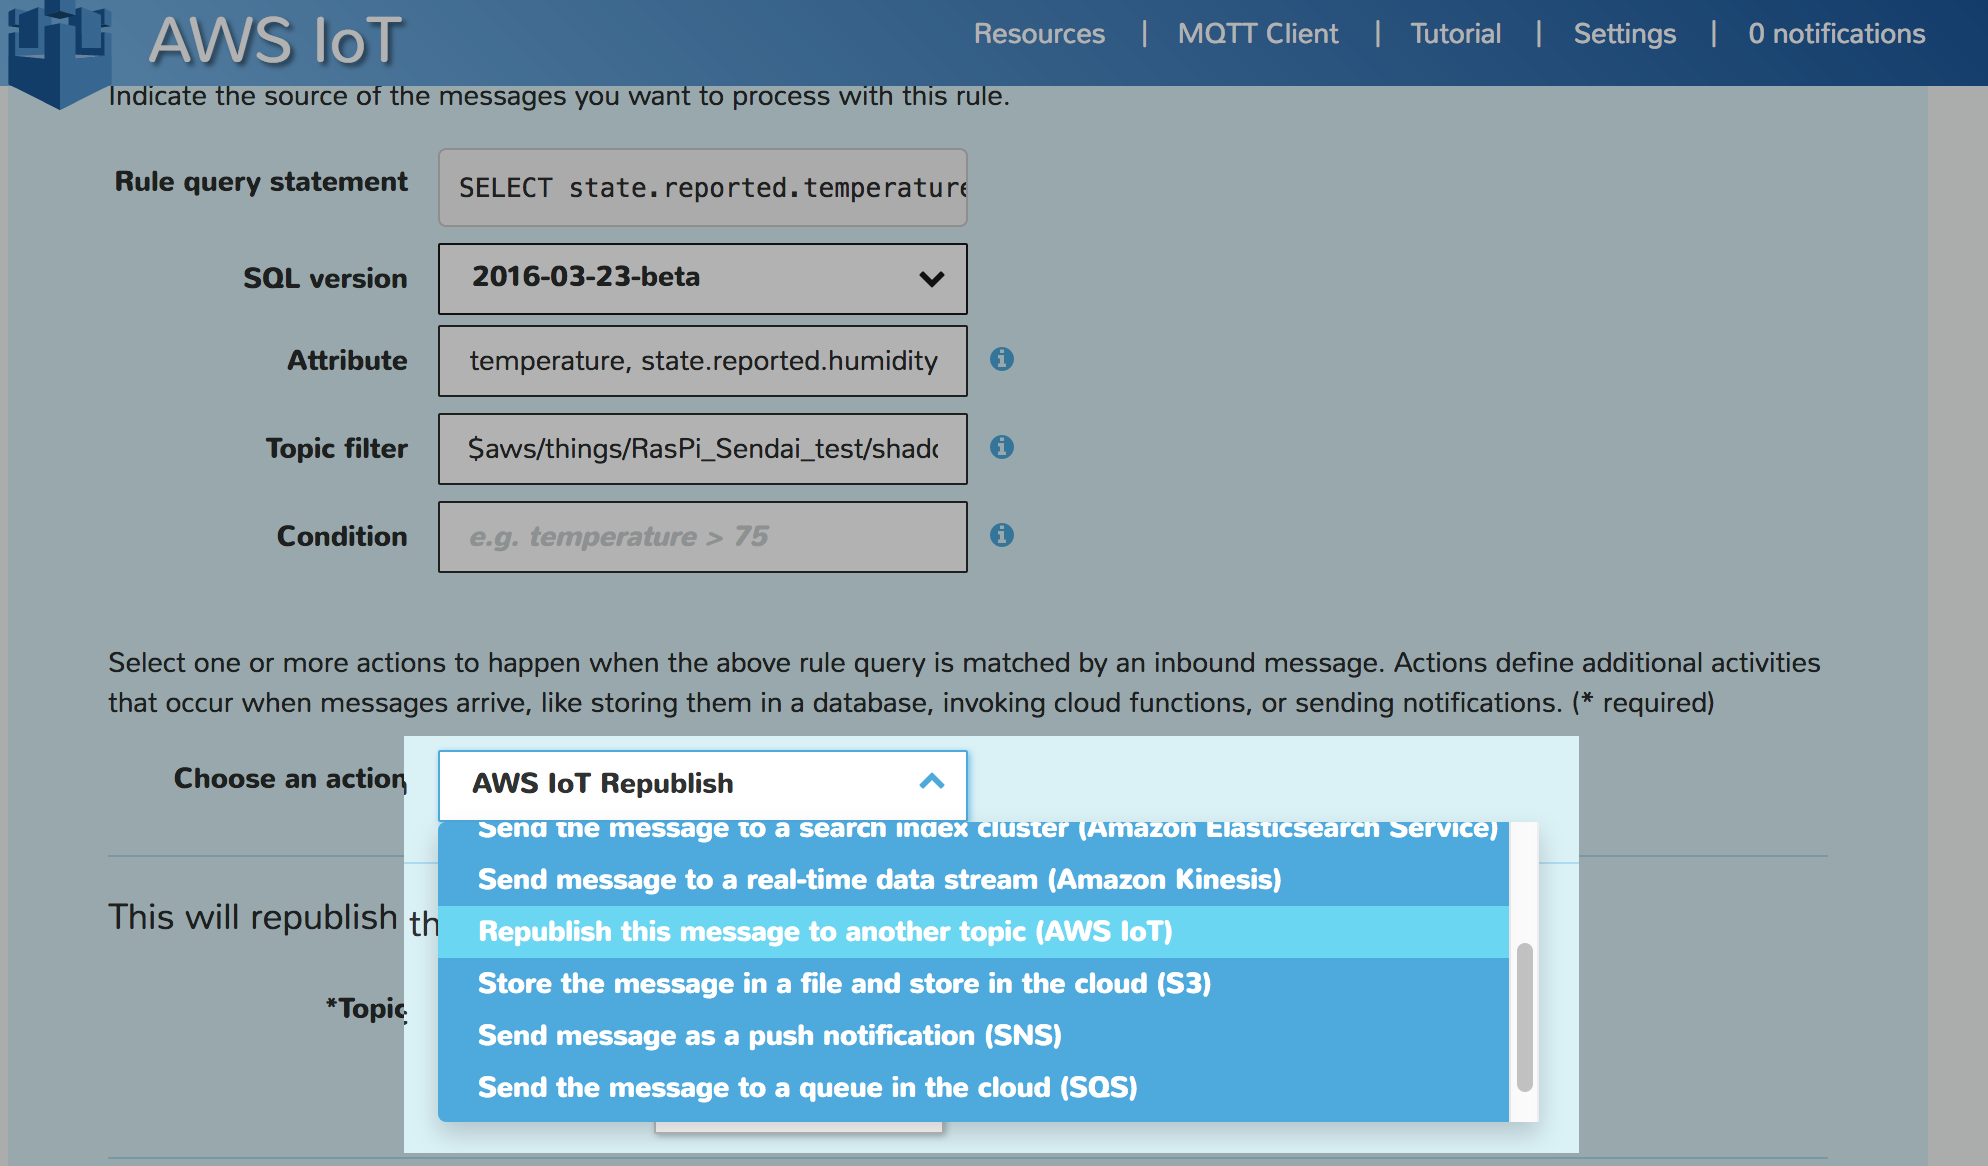
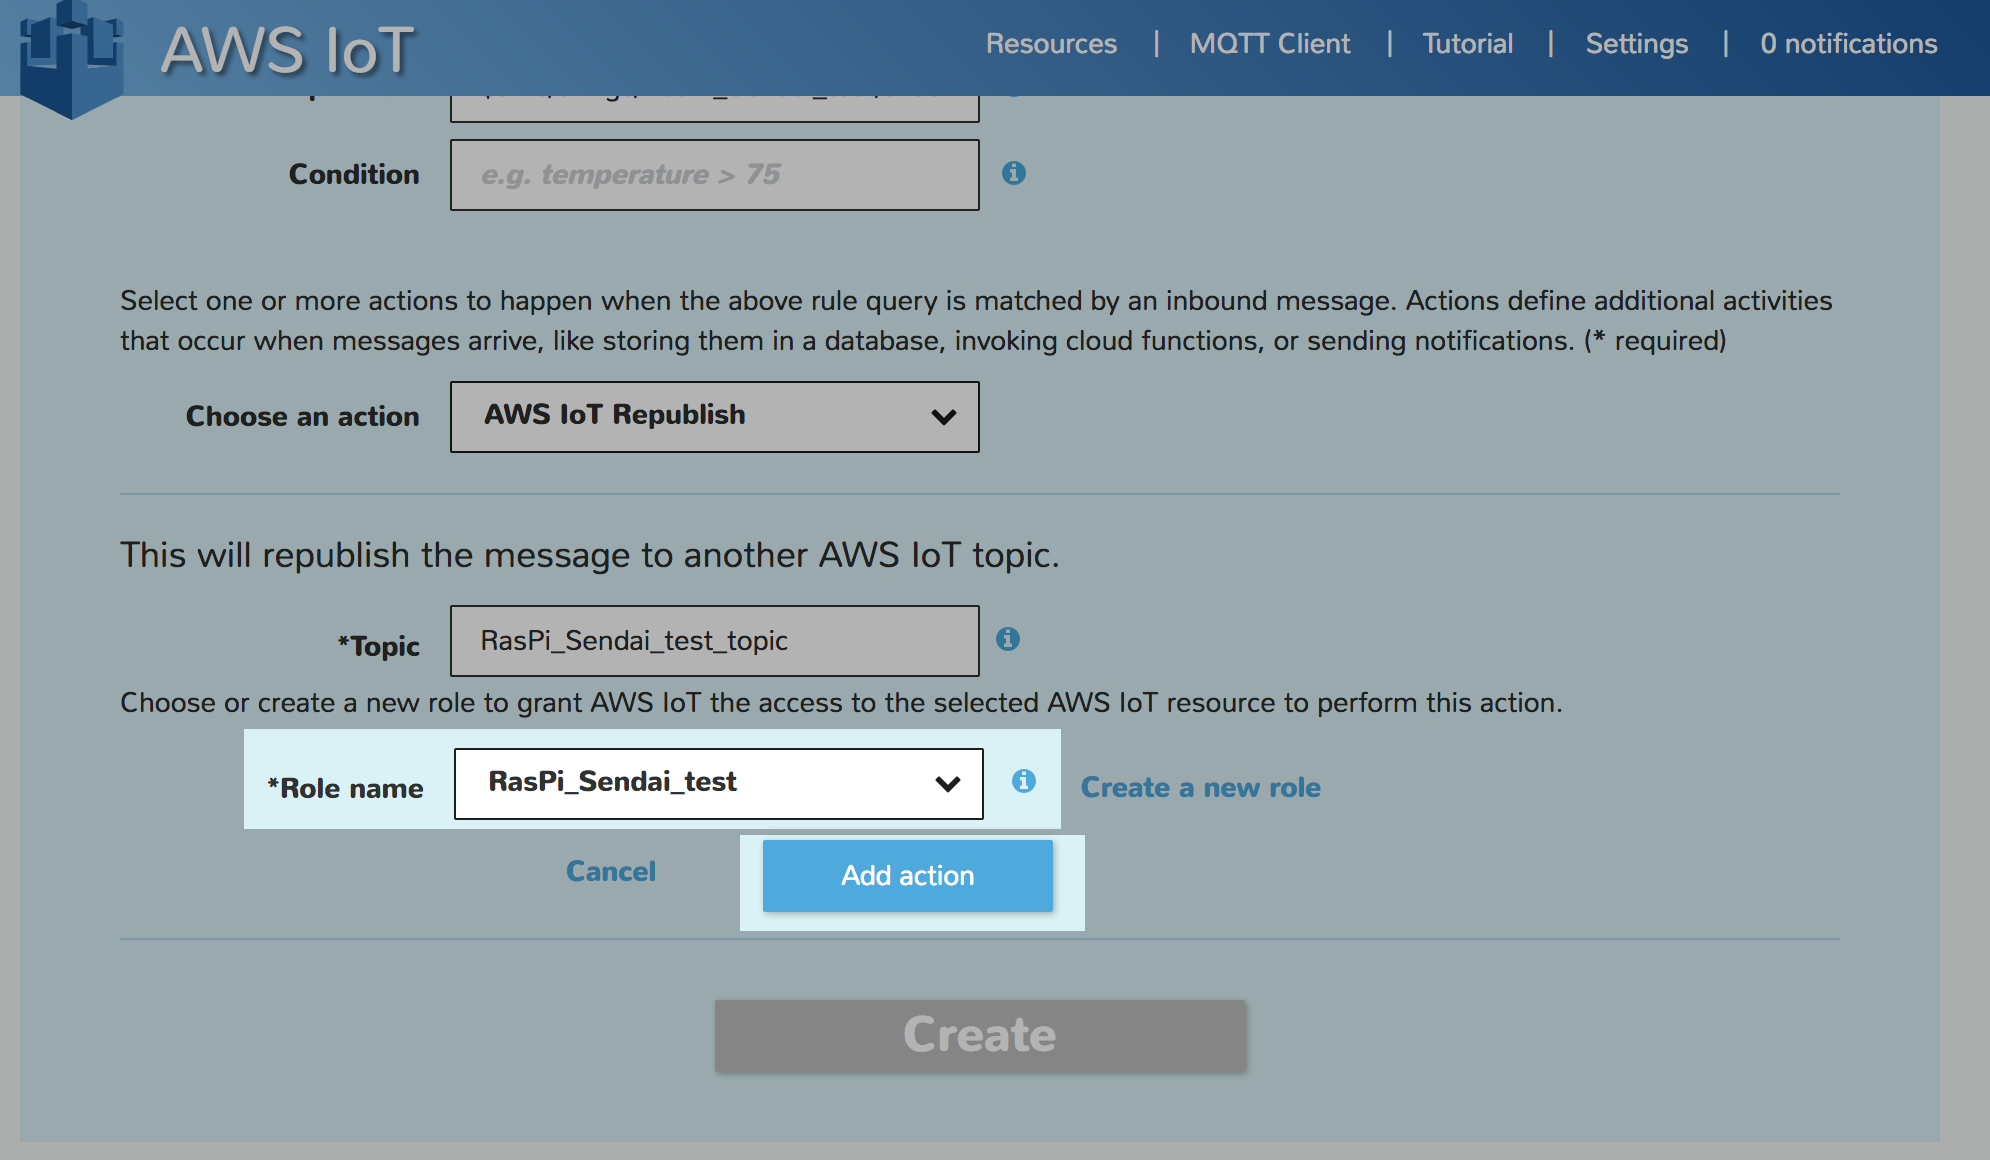
[choosen action] から [Republish this message to another topic (AWS IoT)] を選択
-
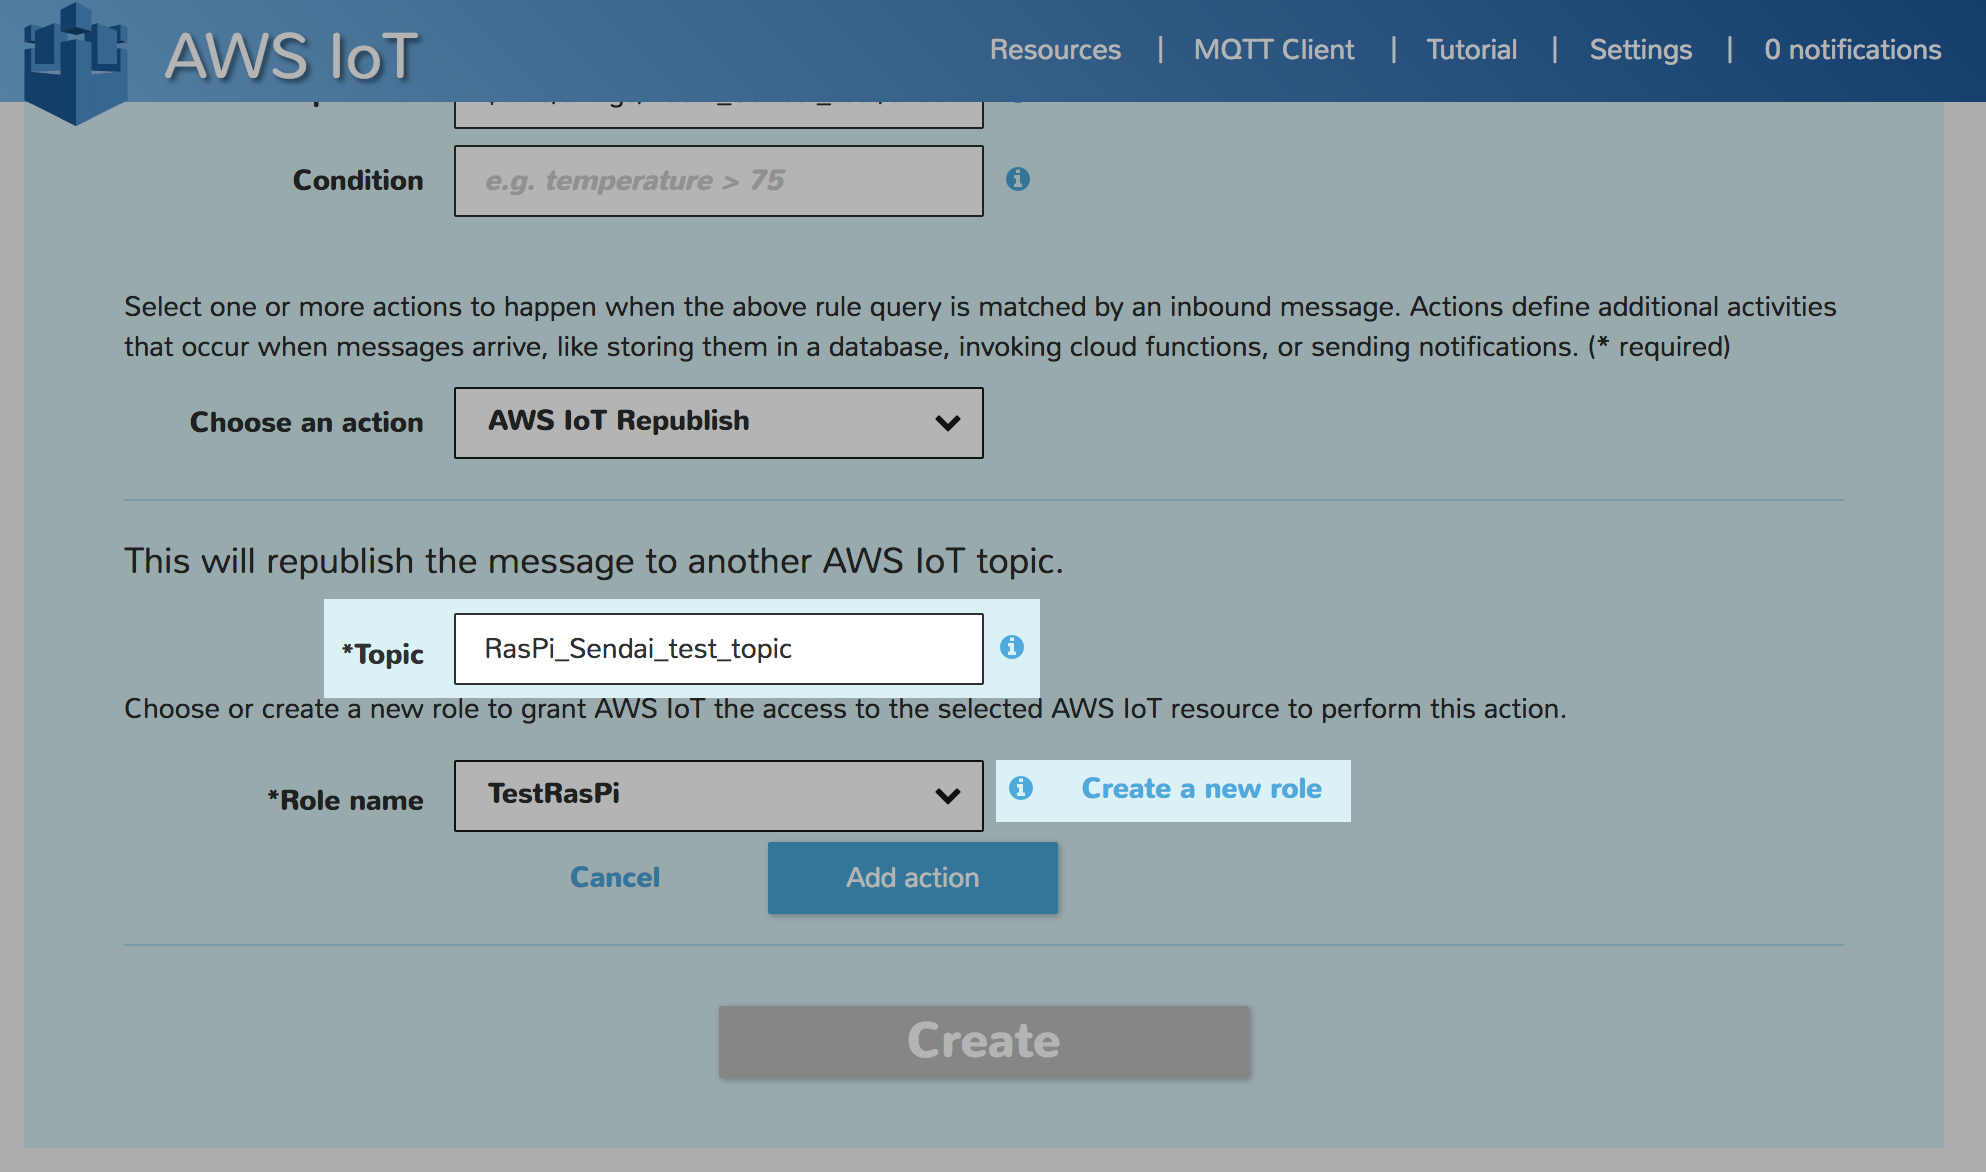
[Topic] へ適当な名前を入力
-
[Create a new role] を選択
-
Role Nameを入力
-
[Create] を選択

-
入力した Role名が表示される事を確認
-
[Add Action] を選択
-
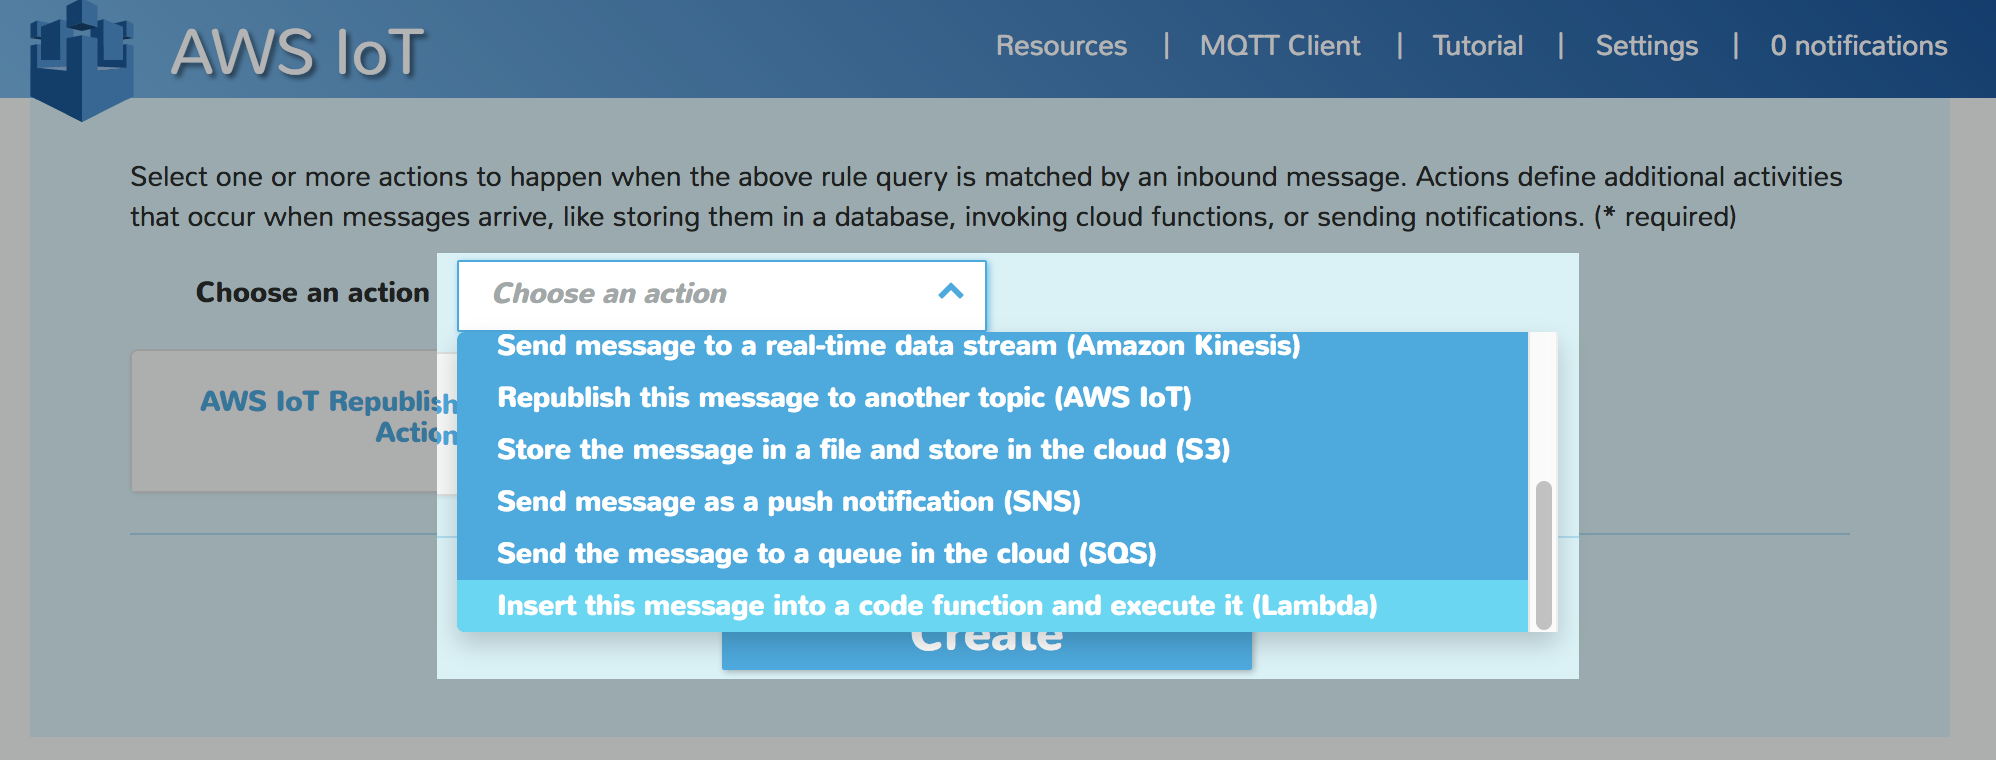
[choosen action] から [Insert this message into a code function and excut it(Lambda)] を選択
-
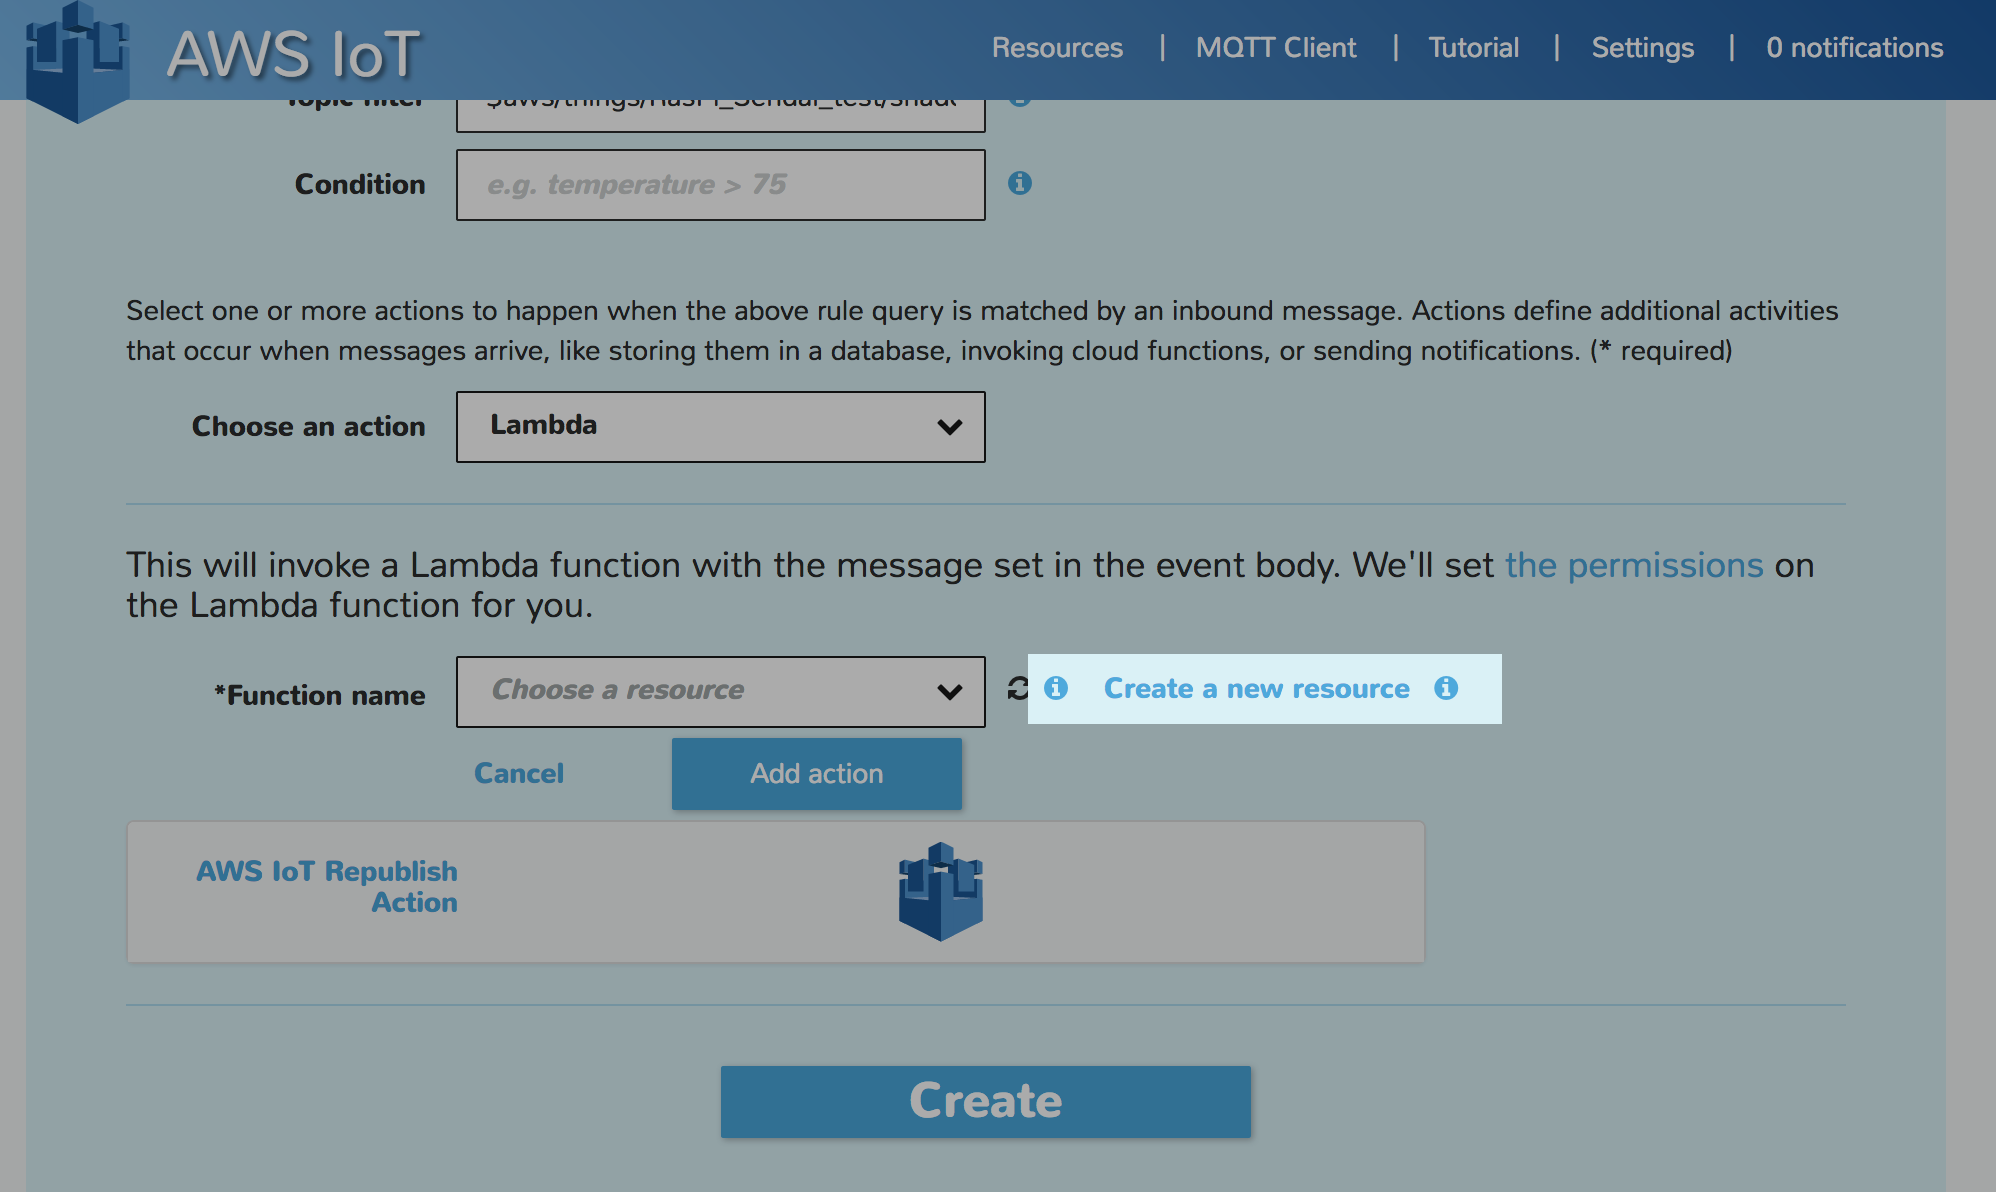
[Create a new resouce] を選択
記事移動
残工程
- Lambdaの画面から抜け, 設定途中のIoT画面へ戻る
- フォーム右手の更新アイコンを押下し、function listを再取得
- 新規作成した lambda functionを選択
- [Add Action] を選択

- [Create] を選択し、完了
RaspBerry Pi
Access keys をraspberry piへ転送
// AWS IoT : Create Thing 設定時DLした, pub / pri / cert の3個及び, root証明書 1個.
ssh pi@192.168.1.100
mkdir ~/cert
cd ~/cert
wget -O root-CA.crt https://www.symantec.com/content/en/us/enterprise/verisign/roots/VeriSign-Class%203-Public-Primary-Certification-Authority-G5.pem
exit
scp ./xxxx-certificate.pem.crt pi@192.168.1.100:/home/pi/cert/certificate.pem.crt
scp ./xxxx-private.pem.key     pi@192.168.1.100:/home/pi/cert/private.pem.key
scp ./xxxx-public.pem.key      pi@192.168.1.100:/home/pi/cert/root-CA.crt