動作確認
ESP-WROOM-02
Arduino IDE on Windows 7 pro 32bit
回路
http://qiita.com/exabugs/items/9d1b66aa1d22805afbc8
の回路通りに実装
関連回路図 https://upverter.com/7of9/ed476abaa01fdfbd/AQM0802-with-capacitor/
使用セット http://qiita.com/7of9/items/bf5a653d1925cbb38569
手順
- Arduino IDE にて esp8266_160217_AQM0802.ino を作成
- 新規タブにて AQM0802lib.ino を追加 ( 関連 )
以下のコードを貼る
code (v0.2)
esp8266_160217_AQM0802.ino
# include <Wire.h>

void setup() {
  Serial.begin(115200);
  Serial.println("");

  Wire.begin(); // (SDA,SCL) Default 4 and 5

  AQM0802_Initialize(/* cursorOn=*/true, /* cursorPosOn=*/true, /* contrast=*/7);
//  Test_AQM0802_cursorOn_posOff_contrastLow();
//  Test_AQM0802_cursorOn_posOn_contrastLow();
//  Test_AQM0802_cursorOn_posOn_contrastHigh();

  displayDateTime();
}

void displayDateTime()
{
  uint8_t pos;
  pos = 0x80 | (0 * 0x40); // DDRAM address
  String currentDate = "20160217";
  AQM0802_WriteSingleInstruction(pos);
  AQM0802_WriteData( (uint8_t *)currentDate.c_str(), currentDate.length() );

  pos = 0x80 | (1 * 0x40); // DDRAM address
  String currentTime = "22:44";
  AQM0802_WriteSingleInstruction(pos);
  AQM0802_WriteData( (uint8_t *)currentTime.c_str(), currentTime.length() );
}

void loop()
{

}
AQM0802lib.ino
# include <Wire.h>

/*
 * v0.2 2016 Feb. 17
 *  - add test functions()
 *    + add Test_AQM0802_cursorOn_posOn_contrastHigh()
 *    + add Test_AQM0802_cursorOn_posOn_contrastLow()
 *    + add Test_AQM0802_cursorOn_posOff_contrastLow()
 * v0.1 2016 Feb. 17
 *  - add AQM0802_Initialize()
 *  - add AQM0802_Clear()
 *  - add AQM0802_WriteData()
 *  - add AQM0802_WriteInstruction()
 *  - add writeToDevice()
 *
 * -------
 * Special thanks to exabugs for ( http://qiita.com/exabugs/items/9d1b66aa1d22805afbc8 )
 */

static const uint8_t kDeviceAddr = 0x3e;

static uint8_t ControlByteList[] = {
  0x00, // Instruction write operation. ( Co=0, Rs=0 )
  0x40, // Data write operation. ( Co=0, Rs=1 )
};

enum {
  TYPE_INSTRUCITON = 0,
  TYPE_DATA,
};

//---------------------------------------------------------------------------------

// private functions ---------------------------
void writeToDevice(int type, uint8_t *dataByte, size_t len)
{
  for (int idx = 0; idx < len; idx++) {
    Wire.beginTransmission(kDeviceAddr);
    Wire.write(ControlByteList[type]);
    Wire.write(dataByte[idx]);
    Wire.endTransmission();
    delayMicroseconds(27); // 26.3us
  }
}

//---------------------------------------------------------------------------------

// public functions ---------------------------
void AQM0802_WriteSingleInstruction(uint8_t data)
{
  size_t len = 1;
  uint8_t list[] = {data};
  writeToDevice(TYPE_INSTRUCITON, list, len);
}

void AQM0802_WriteInstructions(uint8_t *data, int len)
{
  writeToDevice(TYPE_INSTRUCITON, data, len);
}

void AQM0802_WriteData(uint8_t *data, size_t len)
{
  writeToDevice(TYPE_DATA, data, len);
}

void AQM0802_Clear()
{
    AQM0802_WriteSingleInstruction(0x01);
}

void AQM0802_Initialize(bool cursorOn, bool cursorPosOn, uint8_t contrast)
{
  //
  delay(40); // Wait time > 40ms after VDD stable

  // Function set
  AQM0802_WriteSingleInstruction(0x38);

  // Function set
  AQM0802_WriteSingleInstruction(0x39);

  // Internal OSC frequency
  AQM0802_WriteSingleInstruction(0x14);

  // { Contrast set -----------------------------
  uint8_t ctrst = contrast;
  if (ctrst > 0b1111) {
    ctrst = 0b1111;
  }
  AQM0802_WriteSingleInstruction(0x70 | ctrst);
  // } Contrast set -----------------------------

  // Power/ICON/Contrast control
  AQM0802_WriteSingleInstruction(0x56);

  // Follower control
  AQM0802_WriteSingleInstruction(0x6C);

  // Wait time > 200mS (for power stable)
  delay(200);

  // Function set
  AQM0802_WriteSingleInstruction(0x38);

  // { Display ON/OFF control -----------------------
  uint8_t extra = 0x0;
  if (cursorOn) {
    extra = extra | 0b10;
  }
  if (cursorPosOn) {
    extra = extra | 0b11;
  }
  AQM0802_WriteSingleInstruction(0x0C | extra);
  // } Display ON/OFF control -----------------------

  // Clear Display
  AQM0802_WriteSingleInstruction(0x01);

  // Wait time > 1.08ms
  delay(2);
}


//---------------------------------------------------------------------------------

// test functions ---------------------------

void Test_AQM0802_cursorOn_posOff_contrastLow()
{
  AQM0802_Initialize(/* cursorOn=*/true, /* cursorPosOn=*/false, /* contrast=*/1);
}

void Test_AQM0802_cursorOn_posOn_contrastLow()
{
  AQM0802_Initialize(/* cursorOn=*/true, /* cursorPosOn=*/true, /* contrast=*/1);
}

void Test_AQM0802_cursorOn_posOn_contrastHigh()
{
  AQM0802_Initialize(/* cursorOn=*/true, /* cursorPosOn=*/true, /* contrast=*/15);
}
使い方
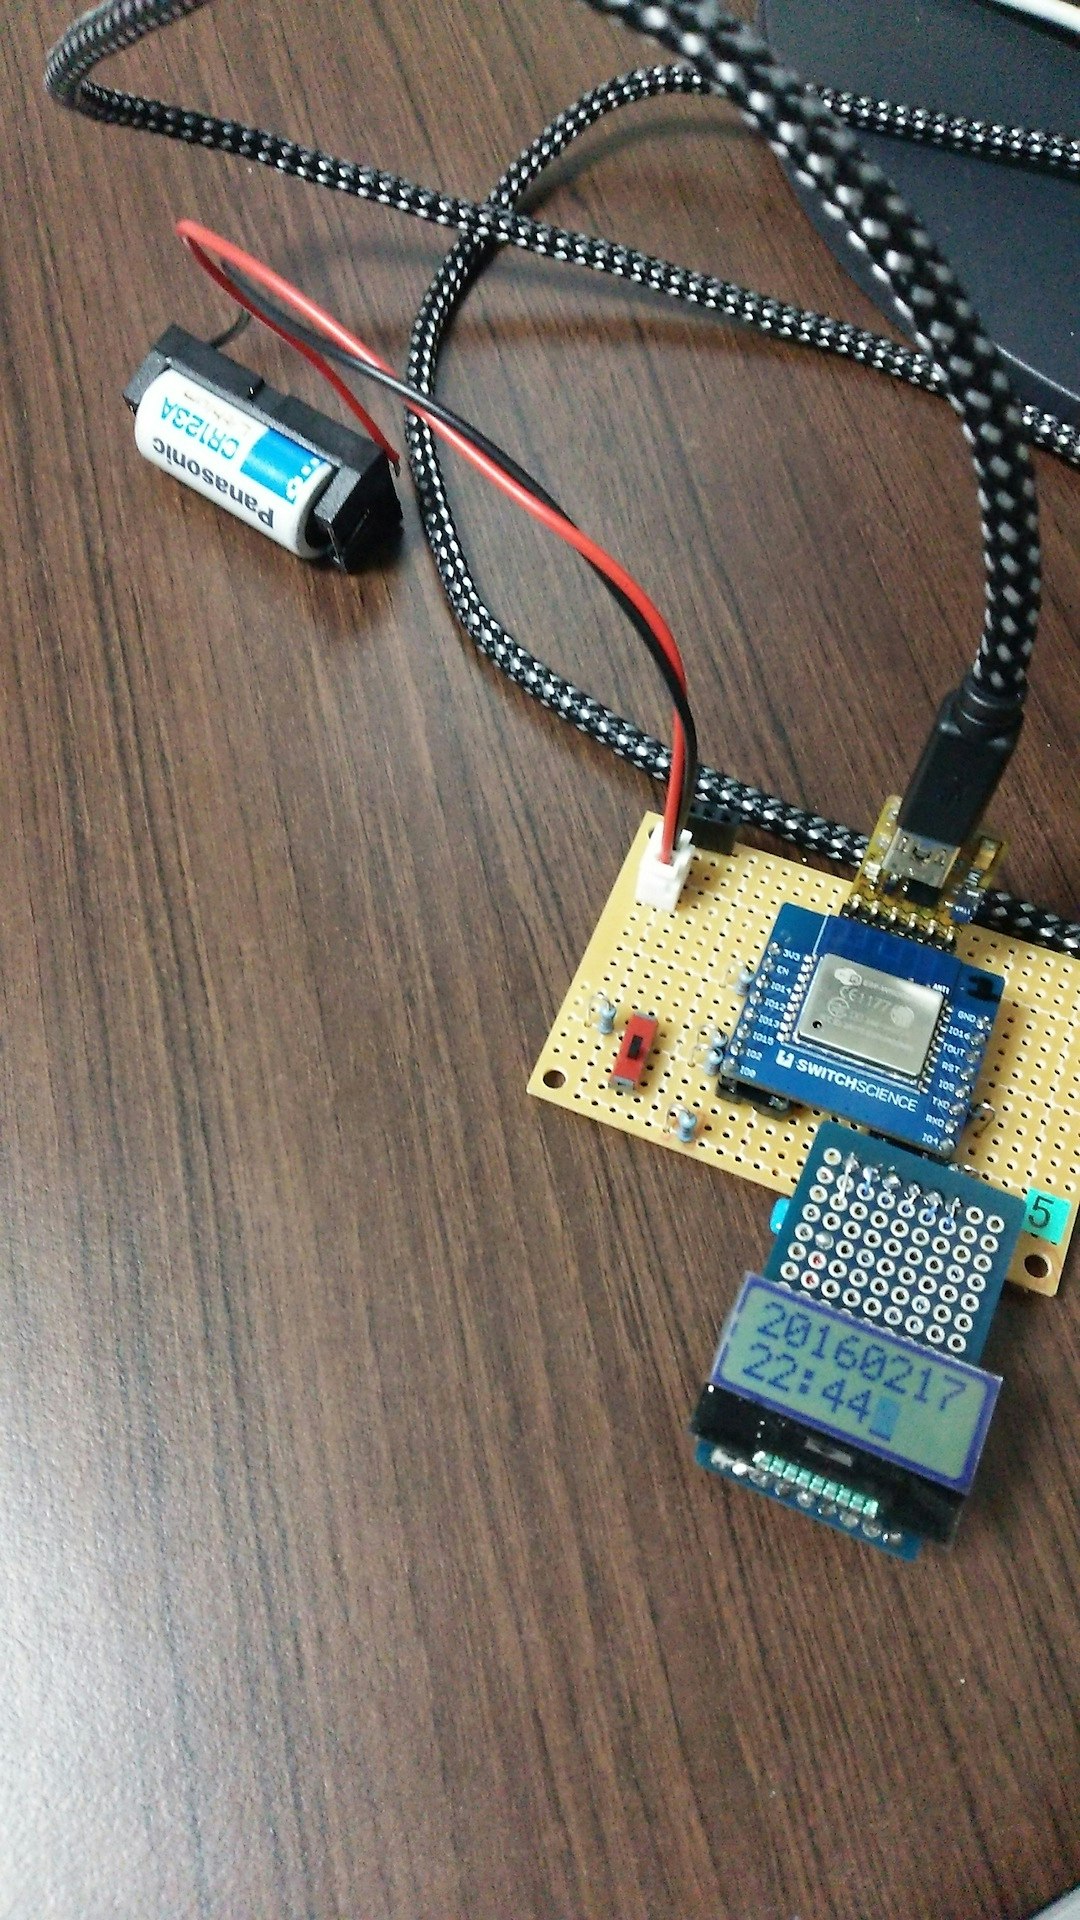
esp8266_160217_AQM0802.ino ファイルの以下にて、現在日時を入力してビルドする。
String currentDate = "20160217";
String currentTime = "22:44";
タイミングよくプログラムを流し込んで実行する。
運が良ければ、表示時刻と現在時刻(JST)が合うかもしれない。
補足
ライブラリの内容はもう少し練らないといけない。
-
初期化時のパラメータを個別に渡すか、構造体渡しにするか
-
ラッパー関数を用意して、細かい設定はしなくていいようにするか
-
途中でコントラストを変更するなどの関数はどうか
-
表示位置と文字列を指定する関数があると便利そうだ
-
Arduinoのdatetimeライブラリの勉強が必要
-
本当はGrenningによるDual Targetにもとづいて実装したい。そうすれば、他のマイコンに応用が聞く