概要
ESP8266 (ESP-WROOM-02) で I2C で接続可能な LCD 8桁2行 を制御する
はじめに
部品セットに含まれていた LCD を制御しようという企画なのですが、16桁2行 型番:1602 ということしかわからない orz。
秋月でも扱ってなさそうなので、この LCD は諦めて、もっと安価でメジャーな LCD を選択しました。それが AQM0802 という LCD です。
部品調達
上が AQM0802 (8桁2行)、下が 1602 (16桁2行)
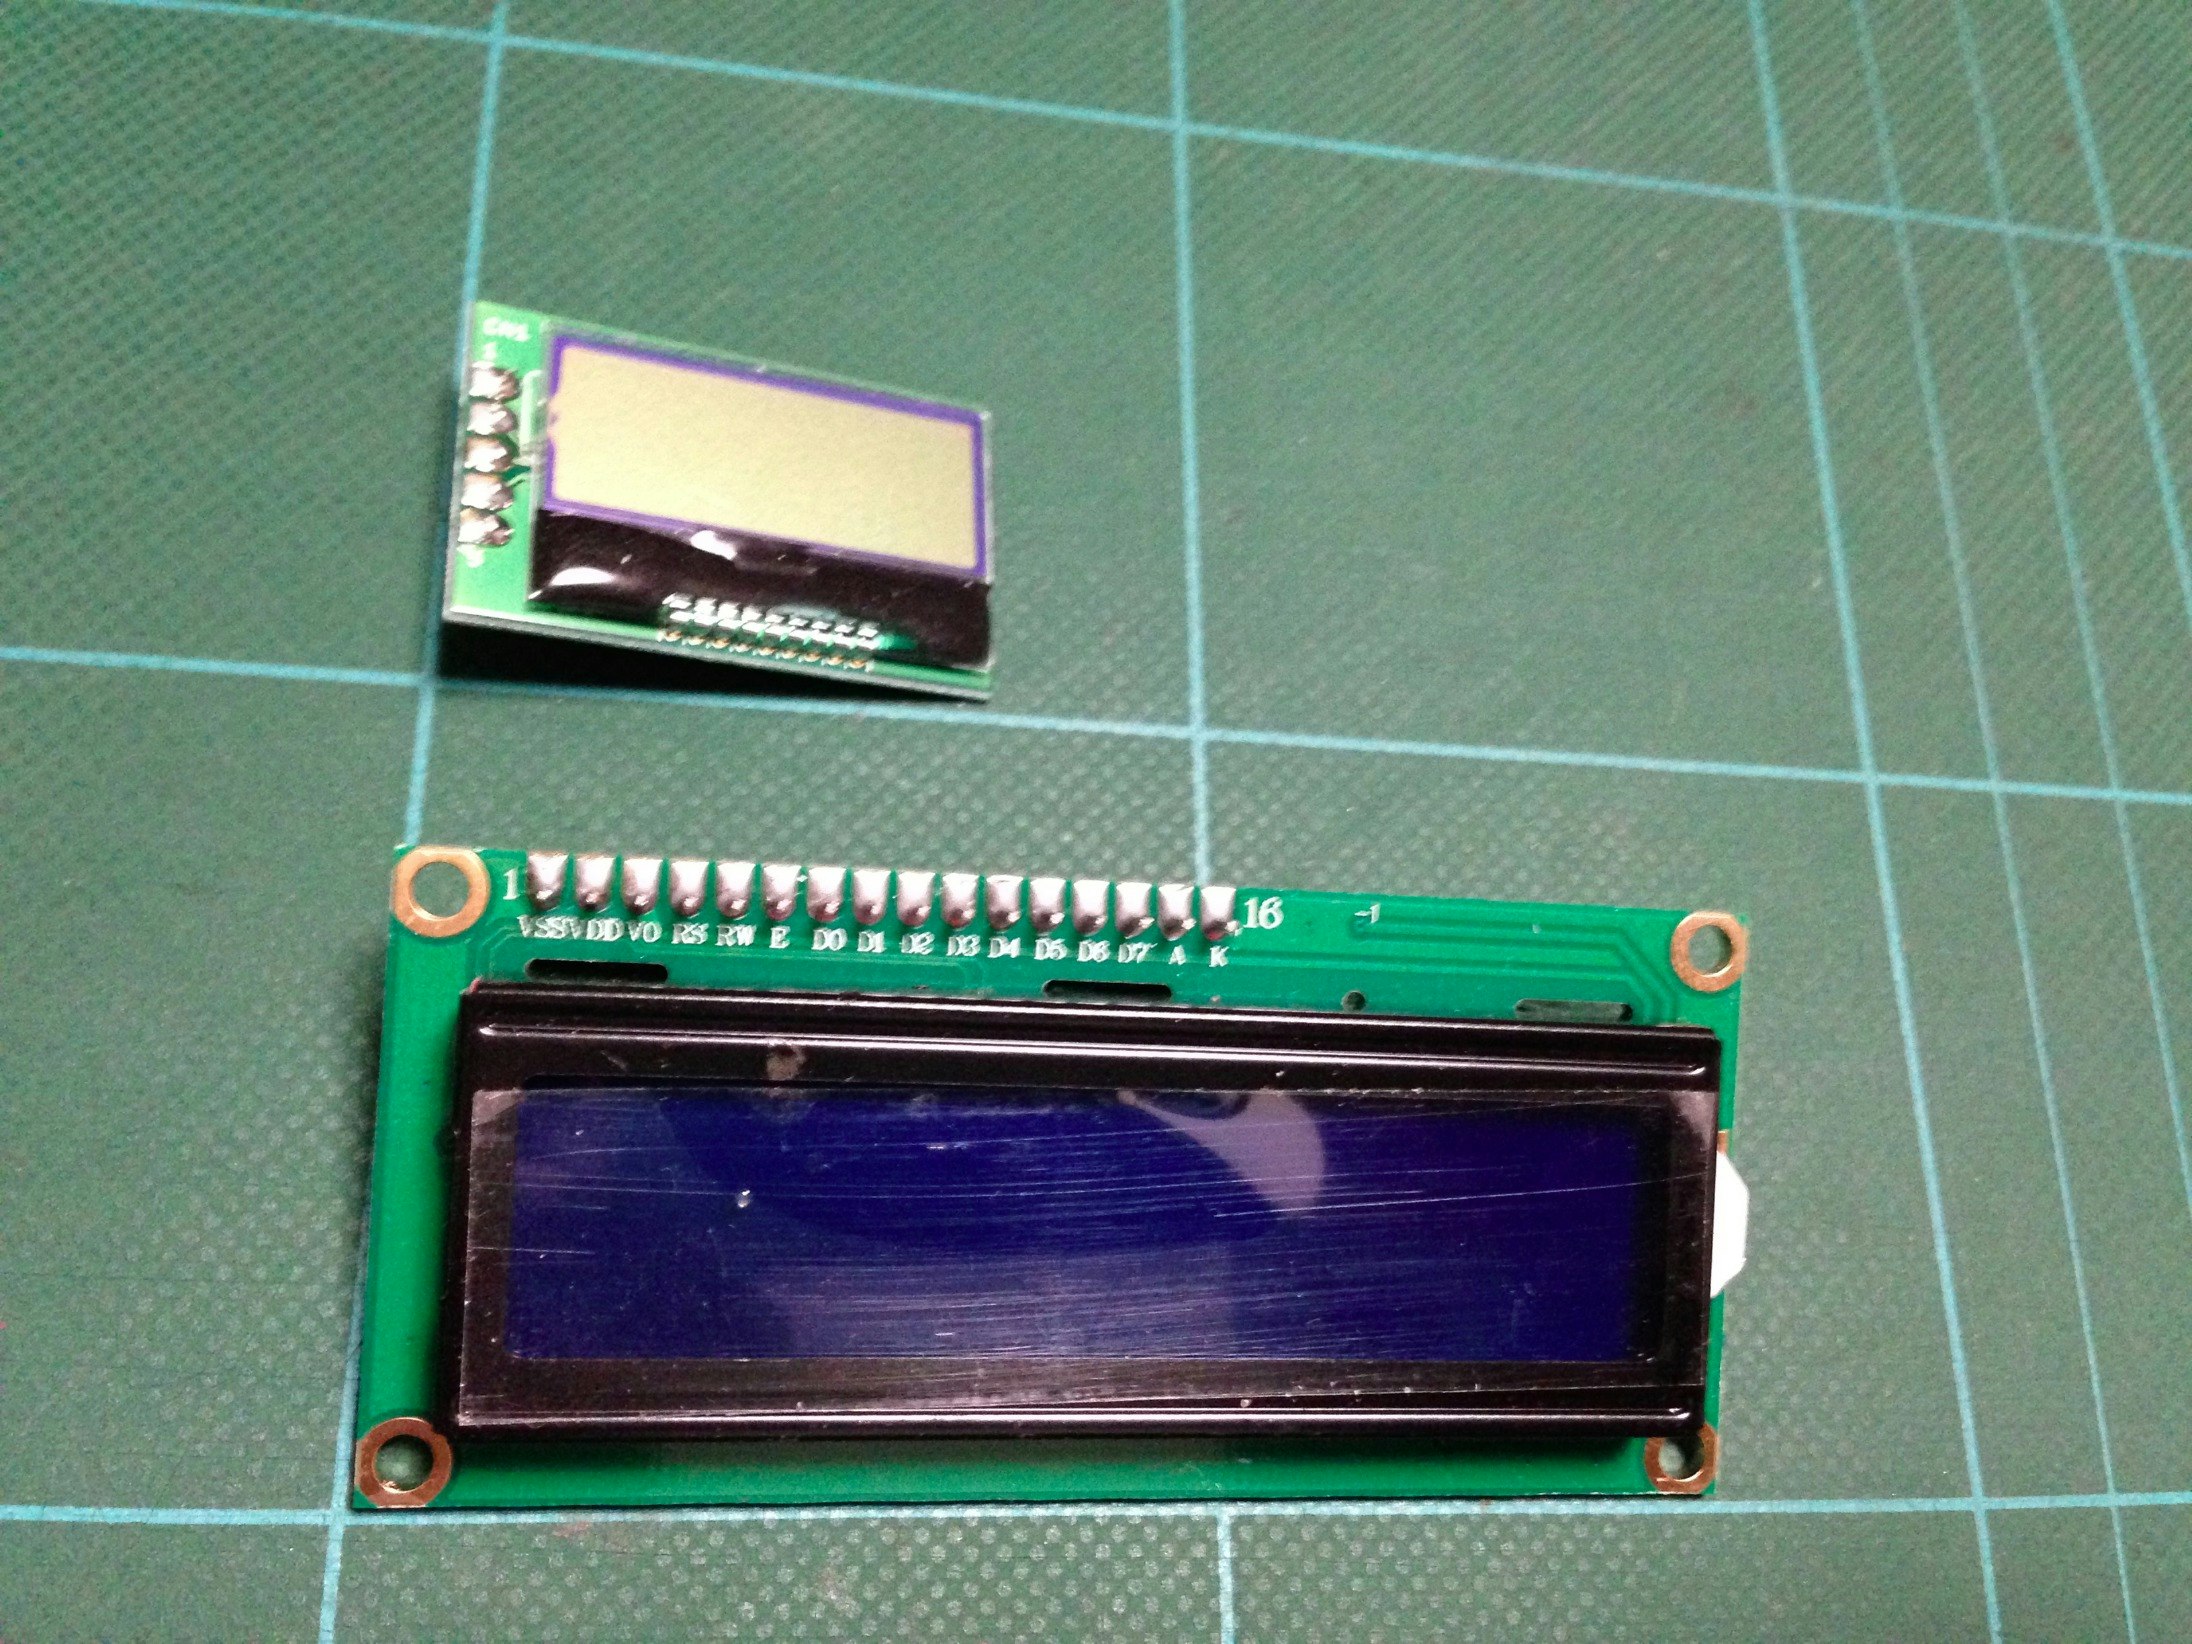
AQM0802 は安価に入手可能です。I2C接続 小型キャラクタ LCDモジュール (8x2行) 320円
ブレボー用にピッチ変換済みモジュールはこちら。ピッチ変換モジュール (完成品) 700円 今回はこれを使用しました。
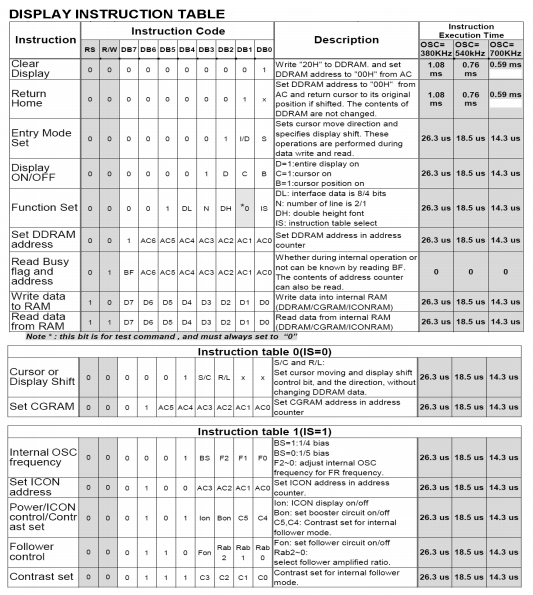
以下、データシート抜粋
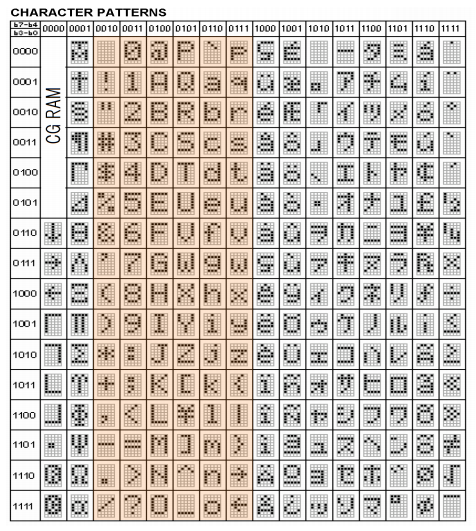
カタカナも表示可能のようですが、今回は取り敢えず、オレンジ色網掛け (ASCII互換) 部分にフォーカスします。
回路
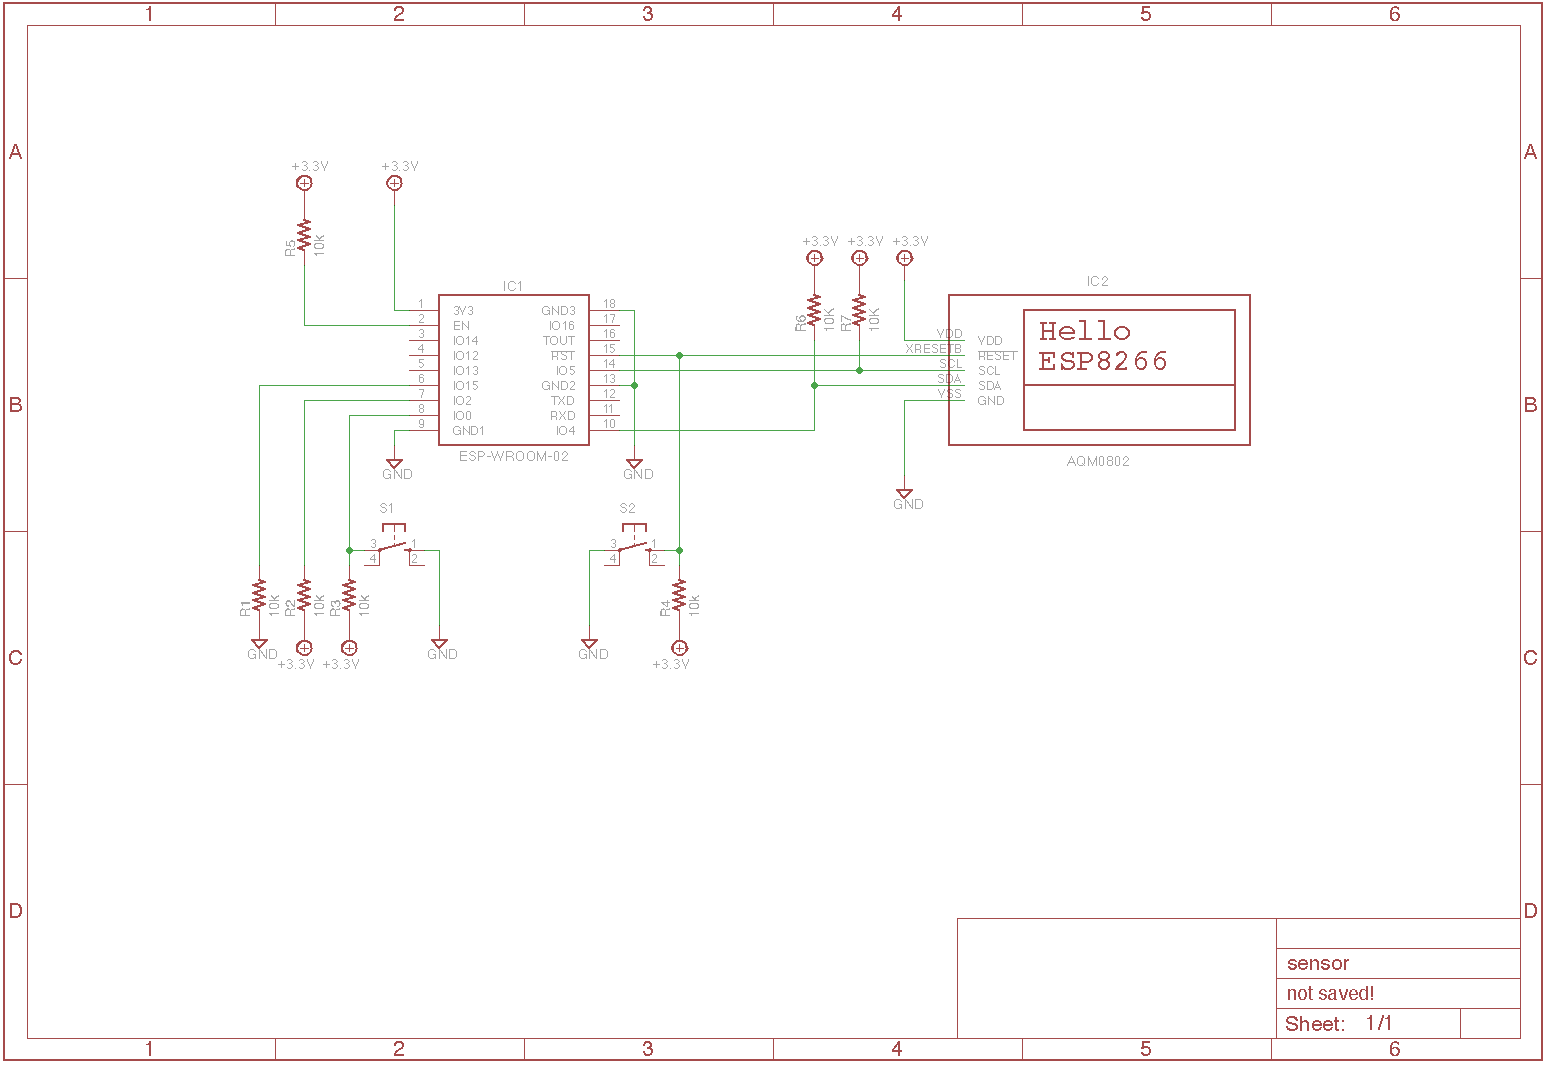
- I2C 用の端子は、ESP8266 データシート上では IO2/IO14 となっていましたが、以下 (pins_arduino.h) で IO4/IO5 として定義されています。
- よって、今回はデフォルト指定の IO4/IO5 を使用します。
~/Library/Arduino15/packages/esp8266/hardware/esp8266/2.0.0/variants/generic/pins_arduino.h
static const uint8_t SDA = 4;
static const uint8_t SCL = 5;
- WROOM02 のリセット(RST) を、LCD のリセットと共用しています。
回路図
- I2C の SDA/SCL は、プルアップが必要です。
- I2C は接続本数が少なくて、とても楽ですね www
Eagle
https: //github.com/exabugs/eagleLCD
スケッチ
- Wire ライブラリを使用しています。
- シリアルから入力を受け付けて、LCD に表示します。echo的な。
- I2C 機器は、それぞれ固有のスレーブ・アドレスを持つようです。
AQM0802 では 0x3e がそれに該当します。 - 初期化のコマンドは、データシートの例を参考にしました。
(半分くらい理解できていません。スイマセン。)
# include <Wire.h>

# define ADDR 0x3e

uint8_t CONTROLL[] = {
  0x00, // Command
  0x40, // Data
};

const int C_COMM = 0;
const int C_DATA = 1;

uint8_t settings[] = {

  0b00111001, // 0x39 // [Function set] DL(4):1(8-bit) N(3):1(2-line) DH(2):0(5x8 dot) IS(0):1(extension)

  // Internal OSC frequency
  (0b0001 << 4) + 0b0100, // BS(3):0(1/5blas) F(210):(internal Freq:100)

  // Contrast set
  (0b0111 << 4) + 0b0100, // Contrast(3210):4

  // Power/ICON/Contrast control
  (0b0101 << 4) + 0b0110, // Ion(3):0(ICON:off) Bon(2):1(booster:on) C5C4(10):10(contrast set)

  // Follower control
  (0b0110 << 4) + 0b1100, // Fon(3):1(on) Rab(210):100

  // Display ON/OFF control
  (0b00001 << 3) + 0b111, // D(2):1(Display:ON) C(1):1(Cursor:ON) B(0):1(Cursor Blink:ON)
};

const int LINE = 2;

String buff[LINE];

void setup() {
  Serial.begin(115200);
  Serial.println("");

//Wire.begin(4, 5); // (SDA,SCL) Default
  Wire.begin(); // (SDA,SCL)

  // LCD初期化
  write(C_COMM, settings, sizeof(settings));
}


void loop() {
  if (0 < Serial.available()) {
    delay(10);

    for (int i = 0; i < LINE - 1; i++) {
      buff[i] = buff[i + 1];
    }
    buff[LINE - 1] = "";

    while (0 < Serial.available()) {
      char ch = Serial.read();
      if (ch == '\n') {
        print2line();
        Serial.println(buff[LINE - 1]);
        break;
      } else if (0x20 <= ch && ch <= 0x7f) {
        // ASCII文字コード
        buff[LINE - 1] = buff[LINE - 1] + ch;
      } else {
        // Do nothing
      }
    }
  }
}

// 2行表示
void print2line() {
  // クリア
  uint8_t cmd[] = {0x01};
  write(C_COMM, cmd, sizeof(cmd));
  delay(1);

  // 書き出し
  for (int i = 0; i < LINE; i++) {
    uint8_t pos = 0x80 | i * 0x40; // 位置
    uint8_t cmd[] = {pos};
    write(C_COMM, cmd, sizeof(cmd));
    write(C_DATA, (uint8_t *)buff[i].c_str(), buff[i].length());
  }
}

void write(int type, uint8_t *data, size_t len) {
  for (int i=0; i < len; i++) {
    Wire.beginTransmission(ADDR);
    Wire.write(CONTROLL[type]);
    Wire.write(data[i]);
    Wire.endTransmission();
    delayMicroseconds(27); // 26.3us
  }
}
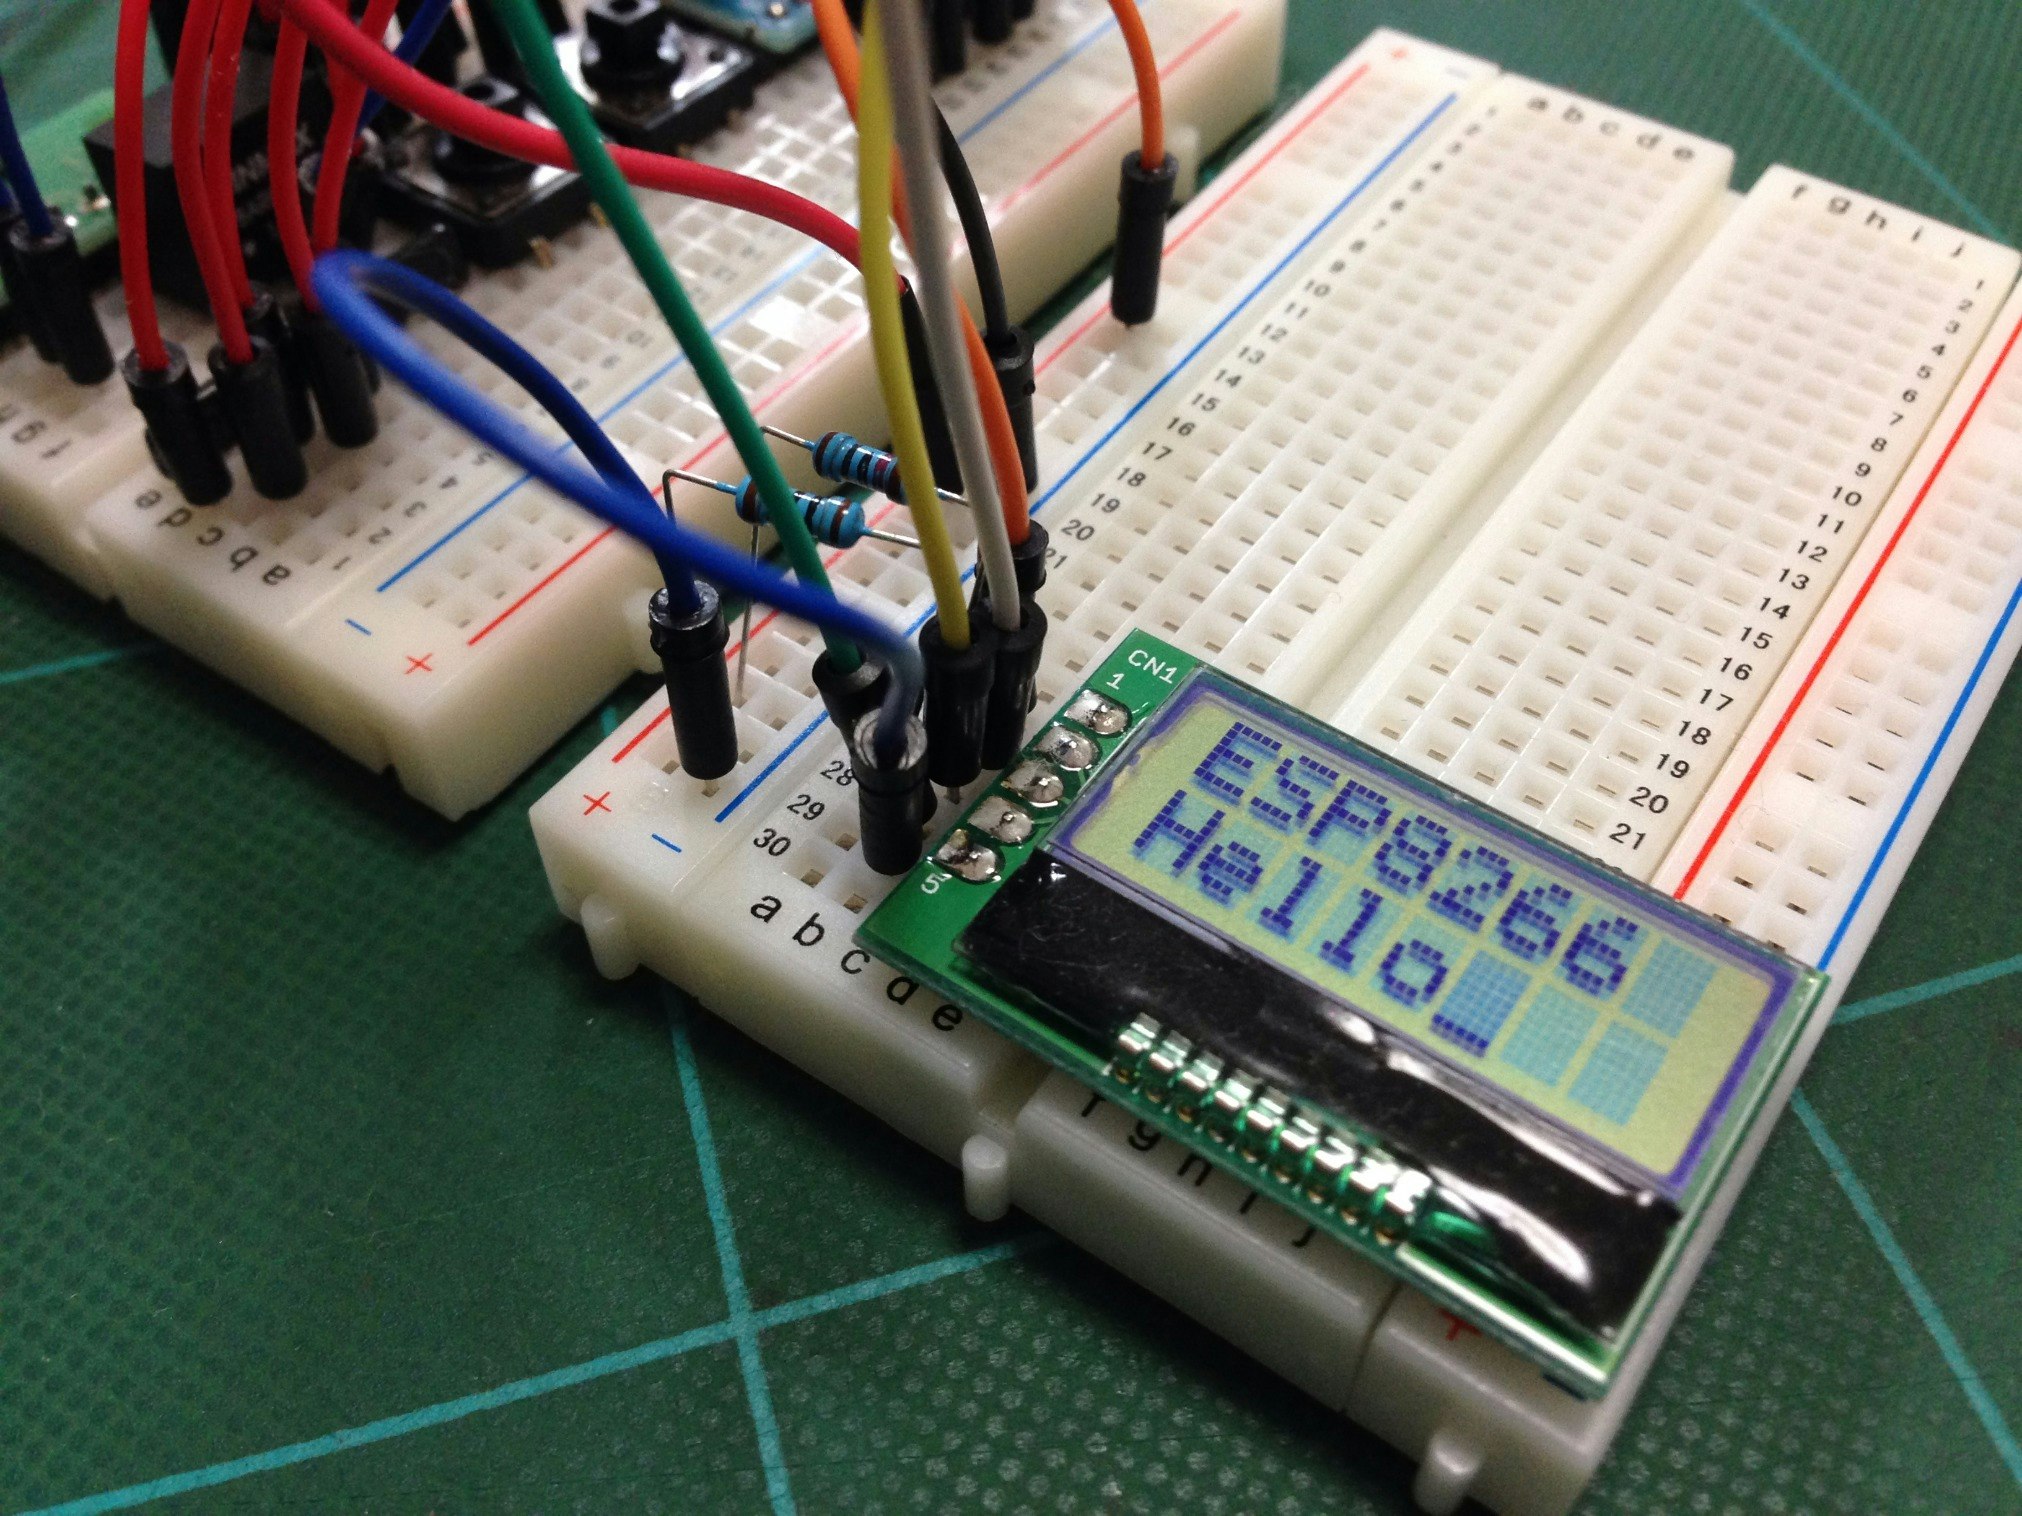
結果
- 起動後、シリアルから適当に文字を入力してください。
- LCD に表示されたら成功です。
- さらに入力すると、LCD 上でスクロールして、2行目に表示されます。
まとめ
- 今回は I2C を直接操作して LCD を制御しました。
(LiquidCrystal ライブラリを使えば、もっと簡単に実現できるかもしれません。) - 1602 は、頑張ったのですが、うまくいきませんでした。ザンネン。
余談
- SPI 用で IO15/IO13/IO12/IO14 を使います。
- I2C 用で IO4/IO5 を使えば、これで、全ての端子が、それぞれキレイに役割を持つことになりました。
static const uint8_t SS    = 15;
static const uint8_t MOSI  = 13;
static const uint8_t MISO  = 12;
static const uint8_t SCK   = 14;
