はじめに
- 以前紹介したSoftlayerに専用オンラインストレージ構築で構築したownCloudとSoftlayer Object Storageを接続します。
- Softlayer Object Storageとは、大容量のデータを格安に保存できるswiftベースのクラウドストレージです。
- ownCloudは、自身が管理するファイルに対してPCやモバイルデバイスからどこにいてもユニバーサルアクセスを可能とします。
- つまり、以下の簡単な手順で、PCやモバイルデバイスからどこにいても、Web経由で格安で大容量なクSoftlayer Object Storageにユニバーサルアクセスできるようになります。
- 全体的な構成のイメージは以下になります。
前提条件
- Softlayerに専用オンラインストレージ構築が完了していること
- Object Storageを利用するための準備が完了していること
- リージョンはHong Kong 2を利用
ownCloudプラグイン有効化
ownCloudの特徴として、様々なプラグイン(アプリ)をアドオンすることができます。
ownCloudインストール時に導入されている「External storage support」アプリはownCloudから様々な外部ストレージに接続するためのプラグインです。
AmazonS3やSwiftのようなオブジェクトストレージや、CIFS/SMB、FTPでの接続が簡単に行えます。
Swift v1のSoftlayerObjectStorageに接続するためには「Softlayer object storage support」アプリを追加インストールする必要があります。
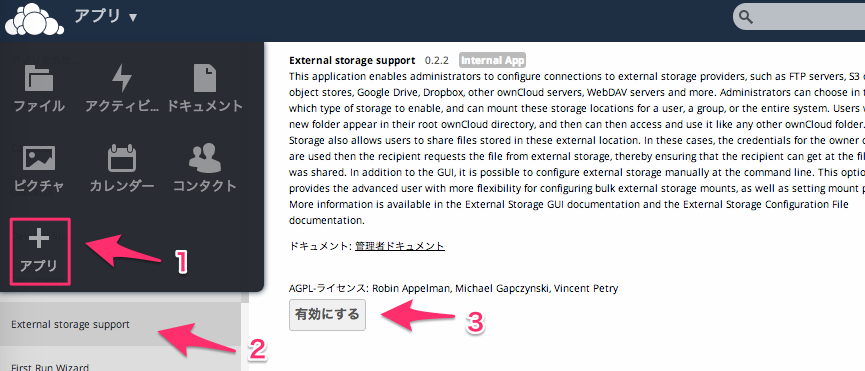
1.External storage supportアプリの有効化
2.Softlayer object storage supportアプリの有効化
-
インスタンスにSSHでログインします。PrivateIPとPasswordを確認しておきましょう。
SSH接続については、こちらの記事を参考にしてください。

-
以下のコマンドで「Softlayer object storage support」アプリを指定の場所にダウンロードします。
yum -y install git cd /var/www/html/owncloud/apps/ sudo -u apache git clone https://github.com/ukitiyan/files_softlayer.git -
ownCloud内左上メニューにある「+アプリ」ボタンをクリックし、「Softlayer object storage support」を有効にします。
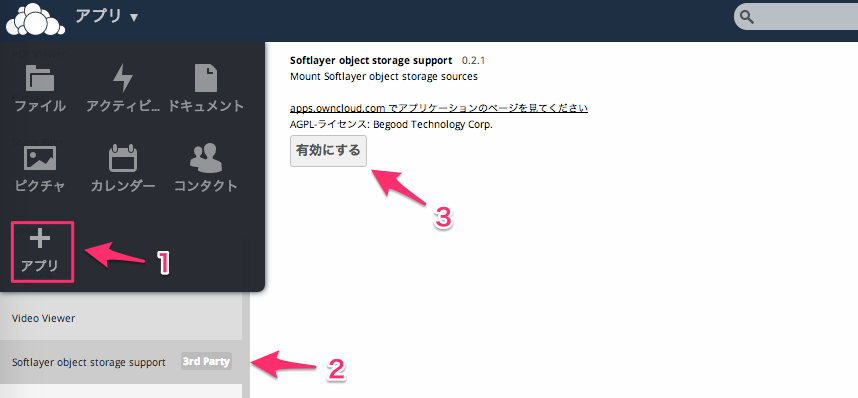
ownCloud外部ストレージ設定
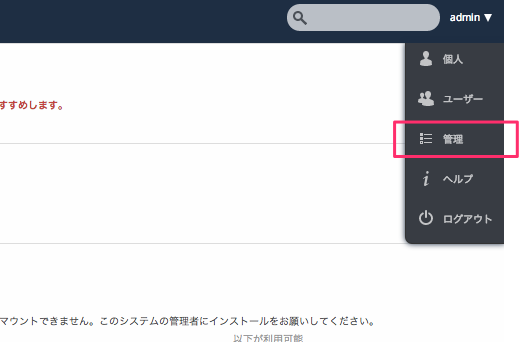
上記のアプリを有効にするとownCloud管理画面に設定メニューが表示されますので、SoftlayerObjectStorageのEndpointやAPIキーを入力します。
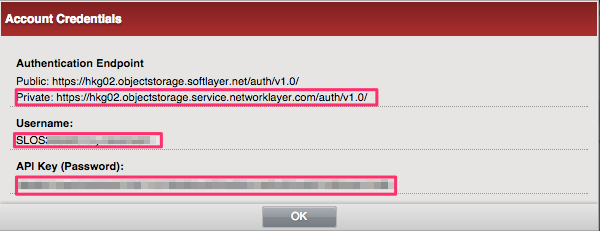
1.AccountCredentialsの確認
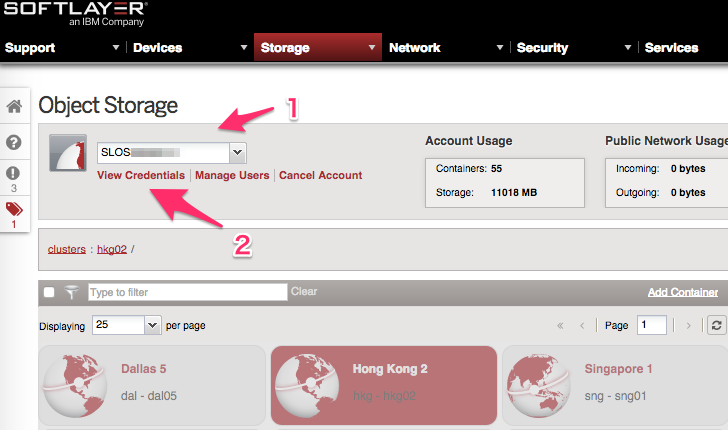
- Softlayerのポータルにアクセスし、ログインします。
-
[Storage] - [Object Storage]を選択して、Order済のStorageを選択します。
- Autentication Endpoint(Private)
- Username
- API Key(Password)
2.ownCloud外部ストレージ設定
- フォルダ名:任意の名称を設定します。(例:Softlayer)
- ユーザ名:AccountCredentialsのUsername
- バケット:ObjectStorageのバケット名
- パスワード:AccountCredentialsのAPI Key
- 識別用エンドポイント:AccountCredentialsのAutentication Endpoint
- 適用範囲:この機能を公開するownCloudユーザー/グループ
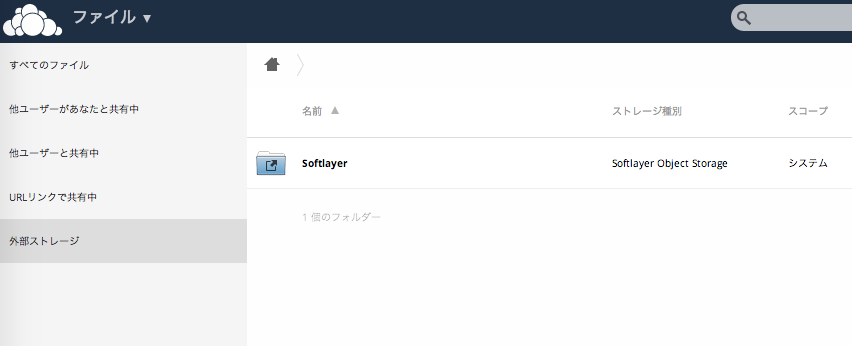
- ownCloudのトップ画面に戻ると「Softlayer」というフォルダが表示されています。
このフォルダの先がSoftlayerObjectStorageとなります。
ownCloudの通常のフォルダと同様にファイルのドラッグ&ドロップアップロードやグループ共有、URL共有が行えます。
勿論、Windowsシンクアプリやモバイルアプリからの接続も可能になるので様々な用途で便利に利用できると思います。
その他
- AmazonS3との接続方法については、無制限ストレージ with ownCloud and Amazon S3を確認してください。
- ownCloudのその他活用事例は、ownCloudJPのホームページを確認してください。
- 日本語フォーラムもあるので活用してください。

