Playgroundによるコーディングです。
初めての方は下記をご参考ください。
第1回:【初心者向け】Swift3で爆速コーディングその1(画面作成とSnippetsの使い方)
第2回:【初心者向け】Swift3で爆速コーディングその2(UIViewと文字表示)
ボタンクリックする
早速ですが全ソースコードです。
イベントに関しては動かしてみたほうが早いと思うので・・・
import UIKit


class ViewController: UIViewController {


    override func viewDidLoad() {
        super.viewDidLoad()


        // Buttonを生成する
        let button = UIButton()
        button.frame = CGRect(x:0,y:0,width:200,height:40)
        button.backgroundColor = UIColor.blue
        button.layer.masksToBounds = true
        // ボタンの状態
        button.setTitle("ボタン", for: UIControlState.normal)
        button.setTitleColor(UIColor.white, for: UIControlState.normal)
        // 押された時
        button.setTitle("押されました", for: UIControlState.highlighted)
        button.setBackgroundImage(self.colorToImage(color: UIColor.orange), for: UIControlState.highlighted)
        button.tag = 1 // ボタン識別用ID

        button.layer.cornerRadius = 10.0
        button.layer.position = CGPoint(x: button.bounds.width/2
            , y:button.bounds.height/2)
        button.addTarget(self, action: #selector(self.onClick(_:)), for: .touchUpInside)

        self.view.addSubview(button)

        print(self.view.perform(Selector(("recursiveDescription"))))

    }

    func onClick(_ sender: AnyObject){
        let button = sender as! UIButton
        print("sender.tag:\(button.tag)")

        // アラート表示
        let alert: UIAlertController = UIAlertController(title: "タイトル", message: "メッセージ", preferredStyle: .alert)
        let okAction = UIAlertAction(title: "OK", style: .default) { action in
            print("Action OK!!")
        }
        alert.addAction(okAction)
        self.present(alert, animated: true, completion: nil)
    }

    func colorToImage(color:UIColor)->UIImage{
        let rect = CGRect(x:0, y:0, width:1.0,height: 1.0)
        UIGraphicsBeginImageContext(rect.size)
        let context:CGContext = UIGraphicsGetCurrentContext()!

        context.setFillColor(color.cgColor)
        context.fill(rect)

        let image:UIImage = UIGraphicsGetImageFromCurrentImageContext()!
        UIGraphicsEndImageContext()

        return image
    }


    override func viewWillAppear(_ animated: Bool) {
        super.viewWillAppear(animated)


    }

    override func didReceiveMemoryWarning() {
        super.didReceiveMemoryWarning()
    }

}

let viewController = ViewController()
viewController.view.backgroundColor = UIColor.white


import PlaygroundSupport

PlaygroundPage.current.liveView = viewController
PlaygroundPage.current.needsIndefiniteExecution = true
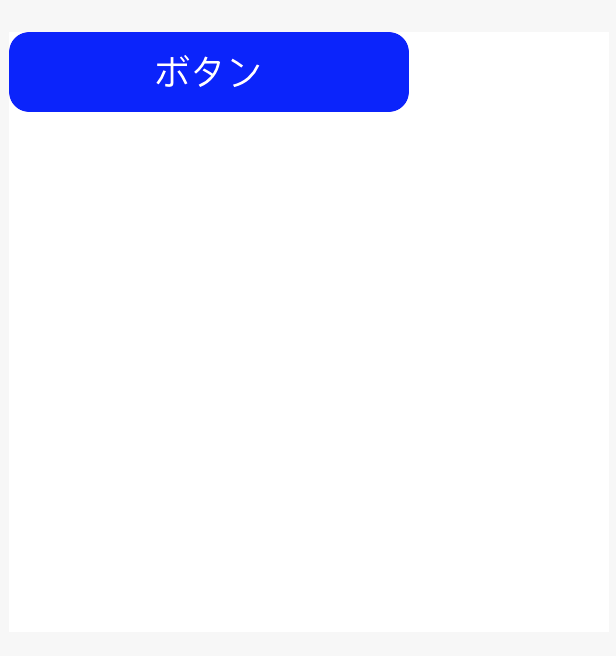
プレビュー
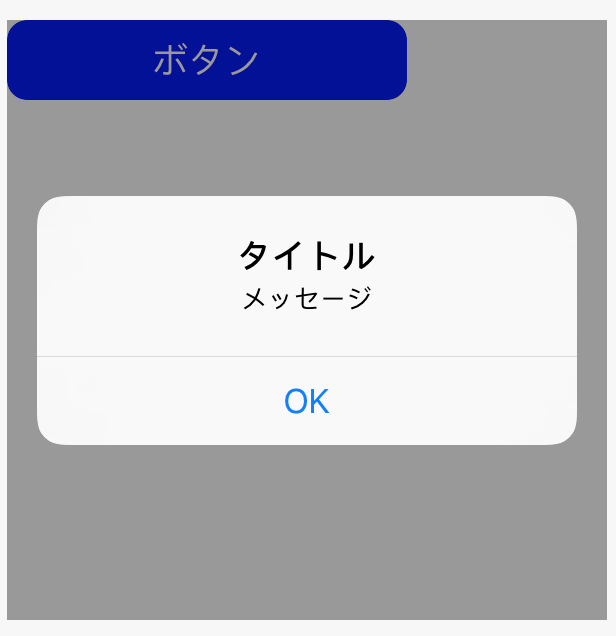
ボタンをクリックすると次のようなポップアップ(アラート)が表示されます。
イベントの追加
クリックのイベントを追加している部分は次の箇所です。
addTargetメソッドを用いてイベントを呼び出しています。
actionパラメータには呼び出すメソッドを指定します。
今回は自作のonClickメソッドを作成して呼び出しています。
forパラメータにはイベントを起こすためのアクションの種別を指定します。
条件を満たしたタイミングでメソッドが呼び出されます。
今回は最もよく使われるであろうタイミング
touchUpInside(ボタンを押してボタン領域内でボタンが離された)で指定しています。
button.addTarget(self, action: #selector(self.onClick(_:)), for: .touchUpInside)
イベントの種別に関してはUIControlEvents列挙体にて定義されています。
UIControlクラスを継承したUIButton,UISlider,UISwitch,UITextFieldなどはaddTargetメソッドによるイベント追加ができます。
よく使うイベントを挙げておきます。
- touchDown:コンポーネントが押されたタイミングで呼ばれる
- touchUpInside:コンポネントが押されてコンポーネントの領域内で離されたタイミングで呼ばれる(UIButton)
- valueChanged:コンポーネントのパラメータが変わったタイミングで呼ばれる(UISwitch,UISlider)
- editingBegin:コンポーネントのフォーカスが当たって編集モードになったタイミングで呼ばれる(UITextField)
- editingEnd:コンポーネントのフォーカスが外れて編集モードが解除されたタイミングで呼ばれる(UITextEnd)
- editingChanged:コンポーネントのテキストが変更されたタイミングで呼ばれる(UITextField)
onClickメソッドは次のようになっています。
UIAlertControllerはポップアップ(アラート)を出すためのUIです。
UIViewConrtollerクラスのpresentメソッドにてポップアップの呼び出しを行います。
func onClick(_ sender: AnyObject){
     let button = sender as! UIButton
     print("sender.tag:\(button.tag)")

     // アラート表示
     let alert: UIAlertController = UIAlertController(title: "タイトル", message: "メッセージ", preferredStyle: .alert)
     let okAction = UIAlertAction(title: "OK", style: .default) { action in
        print("Action OK!!")
     }
     alert.addAction(okAction)
     self.present(alert, animated: true, completion: nil)
}
button.tagはUIを識別するための番号です。
同一のメソッドに対し複数のUIコンポーネントをaddTargetすることができるのですが
それを区別するために使います。
例えばボタンが二つあった場合に次のようにするとどちらのボタンが
押されたかonClickメソッド側でわかります。
button1.tag=1
button2.tag=2
button1.addTarget(self, action: #selector(self.onClick(_:)), for: .touchUpInside)
button2.addTarget(self, action: #selector(self.onClick(_:)), for: .touchUpInside)
イベントの削除
イベントの削除にはremoveTargetメソッドを使います。
onClickメソッドの末尾に次のように追記してみてください。
button.removeTarget(self, action: #selector(self.onClick(_:)), for: .touchUpInside)
2回目以降onClickメソッドが呼ばれなくなるはずです。
その他補足(ハイライト)
setTitleメソッドやsetBackgroundImageメソッドに関して
forパラメータにてハイライト状態(クリック選択状態)の変化を指定しています。
button.setTitle("押されました", for: UIControlState.highlighted)
button.setBackgroundImage(self.colorToImage(color: UIColor.orange), for: UIControlState.highlighted)
setBackgroundImageには画像(UIImage)を指定しなければならないのですが
今回は自作のcolorToImageメソッドで
色データ(UIColor)から単色の画像データ(UIImage)を作成しています。
func colorToImage(color:UIColor)->UIImage{
     let rect = CGRect(x:0, y:0, width:1.0,height: 1.0)
     UIGraphicsBeginImageContext(rect.size)
     let context:CGContext = UIGraphicsGetCurrentContext()!

     context.setFillColor(color.cgColor)
     context.fill(rect)

     let image:UIImage = UIGraphicsGetImageFromCurrentImageContext()!
     UIGraphicsEndImageContext()

     return image
}