GoogleのブログでTensorFlow 0.12 が Windows をサポートとあったので、試してみると簡単にできました。
実行環境
以前にインストールしたものになります。
- Windows 10 Professional 64bit
- Anaconda3 4.2.0 (Python 3.5) ⇒ CPU版、GPU版どちらでもpython3.5が必要
- GeForce GTX 1070 ⇒ GPU版に必要
- CUDA Toolkit 8.0 (8.0.44) ⇒ GPU版に必要
- cuDNN 5.1 ⇒ GPU版に必要
CPU版でとりあえず試したい方はこちらより「Anaconda3-4.2.0-Windows-x86_64.zip」をそのままイントールしてください。python3.5やJupyterなどがインストールされます。
Tensorflowのインストール
Windowsスタートメニュー ⇒ Anaconda3 (64-bit) ⇒ Anaconda Promptを立ち上げ、以下のpipコマンドを実行すると、CPU版、GPU版どちらもインストールできました。
- CPU版
C:\> pip install tensorflow
- GPU版
C:\> pip install tensorflow-gpu
Jupyter操作方法
Anacondaをインストールするとブラウザ上でコードを編集・実行できるJupyterが一緒にはいります。コードをコピペで実行できるので、とりあえず動かすにはとても便利です。簡単な操作方法を書いておきます。
Windowsスタートメニュー ⇒ Anaconda3 (64-bit) ⇒Jupyter Notebook
で下のようにブラウザでJupyterが立ち上がります。
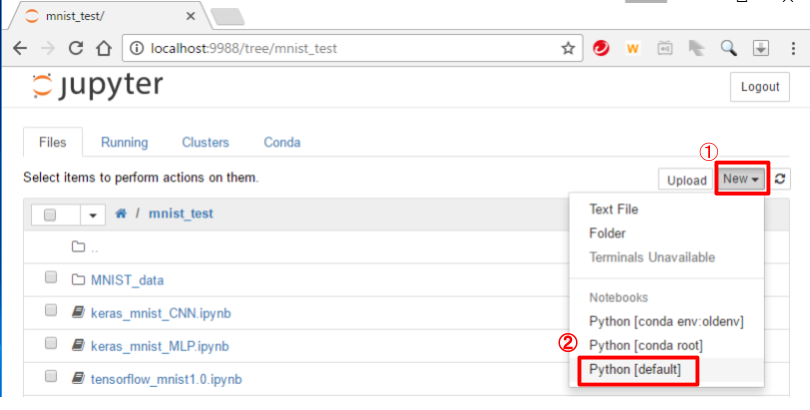
立ち上がったブラウザの右上の「New」の「python(default)」をクリックすると
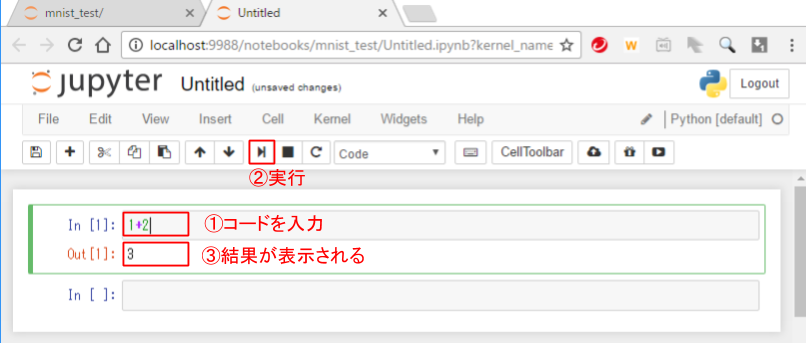
下のような画面が出てきてきます。下のは1+2を計算させた例になります。
TensorFlow MNISTサンプルの実行
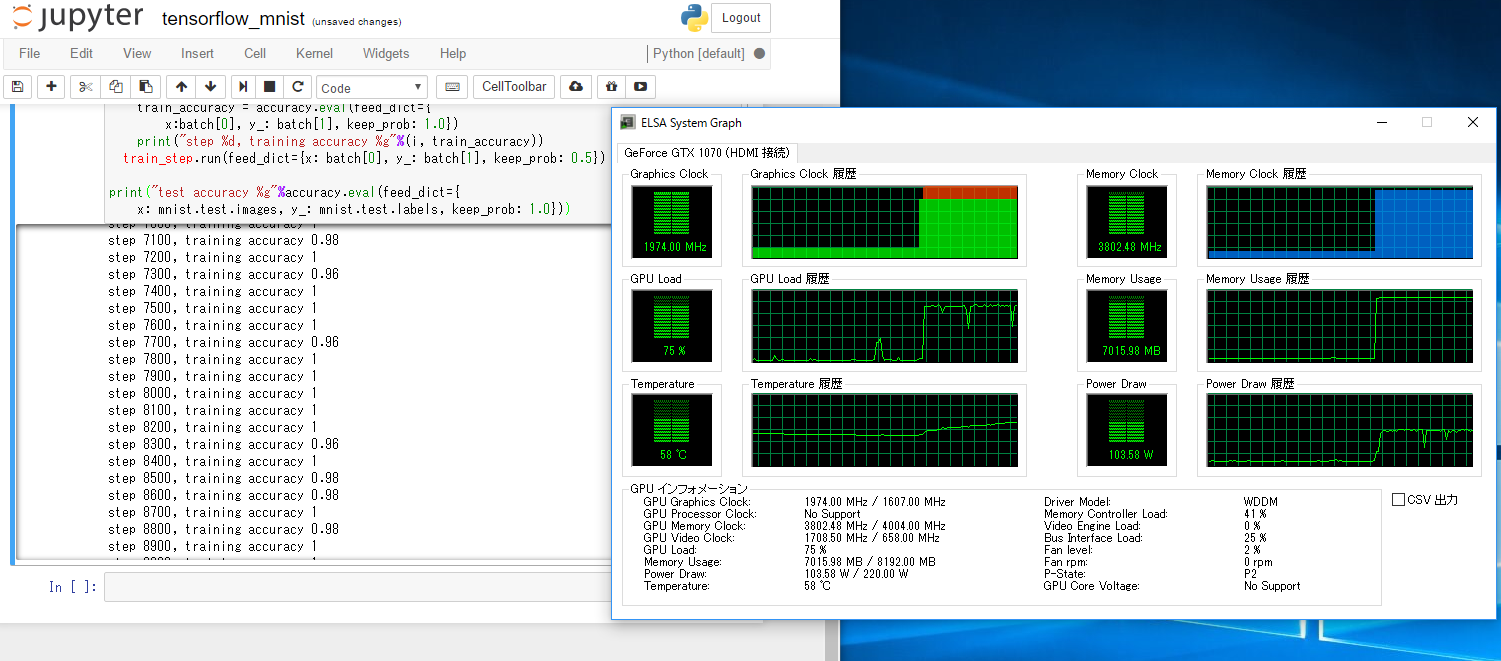
こちらからMNISTのサンプルをJupyterにコピペして実行すると計算されます。
※mnistのデータのダウンロードが最近重いことが多いので、途中で止まっているような感じに見えても、そのままおいてみてください。
CPU版とGPU版両方入れたのでどちらで計算されているかと思い、負荷を見てみると、どうやらGPU版で計算されていたようでした。
Kerasもインストール
簡単だったのでついでにKerasもインストールしてみました。
Anaconda Promptにもどって以下のコマンドでKerasはインストールでき、バックエンドは自動的にtensorflowになります。
C:\> pip install keras
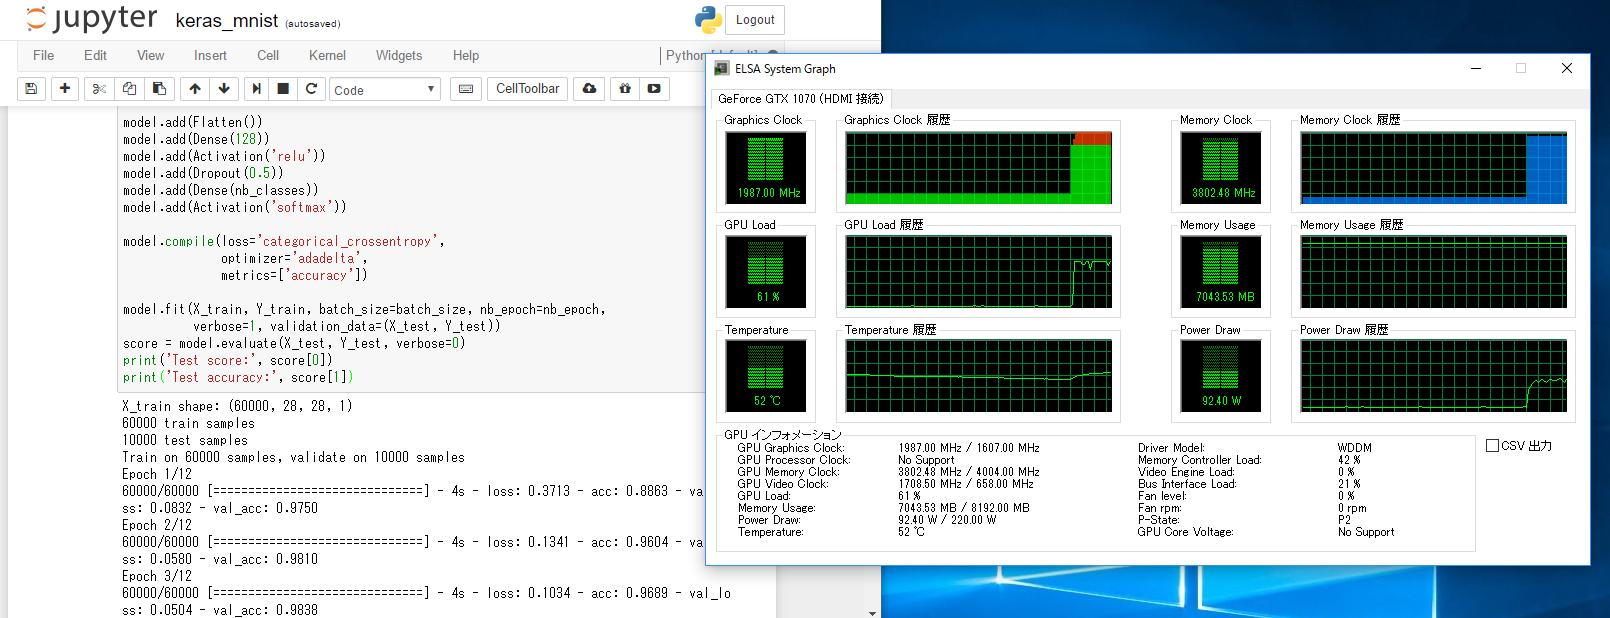
公式の方からMNISTサンプルをJupyterにコピペして実行できました。
更新・追記など
<2017/3/20変更・追記>
-
2017.3.20現在 Windowsではpython3.6のtensorflowがpipでインストールできないようなのでpython3.5をインストールしてください
-
前のリンク先のTensorflowのmnistのサンプルは警告が出てたので、新しくコピペしたものを作りました。
-
Kerasのデフォルトのバックエンドがtheano⇒tensorflowになっていたのでバックエンドの変更は「Keras バックエンドの変更」に分離しました。
-
TensorflowやKeras、Chainerなど最近メジャーアップデートが多いですが、複数の環境をAnaconda で切り替えて使う方法の記事も参考にしてみてください。


