SQLiteとは
SQLiteの使い方について解説します。SQLiteはMySQLなどと同じリレーショナルデータベースですが、サーバとして動作させるのではなく単独のアプリケーションとして動作させることが可能です。参照
Djangoでは、デフォルト設定になっているSQLです!
Djangoによるアプリ開発
前回のアプリをSQLiteに移植したいと思います。
PTVSを知らない方はこちらを参考にしてプロジェクトを作成してください!
全体のソースコード
メインのタスク部分です!
# -*- coding: utf-8 -*-
"""
Definition of views.
"""

from django.shortcuts import render
from django.template.loader import render_to_string
from django.http import HttpResponse
from django.http import HttpRequest
from django.template import RequestContext
from datetime import datetime
from app.models import Check_list

def list_tasks(request):
    entities = Check_list.objects.all()
    html = render_to_string('app/test.html', {'entities':entities})
    return HttpResponse(html)


def add_task(request):
    name = request.GET['name']
    category = request.GET['category']
    Check_list.objects.update_or_create(name=name,category=category)
    entities = Check_list.objects.all()
    html = render_to_string('app/test.html', {'entities':entities})
    return HttpResponse(html)


def update_task(request):
    name = request.GET['name']
    category = request.GET['category']
    Check_list.objects.filter(name=name,category=category).delete()
    entities = Check_list.objects.all()
    html = render_to_string('app/test.html', {'entities':entities})
    return HttpResponse(html)
URLによって関数を呼ぶ部分
"""
Definition of urls for DjangoWebProject4.
"""

from datetime import datetime
from django.conf.urls import url
import django.contrib.auth.views

import app.forms
import app.views

# Uncomment the next lines to enable the admin:
from django.conf.urls import include
# admin
from django.contrib import admin
admin.autodiscover()

urlpatterns = [
    # Examples:
    #admin
    url(r'^admin/', include(admin.site.urls)),
    url(r'^$',app.views.list_tasks),
    url(r'^list_tasks$',app.views.list_tasks),
    url(r'^add_task$', app.views.add_task),
    url(r'^update_task$', app.views.update_task)
]
データベースの設定
ここでは、Check_listというテーブルにNameとCategoryカラム設定を行なっている
"""
Definition of models.
"""

from django.db import models

# Create your models here.
class Check_list(models.Model):
    name = models.CharField('Name', max_length=255)
    category = models.CharField('Category', max_length=255, blank=True)
Admin画面表示に関する部分
ここでlist_displayしないとDjangoのデータベース部分に
アクセスしてもCheck_listが表示されない
from django.contrib import admin
from app.models import Check_list


class Check_listAdmin(admin.ModelAdmin):
    list_display = ('id', 'name', 'category')
    list_display_links = ('id', 'name',)
admin.site.register(Check_list, Check_listAdmin)
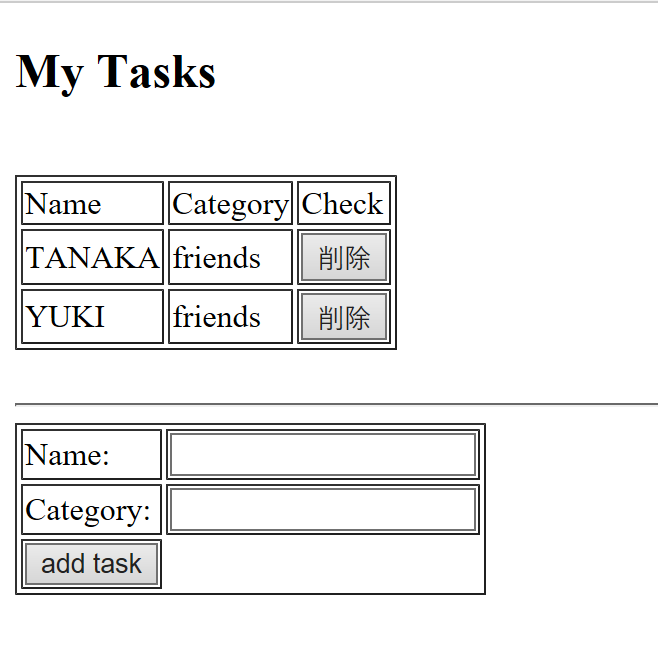
テーブルを用いた普通のHTML
<!DOCTYPE html>
<html>
    <head>
        <title></title>
    </head>
    <body>
        <h2>My Tasks</h2> <br>
        <table border="1">
            <tr>
                <td>Name</td>
                <td>Category</td>
                <td>Check</td>
            </tr>
            {% for entity in entities %}
                <form action="update_task" method="GET">
                    <tr>
                        <td>{{entity.name}} <input type="hidden" name='name' value="{{entity.name}}"></td>
                        <td>{{entity.category}} <input type="hidden" name='category' value="{{entity.category}}"></td>
                        <td><input type="submit" value="削除"></td>
                    </tr>
                </form>
            {% endfor %}
        </table>
        <br>
        <hr>
        <table border="1">
            <form action="add_task" method="GET">
                <tr>
                    <td>Name:</td
                    ><td><input type="text" name="name"></input></td>
                </tr>
                <tr>
                    <td>Category:</td>
                    <td><input type="text" name="category"></input></td>
                </tr>
                <tr>
                    <td><input type="submit" value="add task"></input></td>
                </tr>
            </form>
        </table>
    </body>
</html>
設定
プロジェクトを右クリックして、
【Python】▶︎【Django Create Superuser】
を選択する
これにより、スーパーユーザを作成し、DjangoのAdmin画面にて、ログインすることができる!
作成の際にパスワードを入力するとエラー的なのが出てるように見えるがただ、もう一度パスワードを入力してくれってことなので、スーパーユーザを作成してください

次にDatabaseの設定を反映させるために
【Python】▶︎【Django Make Migrations】
【Python】▶︎【Django Make Migrate】
をそれぞれ実行し、反映させる!また、データベースの追加や変更を行った場合も
同様に実行しないと反映されない!

実行
RUNすると削除と追加ができるアプリが立ち上がる
また、/adminすることでDjangoデータベースにアクセスし、GUIでテーブル内容を見ることができる!
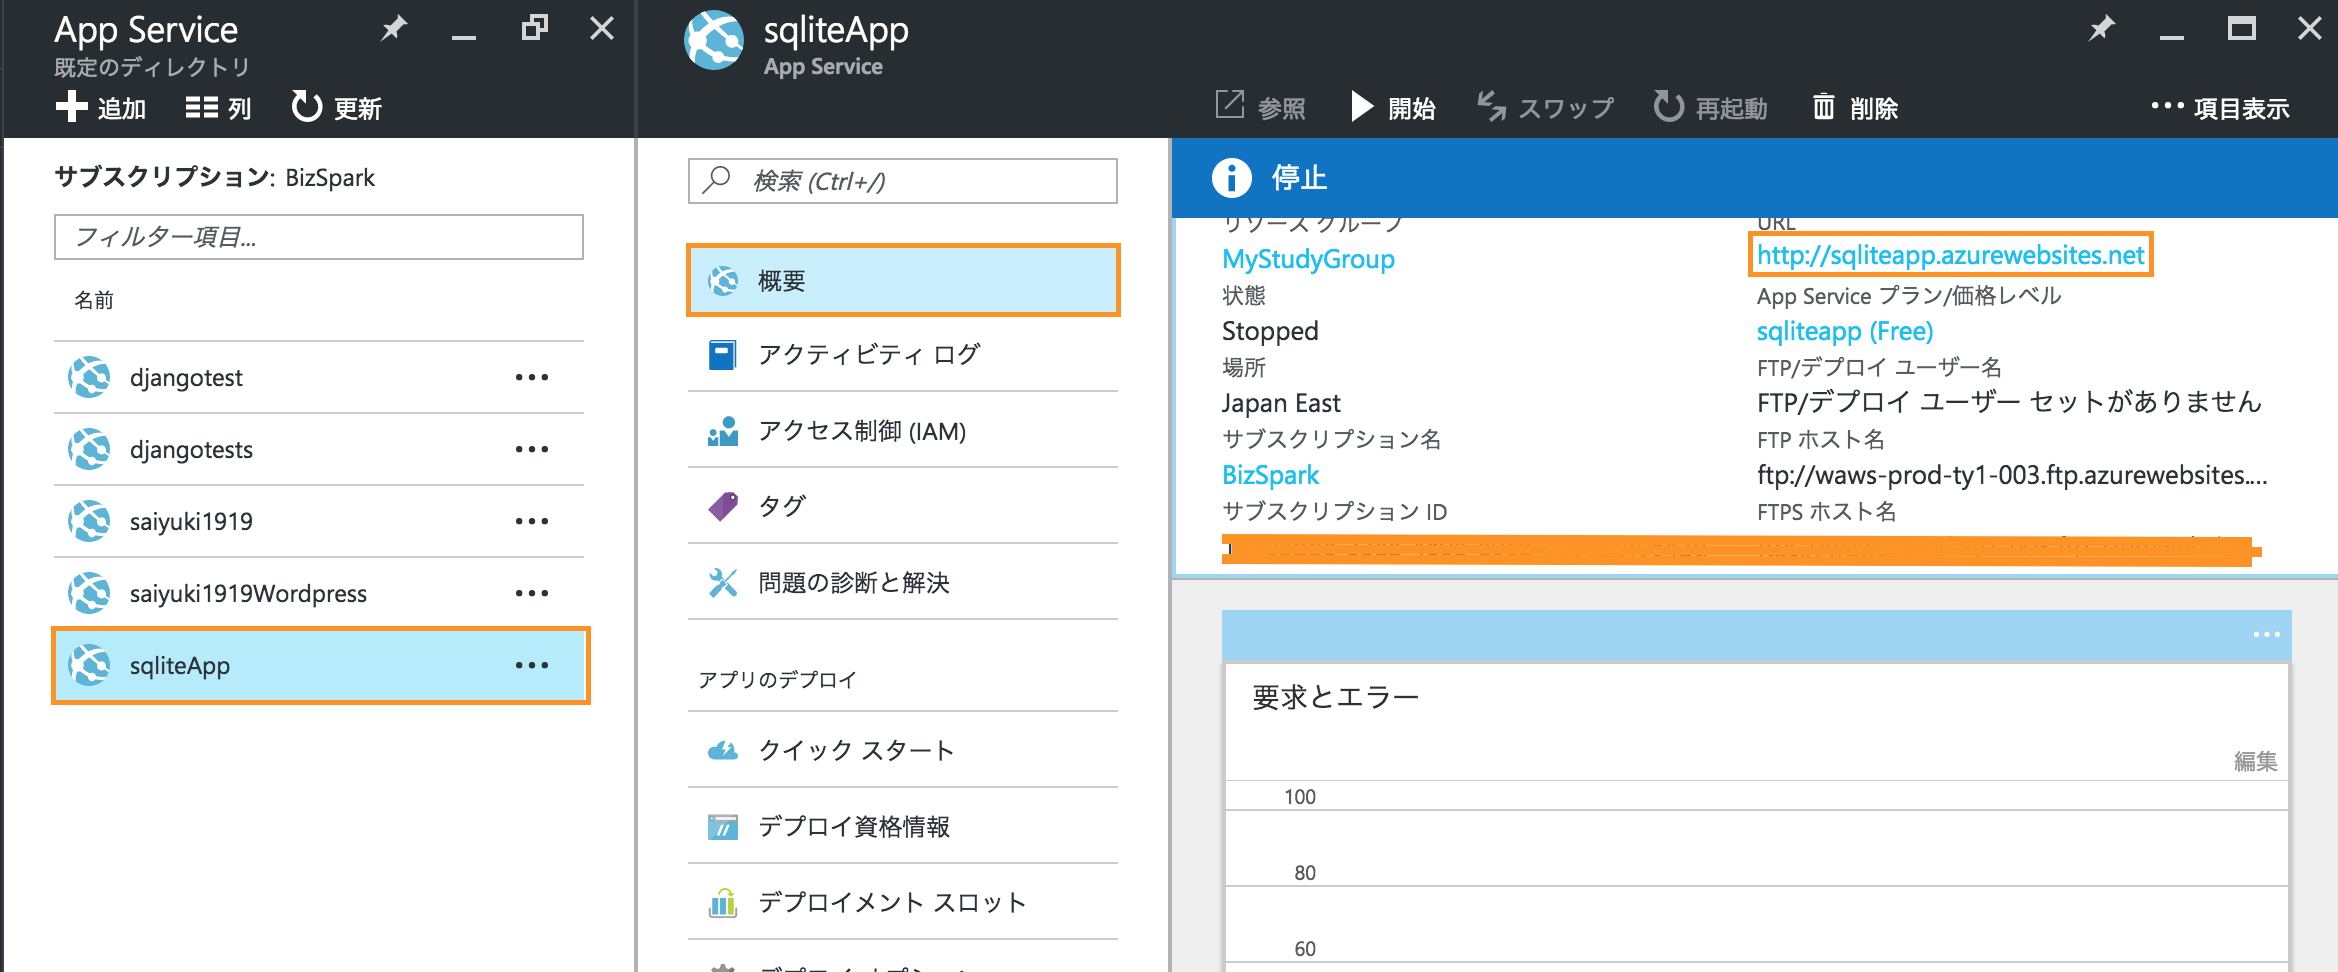
デプロイ
こちらと同様に【Publish】から【WebApps】を選択して、Azure上にデプロイする
デプロイした後、
【App Service】▶️【概要】▶️【URL】
から開くことで先ほどのアプリが動作していることが確認できる
※わざわざ、SQLのデータストレージを使う必要がなくSQLが使える!
終わりに
SQLiteをAzureにあげてもそのまま使えるのは驚いた!
しかし,MySQLをやってみたが結局うまくいかなかったのでそこはどうにかしたい!
詳しい人は教えてください!!