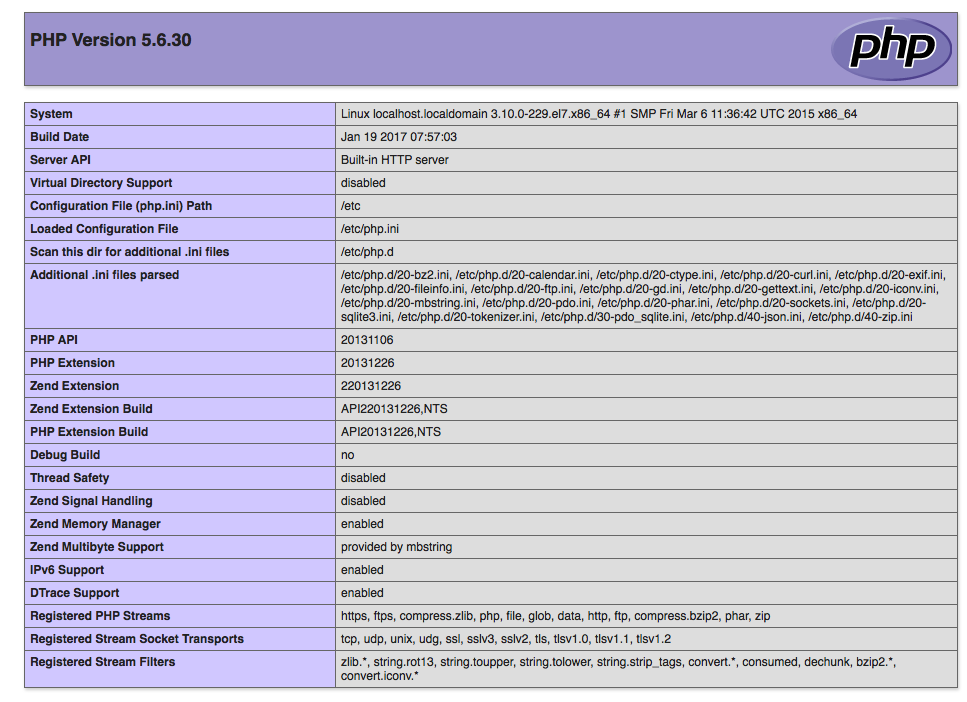
PHPの開発をするときにPHPのビルトインサーバーを利用して簡易的に動作確認をすることがあります。これをmac上に構築したvagrant,virtualbox,centos7の環境で利用するための設定について記録しておきます。
前提
- PHPのインストールは完了していること
- CentOS7を利用していること
PHPのビルトインサーバーを起動して、ホスト側のmacのブラウザからアクセスさせることを実現します。
Vagrantfileの編集
Vagrantfileのポートフォワーディングの設定部分を追加します。もともと同じような記述の部分があるのでそこに記述します。
この例では、ホストOS側の8080番ポートをゲストOS側の80番ポートに、同じくホストOS側の8090番ポートをゲストOS側の8889番ポートに転送します。
PHPのビルトインサーバーは、ポート番号8889番で起動することにします。
config.vm.network "forwarded_port", guest:80,host:8080,  id:'http'
config.vm.network "forwarded_port", guest:8889,host:8990, id:'http_php'
ゲストOSを起動します。起動途中にポートフォワーディングの設定状況が表示されます。この例の中のゲストOSの8889番ポートのものが今回ビルトインサーバーで利用するものです。
vagrant up

==> default: Forwarding ports...
    default: 80 (guest) => 8080 (host) (adapter 1)
    default: 8889 (guest) => 8990 (host) (adapter 1)
    default: 22 (guest) => 2222 (host) (adapter 1)
vagrant ssh
firewallの設定
指定した8889番ポートについてはゲストOS側のファイアウォールにてブロックされているみたいなので、ファイアウォールに穴を開けます。
参考)ファイアウォールの停止
これはおすすめできないので、次の穴あけをします。
[vagrant@localhost ~]$ sudo systemctl stop firewalld
登録されているサービスの確認
ここで表示されるものについてはサービス名を指定してファイアウォールを通過する設定ができますが、今回利用するポート番号は下記にはないので、ポート番号を指定して個別に穴を開けます。
[vagrant@localhost ~]$ firewall-cmd --get-services
RH-Satellite-6 amanda-client bacula bacula-client dhcp dhcpv6 dhcpv6-client dns ftp high-availability http https imaps ipp ipp-client ipsec kerberos kpasswd ldap ldaps libvirt libvirt-tls mdns mountd ms-wbt mysql nfs ntp openvpn pmcd pmproxy pmwebapi pmwebapis pop3s postgresql proxy-dhcp radius rpc-bind samba samba-client smtp ssh telnet tftp tftp-client transmission-client vnc-server wbem-https
利用したいポートの穴あけ確認
コマンドを打つとnoと表示されて穴が空いていないことがわかります。
[vagrant@localhost ~]$ firewall-cmd --zone=public --query-port=8889/tcp
no
穴あけをします。
successと表示されて穴が空きました。
[vagrant@localhost ~]$ sudo firewall-cmd --zone=public --add-port=8889/tcp
success
※ファイアウォールは再起動しないと反映されないので下記コマンドで再起動させます。
sudo systemctl stop firewalld
sudo systemctl start firewalld
テスト用のPHPファイルの作成
<?php

phpinfo();

?>
ファイルを作成したら、/vargrant/htdocsディレクトリに配置しておきます。htdocsディレクトリは作ってください。
PHPビルトインサーバーの起動
[vagrant@localhost ~]$ php -S 0.0.0.0:8889 -t /vagrant/htdocs
PHP 5.6.30 Development Server started at Thu May 11 18:15:37 2017
Listening on http://0.0.0.0:8889
Document root is /vagrant/htdocs
Press Ctrl-C to quit.
ホスト側からの接続確認
ホスト側OSのブラウザからアクセスしてPHPビルトインサーバーの動作確認をします。
参考
macOS Sierra バージョン10.12.4
Vagrant 1.9.4
VirtualBox 5.1.22
CentOS 7.0 64bit
PHP 5.6.30
シリーズ一覧 (vagrant centos LAMP環境構築)
1.macにvagrantでcentos7の仮想環境を構築したときの初期設定
2.mac上の仮想環境に構築したcentos7にPHPを導入する
3.mac上の仮想環境に構築したcentos7でPHPのビルトインサーバーを利用する
4.mac上の仮想環境に構築したcentos7にapahceを導入する
5.mac上の仮想環境に構築したcentos7にmysqlを導入する
6.centos7に導入したMySQL5.6の初期設定と動作確認
