【サーバーレスアーキテクチャ】をserverlessフレームワークで試す第1章 〜nodejsのtemplate編〜
あらすじ
毎年バレンタインデーの時期になると、スギ花粉で体調が絶不調になります。
痒い目を擦りながら、鼻をかみながら必死でこの投稿をしています。
会社にジョインしてから、もう2年くらい経ちました。
今回からは少し話題になっている「サーバーレスアーキテクチャ」というネタをシリーズで公開したいと思います。
※後々、リクエストに応じて更新することが多いのでストックしておくことをおすすめします。
自分は某社でCTOをしていますが、頭でっかちに理論ばっかり学習するよりは、イメージがなんとなく掴めるように学習し、実践の中で知識を深めていく方が効率的に学習出来ると考えています。
教育スタイルとしては正しい事をきっちりかっちり教えるのではなく、未経験レベルの人がなんとなく掴めるように、資料を構成していきます。
以下のようなシリーズネタで進めます。
| No. | 記事 |
|---|---|
| 1 | 【サーバーレスアーキテクチャ】をserverlessフレームワークで試す第1章 〜nodejsのtemplate利用編〜 |
| 2 | 【サーバーレスアーキテクチャ】をserverlessフレームワークで試す第2章 〜API Gateway利用編〜 |
| 3 | [【サーバーレスアーキテクチャ】をserverlessフレームワークで試す第3章 〜DynamoDB利用編〜] |
では、今回もはじめていきましょう!
はじめに
サーバーレスアーキテクチャとは字の如く、サーバーがないアーキテクチャです。
AWSでいうところのEC2インスタンスすら必要なく、予め用意された機能のサービス(Function-as-a-Service)を組み合わせたアーキテクチャの事を言います。
FaaSなどと言われたりしますが、AWSでもサーバーレス系のサービスが増えていますね。
今回はサーバーレス用フレームワークとして開発が進んでいるserverlessを使って
AWS Lambda、AWS API Gateway, AWS DynamoDBなどを組み合わせたサーバーレスアーキテクチャを体験してみましょう。
環境
Mac環境
10.11.6
node環境
$ nodebrew ls

v0.12.14
$ nodebrew install-binary v7.4.0
$ nodebrew ls
v0.12.14
v7.4.0
python環境
$ pyenv versions
  system
  2.7.12
$ pyenv install -v 3.5.2
$ eval "$(pyenv init -)"
$ pyenv shell 3.5.2
$ python --version
Python 3.5.2
awscli環境
$ pip install awscli
$ aws --version
aws-cli/1.11.9 Python/2.7.10 Darwin/15.6.0 botocore/1.4.66
serverless環境
$ npm install serverless -g
$ serverless --version
1.5.1
serverless テスト用IAMを作成
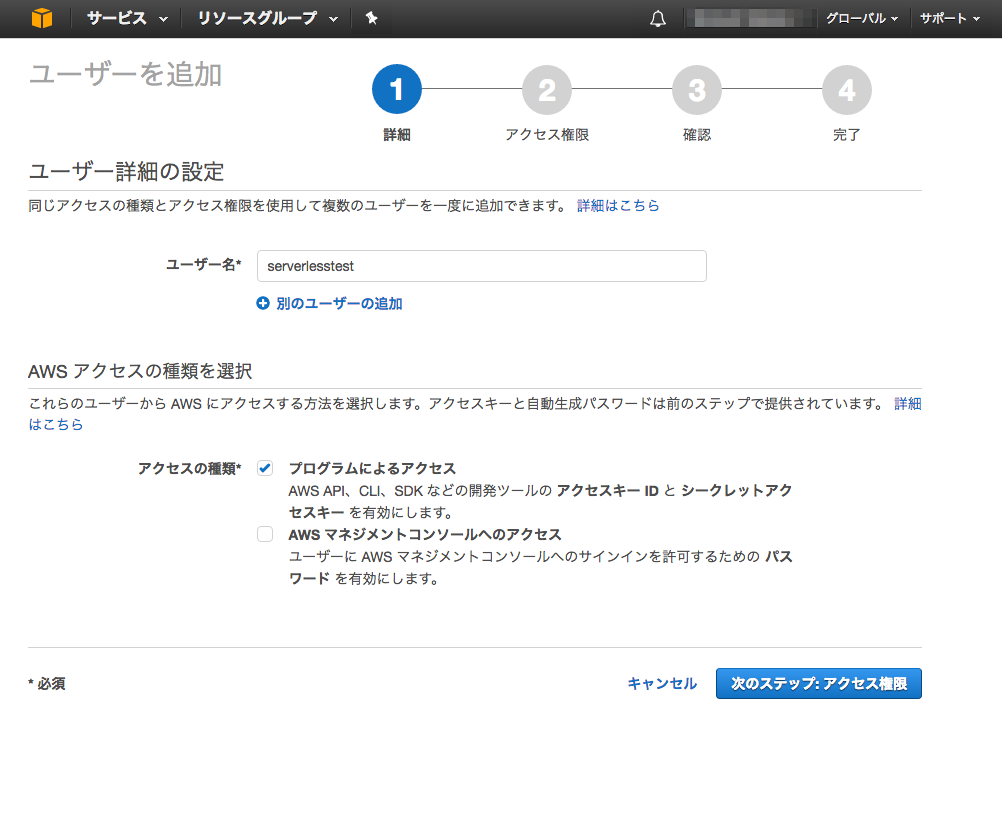
IAMを作成する
ユーザー名: serverlesstest
アクセスの種類: プログラムによるアクセス
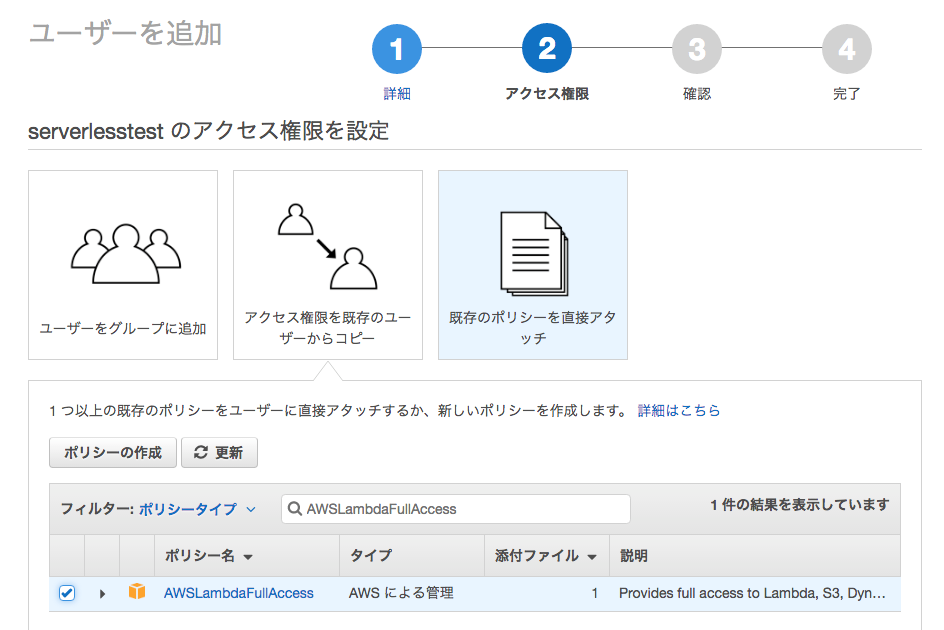
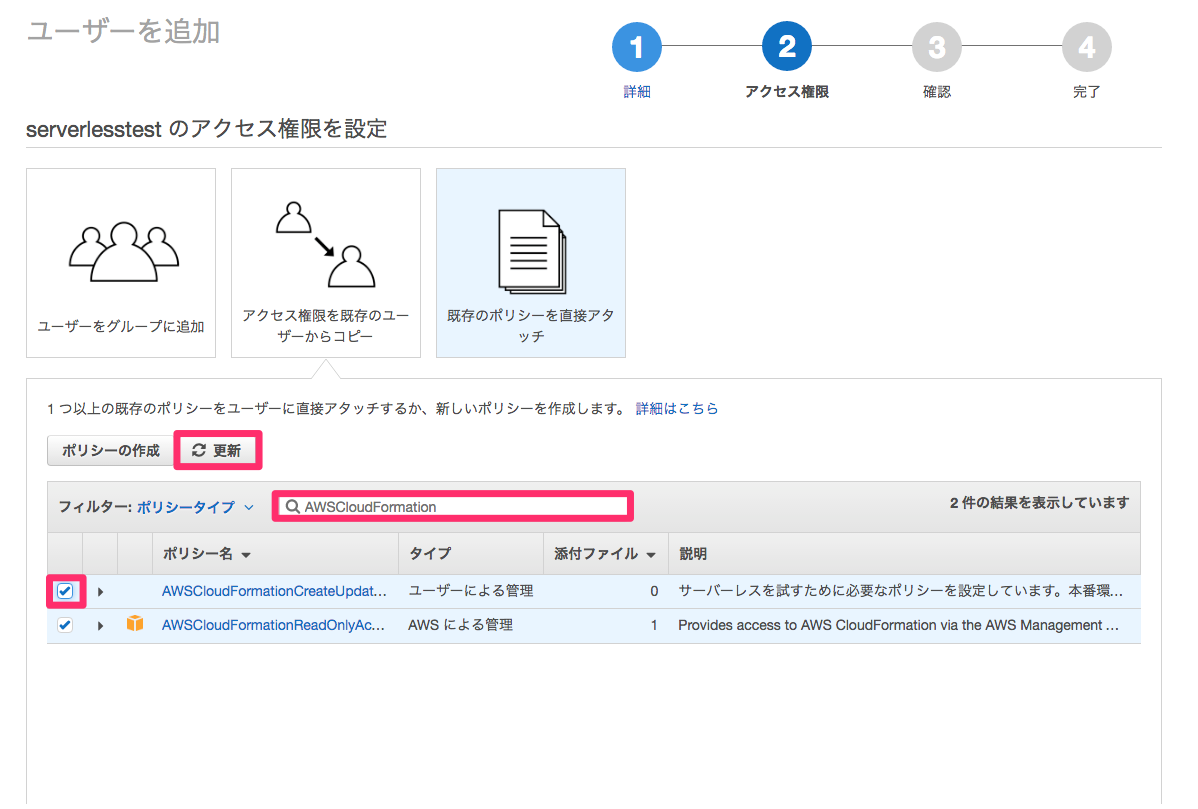
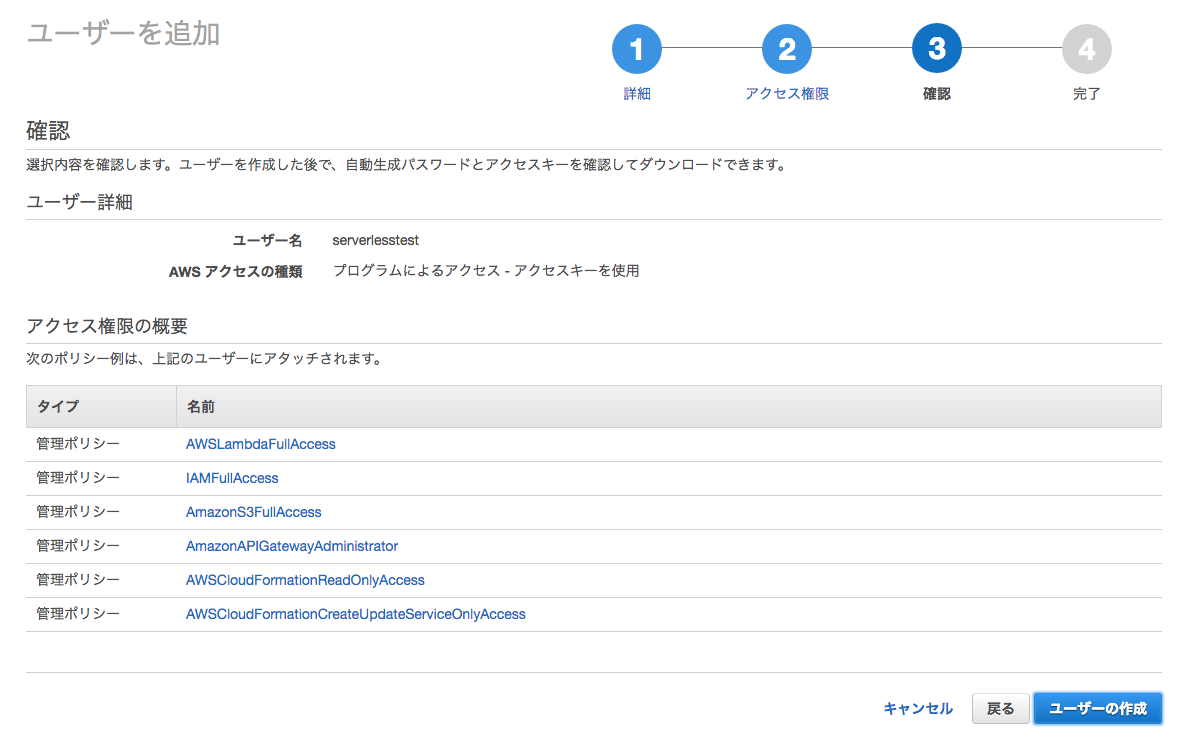
既存のポリシーを直接アタッチ
- AWSLambdaFullAccess
- IAMFullAccess
- AmazonS3FullAccess
- AmazonAPIGatewayAdministrator
- AWSCloudFormationReadOnlyAccess
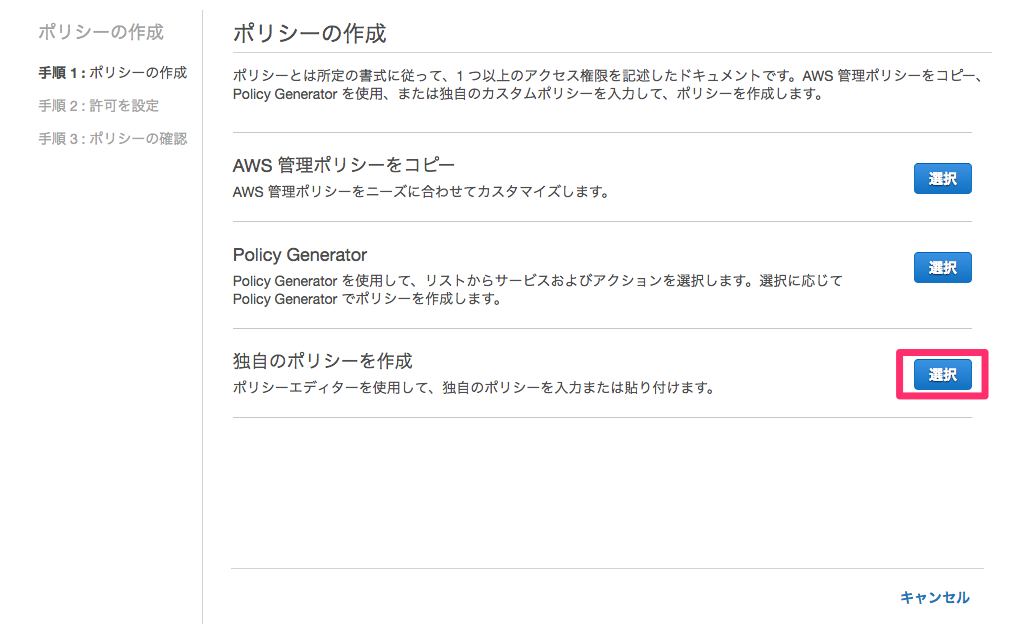
独自のポリシーを作成
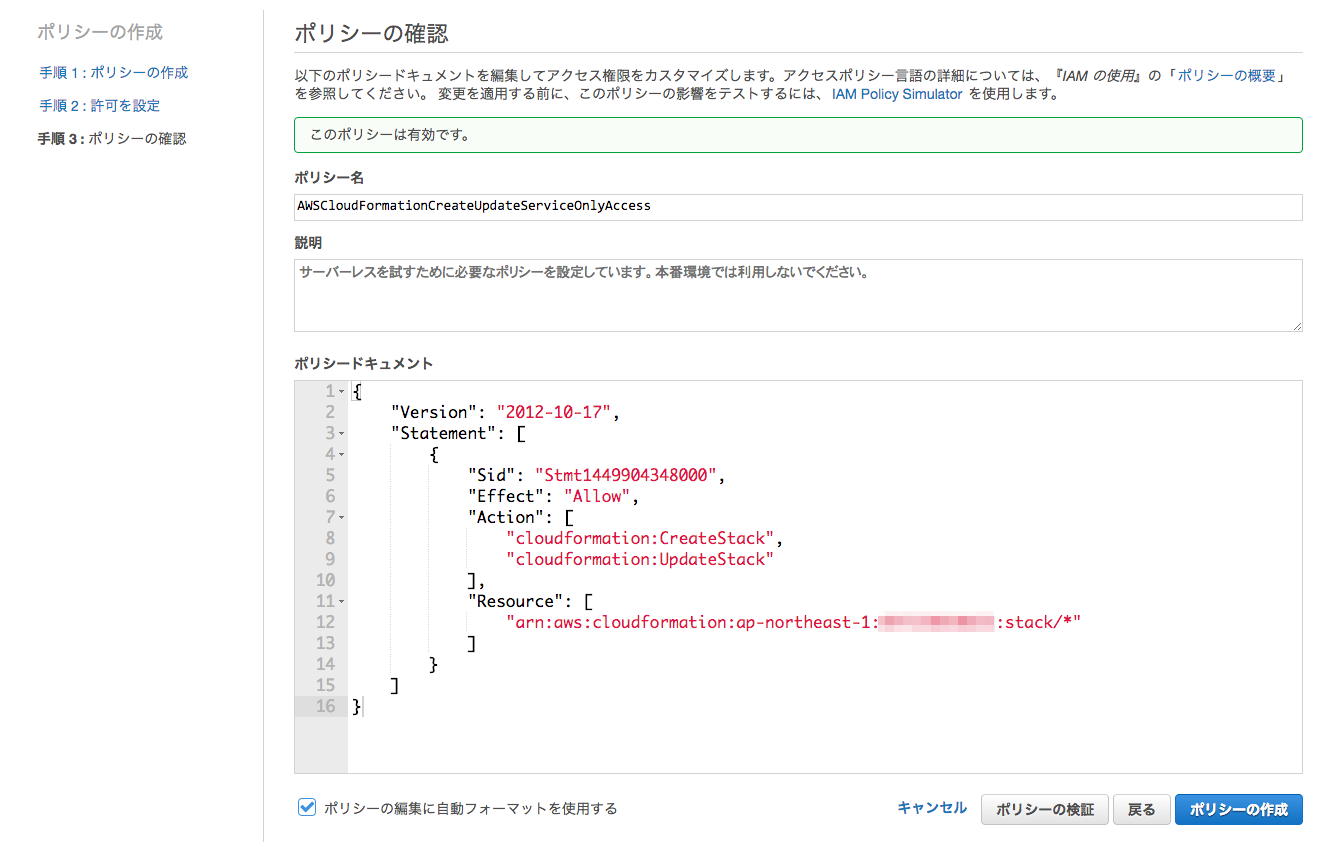
ポリシー名:AWSCloudFormationCreateUpdateServiceOnlyAccess
ポリシー概要: サーバーレスを試すために必要なポリシーを設定しています。※本番環境では利用しないでください。
画像の赤枠の「独自のポリシーを作成」を押下し
以下の文字列をポリシードキュメントへコピーしてください。
{
    "Version": "2012-10-17",
    "Statement": [
        {
            "Sid": "Stmt1449904348000",
            "Effect": "Allow",
            "Action": [
                "cloudformation:CreateStack",
                "cloudformation:UpdateStack"
            ],
            "Resource": [
                "arn:aws:cloudformation:ap-northeast-1:xxxxxxxxxxxxxxxx:stack/*"
            ]
        }
    ]
}
「ポリシー名」、「説明」、「ポリシードキュメント」を入力すると以下の画面のようになります。
ポリシーの作成を押下したら、IAMの作成画面に戻り「更新」を押下し、チェックボックスを選択してください。
※検索をするとタイプがユーザーのよる管理の独自に作ったポリシーが表示されているはずです
AWS CLIの新規ユーザーの設定
いちいちcredentialsの中身をコメントイン・コメントアウトするのも面倒なので
自分はAWS CLIをプロファイル毎管理してます。
今回はprofile名「serverlesstest」で作成しましょう。
| ファイル | 備考 |
|---|---|
| ~/.aws/config | 認証情報以外の情報(リージョンやフォーマットなど) |
| ~/.aws/credentials | 認証情報 |
AWS CLIの設定作成
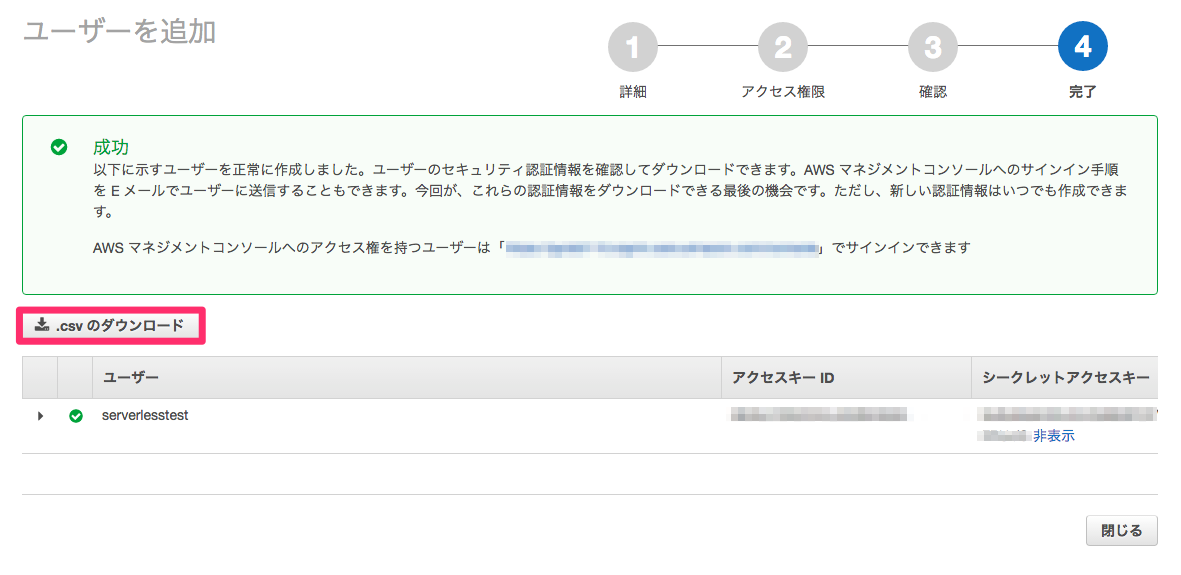
$ aws configure --profile serverlesstest
AWS Access Key ID [None]: XXXXXXXXXXXXXXXXXXXXX
AWS Secret Access Key [None]: XXXXXXXXXXXXXXXXXXXXX
Default region name [None]: ap-northeast-1
Default output format [None]: json
例) ~/.aws/config
$ cat ~/.aws/config
[profile serverlesstest]
output = json
region = ap-northeast-1
例) ~/.aws/credentials
$ cat ~/.aws/credentials
[serverlesstest]
aws_access_key_id = XXXXXXXXXXXXXX
aws_secret_access_key = XXXXXXXXXXXXXX
serverless templateからプロジェクトを作成
今回はnodejsのテンプレートから作成します。
$ serverless create --template aws-nodejs --provider aws --profile serverlesstest --path serverlesstest --verbose
Serverless: Generating boilerplate...
Serverless: Generating boilerplate in "/Users/xxxxxxxxxxx/Documents/serverlesstest"
 _______                             __
|   _   .-----.----.--.--.-----.----|  .-----.-----.-----.
|   |___|  -__|   _|  |  |  -__|   _|  |  -__|__ --|__ --|
|____   |_____|__|  \___/|_____|__| |__|_____|_____|_____|
|   |   |             The Serverless Application Framework
|       |                           serverless.com, v1.5.1
 -------'

Serverless: Successfully generated boilerplate for template: "aws-nodejs"
生成されるファイル
% ls ./serverlesstest
handler.js
serverless.yml
設定変更
設定箇所は「profile」、「stage」、「region」です。
$ cd serverlesstest
$ vi serverless.yml
変更箇所
provider:
  name: aws
  runtime: nodejs4.3
⇣⇣⇣⇣⇣
provider:
  name: aws
  runtime: nodejs4.3
  profile: serverlesstest
  stage: dev
  region: ap-northeast-1
デプロイ
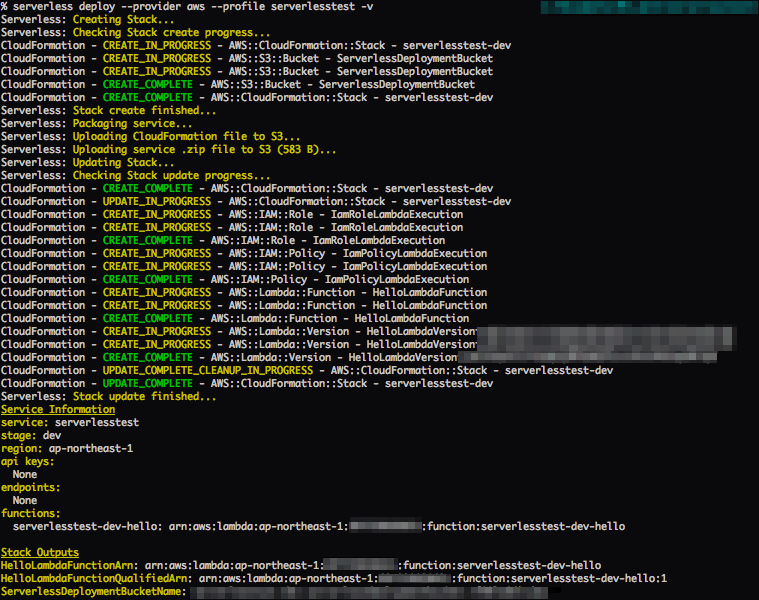
$ serverless deploy --provider aws --profile serverlesstest -v
無事に成功すると以下のような画面となる。
AWSの各サービス確認
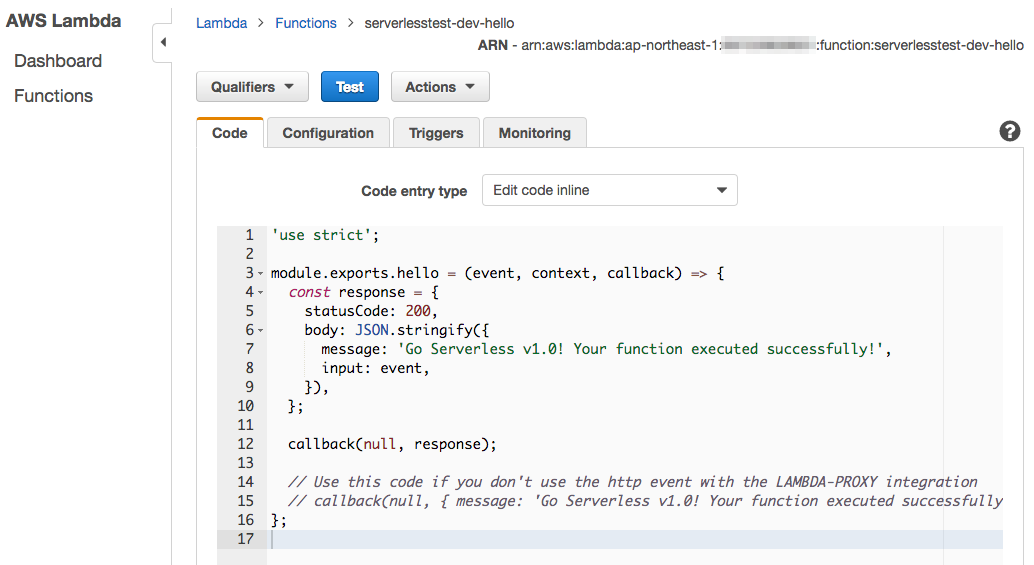
Lambda
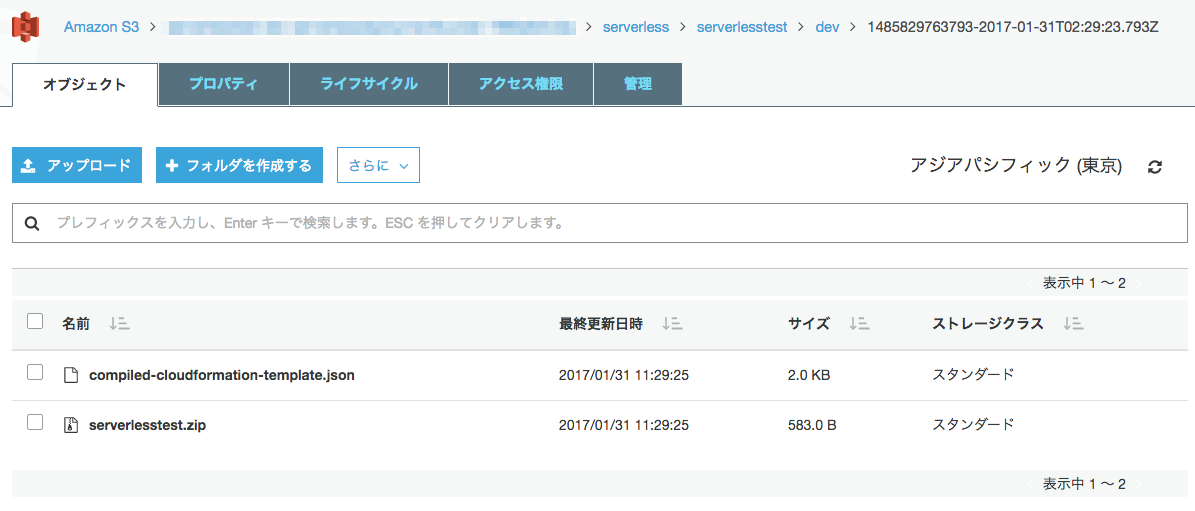
S3
Lambdaの実行
「invoke」コマンドを利用してLambdaの実行してみましょう。
以下のように、helloというファンクションを実行してみます。
$ serverless invoke --function hello --provider aws --profile serverlesstest
{
    "statusCode": 200,
    "body": "{\"message\":\"Go Serverless v1.0! Your function executed successfully!\",\"input\":{}}"
}
処理内容
テンプレートとして、生成された「handler.js」の中身を見てみましょう。
レスポンスとしては、ステータスコードとして200でメッセージの中身を返していますね。
$ cat handler.js
'use strict';

module.exports.hello = (event, context, callback) => {
  const response = {
    statusCode: 200,
    body: JSON.stringify({
      message: 'Go Serverless v1.0! Your function executed successfully!',
      input: event,
    }),
  };

  callback(null, response);

  // Use this code if you don't use the http event with the LAMBDA-PROXY integration
  // callback(null, { message: 'Go Serverless v1.0! Your function executed successfully!', event });
};
編集後記
今回の状態でも、雰囲気はつかめたかなと思います。このままではendpointも公開されておらず、外部から使えないため
次回はAWSのAPI Gatewayを利用してサンプルアプリケーションを少し修正して動かしてみましょう。
