はじめに Introduction
SoftLayerのベアメタルサーバはGPUを搭載できるモデルがあります。執筆時には3種類のGPUが選択できますが、今回はNvidia Tesla M60というGPUを選択しました。ベアメタルサーバにはVMware ESX 6.0が導入されている前提で、ESXとGuest OSのRedhat 6.3にNvidiaのGRIDドライバを投入し、GPUを仮想化するテクニックをご紹介します。
SoftLayer's bare metal server has a model that can be equipped with GPU. Three types of GPUs can be selected at the time of writing, but this time we chose GPU named Nvidia Tesla M60. On the premise that VMware ESX 6.0 is installed in bare metal server, we introduce Nvidia's GRID driver to ESX and Guest OS Redhat 6.3 and introduce techniques to virtualize GPU.
前提 Prerequisite
Bluemix Infrastructureでベアメタルサーバをオーダーする手順は他のブログなどにも多数掲載されていますので、ここでは省略いたします。GPUを搭載できるベアメタルの種類は限定されていますので、ポータルから選択する際にご注意ください。
同様に、ベアメタルサーバにVMwareをインストールする手順もここでは割愛させていただきます。
本記事を執筆時点では、Nvidia Tesla M60のソフトウェアは別途オーダーする必要がある旨もお伝えしておきます。今回は評価版を使用しています。
Procedures for ordering bare metal servers with Bluemix Infrastructure are also listed in other blogs and so on, so we will omit them here. The types of bare metal that can be equipped with GPU are limited, so please be careful when selecting from the portal.
Likewise, the procedure for installing VMware on a bare metal server is omitted here.
At the time of writing this article, I will also inform you that we need to order Nvidia Tesla M60 software separately. This time we are using the evaluation version.
ESXへのNVIDIA GRIDドライバインストール Installing NVIDIA GRID Driver in ESX
ドライバのダウンロード Downloading Driver
以下のサイトから評価版ドライバをダウンロードします。
Download evaluation driver from the following site.
http://www.nvidia.co.jp/object/nvidia-grid-buy-jp.html
ダウンロードしたパッケージには下記のファイルが含まれています。
The downloaded package contains the following files.
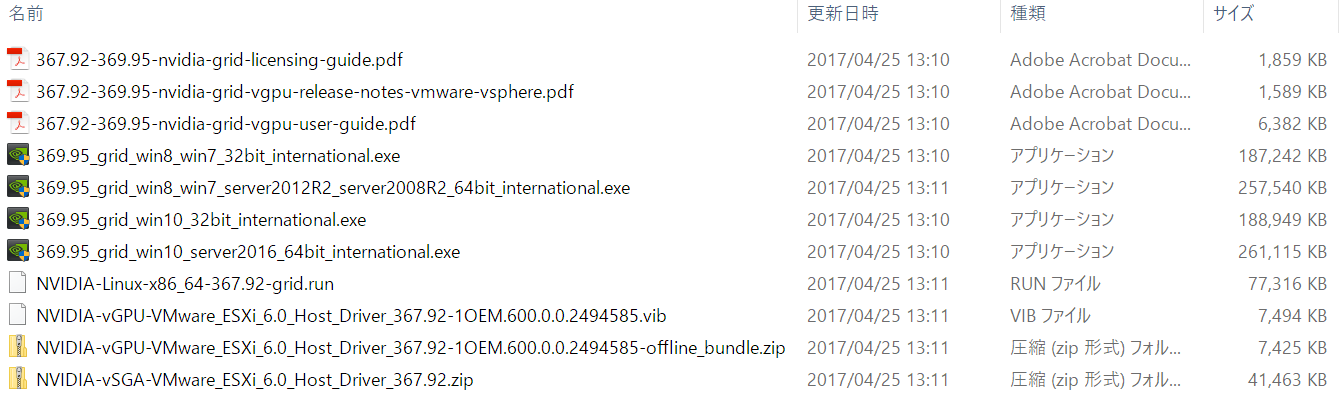
ESXにインストールするドライバだけでなく、Guest OSにインストールするドライバやマニュアル類が含まれています。
In addition to drivers installed on ESX, drivers and manuals to be installed on the Guest OS are included.
データストアへドライバをコピー Copying driver to datastore
ESXから見える適当なデータストアにドライバをコピーします。
Copy the driver to the appropriate data store visible from ESX.
ドライバのインストール Installing driver
次のコマンドを実行してESXにドライバをインストールします。
Execute the following command to install the driver on ESX.
# esxcli software vib install -v /vmfs/volumes/datastore1\ \(8\)/NVIDIA-vGPU-VMware_ESXi_6.0_Host_Driver_367.92-1OEM.600.0.0.2494585.vib
# reboot
ドライバの確認 Confirming driver installation
次のコマンドを実行して正しく認識するかテストします。
Execute the following command to test whether it is recognized correctly.
# nvidia-smi
Fri Apr 21 05:35:42 2017
+-----------------------------------------------------------------------------+
| NVIDIA-SMI 367.92                 Driver Version: 367.92                    |
|-------------------------------+----------------------+----------------------+
| GPU  Name        Persistence-M| Bus-Id        Disp.A | Volatile Uncorr. ECC |
| Fan  Temp  Perf  Pwr:Usage/Cap|         Memory-Usage | GPU-Util  Compute M. |
|===============================+======================+======================|
|   0  Tesla M60           On   | 0000:83:00.0     Off |                  Off |
| N/A   32C    P8    24W / 150W |     19MiB /  8191MiB |      0%      Default |
+-------------------------------+----------------------+----------------------+
|   1  Tesla M60           On   | 0000:84:00.0     Off |                  Off |
| N/A   35C    P8    23W / 150W |     19MiB /  8191MiB |      0%      Default |
+-------------------------------+----------------------+----------------------+

+-----------------------------------------------------------------------------+
| Processes:                                                       GPU Memory |
|  GPU       PID  Type  Process name                               Usage      |
|=============================================================================|
|  No running processes found                                                 |
+-----------------------------------------------------------------------------+
Redhat Guest OSへのNVIDIA GRIDドライバのインストール Installing NVIDIA GRID Driver to Redhat Guest OS
今回はRedhat Enterprise Linux 6.3にインストールしてみました。
リリースノートやUsers Guideには6.6以上とありましたが、正常に稼働しています。(ここではサポート有無の問題は置いておきます)
This time I installed it on Redhat Enterprise Linux 6.3.
There was 6.6 or more in Release Notes and Users Guide, but it is working normally. (We will leave the issue of support or not here.)
nouveauの無効化 Disable nouveau
nouveauドライバはNvidiaドライバと競合するので無効化します。
次のファイルを作成します。
The nouveau driver conflicts with the Nvidia driver, so disable it.
Create the following file.
# vi /etc/modprob.d/disable-nouveau.conf
内容は次の通りです。
The contents are as follows.
blacklist nouveau
options nouveau modeset=0
ブートイメージに登録します。
Register in the boot image.
# mv /boot/initramfs-`uname -r`.img /boot/initramfs-`uname -r`.img.nouveau
# dracut
リブートします。
Do reboot.
# reboot
nouveauがロードされていないことを確認します。
Make sure nouveau is not loaded.
# lsmod | grep nouveau
# dmesg | grep nouveau
前提パッケージのインストール Installing prerequisite packages
EPELや開発キットなどの前提パッケージをインストールします。
Install prerequisite packages such as EPEL and development kit.
EPELリポジトリの登録 Registering EPEL repository
# wget http://download.fedoraproject.org/pub/epel/6/x86_64/epel-release-6-8.noarch.rpm
# rpm -ivh epel-release-6-8.noarch.rpm
開発環境とカーネルヘッダのインストール Installing development environment and kernel header
# yum groupinstall 'Development Tools'
# yum install kernel-devel-$(uname -r) kernel-headers-$(uname -r)
ドライバのインストール Installing driver
先の手順でダウンロードしたインストールパッケージからLinux用のドライバを使います。
# sh NVIDIA-Linux-x86_64-367.92-grid.run
-
ライセンス使用許諾に同意するか求められるので「Accept」を選んでEnterキーを押します。Since you are prompted to agree to the license agreement, select "Accept" and press the Enter key.
-
カーネルモジュールに登録するかどうか聞かれるので「Yes」を選んでEnterキーを押します。Select "Yes" and press the Enter key as you are asked whether you want to register to the kernel module.
-
32ビット互換ライブラリをインストールするか聞かれるので「Yes」を選んでEnterキーを押します。Choose "Yes" and press the Enter key as you are asked whether you want to install a 32-bit compatible library.
-
Xのコンフィグレーションファイル(/etc/X11/xorg.conf)を更新するか聞かれるので「Yes」を選択します。Select "Yes" because you will be asked if you want to update the X configuration file (/etc/X11/xorg.conf).
-
「now complete」という表示が出たら「OK」を選択してEnterキーを押します。When "now complete" is displayed, select "OK" and press the Enter key.
xorg.confの編集 Editing xorg.conf
X Windowの構成を定義する/etc/X11/xorg.confを編集します。
まず、GPUのBUS IDを調べます。
下記の例では、「02:01.0」がBUS IDです。
Edit /etc/X11/xorg.conf which defines the configuration of X Window.
First, check the BUS ID of the GPU.
In the example below, '02: 01.0' is the BUS ID.
# lspci | grep -i vga
00:0f.0 VGA compatible controller: VMware SVGA II Adapter
02:01.0 VGA compatible controller: NVIDIA Corporation GM204GL [Tesla M60] (rev a1)
エディタで/etc/X11/xorg.confを開きます。
"Device"セクションを次のように編集します。
Open /etc/X11/xorg.conf with an editor.
Edit the "Device" section as follows.
Section "Device"
    Identifier     "Device0"
    BusID          "PCI:2:1:0"
    Driver         "nvidia"
    VendorName     "NVIDIA Corporation"
    Option         "IgnoreDisplayDevices" "CRT-0"
    Option         "Connected Monitor" "DFP-0"
EndSection
BusIDには先に確認した値を10進数かつコロンで区切って入力します。
Optionはそのままコピーしてください。
For BusID, enter the value you confirmed earlier, separated by a colon and decimal.
Please copy the Option as it is.
リブートします。
Do reboot
# reboot
ドライバが認識されたか確認します。
Make sure that the driver is recoginized.
nvidia-smi
Tue May  2 20:38:14 2017
+-----------------------------------------------------------------------------+
| NVIDIA-SMI 367.92                 Driver Version: 367.92                    |
|-------------------------------+----------------------+----------------------+
| GPU  Name        Persistence-M| Bus-Id        Disp.A | Volatile Uncorr. ECC |
| Fan  Temp  Perf  Pwr:Usage/Cap|         Memory-Usage | GPU-Util  Compute M. |
|===============================+======================+======================|
|   0  GRID M60-8Q         Off  | 0000:02:01.0      On |                  N/A |
| N/A   N/A    P8    N/A /  N/A |    594MiB /  8191MiB |      0%      Default |
+-------------------------------+----------------------+----------------------+

+-----------------------------------------------------------------------------+
| Processes:                                                       GPU Memory |
|  GPU       PID  Type  Process name                               Usage      |
|=============================================================================|
|    0      3644    G   /usr/bin/X                                      60MiB |
+-----------------------------------------------------------------------------+
プロセスに/usr/bin/Xが表示されていることを確認してください。
Make sure that /usr/bin/X is displayed in the process.
次にすべきこと Next step
NVIDIA GRIDドライバのインストールに成功したら、次の手順に従ってVNCをセットアップし、リモートからデスクトップ画面を操作できるようにします。そして、VirtualGLをインストールして、3D画像の転送を高速化します。
After successfully installing the NVIDIA GRID driver, follow the steps below to set up VNC so that you can operate the desktop screen remotely. Then install VirtualGL and speed up the transfer of 3D images.
デスクトップ画面をクライアントPCから操作する Operate the desktop screen from the client PC
筆者のブログ、SoftLayerにVNCで接続するを参考に、VNCをセットアップしてください。
Please set up VNC referring to my blog, [Connect to SoftLayer with VNC] (http://qiita.com/Sawahashi/items/156be0baaf6384884f3d "Connect to SoftLayer with VNC").
3D画像伝送を高速化するためにVirtualGLをインストールする Install VirtualGL to speed 3D image transmission
筆者のブログ、VirtualGLをセットアップするを参考に、VirtualGLをセットアップしてください。
Please set up VirtualGL referring to my blog, [Set up VirtualGL] (http://qiita.com/Sawahashi/items/b37648f55c428aa92513 "Set up VirtualGL").