今回やること
頂点インデックスを元にモデルの描画
カリング
カメラの設定
今回のソース: 頂点インデックス・カリング, カメラ
頂点インデックス
詳しいことはこちらに。
頂点インデックスとは、三角形を構成する頂点に対応する頂点の番号のリストのことです。
MmdFileLoaderを使用した場合は、MmdFileLoader.Pmd.PmdLoader.Indexに格納されています。
このリストに対応する頂点をバッファに送ることで、正しく描画できるはずです。
バッファに送る頂点のリストはpmdLoader.Index.SelectMany(x => x.Indicies).Select(x => pmdLoader.Vertex[x].Position).ToArray()で、
頂点の数はpmdLoader.Index.Length * 3で取得できます。
カリング(Culling)
DirectX11の初期設定では、MMDモデルを表示しようとすると、モデルの裏もしくは表が描画されません。
描画を設定するラスタライザステートで設定するため、下のコードを追加します。
private void InitializeRasterizerState() {
	device.ImmediateContext.Rasterizer.State = Dx11.RasterizerState.FromDescription(device,
		new Dx11.RasterizerStateDescription() {
			CullMode = Dx11.CullMode.None, FillMode = Dx11.FillMode.Solid,
		}
	);
}
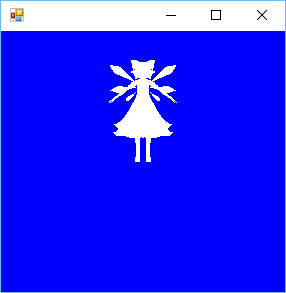
CullModeには「表面の描画を省略する」「裏面の描画を省略する」「描画の省略をしない」の3つから選択可能。
FillModeにWireframeを指定すると、ワイヤフレーム表示になります。
結果は下図のようになります。
カメラ
詳しいことはこちらに
モデルの表示ができましたが、いちいち1/20に縮小したものを用意するのは面倒です。
そこでカメラを用意します。
Direct3D11においては、「カメラ機能」なるものは用意されていない(はず)です。
エフェクトファイルで座標変換を行うことで「カメラ」を実現しています。
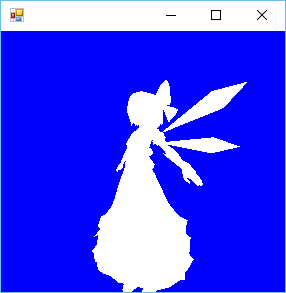
下のコードで、(0, 10, -10)から(0, 10, 0)に視線を向けさせ、全体をy軸を中心に回転させています。
flameCountは描画するごとにインクリメントさせています。
また、エフェクトファイルの頂点シェーダも変更しました。
private void UpdateCamera() {
	var world = Matrix.RotationY((flameCount / 20 % 360) * (float)Math.PI / 180);

	var view = Matrix.LookAtRH(
		new Vector3(0, 10, -10), new Vector3(0, 10, 0), new Vector3(0, 1, 0)
	);

	var projection = Matrix.PerspectiveFovRH(
		(float)Math.PI / 2, ClientSize.Width / ClientSize.Height, 0.1f, 1000
	);

	effect.GetVariableByName("World").AsMatrix().SetMatrix(world);
	effect.GetVariableByName("View").AsMatrix().SetMatrix(view);
	effect.GetVariableByName("Projection").AsMatrix().SetMatrix(projection);
}
matrix World;
matrix View;
matrix Projection;

float4 myVertexShader(float4 position: SV_Position) : SV_Position {
	float4 pos = mul(position, World);
	pos = mul(pos, View);
	pos = mul(pos, Projection);
	return pos;
}

float4 myPixelShader() : SV_Target {
	return float4(1, 1, 1, 1);
}

technique10 myTechnique {
	pass myPass {
		SetVertexShader(CompileShader(vs_5_0, myVertexShader()));
		SetPixelShader(CompileShader(ps_5_0, myPixelShader()));
	}
}
くるくるまわってます。
さいごに
次回は、拡散色(Diffuse)とテクスチャでモデルに色をつける予定です。