今回やること
テクスチャを貼ってモデルに色をつける。
深度バッファを使う
今回のソース: GitHub
テクスチャマッピング
詳しいことはこちら
テクスチャとは、
テクスチャ (texture) は、物の表面の質感・手触りなどを指す概念である。 本来は織物の質感を意味する。 髪型においては髪の表面の見た目の光沢や毛先の揃い方ばかりでなく、手で直接触った際の感触も含む総合的な概念。 コンピュータグラフィックスにおいて、3次元オブジェクト表面に貼り付けられる模様。
Wikipediaより
簡単に言えば、モデルに貼り付ける画像ですね。
PMDファイルでは、色など見た目を定義する「マテリアル」内に、テクスチャとして使用される画像のファイル名が格納されています。
ファイル名は、PmdMaterial.TextureFileNameに格納されています。
以下のコードで、PMDファイルで使用されるテクスチャを読み込み、シェーダで利用するために、ShaderResourceViewに格納します。
parentDirは、PMDファイルがあるディレクトリの絶対パスです。
var texture = new Dx11.ShaderResourceView[];
private void InitializeTexture() {
	texture = new Dx11.ShaderResourceView[pmdLoader.Material.Length];
	for(int i = 0;i < texture.Length; i++) {
		try {
			texture[i] = Dx11.ShaderResourceView.FromFile(device, parentDir + pmdLoader.Material[i].TextureFileName);
		} catch(Dx11.Direct3D11Exception e) {
			Console.WriteLine("Texture of Material" + i + " not found");
			continue;
		}
	}
}
次に、描画する頂点に読み込んだテクスチャのどの部分を対応させるかを指定する、UV値を頂点バッファに送ります。
頂点に対応するUV値は、PmdVertex.Uvに格納されています。
InitializeVertexLayoutの頂点の定義の後ろに以下のコードを追加します。
new Dx11.InputElement() {
	SemanticName = "TEXCOORD", Format = Dxgi.Format.R32G32_Float,
	AlignedByteOffset = Dx11.InputElement.AppendAligned
}
さらに、頂点と一緒にUV値も一緒にシェーダに送るように変更します。
シェーダに送るデータを定義する構造体VertexBufferを追加。
ついでに、素直にデータを格納させたいため、頂点バッファとは別にインデックスバッファを生成し、頂点インデックスのデータを格納します。
InitializeVertexBuffer関数も変更します。
struct VertexData {
	public Vector3 Position;
	public Vector2 Uv;
}

private void InitializeVertexBuffer() {
	using(var vertexStream = new DataStream(
		pmdLoader.Vertex.Select(x => new VertexData() {
			Position = x.Position, Uv = x.Uv
		}).ToArray(), true, true)) {
		vertexBuffer = new Dx11.Buffer(device, vertexStream,
			new Dx11.BufferDescription() {
				SizeInBytes = (int)vertexStream.Length,
				BindFlags = Dx11.BindFlags.VertexBuffer,
				StructureByteStride = sizeof(float),
			}
		);
	}
}

Dx11.Buffer indexBuffer;
private void InitializeIndexBuffer() {
	using(var indexStream = new DataStream(pmdLoader.Index.SelectMany(x => x.Indicies).ToArray(), true, true)) {
		indexBuffer = new Dx11.Buffer(device, indexStream, new Dx11.BufferDescription() {
			SizeInBytes = (int)indexStream.Length,
			BindFlags = Dx11.BindFlags.IndexBuffer,
			StructureByteStride = sizeof(short)
		});
	}
}
生成したバッファをセットします。
device.ImmediateContext.InputAssembler.SetVertexBuffers(
	0, new Dx11.VertexBufferBinding(vertexBuffer, System.Runtime.InteropServices.Marshal.SizeOf(typeof(VertexData)), 0));
device.ImmediateContext.InputAssembler.SetIndexBuffer(indexBuffer, Dxgi.Format.R16_UInt, 0);
ここまで来れば、シェーダに画像を渡して描画するだけでいいのですが、シェーダに複数の画像を切り替えさせて描画させることはできません。
PMDファイルのマテリアルデータに、それぞれのマテリアルを適用する頂点インデックスの数が格納されています。
マテリアル1: 青色 120個
マテリアル2: 赤色 210個
といった具合です。
上記の場合、頂点インデックス120個分(0~119)を青色で描画し、さらに頂点インデックス210個分(120~329)を赤色で描画します。
以下はDrawModel()関数とシェーダです。
private void DrawModel() {
	int startIdx = 0;
	for(int i = 0;i < pmdLoader.Material.Length;i++) {
		if(texture[i] == null) {
			effect.GetVariableByName("tex").AsScalar().Set(false);
		} else {
			effect.GetVariableByName("tex").AsScalar().Set(true);
			effect.GetVariableByName("normalTexture").AsResource().SetResource(texture[i]);
		}
		effect.GetTechniqueByIndex(0).GetPassByIndex(0).Apply(device.ImmediateContext);
		device.ImmediateContext.DrawIndexed(pmdLoader.Material[i].IndiciesCount, startIdx, 0);
		startIdx += pmdLoader.Material[i].IndiciesCount;
	}
}
matrix World;
matrix View;
matrix Projection;
Texture2D normalTexture;

SamplerState mySampler {
};

bool tex;

struct Vertexes {
	float4 position : SV_Position;
	float2 uv : TEXCOORD;
};

Vertexes myVertexShader(Vertexes input) {
	Vertexes output;
	float4 pos = mul(input.position, World);
	pos = mul(pos, View);
	pos = mul(pos, Projection);

	output.position = pos;
	output.uv = input.uv;
	return output;
}

float4 myPixelShader(Vertexes input) : SV_Target {
	if(tex) {
		return normalTexture.Sample(mySampler, input.uv);
	} else {
		return float4(1, 1, 1, 1);
	}
}

technique10 myTechnique {
	pass myPass {
		SetVertexShader(CompileShader(vs_5_0, myVertexShader()));
		SetPixelShader(CompileShader(ps_5_0, myPixelShader()));
	}
}
DrawModel()内では、描画を始める頂点インデックスの番号を格納するstartIdxを用意します。この変数は、描画をするごとに、描画が終わった頂点インデックスの番号を格納します。
描画はマテリアルごとに行い、テクスチャが存在するなら、テクスチャを描画することをシェーダに伝える変数tex(bool)をtrueにし、画像を送ります。存在しない場合は、texをfalseにし、画像は送りません。
シェーダに送るものを設定し終えたら、Applyをし、DrawIndexedを使用してマテリアル単位で描画します。
effect.fxでは、送られてきた画像とUV, 画像の有無などの情報を元に、描画方法を定義しています。
深度バッファ
詳しいことはこちら
これでモデルに色がつくはずですが、現状では後に描画されたものが手前に表示されるため、モデルによっては悲惨な結果になってしまいます。
深度バッファを使いましょう。
protected Dx11.DepthStencilView depthStencil;

private void InitializeDevice() {
	InitializeRenderTarget();
	InitializeDepthStencil();
	device.ImmediateContext.OutputMerger.SetTargets(depthStencil, renderTarget);
	InitializeViewport();
}

private void InitializeDepthStencil() {
	using(var depthBuffer = new Dx11.Texture2D(device,
		new Dx11.Texture2DDescription() {
			ArraySize = 1, BindFlags = Dx11.BindFlags.DepthStencil,
			Format = Dxgi.Format.D32_Float,
			Width = ClientSize.Width, Height = ClientSize.Height,
			MipLevels = 1, SampleDescription = new Dxgi.SampleDescription(1, 0)
		})) {
		depthStencil = new Dx11.DepthStencilView(device, depthBuffer);
	}
}

private void InitializeViewport() {
	device.ImmediateContext.Rasterizer.SetViewports(
		new Dx11.Viewport() { Width = ClientSize.Width, Height = ClientSize.Height, MaxZ = 1 }
	);
}
protected override void Draw() {
	device.ImmediateContext.ClearRenderTargetView(renderTarget, new Color4(1, 0, 0, 1));
	device.ImmediateContext.ClearDepthStencilView(depthStencil, Dx11.DepthStencilClearFlags.Depth, 1, 0);
}
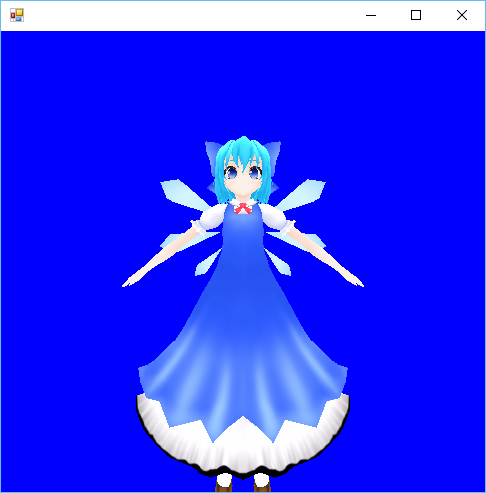
やっと「らしく」表示できました。
さいごに
次回は、視点操作とライトを扱う予定です。