追記:Unity2018以降はもっと簡単に作成できます
今までは無料のアセットを使ってやっていたのですが、
Camera.RenderToCubemap
機能:カメラからキューブマップにレンダリングします。
こんな便利な機能があったなんて知らなかった!
そして使ってみて超便利だったので共有します。
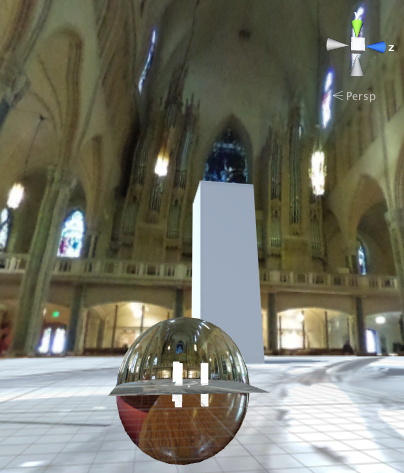
キューブマップにしたいシーンを作成
キューブマップを作るのに「まずキューブマップを用意します」では本末転倒になってしまうので、Sphereに全天球画像を貼り付けたりして作成します。
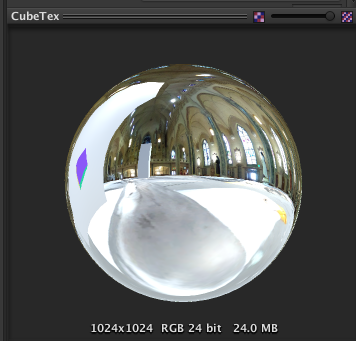
ダミーのキューブマップ用テクスチャを用意
適当なテクスチャをプロジェクトにドロップします。
このテクスチャは後でキューブマップを作る際に上書きされてしまうので、消えてもいいものを使ってください。
- 追記:cubemapは、後でセーブされたものに差し替える必要があります。
ダミーのキューブマップ用テクスチャの設定を変更
ダミーのキューブマップ用テクスチャを選択し、Inspectorから設定を変更します。
- Texture Type を Cubemap に変更
CubeMapマテリアルを用意
Create > Material でマテリアルを作成し、Shader > Skybox > 6Sided を選択、テクスチャにダミーのキューブマップテクスチャを指定します。
エディタースクリプトを用意
Editorフォルダを作成し、その中にこちらのUnityサンプルスクリプトを作成します。
- 追記:サンプルのままだと保存されないので、こちらを参考にスクリプトを修正しました(天地逆に出力されていたのを修正)。
// // http://docs.unity3d.com/ja/current/ScriptReference/Camera.RenderToCubemap.html
// http://stackoverflow.com/questions/34458622/unity-save-cubemap-to-one-circle-image
using UnityEngine;
using UnityEditor;
using System.Collections;
using System.Linq;
using System.IO;

public class RenderCubemapWizard : ScriptableWizard {

	public Camera camera;
	public Cubemap cubemap;

	void OnWizardUpdate () {
		string helpString = "Select transform to render from and cubemap to render into";
		bool isValid = (camera != null) && (cubemap != null);
	}

	void OnWizardCreate () {
		if (camera == null) {
			camera = Camera.main;
		}
		// render into cubemap
		camera.RenderToCubemap( cubemap );
		cubemap.Apply ();
		ConvertToPng ();
	}

	[MenuItem("GameObject/Render into Cubemap")]
	static void RenderCubemap () {
		ScriptableWizard.DisplayWizard<RenderCubemapWizard>(
			"Render cubemap", "Render!");
	}

	void ConvertToPng()
	{
		Debug.Log(Application.dataPath + "/" +cubemap.name +"_PositiveX.png");
		var tex = new Texture2D (cubemap.width, cubemap.height, TextureFormat.RGB24, false);
		var bytes = getPlanePixels(tex,CubemapFace.PositiveX);
		File.WriteAllBytes(Application.dataPath + "/"  + cubemap.name +"_PositiveX.png", bytes);

		bytes = getPlanePixels(tex,CubemapFace.NegativeX);
		File.WriteAllBytes(Application.dataPath + "/"  + cubemap.name +"_NegativeX.png", bytes);

		bytes = getPlanePixels(tex,CubemapFace.PositiveY);
		File.WriteAllBytes(Application.dataPath + "/"  + cubemap.name +"_PositiveY.png", bytes);

		bytes = getPlanePixels(tex,CubemapFace.NegativeY);
		File.WriteAllBytes(Application.dataPath + "/"  + cubemap.name +"_NegativeY.png", bytes);

		bytes = getPlanePixels(tex,CubemapFace.PositiveZ);
		File.WriteAllBytes(Application.dataPath + "/"  + cubemap.name +"_PositiveZ.png", bytes);

		bytes = getPlanePixels(tex,CubemapFace.NegativeZ);
		File.WriteAllBytes(Application.dataPath + "/"  + cubemap.name   +"_NegativeZ.png", bytes);
		DestroyImmediate(tex);

	}

	byte[] getPlanePixels(Texture2D _tex, CubemapFace _face){
		Texture2D tmpTex = new Texture2D (cubemap.width, cubemap.height, TextureFormat.RGB24, false);
		tmpTex.SetPixels(cubemap.GetPixels(_face));
		Color[] vline;
		for (int x = 0; x < cubemap.width; ++x) {
			vline = tmpTex.GetPixels (x, 0, 1, cubemap.height);
			_tex.SetPixels (x, 0, 1, cubemap.height,vline.Reverse().ToArray());
		}
		return _tex.EncodeToPNG();
	}

}
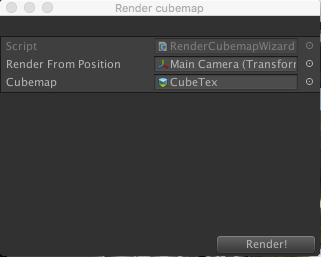
スクリプトを実行する
GameObjectメニューから Render into Cubemap を実行します。

ダイアログウインドウが現れるので、
Render From Position にカメラを、Cubemapにダミーのキューブマップ用テクスチャを指定して実行します
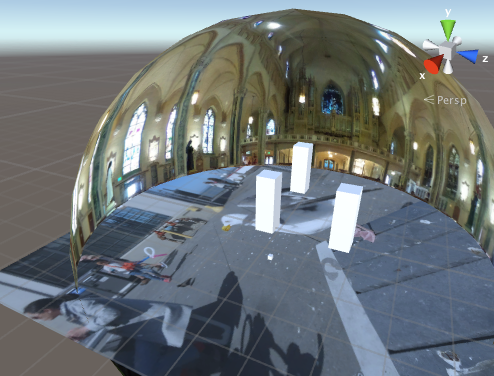
完成!
- 追記:最終的に出力された6枚の画像をキューブマップのそれぞれの面に設定して完成です。
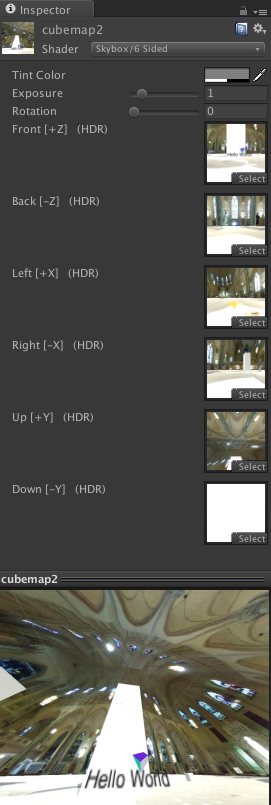
- Window > Lighting > Skyboxでキューブマップマテリアルを指定します。