当記事はケーススタディの連載となっています。目次は【こちら】です。
最新のソースコードは【GitHub】で公開中です。
サーバの責務はこちらで確認ください。
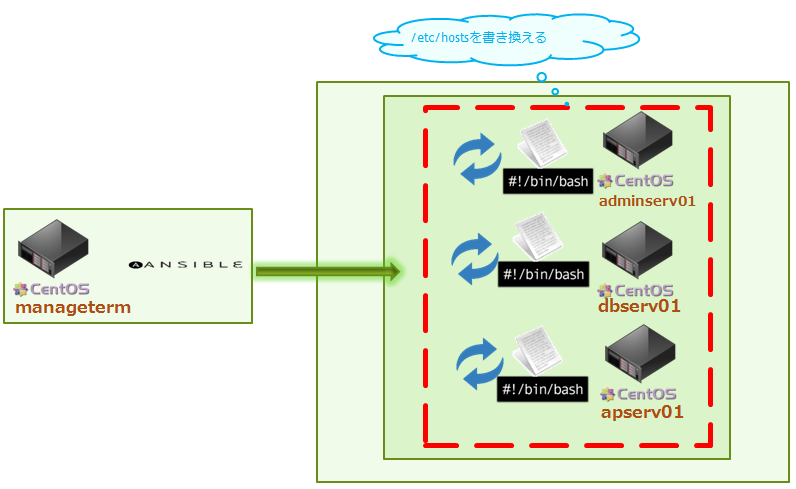
1.hosts設定概要
各サーバに設定するhostsファイルを指定する。
2.playbookファイルの相関
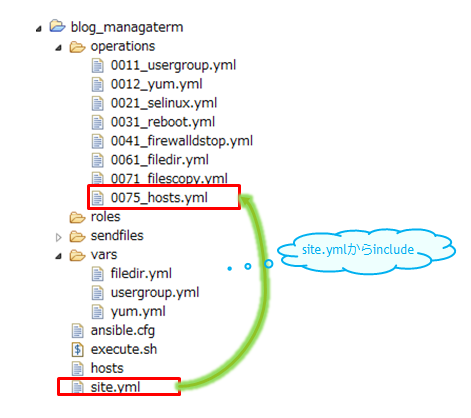
3.playbook(site.yml)
${ANSIBLE_HOME}/site.yml
メインとなるplaybook(site.yml)参照
4.hosts設定のplaybook(/operations/0075_hosts.yml)
${ANSIBLE_HOME}/operations/0075_hosts.yml
hosts設定のplaybookは以下の通り。playbook中のコメントの補足に関しては「5.補足説明」を参照。
# ===================
# hostsファイルにhost情報を書き込み
# ===================
- hosts: all
  sudo: no
  remote_user: root
  tasks:

# ===================
# /etc/hosts内に
# 192.16..134.195がなかったら192.168.134.195 managetermを記述する
# 192.16..134.196がなかったら192.168.134.196 apserv01を記述する
# 192.16..134.197がなかったら192.168.134.197 dbserv01を記述する
# 192.16..134.198がなかったら192.168.134.198 adminserv01を記述する
# ===================
    - debug: msg="HOST設定ファイルは環境依存します。環境変更時は切り替える必要有"
    - lineinfile: state=present dest=/etc/hosts regexp='^192.168.134.195' line='192.168.134.195 manageterm' create=yes  #【4.A:/etc/hostsにサーバ情報を追記する】
    - lineinfile: state=present dest=/etc/hosts regexp='^192.168.134.196' line='192.168.134.196 apserv01' create=yes
    - lineinfile: state=present dest=/etc/hosts regexp='^192.168.134.197' line='192.168.134.197 dbserv01' create=yes
    - lineinfile: state=present dest=/etc/hosts regexp='^192.168.134.198' line='192.168.134.198 adminserv01' create=yes
5.補足説明
【4.A:/etc/hostsにサーバ情報を追記する】コメント
/etc/hostsはインストール直後は大体以下のようになっている。

127.0.0.1 adminserv01 localhost localhost.localdomain localhost4 localhost4.localdomain4
::1 localhost localhost.localdomain localhost6 localhost6.localdomain6
- lineinfile: state=present dest=/etc/hosts regexp='^192.168.134.195' line='192.168.134.195 manageterm' create=yes
lineinfileは正規表現にて該当する文字列が見つかった場合に行を置換する。
今回はhostsファイルに【192.168.134.195から始まる文字列】を探し出し192.168.134.195 managetermに置換する。
もし該当する行がなければcreate=yesで追記を行う。
デフォルトは「create=no」なので正規表現に該当しない場合は追記されない。

127.0.0.1 adminserv01 localhost localhost.localdomain localhost4 localhost4.localdomain4
::1 localhost localhost.localdomain localhost6 localhost6.localdomain6
192.168.134.195 manageterm
192.168.134.196 apserv01
192.168.134.197 dbserv01
192.168.134.198 adminserv01
0075_hosts.ymlを実行するとhostsファイルが更新される。
1度目は該当せず追記。2度目以降は該当するが同じ値に置換されるだけなので冪等性は保つことが出来る。
6.補足の補足
今回はymlファイルに直接IPアドレスを記述しているが、IP、ディレクトリ、host名、ポート等は環境依存しやすい情報の為、実際は外部ファイルに外出しする方がおすすめ。(202.Ansible実行端末からのCentOSサーバ群を構築する(Ansible準備編)参照)
次回は「211.NFSをインストールし管理サーバ(adminserv01)とAPサーバ(apserv01)・DBサーバ(dbserv01)から接続する」について。
連載の目次は【こちら】です。