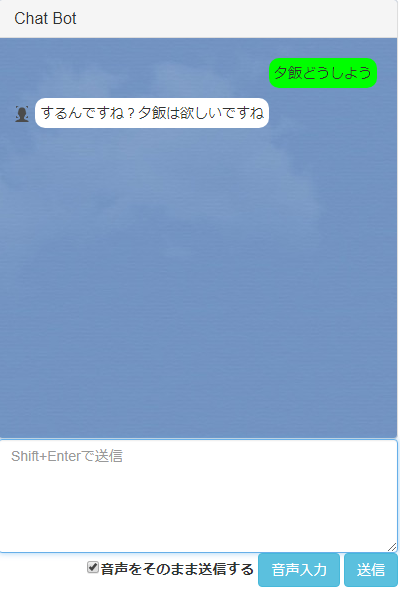
続・Chromeで気軽に話ができる雑談会話Bot
前回の雑談ChromeExtentionをバージョンアップしてみた。
気軽に話ができるという意味で、音声でも会話ができるようにした。
今回はChromeExtentionではなく、Webアプリに。(理由は後述)
使用したもの
サーバー:Heroku
音声認識:WebSpeechAPI
雑談会話:docomo Developer support
準備
Herokuのセットアップ
phpを使用します。index.phpというファイルがないとHerokuにデプロイできないので注意。
Herokuの使い方については参考URLを参照。
WebSpeechAPI
主にChromeなどのHTML5で使用できる音声認識+合成のAPIです。
特にライブラリのimport等は不要で、jsに書くだけで使用できますので準備は不要です。
https://developer.mozilla.org/ja/docs/Web/API/Web_Speech_API
使い方はインラインで説明します。
雑談会話APIを使用するためのアカウント登録
docomoが提供している雑談会話のAPIです。
https://dev.smt.docomo.ne.jp/?p=docs.api.page&api_name=dialogue&p_name=api_usage_scenario
アカウント登録をすると、無料で使用できます。
回数に制限があるみたいなので、公開するには法人登録する必要があるかなと思います。
使い方はインラインで説明します。
フォルダ構成
├── css
│ └── popup.css
├── images
│ ├── background_sky.jpg
│ ├── bot_128.png
│ ├── bot_16.png
│ └── bot_48.png
├── lib
│ ├── css
│ │ ├── bootstrap-theme.min.css
│ │ ├── bootstrap-theme.min.css.map
│ │ ├── bootstrap.min.css
│ │ └── bootstrap.min.css.map
│ └── js
│ ├── bootstrap.min.js
│ ├── jquery.cookie.js
│ └── jquery.min.js
├── index.php
├── popup.html
└── popup.js
各ファイル
<!DOCTYPE html>
<html lang="jp">

<head>
    <meta charset="utf-8">
    <meta name="viewport" content="width=device-width, initial-scale=1, shrink-to-fit=no">
    <meta http-equiv="x-ua-compatible" content="ie=edge">
    <title>ChatBot</title>
    <link rel="stylesheet" href="lib/css/bootstrap.min.css" type="text/css">
    <link rel="stylesheet" href="css/popup.css" type="text/css">
    <script src="lib/js/jquery.min.js"></script>
    <script src="lib/js/bootstrap.min.js"></script>
    <script src="lib/js/jquery.cookie.js"></script>
    <script src="popup.js"></script>
</head>

<body>
    <div class="panel panel-default">
        <div class="panel-heading">
            <h1 class="panel-title">Chat Bot</h1>
        </div>
        <div class="panel-body">
            <div id='chat'></div>
        </div>
    </div>
    <div class='inputText'>
        <textarea rows="5" id="txt" class="form-control" placeholder="Shift+Enterで送信"></textarea>
        <label><input type="checkbox" class="submit-speech">音声をそのまま送信する</label>
        <button type="button" class="btn btn-info rec-btn">音声入力</button>
        <button type="button" class="btn btn-info chat-btn">送信</button>
    </div>
</body>

</html>
body {
    width: 400px;
    margin: 0px;
    min-width: 357px;
    overflow-x: hidden;
    font-family: "Helvetica Neue", Helvetica, "Hiragino Kaku Gothic Pro", "Lucida Grande", Verdana, Arial, Meiryo, "メイリオ", sans-serif;
}

.panel {
    margin: 0;
    background-image: url("../images/background_sky.jpg");
}

.panel-body {
    height: 400px;
    overflow: auto;
}

.chatBox {
    width: 100%;
    height: auto;
    overflow: hidden;
}

.chatBalloon {
    display: inline-block;
    border-radius: 10px;
    padding: 5px;
    margin: 5px;
    background-color: white;
}

.bot {
    float: left;
    display: inline-block;
}

.usr {
    float: right;
    background-color: Lime;
}

.inputText {
    text-align: right;
}
WebSpeechAPIの使い方
ローカルでは使用できません!サーバーで動かすようにしましょう
このせいでchrome拡張にはできず
1. 初めにWebSpeechApiを定義 言語は日本語 ・・・①
2. ボタンを押したら録音スタート・・・②
3. 録音が終わるとresultイベントが発生し、transcriptでテキストに変換・・・③
// define api ・・・①
var speech = new webkitSpeechRecognition();
// I can speak japanese only.
speech.lang = "ja";
function submitChatText() {
var inputText = $('#txt').val();
$('#txt').val('').focus();
getBotSpeech(inputText);
}
function getBotSpeech(inputText) {
var messageMine = $("<div class='chatBox'><div class='usr chatBalloon'>" + esc(inputText) + "</div></div>");
$('#chat').append(messageMine);
var context = ''
if ($.cookie('context')) {
context = $.cookie('context');
}
$.ajax({
url: "index.php?text=" + encodeURI(inputText) + "&context=" + encodeURI(context),
type: "GET",
async: true,
cache: false
}).done(function(data) {
var res = JSON.parse(data);
var chat = $("<div class='chatBox'><div class='bot'><img src='./images/bot_16.png'><div class='chatBalloon'>" + esc(res['utt']) + "</div></div></div>");
$('#chat').append(chat);
$.cookie('context', res['context'], { expires: 7 });
}).fail(function(data) {
console.log(data);
}).always(function(data) {});
}
function esc(s) {
return s.replace('&', '&').replace('<', '<').replace('>', '>');
}
function chatClickHandler(e) {
submitChatText();
}
function recClickHandler(e) {
// start rec ・・・②
speech.start();
}
function recResultHandler(e) {
// convert speech to text・・・③
var speechText = e.results[0][0].transcript;
if ($(".submit-speech").prop('checked')) {
getBotSpeech(speechText);
} else {
$('#txt').val(speechText);
}
}
function textareaHandler(e) {
if (!(e.keyCode == 13 && e.shiftKey)) return;
submitChatText();
}
document.addEventListener('DOMContentLoaded', function() {
document.querySelector('.chat-btn').addEventListener('click', chatClickHandler);
document.querySelector('.rec-btn').addEventListener('click', recClickHandler);
document.querySelector('#txt').addEventListener('keyup', textareaHandler);
speech.addEventListener('result', recResultHandler);
});
docomo雑談会話APIの使い方
- APIキーをAPIKEYというパラメータに乗せる・・・①
- javascriptから送信されたパラメータをPOSTで送信する・・・②
- utt: 発言したテキスト
- context: 会話ID(会話初言に発行され返答に付与されてくる。2回目以降これを送信すると、会話の流れが記録され、文脈の通った会話が楽しめる)
- 上記のパラメータがJSONで返信されてくるので返答・・・③
<?php
    ini_set('display_errors',1);
    // docomo chatAPI・・・①
    $api_key = 'docomoより発行されたapiキー';
    $api_url = sprintf('https://api.apigw.smt.docomo.ne.jp/dialogue/v1/dialogue?APIKEY=%s', $api_key);
  // parameter from js ・・・②
    $req_body = array('utt' => $_GET['text'], 'context' => $_GET['context']);

    $headers = array(
        'Content-Type: application/json; charset=UTF-8',
    );
    $options = array(
        'http'=>array(
            'method'  => 'POST',
            'header'  => implode("\r\n", $headers),
            'content' => json_encode($req_body),
            )
        );
    $stream = stream_context_create($options);
    echo file_get_contents($api_url, false, $stream); // ...③
?>
終わりに
さびしいときに呆れるまで(制限を超えるまで)相槌をうってくれる意外とドライな友達です
参考URL
勉強になりました。ありがとうございます!
Heroku×PHPでHello world!表示手順
http://qiita.com/fgnhssb/items/e1b76ce35d88d008919d
【LINE Bot】Heroku+PHP+雑談対話APIで会話Bot作ってみた
http://qiita.com/shanonim/items/f90ee13180ee70a1903d