- 2015.8.6 r-iRkernelのインストールについて追記
- 2015.8.23 r-iRkernel部分更新、iRubyインストール追記
- [jupyter関連はこちら] (http://qiita.com/y__sama/items/bb0756574456f9ab11d4#jupyter-ipython-notebook-3x%E7%92%B0%E5%A2%83%E6%A7%8B%E7%AF%89)
モチベーション
- 安価なchromebook ASUS C300MAに開発環境を同居させたい
anaconda+jupyterに落とし込むのがゴール
jupyterを経由すれば、ubuntu自体をwebアプリライクに使うことが可能(ファイルの受け渡し、端末の起動など)
- croutonでubuntuを同居させる
SSDが心もとないので、64GB microSDを購入ubuntu環境はこちらに入れる
- 参照サイト
http://qiita.com/ikuwow/items/c5832fd823e869825c80
http://chrome.hatenablog.jp/entry/2015/05/03/020205
http://taiju.hatenablog.com/entry/20150103/1420269653
http://qiita.com/yasuki/items/f4b9a004305c8a96baa0
USBメモリの設定
パーティション確認
sudo fdisk -l
# Device         Boot  Start       End   Sectors  Size Id Type
# /dev/mmcblk1p1 *      2048    204800    202753   99M 83 Linux
# /dev/mmcblk1p2      206848 125433855 125227008 59.7G 83 Linux
パーティション作成
sudo fdisk /dev/mmcblk1
# fdiskに入る
コマンドは下記。
Help:

  DOS (MBR)
   a   toggle a bootable flag
   b   edit nested BSD disklabel
   c   toggle the dos compatibility flag

  Generic
   d   delete a partition
   l   list known partition types
   n   add a new partition
   p   print the partition table
   t   change a partition type
   v   verify the partition table

  Misc
   m   print this menu
   u   change display/entry units
   x   extra functionality (experts only)

  Save & Exit
   w   write table to disk and exit
   q   quit without saving changes

  Create a new label
   g   create a new empty GPT partition table
   G   create a new empty SGI (IRIX) partition table
   o   create a new empty DOS partition table
   s   create a new empty Sun partition table
dを連打して全部消した後、nで作っていく。
Command (m for help): n
Partition type
   p   primary (1 primary, 0 extended, 3 free)
   e   extended (container for logical partitions)
Select (default p): p
Partition number (2-4, default 2):
First sector (204801-125433855, default 206848):
Last sector, +sectors or +size{K,M,G,T,P} (206848-125433855, default 125433855):

Created a new partition 2 of type 'Linux' and of size 59.7 GiB.

Command (m for help): p
Disk /dev/mmcblk1: 59.8 GiB, 64222134272 bytes, 125433856 sectors
Units: sectors of 1 * 512 = 512 bytes
Sector size (logical/physical): 512 bytes / 512 bytes
I/O size (minimum/optimal): 512 bytes / 512 bytes
Disklabel type: dos
Disk identifier: 0x1f86c1e5

Device         Boot  Start       End   Sectors  Size Id Type
/dev/mmcblk1p1 *      2048    204800    202753   99M 83 Linux
/dev/mmcblk1p2      206848 125433855 125227008 59.7G 83 Linux
なんとなく2つに分けてみた。
フォーマット
sudo umount /dev/mmcblk1p2
sudo mkfs -t ext4 -L crouton /dev/mmcblk1p2
mkfsでext4でフォーマット可能
Crouton設定
crouton本体は以下からダウンロードしておく
https://goo.gl/fd3zc
precise インストール
sudo mkdir /media/removable/chromebook/crouton
sudo sh -e ~/Downloads/crouton -r precise -t xfce,keyboard,audio,extension,chrome -p /media/removable/crouton
2015/08/04 現在なぜかtrustyをインストールできない?途中でread-onlyに書込できないと出て落ちる。
12.02 preciseなら問題なくインストールできた。
croutonが既にある場合
cd /media/removable/crouton/chroots
sudo sh delete-chroot -a
これでうまく行くはずだが、全消しした後USBにcroutonの書き込みができなかったので、ドライブごとフォーマットしてやりなおした。
ubuntuへのログイン
cd /media/removable/crouton/chroots
sudo sh enter-chroots
~/.bashrcに下記を追加しとくと便利。enterだけで入れる。
export PATH=/media/removable/crouton/bin:"$PATH"

echo 'if you want to enter ubuntu, input "enter".'
alias enter='sudo sh /media/removable/crouton/bin/enter-chroot'
ubuntu環境構築
(precise)ubuntu@localhost:~$ sudo apt-get update
(precise)ubuntu@localhost:~$ sudo apt-get install make g++ cmake curl git
(precise)ubuntu@localhost:~$ git clone https://github.com/yyuu/pyenv.git ~/.pyenv
(precise)ubuntu@localhost:~$ echo 'export PYENV_ROOT="$HOME/.pyenv"' >> ~/.bashrc
(precise)ubuntu@localhost:~$ echo 'export PATH="$PYENV_ROOT/bin:$PATH"' >> ~/.bashrc
(precise)ubuntu@localhost:~$ echo 'eval "$(pyenv init -)"' >> ~/.bashrc
(precise)ubuntu@localhost:~$ source ~/.bashrc
(precise)ubuntu@localhost:~$ pyenv
# pyenv 20150719-6-g57d1c9d
# Usage: pyenv <command> [<args>]
#
# Some useful pyenv commands are:
#   commands    List all available pyenv commands
#   local       Set or show the local application-specific Python version
#   global      Set or show the global Python version
#   shell       Set or show the shell-specific Python version
#   install     Install a Python version using python-build
#   uninstall   Uninstall a specific Python version
#   rehash      Rehash pyenv shims (run this after installing executables)
#   version     Show the current Python version and its origin
#   versions    List all Python versions available to pyenv
#   which       Display the full path to an executable
#   whence      List all Python versions that contain the given executable
#
# See `pyenv help <command>' for information on a specific command.
# For full documentation, see: https://github.com/yyuu/pyenv#readme
Jupyter (ipython notebook 3.x)環境構築
miniconda + ipython notebookを入れる
# システムの上書きはリスキーなのでpyenvでラップ
(precise)ubuntu@localhost:~$ pyenv install -l | grep mini
# 最新版を確認。miniconda3-3.10.1 (2系はminiconda-3.10.1)
(precise)ubuntu@localhost:~$ pyenv install miniconda3-3.10.1
(precise)ubuntu@localhost:~$ pyenv global miniconda3-3.10.1
# minicondaをメインのpythonに設定。
(precise)ubuntu@localhost:~$ echo 'export PATH="$PYENV_ROOT/versions/miniconda3-3.10.1/bin/:$PATH"' >> ~/.bashrc
(precise)ubuntu@localhost:~$ source ~/.bashrc
# activateがpyenvとminicondaでバッティングするので、pathに明示しておく。
(precise)ubuntu@localhost:~$ conda update conda #念のため
(precise)ubuntu@localhost:~$ conda install ipython ipython-notebook ipython-qtconsole
python 2.7の環境を作って、kernelをjupyterに追加する
(precise)ubuntu@localhost:~$ conda create -n py2 python=2.7 pip ipython pyzmq
(precise)ubuntu@localhost:~$ source activate py2
(py2)(precise)ubuntu@localhost:~$ ipython kernelspec install-self --user
# ~/.ipython/kernels/python2にprofileが作成される。
# kernels.jsonを編集すればdisplay nameも変えられる。
(py2)(precise)ubuntu@localhost:~$ source deactivate
ipython notebookを立ち上げる
(precise)ubuntu@localhost:~$ ipython notebook
iRubyのインストール
2015.8.23追記
Rubyのインストール
irubyのRequired dependenciesはRuby>=2.1.0なのでそれ以降を入れる。
preciseのリポジトリは1.9.3までしかないので、rbenv経由が楽でよろしい。
git clone https://github.com/sstephenson/rbenv.git ~/.rbenv
echo 'export PATH="$HOME/.rbenv/bin:$PATH"' >> ~/.bashrc
echo 'eval "$(rbenv init -)"' >> ~/.bashrc
source ~/.bashrc
git clone https://github.com/sstephenson/ruby-build.git ~/.rbenv/plugins/ruby-build
rbenv install 2.2.3
rbenv rehash
rbenv global 2.2.3
irubyのインストール
# presiceでは公式リポジトリにlibzmq3-devがないので、別リポジトリから入れる必要あり
# でも、add-apt-repositoryが使えないので、まずsoftware-properties-commonを入れる
sudo apt-get install software-properties-common python-software-properties
sudo add-apt-repository ppa:chris-lea/zeromq
sudo apt-get update

# libzmq3のインストール
sudo apt-get install libzmq3-dbg libzmq3-dev libzmq3 libtool

gem i iruby

iruby notebook
# 一回実行するとkernelの設定をしてくれる
# 次回以降はipython notebookで起動できる

gem i nyaplot
ついでにnyaplotも入れた
http://domitry.hatenablog.jp/entry/2014/08/23/215630
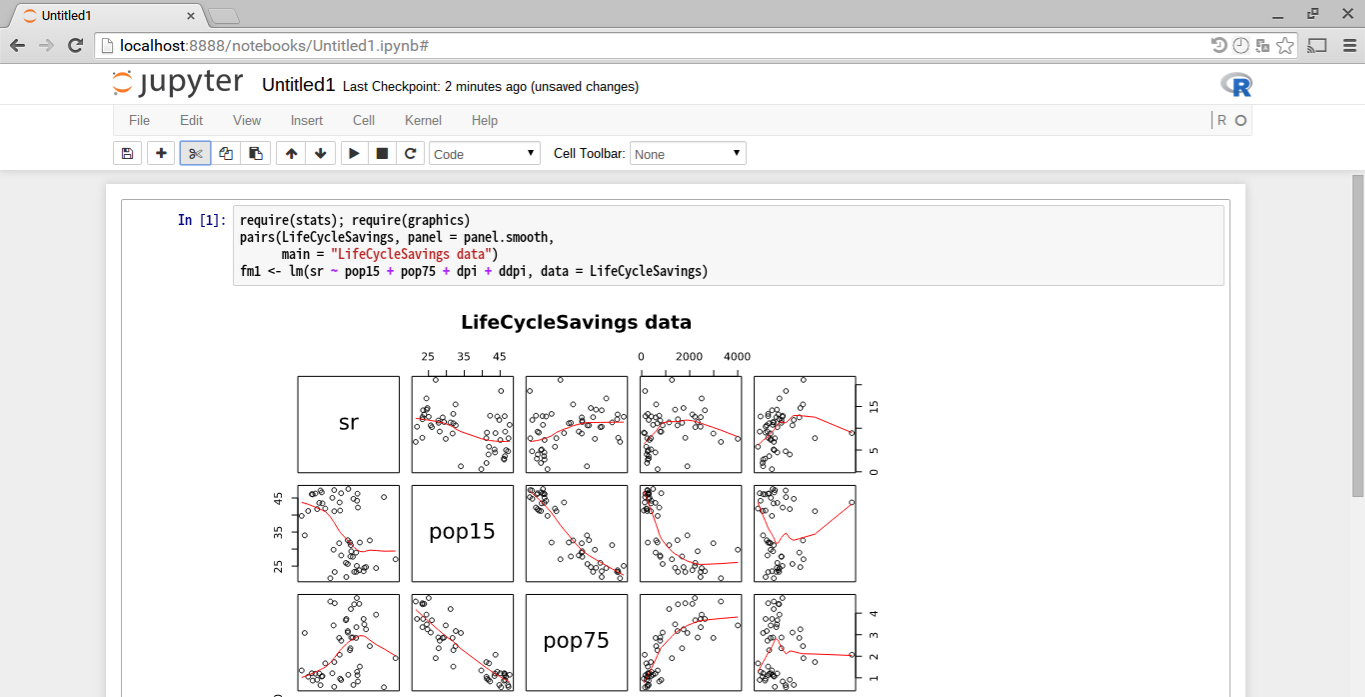
iRkernelの追加
2015.8.6追記
2015.8.23更新
conda create -n r -c r r-irkernel
# r-baseがインストールできない不具合が解消された様子
iRkernelはrzmq周りの環境構築でハマることが多いので、conda使ったほうが安全かも
めでたしめでたし
