はじめに
Azure Functionsをローカル環境でデバッグの記事の続きです。今回はAzure StorageのQueueにメッセージが入ったらFunctionが起動するというのを試します。
動作確認環境
OS: Window 10
Node.js: v4.4.7
npm:3.10.6
Visual Studio Code: 1.7.2
1. QueueTrigger-JavaScriptテンプレートでfunctionを作成
func newで以下のようにfunctionを作成します。
c:\dev\azure\AzureFunctionsDemo>func new

     _-----_
    |       |    ╭──────────────────────────╮
    |--(o)--|    │   Welcome to the Azure   │
   `---------´   │   Functions generator!   │
    ( _´U`_ )    ╰──────────────────────────╯
    /___A___\   /
     |  ~  |
   __'.___.'__
 ´   `  |° ´ Y `

? Select an option... List templates by language
There are 8 languages available
? Select a language... JavaScript
There are 16 templates available
? Select from one of the available templates... QueueTrigger-JavaScript
? Enter a name for your function... QueueTriggerJS
Creating your function QueueTriggerJS...
Location for your function...
c:\dev\azure\AzureFunctionsDemo\QueueTriggerJS
2. appsettings.jsonとfunction.jsonの設定
Storage Emulatorを使いローカル環境で試す設定をします。
{
    "IsEncrypted": false,
    "Values": {
        "LocalStorage": "UseDevelopmentStorage=true"
    }
}
QueueTriggerJSフォルダにあるfunction.jsonの"connection"に"LocalStorage"を設定します。
{
    "disabled": false,
    "bindings": [
        {
            "name": "myQueueItem",
            "type": "queueTrigger",
            "direction": "in",
            "queueName": "js-queue-items",
            "connection":"LocalStorage"
        }
    ]
}
3. QueueTriggerJS functionの実行
func runコマンドに-cパラメーターで疑似メッセージを送信します。
*オプションの詳細はこちらを参照。
c:\dev\azure\AzureFunctionsDemo>func run .\QueueTriggerJS\ -c "I love this CLI!"

We need to launch a server that will host and run your functions.
The server will auto load any changes you make to the function.
Do you want to always display this warning before launching a new server [yes/no]? [yes]

Response Status Code: OK
Function実行Windowでは以下のように「I love this CLI!」が表示されます。
Listening on http://localhost:7071/
Hit CTRL-C to exit...
Reading host configuration file 'c:\dev\azure\AzureFunctionsDemo\host.json'
Generating 2 job function(s)
Starting Host (HostId=143dd58f1aa24ce08c93c3ee016963ae, Version=1.0.0.0, ProcessId=10608, Debug=True)
Found the following functions:
Host.Functions.HttpTrigger-JS
Host.Functions.QueueTriggerJS

Job host started
Http Function HttpTrigger-JS: http://localhost:7071/api/HttpTrigger-JS
Executing: 'Functions.QueueTriggerJS' - Reason: 'This function was programmatically called via the host APIs.'
Function started (Id=74280a2b-6a45-4016-9bd2-f791fb06eb72)
Debugger listening on [::]:5858
JavaScript queue trigger function processed work item I love this CLI!
Function completed (Success, Id=74280a2b-6a45-4016-9bd2-f791fb06eb72)
Executed: 'Functions.QueueTriggerJS' (Succeeded)
4. ローカル環境でQueueの作成とメッセージの登録
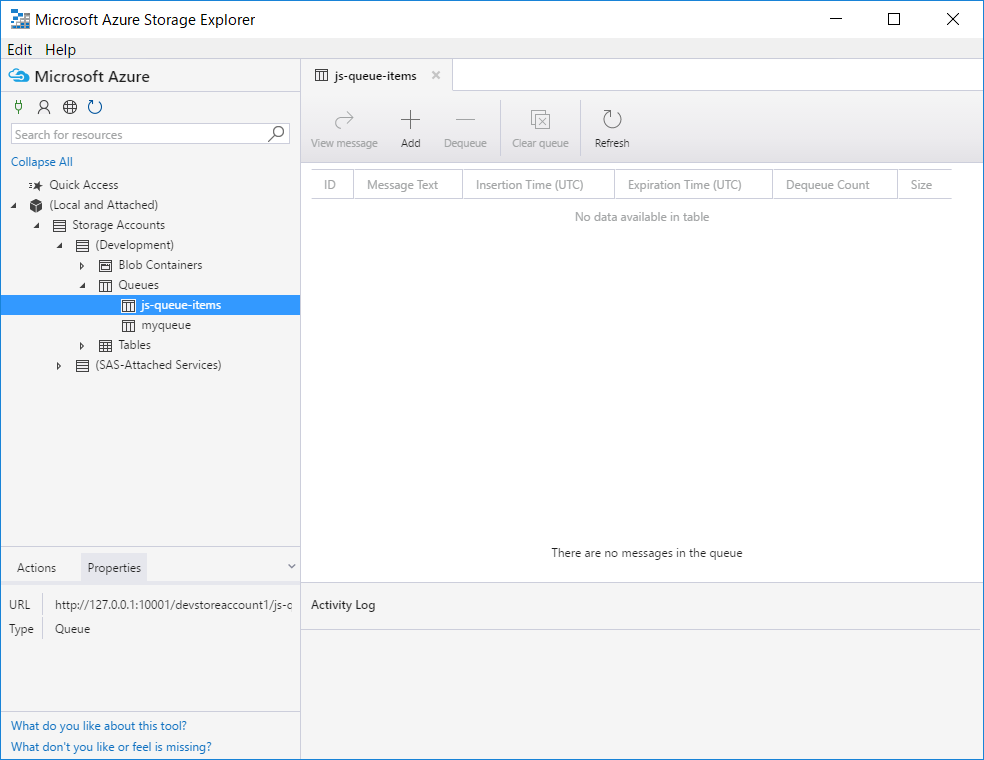
Azure Storage Explorerを起動し、function.jsonに記載されているQueue(js-queue-items)を作成します。
*Azure Storage Explorerの使い方はこちらを参照。
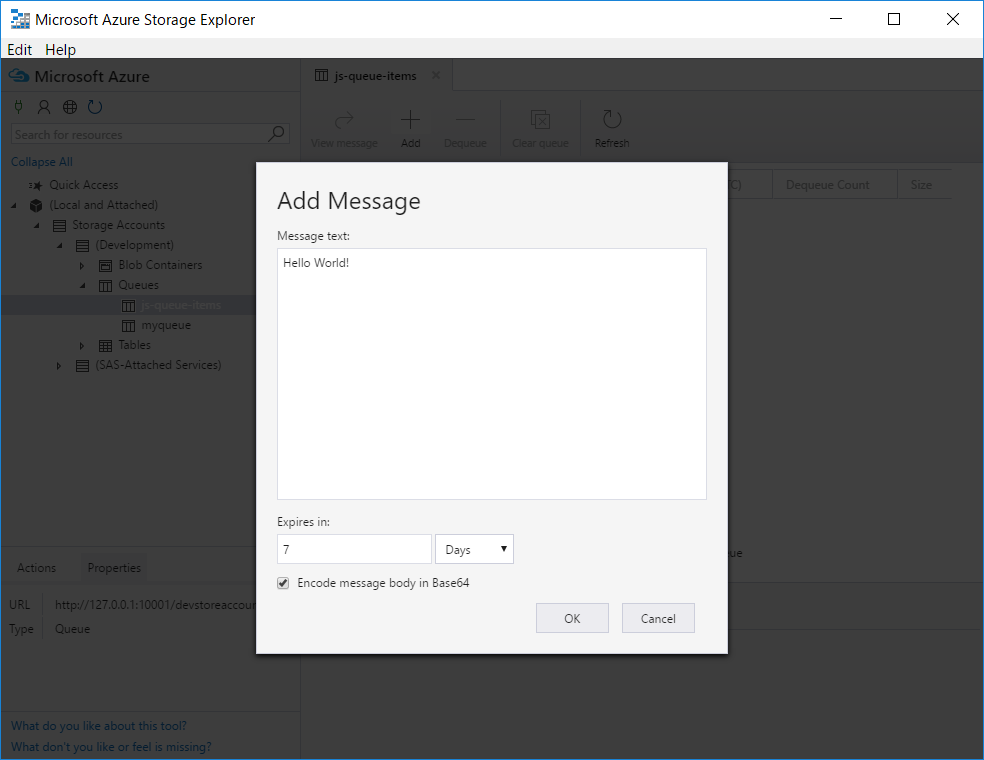
作成したQueue(js-queue-items)を選択し、+Addボタンをクリックしてメッセージを登録します。

メッセージ入力ダイアログで適当なメッセージを入力しOKをクリック。

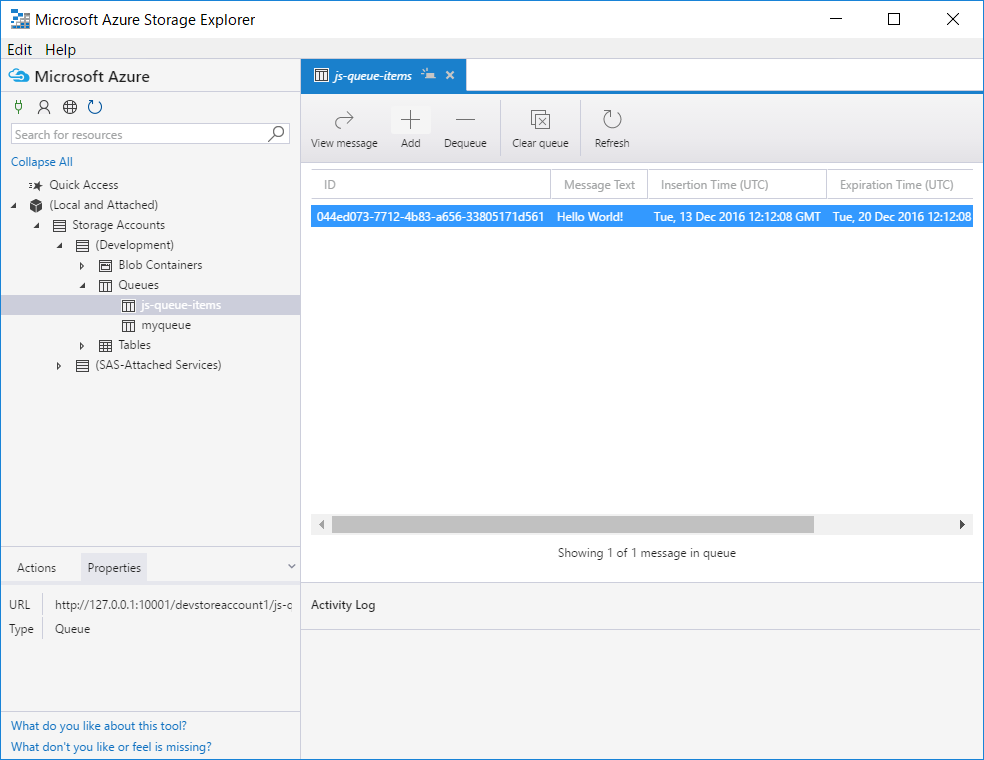
メッセージ登録後はこのようになりますが、QueueTriggerJS functionを起動していれば、Queueから直ぐにメッセージが取り出されます。

メッセージを取り出すと以下のような情報がFunction実行中Windowに表示されます。
Function started (Id=44c1ccdb-e30c-464a-8f0b-80234b2e9fd3)
JavaScript queue trigger function processed work item Hello World!
Function completed (Success, Id=44c1ccdb-e30c-464a-8f0b-80234b2e9fd3)
Executed: 'Functions.QueueTriggerJS' (Succeeded)
*Queueからメッセージを取り出すサイクルが遅い場合は、host.jsonに以下の設定を追加すると良いようです。
{
     "queues": {
        "maxPollingInterval": 2000
     }
}
5. Azure環境でQueueの作成とメッセージの登録
Azure環境でQueueを作成する場合もAzure Storage Explorerを使用します。
*Azure Storage Explorerの使い方はこちらを参照。
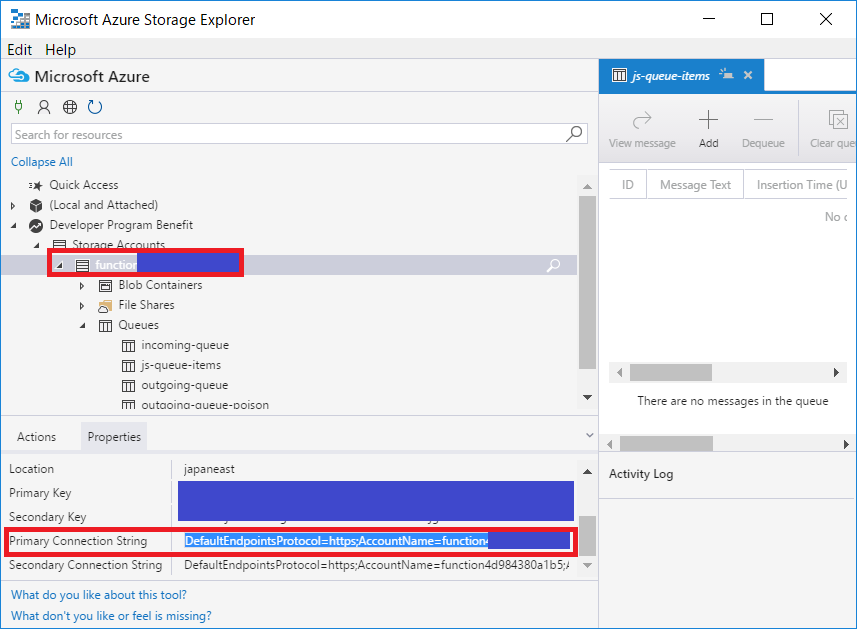
Queueを作成したらストレージアカウントを選択しConnection Stringの情報を取得します。

それをappsettings.jsonに"AzureWebJobsStorage"として追記し、function.jsonの"connection"も変更します。
{
    "IsEncrypted": false,
    "Values": {
        "LocalStorage": "UseDevelopmentStorage=true",
        "AzureWebJobsStorage": "DefaultEndpointsProtocol=https;AccountName=functionxxxxxxxxxxxx;AccountKey=yyyyyyyyyyy+zzzzzzzzzzzzzzzzzzzzzzzzzzzzzzzzzzzzzz/aaaaaaaaaaaaaaaaaaaaaaaaaaaaaaaaaaaaa"
    }
}
{
    "disabled": false,
    "bindings": [
        {
            "name": "myQueueItem",
            "type": "queueTrigger",
            "direction": "in",
            "queueName": "js-queue-items",
//            "connection":"LocalStorage"
            "connection":"AzureWebJobsStorage"
        }
    ]
}
AzureのQueue(js-queue-items)にメッセージを登録すると、QueueTriggerJS functionを起動していれば、ローカル環境で実行した際と同様にQueueから直ぐにメッセージが取り出されます。
続編
次回はFunctionをAzureにデプロイするところまでやってみます。
Azure Functionsをローカル環境からAzure環境にデプロイ
参考URL
Running Azure Functions Locally with the CLI and VS Code
Azure Functions における Azure Storage のトリガーとバインド
Azure Storage の接続文字列を構成する