※Ubuntu版はこちらをご参照ください。
Tensorflow + GPU 環境を nvidia-docker を使って楽に作る (on Ubuntu 17.04)
背景
以前自作GPUマシン上でDeepLearning用の環境を構築したのですが、
- GPUのドライバインストール
- Cuda/Cudnnのインストール
- DeepLearningライブラリのインストール
- 動作テスト
とステップが多く、ハマると結構インストールに苦労します。
また、Cuda/Cudnn、各ライブラリ共にバージョンアップが頻繁であったり、色々とモジュールを入れているうちに依存関係が壊れてしまったり何かと環境を作り直したくなることも多いです。
簡単に環境を作り直せるようにしたいと思い、NVIDIAが提供しているnvidia-dockerを用いた環境構築の方法を試してみました。
目的
GPUマシン上でのDeepLearning用環境の構築は何かと手間が多いので最大限楽したい。
クラウドのサーバ上や自作PC上でさくっとTensorflow on GPU環境を構築したい。
使うもの
- GPU搭載のサーバ(今回はIBM Softlayer)
- OS : CentOS7.2
- CPU : 2.4GHz Intel Xeon-Haswell x 2
- GPU : NVIDIA GRID K2 x 1
- nvidia-docker (https://github.com/NVIDIA/nvidia-docker)
- docker (https://www.docker.com/)
- Tensorflow (https://github.com/tensorflow/tensorflow)
※2016/9/30追記
Tensorflowのバージョン0.10.0でも動くことを確認しました。
- Tensorflow version : 0.10.0
- GPU : NVIDIA Corporation GK210GL [Tesla K80]
- Driver : http://jp.download.nvidia.com/XFree86/Linux-x86_64/361.93.02/NVIDIA-Linux-x86_64-361.93.02.run
(BETA版と書かれていたけど動きました)
nvidia-dockerとは
dockerのラッパーとして実装されているツールで、ホストOS上にNVIDIAのドライバがインストールされていれば、CudaToolkitを含んだコンテナからGPUを利用出来るようになります。
参考)http://www.nvidia.co.jp/object/docker-container-jp.html
導入手順
以下の手順で導入できます。
- ドライバインストール(ホストOS上)
- Dockerインストール(ホストOS上)
- nvidia-dockerインストール(ホストOS上)
- Tensorflow + GPU のイメージ作成&実行
1. ドライバインストール
nouveauグラフィックスドライバを無効化した後、NVIDIAのドライバをインストールします。
(nouveauを無効化しないとドライバインストールが失敗するため)
## nouveau ドライバーを無効にする
sudo su -

# nouveauが読み込まれていることを確認
lsmod | grep nouveau
---
nouveau              1403757  0
video                  24400  1 nouveau
mxm_wmi                13021  1 nouveau
i2c_algo_bit           13413  1 nouveau
drm_kms_helper        125008  1 nouveau
ttm                    93441  1 nouveau
drm                   349210  3 ttm,drm_kms_helper,nouveau
i2c_core               40582  5 drm,i2c_i801,drm_kms_helper,i2c_algo_bit,nouveau
wmi                    19070  2 mxm_wmi,nouveau
---

# nouveauなしの起動イメージ生成
mv /boot/initramfs-$(uname -r).img /boot/initramfs-$(uname -r)-nouveau.img
dracut --omit-drivers nouveau /boot/initramfs-$(uname -r).img $(uname -r)

# 依存からロードされないように設定変更
echo 'blacklist nouveau' >> /etc/modprobe.d/modprobe.conf
echo 'blacklist nouveau' >> /etc/modprobe.d/nouveau_blacklist.conf

# 再起動
reboot now

# nouveauが読み込まれていないことを確認
lsmod | grep nouveau

## nvidia drive のインストール
yum -y install pciutils gcc kernel-devel tmux git

# GPUの型番を確認
lspci | grep -i nvidia
---
83:00.0 VGA compatible controller: NVIDIA Corporation GK104GL [GRID K2] (rev a1)
84:00.0 VGA compatible controller: NVIDIA Corporation GK104GL [GRID K2] (rev a1)
---

# http://www.nvidia.co.jp/Download/index.aspx?lang=jp
# ここからGPUに合った最新のドライバを探す
# GRID -> GRID Series -> Linux 64bit
cd /tmp/
wget http://us.download.nvidia.com/XFree86/Linux-x86_64/367.27/NVIDIA-Linux-x86_64-367.27.run
sh NVIDIA-Linux-x86_64-367.27.run
# 誘導にしたがってインストールする
2. Dockerインストール
公式のインストールマニュアルに従ってインストールします。
sudo tee /etc/yum.repos.d/docker.repo <<-'EOF'
[dockerrepo]
name=Docker Repository
baseurl=https://yum.dockerproject.org/repo/main/centos/7/
enabled=1
gpgcheck=1
gpgkey=https://yum.dockerproject.org/gpg
EOF

sudo yum install docker-engine
sudo service docker start
sudo docker run hello-world
# Hello from Docker! のメッセージを確認

# 自動起動設定
sudo chkconfig docker on

# 一応docker-composeもインストール
sudo sh -c 'curl -L https://github.com/docker/compose/releases/download/1.10.0/docker-compose-`uname -s`-`uname -m` > /usr/local/bin/docker-compose'
sudo chmod +x /usr/local/bin/docker-compose
3. nvidia-dockerインストール
公式のQuickStartに従ってインストールします。
### nvidia-docker install
# Install nvidia-docker and nvidia-docker-plugin
wget -P /tmp https://github.com/NVIDIA/nvidia-docker/releases/download/v1.0.0-rc.3/nvidia-docker-1.0.0.rc.3-1.x86_64.rpm
sudo rpm -i /tmp/nvidia-docker*.rpm && rm /tmp/nvidia-docker*.rpm
sudo systemctl start nvidia-docker
sudo systemctl enable nvidia-docker

# Test nvidia-smi
nvidia-docker run --rm nvidia/cuda nvidia-smi
# 以下の様な出力を確認
---
+-----------------------------------------------------------------------------+
| NVIDIA-SMI 367.27                 Driver Version: 367.27                    |
|-------------------------------+----------------------+----------------------+
| GPU  Name        Persistence-M| Bus-Id        Disp.A | Volatile Uncorr. ECC |
| Fan  Temp  Perf  Pwr:Usage/Cap|         Memory-Usage | GPU-Util  Compute M. |
|===============================+======================+======================|
|   0  GRID K2             Off  | 0000:83:00.0     Off |                  Off |
| N/A   31C    P8    18W / 117W |   3794MiB /  4036MiB |      0%      Default |
+-------------------------------+----------------------+----------------------+
|   1  GRID K2             Off  | 0000:84:00.0     Off |                  Off |
| N/A   28C    P8    17W / 117W |     38MiB /  4036MiB |      0%      Default |
+-------------------------------+----------------------+----------------------+

+-----------------------------------------------------------------------------+
| Processes:                                                       GPU Memory |
|  GPU       PID  Type  Process name                               Usage      |
|=============================================================================|
+-----------------------------------------------------------------------------+
---
4. Tensorflow + GPU のイメージ作成&実行
https://github.com/tensorflow/tensorflow/tree/master/tensorflow/tools/docker
Tensorflowが提供しているDockerhubのイメージを使うと以下の様なエラーが出るので (2016/7/20時点)、
F tensorflow/stream_executor/cuda/cuda_dnn.cc:204] could not find cudnnCreate in cudnn DSO; dlerror: /usr/local/lib/python2.7/dist-packages/tensorflow/python/_pywrap_tensorflow.so: undefined symbol: cudnnCreate
[I 16:47:11.347 NotebookApp] KernelRestarter: restarting kernel (1/5)
githubのmasterにあるDockerファイルからイメージをビルドします。
## run tensorflow docker

# ※これうまく動かなかった
# nvidia-docker run -it -p 8888:8888 gcr.io/tensorflow/tensorflow:latest-gpu

# TensorflowのmasterにあるDockerfileからビルドする
git clone https://github.com/tensorflow/tensorflow.git
cd tensorflow/tensorflow/tools/docker
docker build -t $USER/tensorflow-suffix -f Dockerfile.gpu .
nvidia-docker run -it -p 8888:8888 $USER/tensorflow-suffix
Dockerを起動後
http://${HOST_IP}:8888/
にアクセスすればjupyterの画面が確認できます。
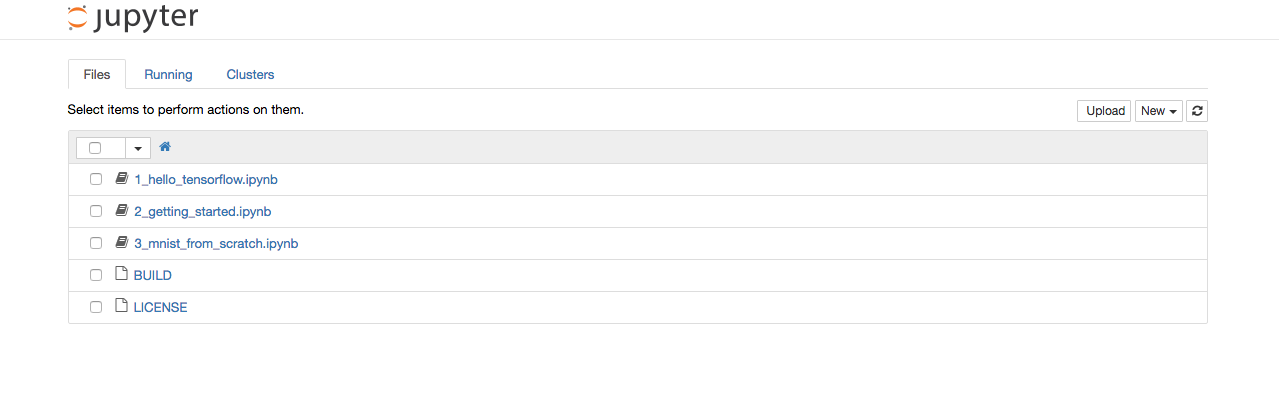
3_mnist_from_scratch.ipynb のnotebookを起動して Cell -> Run All でサンプルが動くことを確認します。結果を確認。

jupyterのログでGPUを使って計算されていることを確認します。
I tensorflow/stream_executor/dso_loader.cc:108] successfully opened CUDA library libcublas.so locally
I tensorflow/stream_executor/dso_loader.cc:108] successfully opened CUDA library libcudnn.so locally
I tensorflow/stream_executor/dso_loader.cc:108] successfully opened CUDA library libcufft.so locally
I tensorflow/stream_executor/dso_loader.cc:108] successfully opened CUDA library libcuda.so locally
I tensorflow/stream_executor/dso_loader.cc:108] successfully opened CUDA library libcurand.so locally
I tensorflow/core/common_runtime/gpu/gpu_init.cc:102] Found device 0 with properties:
name: GRID K2
major: 3 minor: 0 memoryClockRate (GHz) 0.745
pciBusID 0000:83:00.0
Total memory: 3.94GiB
Free memory: 3.91GiB
W tensorflow/stream_executor/cuda/cuda_driver.cc:572] creating context when one is currently active; existing: 0x6f991e0
I tensorflow/core/common_runtime/gpu/gpu_init.cc:102] Found device 1 with properties:
name: GRID K2
major: 3 minor: 0 memoryClockRate (GHz) 0.745
pciBusID 0000:84:00.0
Total memory: 3.94GiB
Free memory: 3.91GiB
I tensorflow/core/common_runtime/gpu/gpu_init.cc:126] DMA: 0 1
I tensorflow/core/common_runtime/gpu/gpu_init.cc:136] 0:   Y Y
I tensorflow/core/common_runtime/gpu/gpu_init.cc:136] 1:   Y Y
I tensorflow/core/common_runtime/gpu/gpu_device.cc:806] Creating TensorFlow device (/gpu:0) -> (device: 0, name: GRID K2, pci bus id: 0000:83:$0.0)
I tensorflow/core/common_runtime/gpu/gpu_device.cc:806] Creating TensorFlow device (/gpu:1) -> (device: 1, name: GRID K2, pci bus id: 0000:84:$0.0)
W tensorflow/core/common_runtime/bfc_allocator.cc:213] Ran out of memory trying to allocate 2.92GiB. The caller indicates that this is not a failure, but may mean that there could be performance gains if more memory is available.
W tensorflow/core/common_runtime/bfc_allocator.cc:213] Ran out of memory trying to allocate 2.59GiB. The caller indicates that this is not a failure, but may mean that there could be performance gains if more memory is available.
W tensorflow/core/common_runtime/bfc_allocator.cc:213] Ran out of memory trying to allocate 5.84GiB. The caller indicates that this is not a failure, but may mean that there could be performance gains if more memory is available.
W tensorflow/core/common_runtime/bfc_allocator.cc:213] Ran out of memory trying to allocate 5.19GiB. The caller indicates that this is not a failure, but may mean that there could be performance gains if more memory is available.
W tensorflow/core/common_runtime/bfc_allocator.cc:213] Ran out of memory trying to allocate 5.20GiB. The caller indicates that this is not a failure, but may mean that there could be performance gains if more memory is available.
以上です。
Reference
nvidia-dockerでtensorflowを動かす - Qiita
Ubuntu14.04.3でnvidia-docker使ってCaffeをインストールしてみた - Qiita