Firebaseとは
私はiOSデベロッパーですので、WWDCはジョブス時代から見てますが、Google I/Oは一度も見たことがありませんでした。野外コンサート会場みたいなんですね。。。グーグルのCEOスンダーはインド人です。マイクロソフトのCEOもインド人ですね。ティムクックもインドを訪問し、インドで4000人のエンジニアを採用すると発表しましたが、インドの勢いはすごいですね。
Parseサービス終了に伴う、受け皿のFirebaseです。AWSサービスにもかぶります。Google I/Oにて、リノベートされたとのことでしたので、メール&パスワードログインと、Googleログインを使ってみました。
メール&パスワードログイン
Podでプロジェクトを作成するまではkoogawaさんのページをご覧ください。
Podfileに下記を追加し、pod update してください。
pod 'Firebase/Auth'
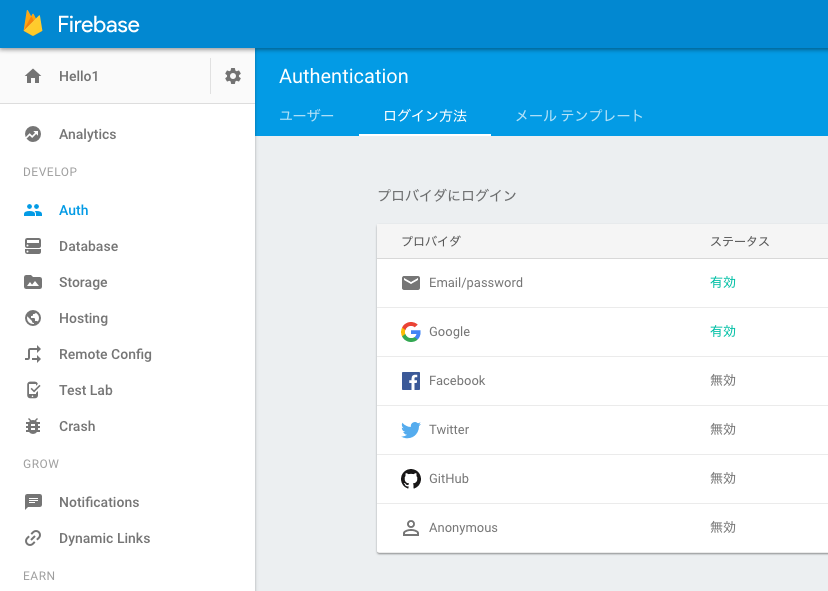
Firebaseのコンソールから、Auth>ログイン方法を選択し、Email/passwordとGoogleを有効にします。
Storyboardで、メール、パスワード用のUITextFieldを適当に作成します。(email,passwdとします)
実装します。
ここで、メールアドレスはなんでもいいようですが、gmailやyahooドメインの場合は存在チェックをしているようです。
        FIRAuth.auth()?.createUserWithEmail(email.text!, password: passwd.text!, completion: { (user:FIRUser?, error:NSError?) in
            if let error = error {
                print("Creating the user failed! \(error)")
                return
            }

            if let user = user {
                print("user : \(user.email) has been created successfully.")
            }
        })
実行します。
Firebaseのコンソールから、アカウントが作成されたか確認します。
Auth > ユーザ を開きます。
ログインの処理も同じように、signInWithEmail() を使用します。
先ほど作成したアカウントでログインしてみてください。
        FIRAuth.auth()?.signInWithEmail(email.text!, password: passwd.text!, completion: { (user:FIRUser?, error:NSError?) in
            if let error = error {
                print("login failed! \(error)")
                return
            }

            if let user = user {
                print("user : \(user.email) has been signed in successfully.")
            }
        })
Googleログイン
次は、Googleに飛ばしてログインさせる方法です。
Podfileに以下を追加します。
pod 'GoogleSignIn'
ブリッジヘッダーファイルを作成し、プロジェクトに追加します。
# import <GoogleSignIn/GoogleSignIn.h>
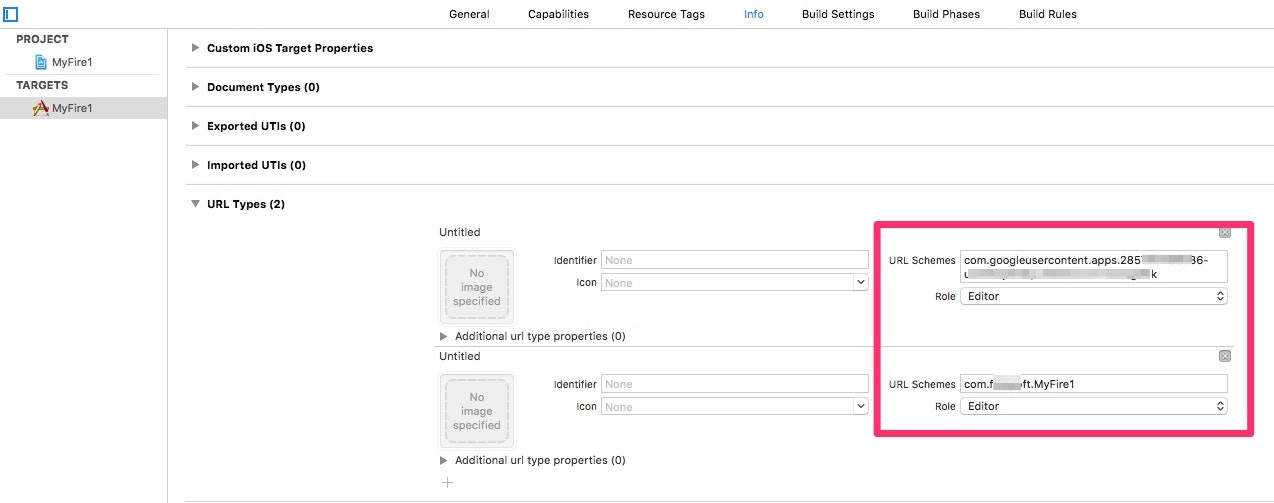
Info > URL Typeに、以下の2つのエントリを追加します。
- GoogleService-Info.plist の
REVERSED_CLIENT_IDの値 - Bundle ID
AppDelegateを以下のように修正します。
import UIKit
import Firebase
import FirebaseAuth

@UIApplicationMain
class AppDelegate: UIResponder, UIApplicationDelegate, GIDSignInDelegate {

    var window: UIWindow?

    func application(application: UIApplication, didFinishLaunchingWithOptions launchOptions: [NSObject: AnyObject]?) -> Bool {

        FIRApp.configure()
        GIDSignIn.sharedInstance().clientID = FIRApp.defaultApp()!.options.clientID
        GIDSignIn.sharedInstance().delegate = self

        return true
    }

    func application(_ app: UIApplication, open url: URL, options: [UIApplicationOpenURLOptionsKey : Any] = [:]) -> Bool {
        return GIDSignIn.sharedInstance().handle(url,
                                                    sourceApplication: options[UIApplicationOpenURLOptionsKey.sourceApplication] as? String,
                                                    annotation: options[UIApplicationOpenURLOptionsKey.annotation])
    }

    func sign(_ signIn: GIDSignIn!, didSignInFor user: GIDGoogleUser!, withError error: Error!) {
        if let error = error {
            print("Error: \(error.localizedDescription)")
            return
        }
        let authentication = user.authentication
        // Googleのトークンを渡し、Firebaseクレデンシャルを取得する。
        let credential = FIRGoogleAuthProvider.credential(withIDToken: (authentication?.idToken)!,
                                                          accessToken: (authentication?.accessToken)!)
        // Firebaseにログインする。
        FIRAuth.auth()?.signIn(with: credential) { (user, error) in
            print("Sign on Firebase successfully")
            // performSegue でログイン後のVCへ遷移させる。
        }
    }

    func sign(_ signIn: GIDSignIn!, didDisconnectWith user: GIDGoogleUser!, withError error: Error!) {
        print("Sign off successfully")
    }
ViewControllerに、Googleに飛ばすボタンを設置します。
import UIKit
import FirebaseAuth
import Firebase

class ViewController: UIViewController, GIDSignInUIDelegate {
...
    override func viewDidLoad() {
        super.viewDidLoad()

        GIDSignIn.sharedInstance().uiDelegate = self

        // ログインボタンを追加
        let signInButton = GIDSignInButton()
        self.view.addSubview(signInButton)
    }
シミュレータで実行します。
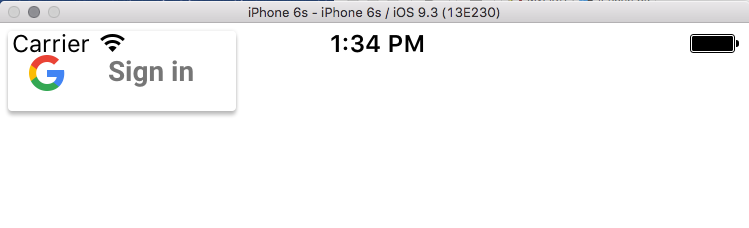
Googleへのサインインボタンが表示されます。タップします。
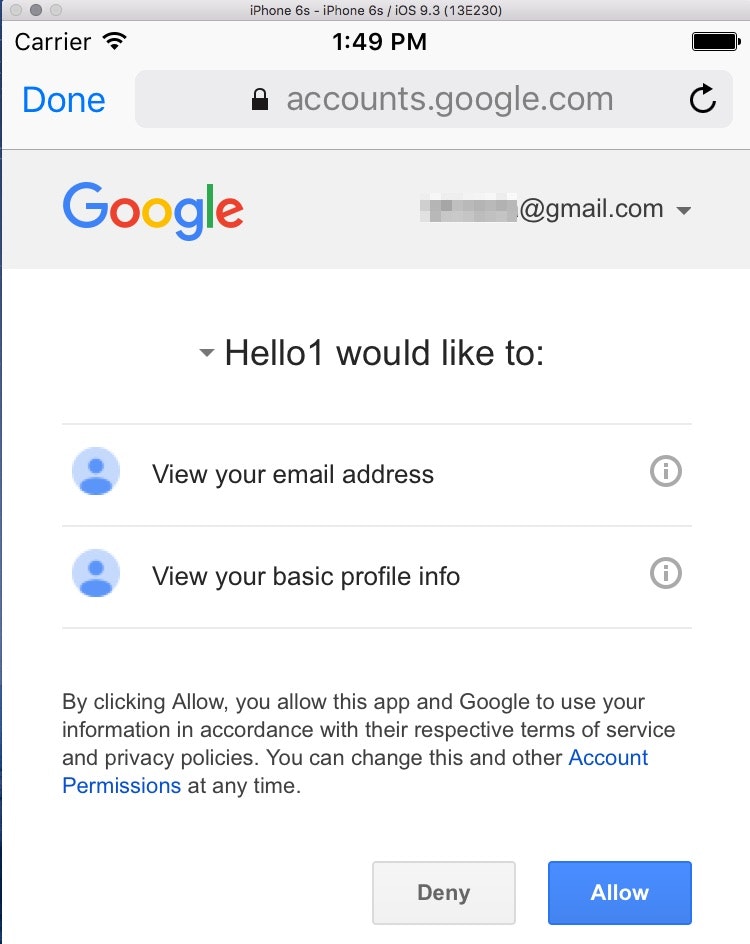
Googleのログインページに飛びます。ご自身のGmailアカウントでログインします。成功すると元のページにリダイレクトします。
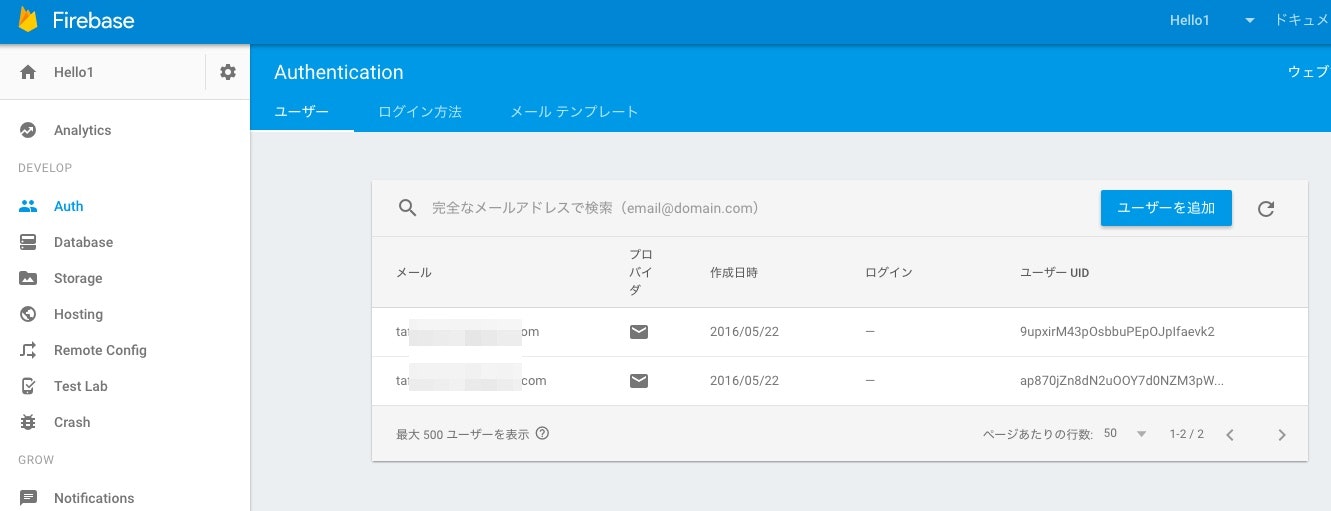
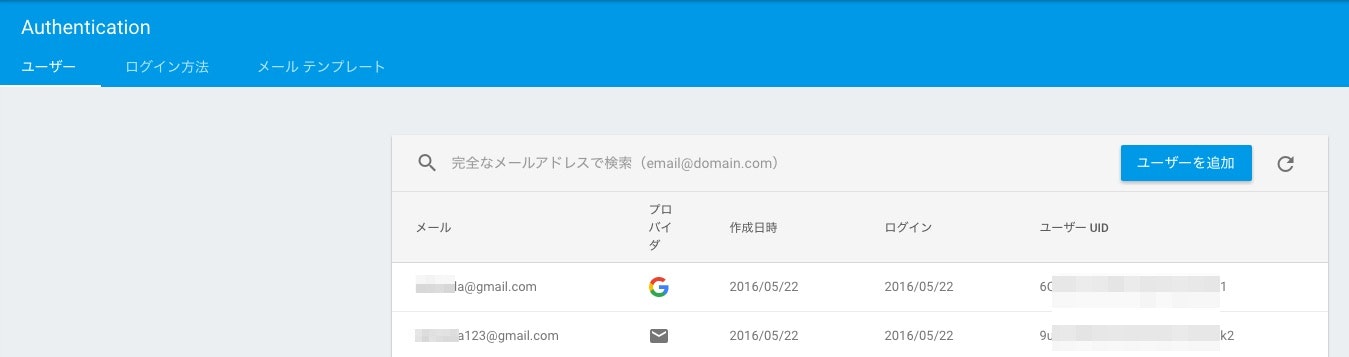
Firebaseコンソールのユーザから、ログインしたユーザが確認できます。
プロバイダのアイコンがグーグルのアイコンになっているのが、Googleで認証したユーザです。
参考