概要
Raspberry Pi3を購入したので、自宅で留守番するペットの見守り用に、WEBカメラの映像をストリーミングする環境を構築しました。
UV4L(Userspace Video4Linux framework)とは
Video4Linux2準拠のモジュラーコレクションです。
様々なエクステンションが用意されており、
インストールすることで、ストリーミングが可能となります。
UV4Lのインストール
piユーザーでの作業を想定しています。
1.リポジトリの追加
以下のコマンドを実行します。
$ sudo nano /etc/apt/sources.list
以下を末尾に追記します。
deb http://www.linux-projects.org/listing/uv4l_repo/raspbian/ wheezy main
2.uv4lのインストール
以下のコマンドを実行します。
$ sudo apt-get install uv4l uv4l-webrtc uv4l-uvc uv4l-xscreen uv4l-dummy
依存するパッケージがいろいろインストールされたのを確認します。
$ dpkg -l | grep uv4l
ii  uv4l                                  1.9.10                                    armhf        User space Video4Linux Framework Core
ii  uv4l-decoder                          1.6                                       armhf        Video Hardware Decoder support for the
ii  uv4l-dummy                            1.0                                       armhf        Dummy driver module for UV4L.
ii  uv4l-encoder                          1.7                                       armhf        Video Hardware Encoder support for the
ii  uv4l-mjpegstream                      1.3-6                                     armhf        MJPEGStream driver module for UV4L.
ii  uv4l-renderer                         1.5                                       armhf        Video Renderer for the WebRTC Extension
ii  uv4l-server                           1.1.58                                    armhf        Streaming Server module for UV4L with HTTP/HTTPS front-end.
ii  uv4l-uvc                              1.5-1                                     armhf        Usb Video Class driver module for UV4L.
ii  uv4l-webrtc                           1.38                                      armhf        WebRTC extension for the
ii  uv4l-xmpp-bridge                      1.8                                       armhf        XMPP Bridge for UV4L
ii  uv4l-xscreen                          1.2                                       armhf        XScreen driver module for UV4L.
3.USBカメラ接続確認
家に転がっていたUSB WEBカメラ(iBUFFALO BSW20KMD10H)をラズベリーパイに接続します。
※WEBカメラはUVC(USB Video Class)に対応した機種である必要があります。
$ lsusb
Bus 001 Device 004: ID 1dd8:0018
Bus 001 Device 003: ID 0424:ec00 Standard Microsystems Corp. SMSC9512/9514 Fast Ethernet Adapter
Bus 001 Device 002: ID 0424:9514 Standard Microsystems Corp.
Bus 001 Device 001: ID 1d6b:0002 Linux Foundation 2.0 root hub
Device004が新たに表示されるようになりました。
あとで使うので、「1dd8:0018」の部分をメモしておきます。
4.uv4lの起動
以下のコマンドを実行します。
--device-pathのところに
$ uv4l --driver uvc --device-id 1dd8:0018 --config-file=/etc/uv4l/uv4l-uvc.conf
<notice> [core] Trying driver 'uvc' from built-in drivers...
<warning> [core] Driver 'uvc' not found
<notice> [core] Trying driver 'uvc' from external plug-in's...
<error> [core] No device found at specified path 1dd8:0018
<alert> [core] No device detected
5.WEBブラウザからアクセス
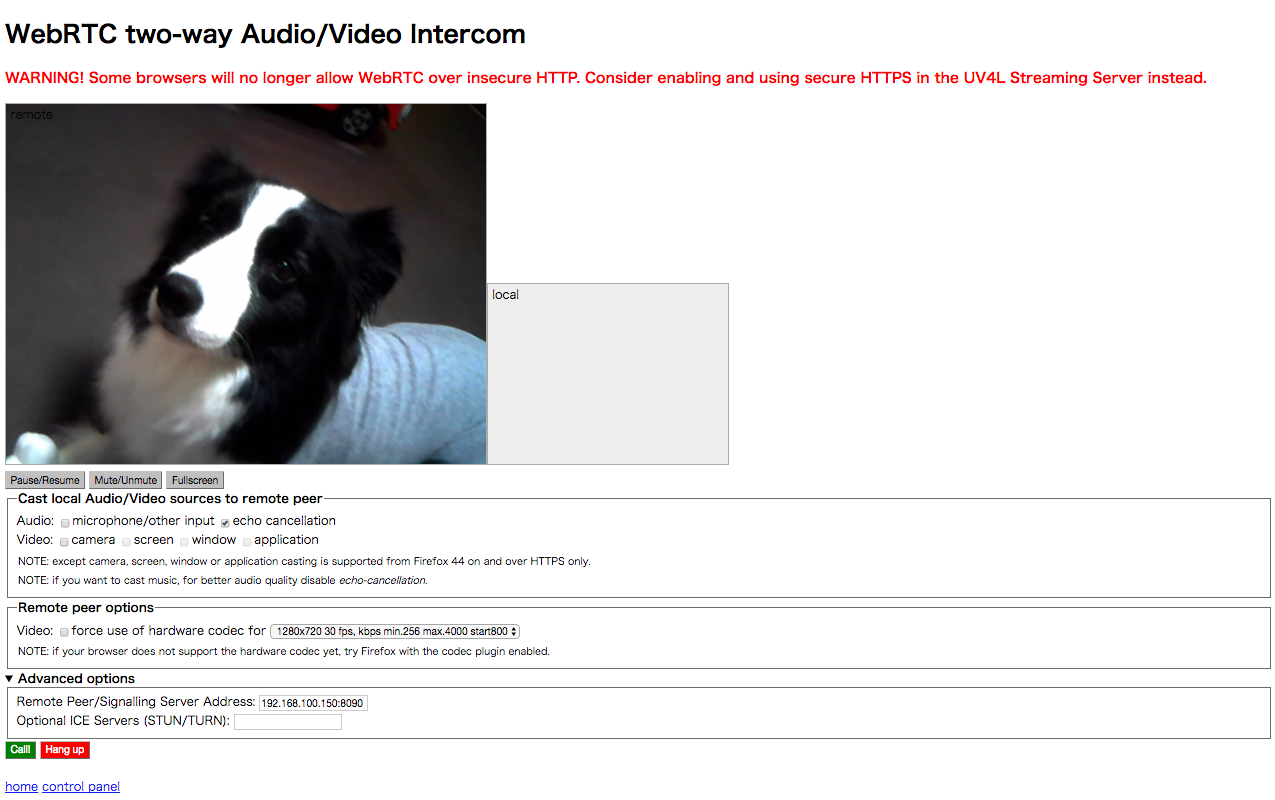
下記のURLにアクセスすると、WebRTCを使用したストリーミングが可能となります。
「Call」ボタンをクリックすると、WEBカメラの映像が画面に表示されます。
http://<ラズベリーパイのIPアドレス>:8090/stream/webrtc
iOS SafariはWebRTCに未対応のため、下記のURLから映像のみ(mjpeg)が閲覧できます。
http://<ラズベリーパイのIPアドレス>:8090/stream
6.終了する
下記のコマンドで終了できます。
$ sudo pkill uv4l
7.設定ファイルの編集
インストールした時点で自動起動が有効になっているので、デバイスIDを指定しておきます。
次回起動時は、そのままブラウザでストリーミング可能な状態となっています。
$ sudo nano /etc/uv4l/uv4l-uvc.conf
device-id = 1dd8:0018
外部から自宅ラズベリーパイにアクセスする場合は、下記の設定でBasic認証が有効にしておきましょう。
ID:user
PW:myp4ssw0rd
server-option = --user-password=myp4ssw0rd
8.オーディオの設定
WebRTCのストリーミングにて、音声を有効にするには、以下の設定ファイルを新規作成します。
ラズベリーパイを再起動すると有効になります。
$ sudo nano /etc/asound.conf
pcm.!default {
type asym
playback.pcm "plug:hw:0"
capture.pcm "plug:dsnoop:1"
}
まとめ
ラズベリーパイ標準のカメラモジュールを使った情報は多いのですが、WEBカメラでの設定は情報が少なかったので、情報共有します。
カメラモジュールの場合はポート8080が初期値になっていて、uvcでは8090が初期値だと気づくまでに、だいぶ時間がかかりました。。。
参考サイト
- http://www.linux-projects.org/modules/sections/index.php?op=viewarticle&artid=14
- http://qiita.com/kgbu/items/ccdc69b5fd66b49f454f
- http://raspberrypi.stackexchange.com/questions/39690/configuring-uv4l-for-webrtc-using-usb-camera-on-rpi2-raspbian
- http://www.slideshare.net/KensakuKOMATSU/webrtc-uv4lwebrtc
