1、Command Line Toolsを最新にする
xcode-select --install
Xcodeはとりあえず入れておいてください
2、fastlaneをインストールする
sudo gem install -n /usr/local/bin fastlane --verbose
El Capitanからrootlessというものでパスを指定しなければ以下のエラーになります。
ERROR: While executing gem ... (Errno::EPERM)
Operation not permitted - /usr/bin/xcodeproj
El Capitan以前に人は、
-n /usr/local/bin
の部分は必要ないと思います
詳しくは http://qiita.com/AcaiBowl/items/4bb4708de03e6ee14a4a
3、iTunesConnectに自分のアプリを作成します
4、fastlaneを使用する
cd [あなたのプロジェクトファイル]
sudo fastlane init
これもEl Capitanの問題でしょうか?
sudoを入れないと、怒られました
必要に応じて、はいといいえで答えます
http://dev.classmethod.jp/smartphone/initial_setup_fastlane/
ここら辺が参考になります
fastlane
├── Appfile
├── Deliverfile
├── Fastfile
├── Snapfile
├── SnapshotHelper.swift
├── actions
├── metadata
│ ├── copyright.txt
│ ├── ja
│ │ ├── description.txt
│ │ ├── keywords.txt
│ │ ├── marketing_url.txt
│ │ ├── name.txt
│ │ ├── privacy_url.txt
│ │ ├── release_notes.txt
│ │ └── support_url.txt
│ ├── primary_category.txt
│ ├── primary_first_sub_category.txt
│ ├── primary_second_sub_category.txt
│ ├── secondary_category.txt
│ ├── secondary_first_sub_category.txt
│ └── secondary_second_sub_category.txt
└── screenshots
└── README.txt
こんな感じのフォルダが作成されます
5、各OSでの起動テストをする
fastlane test
初期テンプレートがあるので、これを実行するだけで、シュミレーターが自動で立ち上がって実行テストが行えます
(すごい)
6、他の機能
Snapfileなどでデバイスの種類とか言語設定とかを追加できます。
devices([
"iPhone 6",
"iPhone 6 Plus",
])
languages([
"ja"
])
Fastfileを書き換えれば色々なことができます
起動テスト
lane :test do
scan(scheme: "Scheme")
end
ipa書き出し
lane :build do
gym(scheme: "Scheme")
end

(すごい)
スクリーンショット撮影
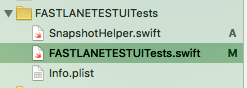
プロジェクトに先ほど自動生成で作られている SnapshotHelper.swift を追加します。
import XCTest

class FASTLANETESTUITests: XCTestCase {

    override func setUp() {
        super.setUp()

        continueAfterFailure = false

        let app = XCUIApplication()
        setLanguage(app)
        app.launch()
    }

    override func tearDown()
    {
        super.tearDown()
    }

    func testExample()
    {
        snapshot("image_name")
    }
}
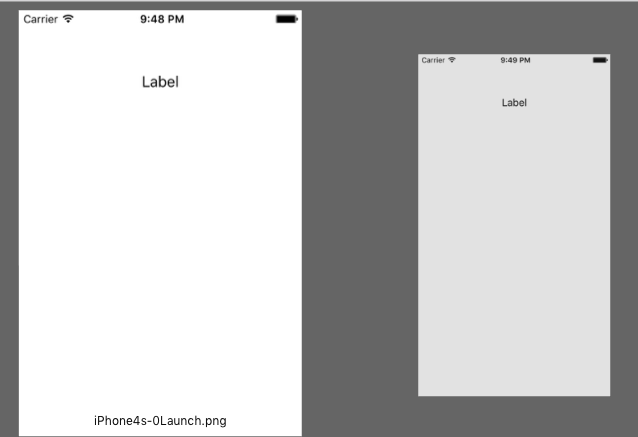
コンソールで
snapshot
と入力すれば、起動画面のスクリーンショットを各画面で撮影して行ってくれます。
(すごい)
権限の問題が出る場合がありますが、フォルダの権限を変更すれば治ります。
snapshot --stop_after_first_error
エラーが出たらそこで止めることもできます
詳しくはこっちに書いてあります
https://github.com/fastlane/snapshot
UIAutomationというものを使って画面フローを撮影することもできるようですが、それを紹介するのは別記事で書きます