前回につづいて、センサーの値をI2Cで出力します。
必要なもの
環境
- arduino IDE 1.6.3 with Adafruit Boards
- ライブラリ
- TinyWireM I2C通信用ライブラリ
事前準備
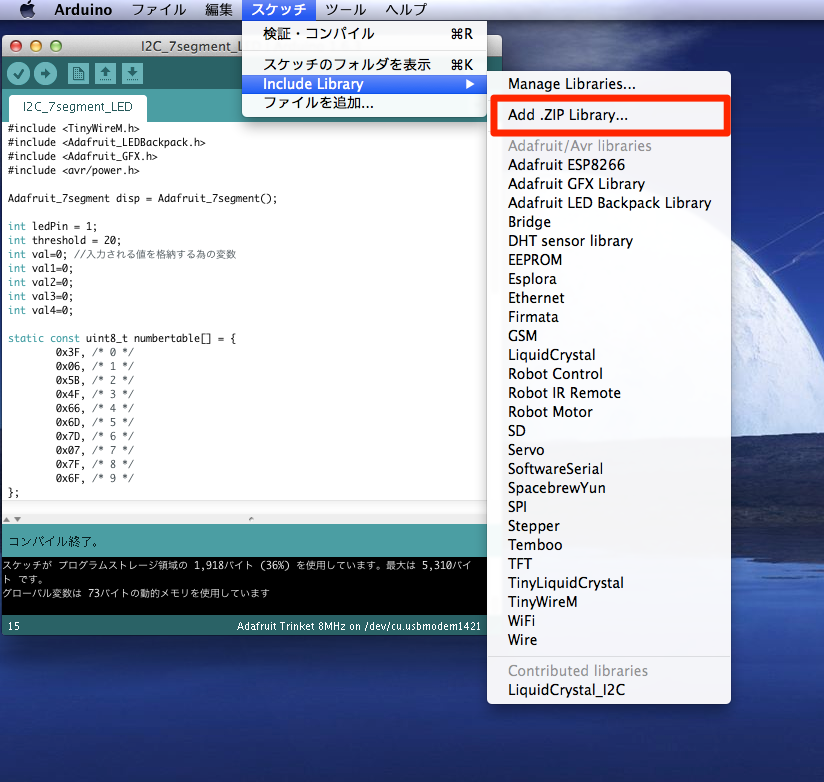
-
こちらを参考に、arduino IDE 1.6.3 with Adafruit Boardsをinstallします。
-
上記のライブラリを.zipとして保存しておきます。
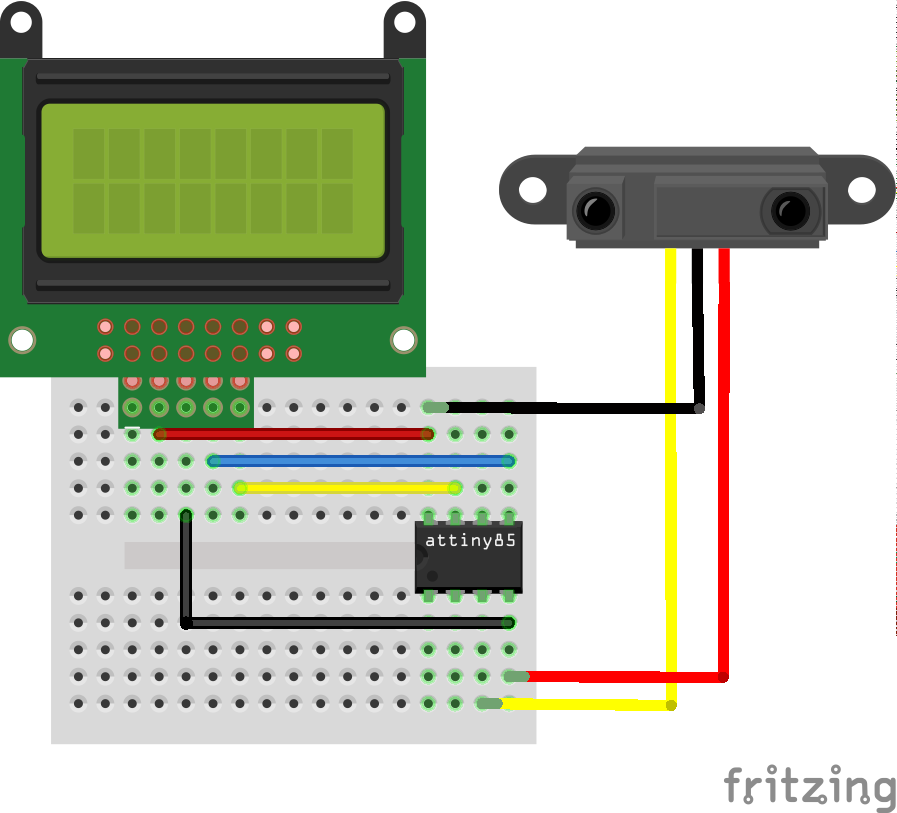
回路
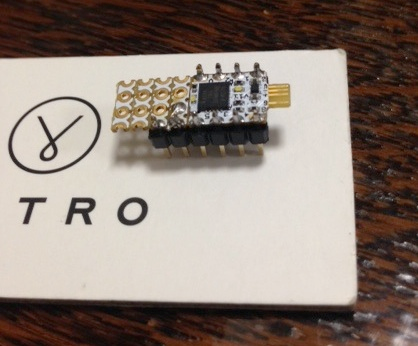
8pinoの部分をATTiny85で表現しています。(回路図を描くFritzingに8pinoのアイコンがないので)

スケッチ
# include <TinyWireM.h>

# define I2Cadr 0x3e  // 固定
byte contrast = 35;  // コントラスト(0~63)
int ledPin = 1;


void setup() {
  pinMode(ledPin, OUTPUT);
  TinyWireM.begin();
  lcd_cmd(0b00111000); // function set
  lcd_cmd(0b00111001); // function set
  lcd_cmd(0b00000100); // EntryModeSet
  lcd_cmd(0b00010100); // interval osc
  lcd_cmd(0b01110000 | (contrast & 0xF)); // contrast Low
  lcd_cmd(0b01011100 | ((contrast >> 4) & 0x3)); // contast High/icon/power
  lcd_cmd(0b01101100); // follower control
  delay(200);
  lcd_cmd(0b00111000); // function set
  lcd_cmd(0b00001100); // Display On
  lcd_cmd(0b00000001); // Clear Display
  delay(2);
}

void loop() {
  int val=0;
  int distance;

  lcd_cmd(0b00000001); // Clear Display
  val = analogRead(2);
  distance = (6762/(val-9))-4;

  lcd_setCursor(0, 0);
  lcd_printStr("raw:");
  lcd_printInt(val);

  lcd_setCursor(0, 1);
  char text[]="キョリ:";
  utf_del_uni(text);
  lcd_printStr(text);
  lcd_printInt(distance);
  delay(1000);
}

void lcd_cmd(byte x) {
  TinyWireM.beginTransmission(I2Cadr);
  TinyWireM.write(0b00000000); // CO = 0,RS = 0
  TinyWireM.write(x);
  TinyWireM.endTransmission();
}

void lcd_contdata(byte x) {
  TinyWireM.write(0b11000000); // CO = 1, RS = 1
  TinyWireM.write(x);
}

void lcd_lastdata(byte x) {
  TinyWireM.write(0b01000000); // CO = 0, RS = 1
  TinyWireM.write(x);
}

// 文字の表示
void lcd_printStr(const char *s) {
  TinyWireM.beginTransmission(I2Cadr);
  while (*s) {
    if (*(s + 1)) {
      lcd_contdata(*s);
    } else {
      lcd_lastdata(*s);
    }
    s++;
  }
  TinyWireM.endTransmission();
}

// 表示位置の指定
void lcd_setCursor(byte x, byte y) {
  lcd_cmd(0x80 | (y * 0x40 + x));
}

void lcd_printInt(int num){
  char int2str[10];
  sprintf(int2str,"%d",num);
  lcd_printStr(int2str);
}

void utf_del_uni(char *s){
    byte i=0;
    byte j=0;
    while(s[i]!='\0'){
        if((byte)s[i]==0xEF){
            if((byte)s[i+1]==0xBE) s[i+2] += 0x40;
            i+=2;
        }
        s[j]=s[i];
        i++;
        j++;
    }
    s[j]='\0';
}
動作
vineに保存しました。
まとめ
- 前回に引き続き、8pinoとI2Cを使って、センサーの値をLCDに出力しました。
- LCDで表現が豊かになったので、ちょっとしたゲームも作ってみたくなっています。
参考
http://www.geocities.jp/zattouka/GarageHouse/micon/Arduino/DMSU/DMSU.htm
http://denshi.blog.jp/arduino/%E8%B7%9D%E9%9B%A2%E8%A8%88%E6%B8%AC

