8pinoから7-segment LEDを表示するのにシリアル通信のI2Cを使用します。
必要なもの
- 8pino
- 7-segment LED HT16K33 Backpack
- ブレッドボード
- ジャンパー線
- 光センサー
- 抵抗
- ピンヘッダ
環境
- arduino IDE 1.6.3 with Adafruit Boards
- ライブラリ
- TinyWireM I2C通信用ライブラリ
- Adafruit_LEDBackpack
- Adafruit_GFX
事前準備
- こちらを参考に、arduino IDE 1.6.3 with Adafruit Boardsをinstallします。
- 上記のライブラリを.zipとして保存しておきます。
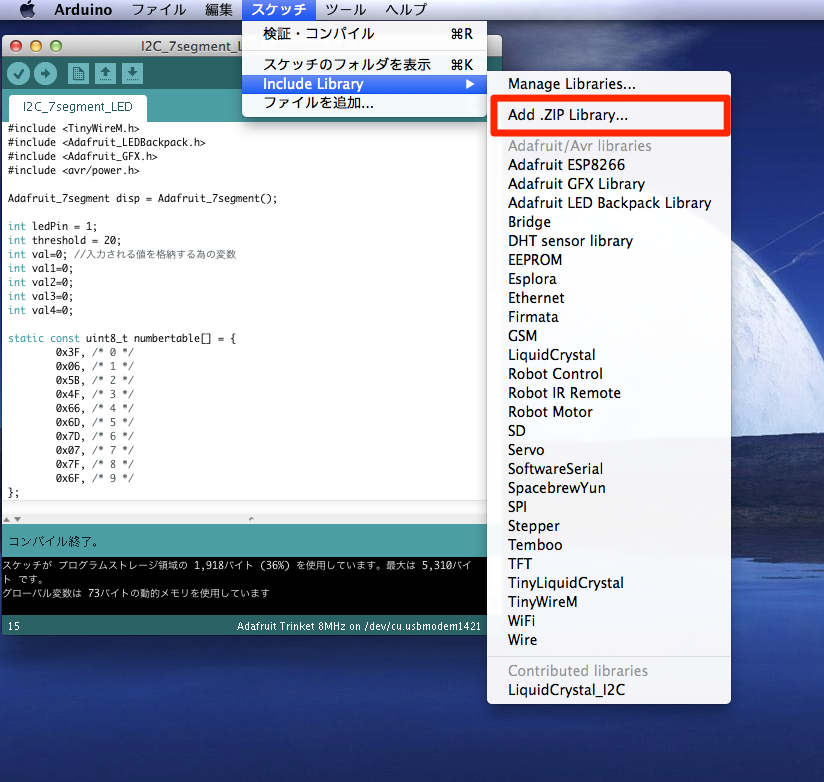
- arduino IDE 1.6.3 with Adafruit Boardsを起動し、[スケッチ]-[Include Library]-[Add .ZIP Library]から、上記で保存したライブラリを追加していきます。

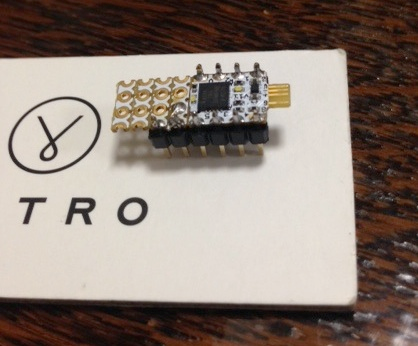
- 8pinoにピンヘッダをハンダ付けする。8pinoをブレッドボードに挿せるようにするためです。

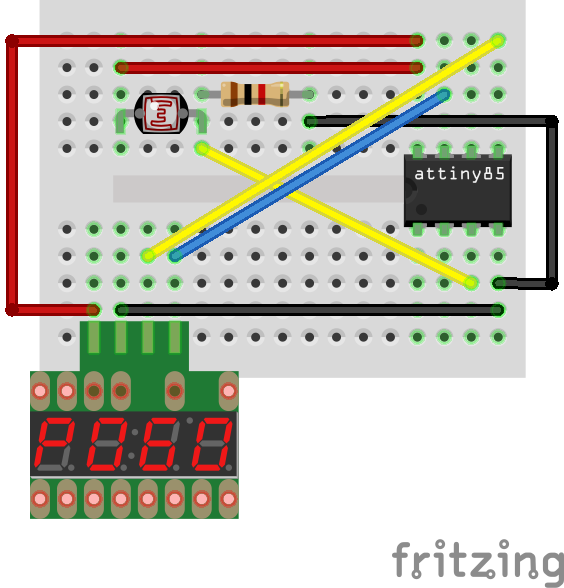
回路
8pinoの部分をATTiny85で表現しています。(回路図を描くFritzingに8pinoのアイコンがないので)

スケッチ
# include <TinyWireM.h>
# include <Adafruit_LEDBackpack.h>
# include <Adafruit_GFX.h>
# include <avr/power.h>

Adafruit_7segment disp = Adafruit_7segment();

int ledPin = 1;
int threshold = 20;
int val=0; //入力される値を格納する為の変数
int val1=0;
int val2=0;
int val3=0;
int val4=0;

static const uint8_t numbertable[] = {
	0x3F, /* 0 */
	0x06, /* 1 */
	0x5B, /* 2 */
	0x4F, /* 3 */
	0x66, /* 4 */
	0x6D, /* 5 */
	0x7D, /* 6 */
	0x07, /* 7 */
	0x7F, /* 8 */
	0x6F, /* 9 */
};

void setup() {
  pinMode(ledPin, OUTPUT);
  //Serial.begin(9800); //モニターに出力するための設定
  if(F_CPU == 16000000) clock_prescale_set(clock_div_1);
  disp.begin(0x70);
}
void loop() {
//ANALOG INの0番ピンからデータを受け付ける
  val=analogRead(2);
  //Serial.println(val); //入力された値をモニターに出力

  if (val >= threshold) {
    digitalWrite(ledPin, HIGH);   // LEDをオンに
  } else {
    digitalWrite(ledPin, LOW);    // LEDをオフに
  }

  val1 = (val % 10); val /= 10;
  val2 = (val % 10); val /= 10;
  val3 = (val % 10); val /= 10;
  val4 = (val % 10); val /= 10;

  disp.writeDigitRaw(0, numbertable[val4]);
  disp.writeDigitRaw(1, numbertable[val3]);
  disp.writeDigitRaw(3, numbertable[val2]);
  disp.writeDigitRaw(4, numbertable[val1]);
  disp.writeDisplay();


  delay(1000);
}
動作
vineに保存しました。
まとめ
- Arduino IDE 1.6.3を使って、8pinoでコンパイルしました。
- 今回、7-segment LED表示には、I2Cを使いましたが、ライブラリがあるので比較的簡単に実装できました。