本記事は Tech-Circle#7 Pepper ハンズオン のハンズオン ~基本編C~ の内容です。
ReKognition APIを使ってPepperにあなたの見た目の印象を聞いてみる(所要時間目安: 20分)
はじめに
ハンズオンCで利用するプロジェクトはshiraco/techcircle_pepper_handson_cにあります。作業ディレクトリに一括git cloneでダウンロードしておきます。
$ cd ~/workspace/techcircle
$ git clone https://github.com/shiraco/techcircle_pepper_handson_c.git
$ cd techcircle_pepper_handson_c
ディレクトリ構成は以下のようになっています。
$ tree -L 1
.
├── rekognition            # ①で利用
└── pepper_rekognition     # ②で利用
以降では上記のプロジェクトを利用します。
最初にReKognition APIをブラウザから体験してみます。以下のURLにアクセスして、顔写真をUploadしてみましょう。
https://rekognition.com/demo/recognize
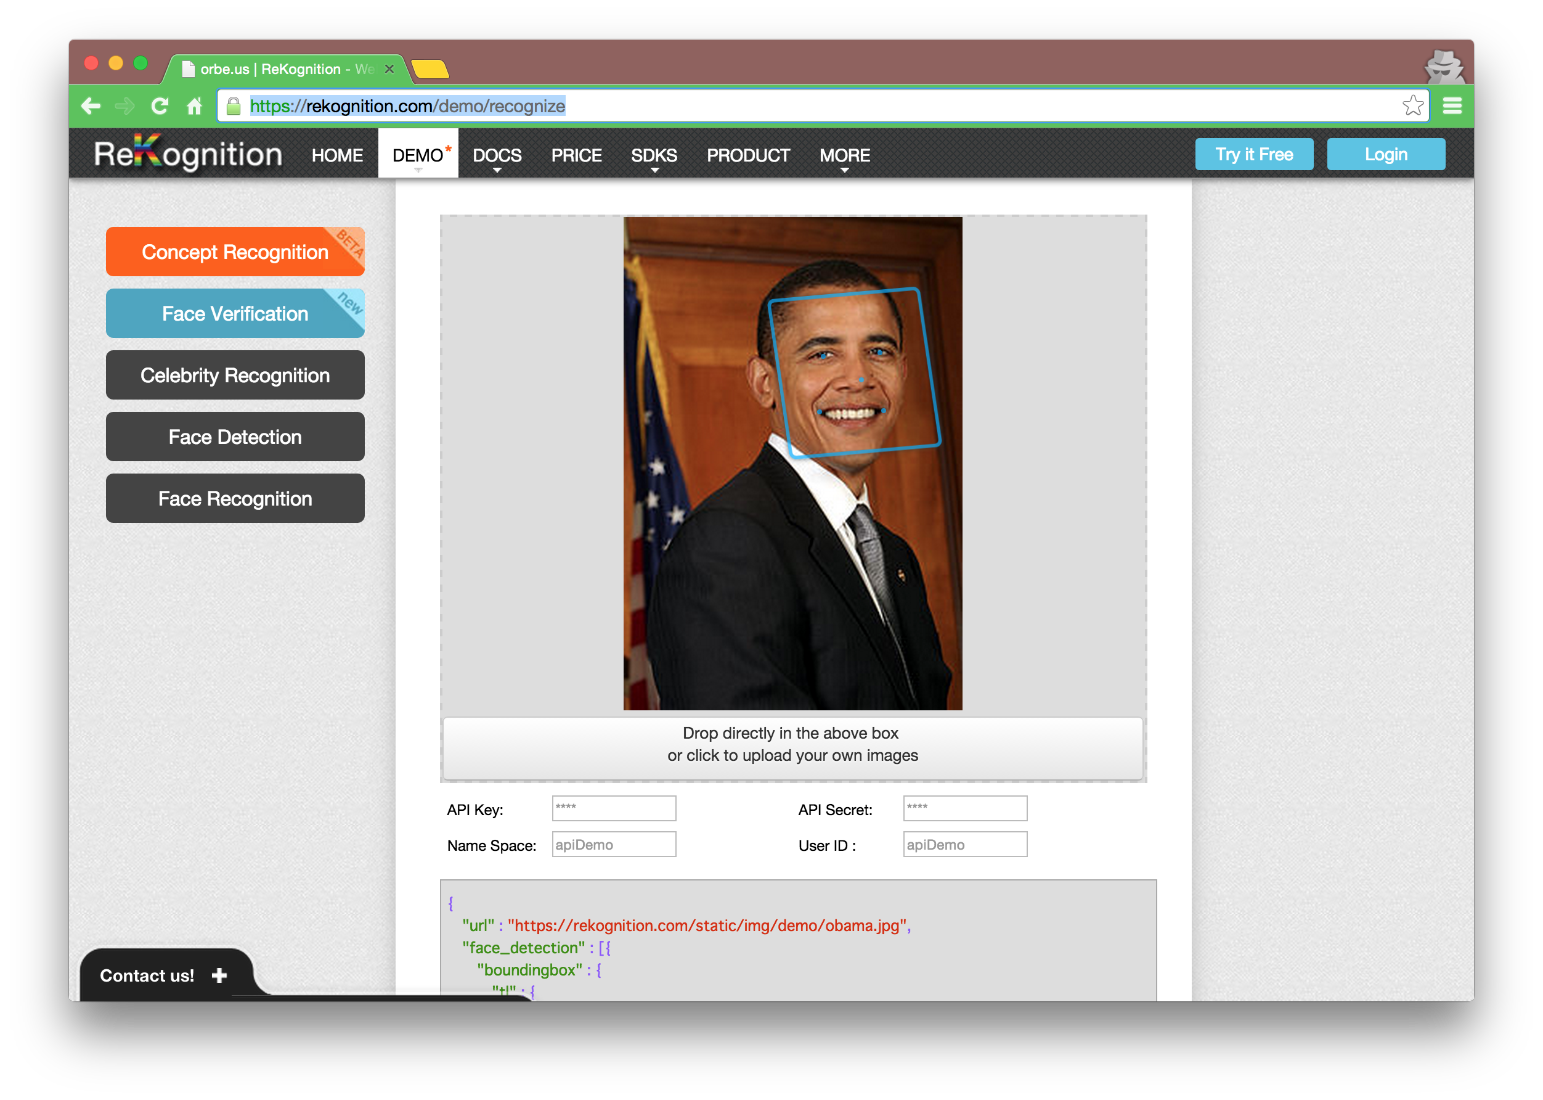
以下のような感じでいろいろ情報がとれるはず。
ちなみにオバマ大統領の現時点での年齢は53歳。
    "age" : 47.35,
    "smile" : 1,
    "glasses" : 0,
    "sunglasses" : 0,
    "eye_closed" : 0,
    "mouth_open_wide" : 0.75,
    "beauty" : 0.56915,
    "sex" : 1
① ReKognition APIをターミナルから実行してみる (要Pythonインストール)
プロジェクトの確認 (google_stt)
スクリプトは先ほどダウンロードしたrekognitionを使用します。
$ cd ~/workspace/techcircle/techcircle_pepper_handson_c/rekognition
外部ライブラリのインポート (requests)
このプロジェクトはAPIにアクセスするにあたって、requestsというライブラリを使っています。pipが実行できる環境であれば以下のコマンドでインストールできます。
このステップはハンズオンBでやっていれば再度実行する必要はありません。
$ pip install -r requirements.txt
API_KEYの設定
エディタでrekognition.pyを開いて、
rekognition_key, rekognition_secretの値をあなたのReKognitionのAPI_KEY, API_SECRETの値で上書きしましょう。API_KEYの確認は https://rekognition.com/index.php/user/account から行えます。
rekognition_key = os.environ.get("REKOGNITION_KEY")
rekognition_secret = os.environ.get("REKOGNITION_SECRET")
↑を↓のようにします。
rekognition_key = "YOUT_API_KEY_HERE"
rekognition_secret = "YOUT_API_SECRET_HERE"
スクリプトの実行と動作確認
pythonのスクリプトを実行することでクラウドで画像認識した結果を取得できます。
$ python rekognition.py who.jpg
{
    ...
    "face_detection": [
        {
            "confidence": 1,
            "age": 42.13,
            "pose": {
                "yaw": -1.43,
                "roll": -3.63,
                "pitch": -4.51
            },
            "sex": 1,
            ...
        }
    ],
    "ori_img_size": {
        "width": 640,
        "height": 960
    },
    "usage": {
        "status": "Succeed.",
        "quota": 3916,
        "api_id": "YOUR_API_ID"
    }
}
認識された結果、もっともらしい結果が得られます。
スクリプトの確認
スクリプト中に実行させるjobのタイプをしていしています。
jobs = "face_gender_age"
その他のjobの種類はReKognition Developerに記載されています。確認してみましょう。
② Pepperにあなたの性別と年齢を聞いてみる
アプリケーションの作成
それでは上記で試した内容をPepperアプリとして実装してみます。
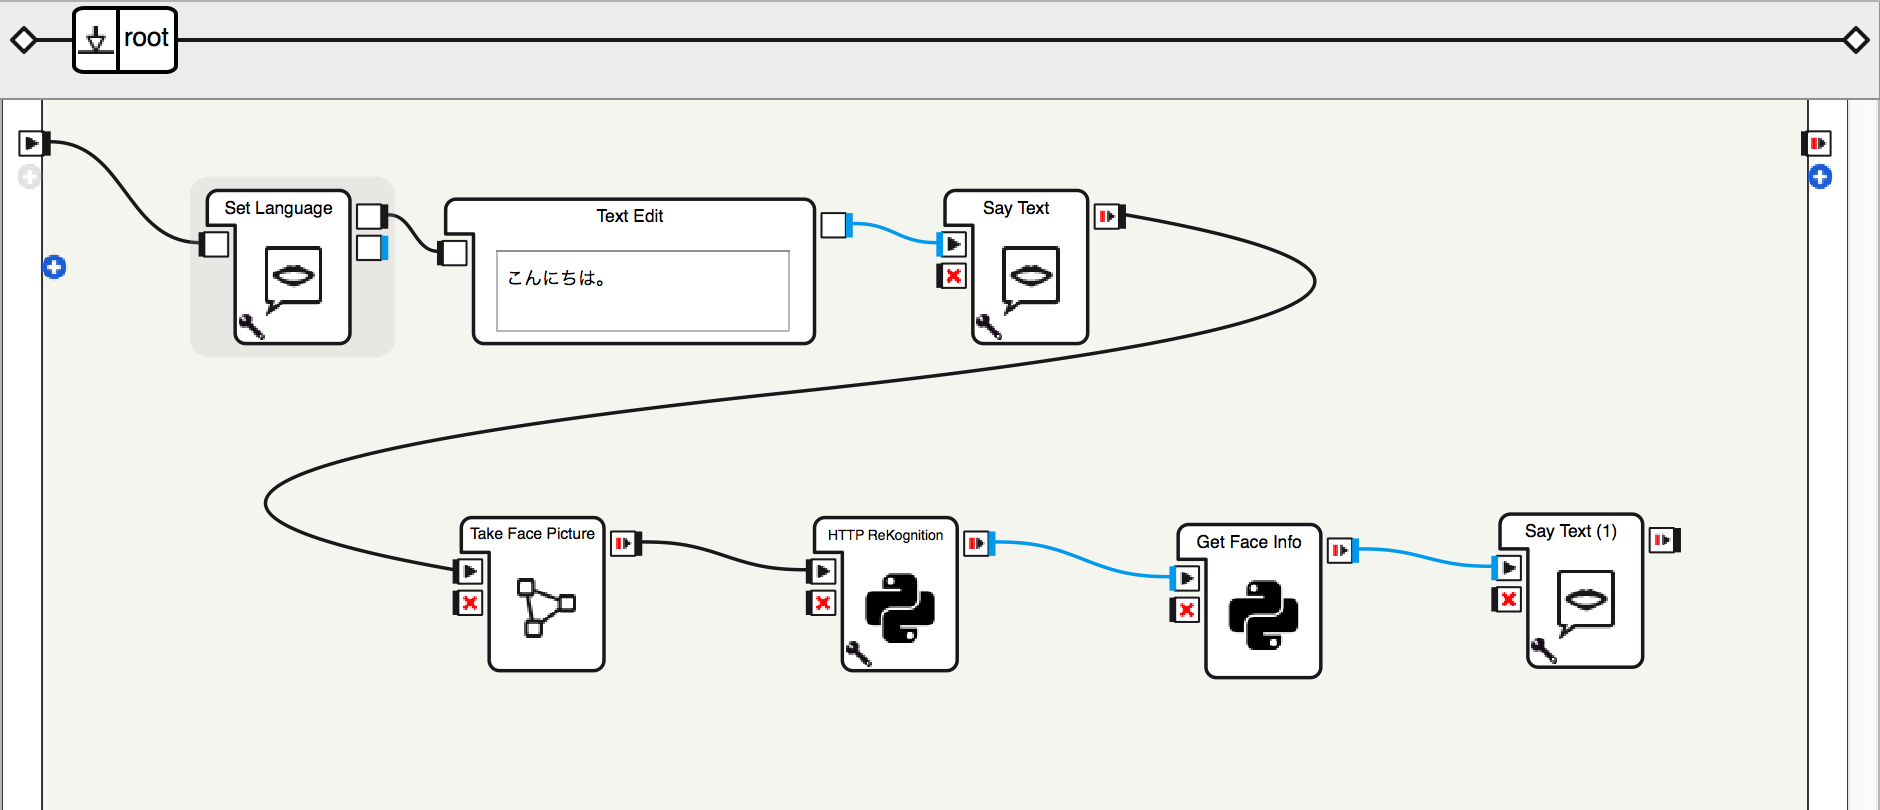
最終的なアプリケーションは以下のようになります。
プロジェクトのオープン (pepper_rekognition)
先ほどダウンロードしたpepper_rekognitionを使用します。
$ cd ~/workspace/techcircle/techcircle_pepper_handson_c/pepper_rekognition
ハンズオンB同様requestsを使ってweb APIにアクセスします。
% tree . -L 3
.
└── pepper_rekognition
    ├── behavior.xar
    ├── lib
    │   └── requests
    ├── manifest.xml
    └── pepper_rekognition.pml
この状態から、以降のステップでボックスをつないでPepperアプリを作っていきます。
Set Language
最初にSet Languageを配置し、Languageを「Japanese」にします。
Text Edit + Say Text
次にText Edit + Say Textを配置します。Text Editの入力は「こんにちは。」にします。
Take Face Picture
顔写真を撮影するTake Face Pictureはtechcircle_boxボックスライブラリにあるボックスを配置します。
ボックスライブラリビューから、Take Face Pictureを選び、つなぎます。
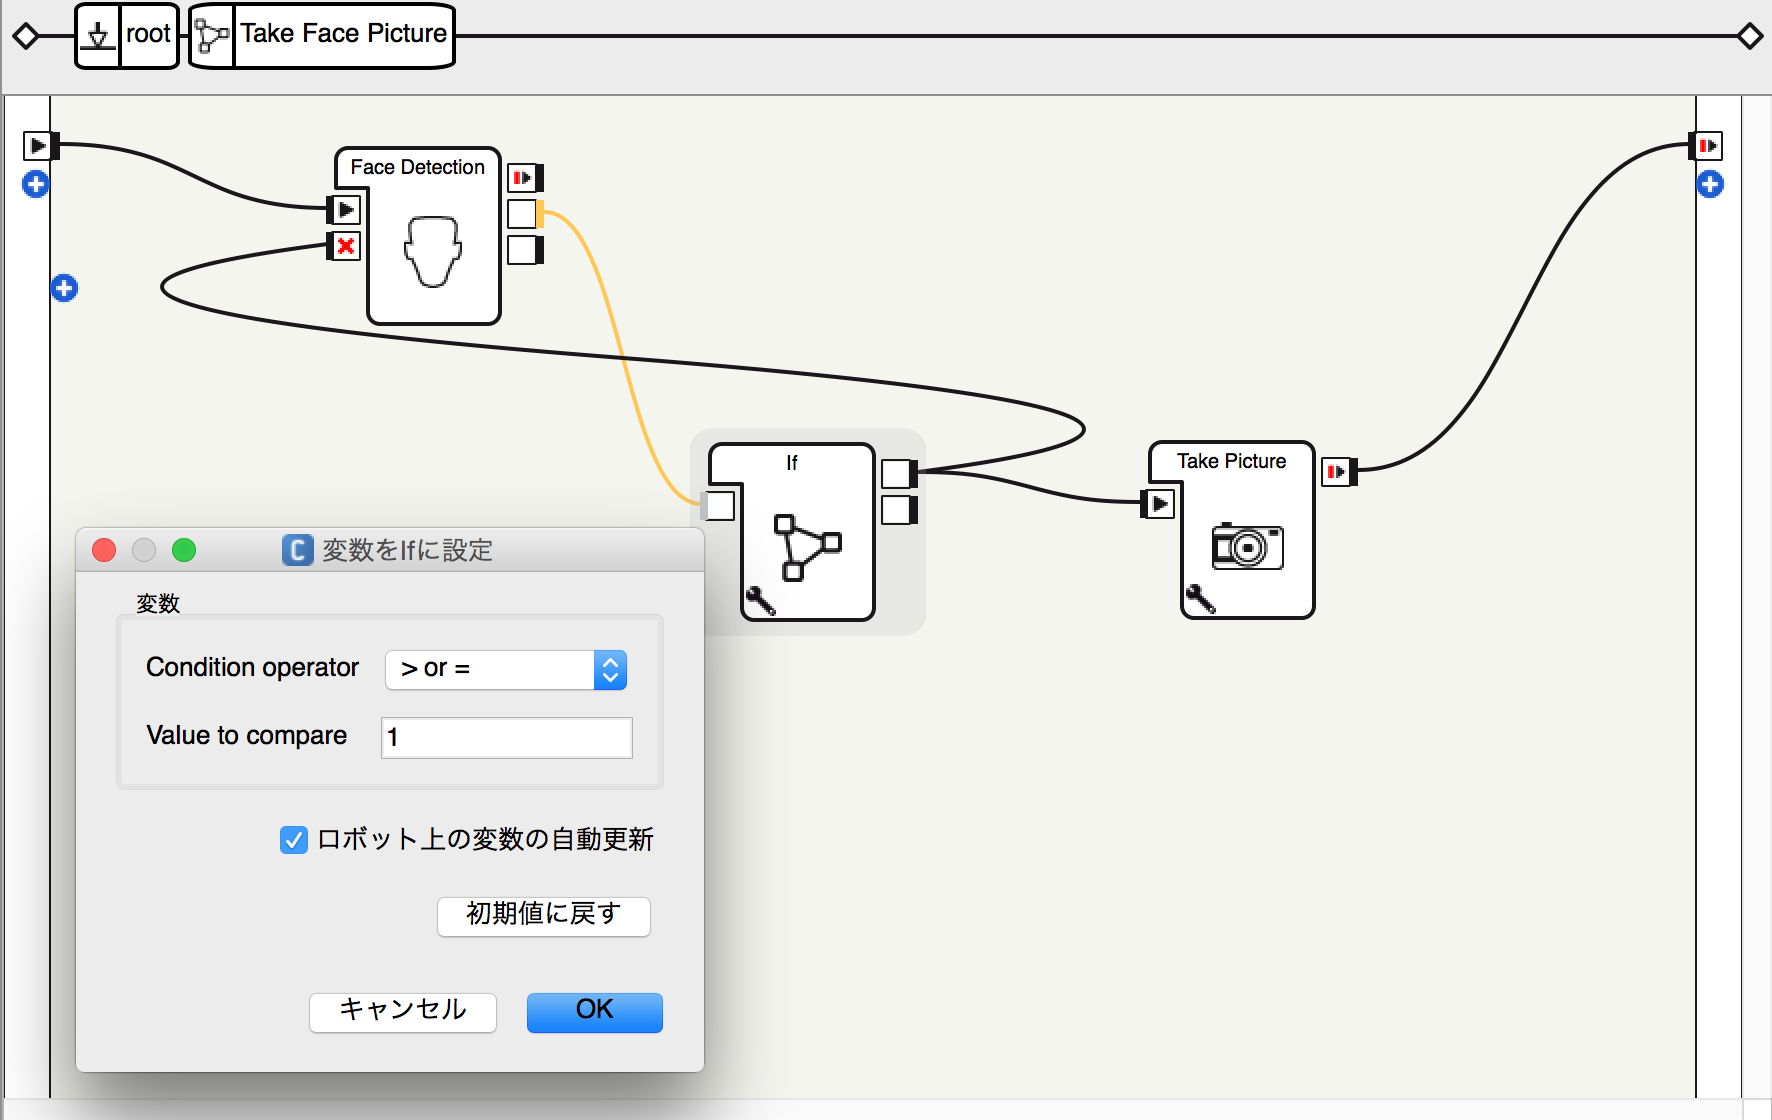
ここでは人間の顔写真を撮影しています。組み込みのボックスであるTake Pictureでも写真の撮影はできますが、Pepperの目線の先に人間の顔がないときに写真をとっても性別や年齢を推定することはできません。
少しでも撮影した写真に顔が映る可能性が高められるように以下のボックスを組み合わせて工夫します。
- Face Detection : 目の前の顔の数を検出する
- If : 撮影するタイミングを指定する
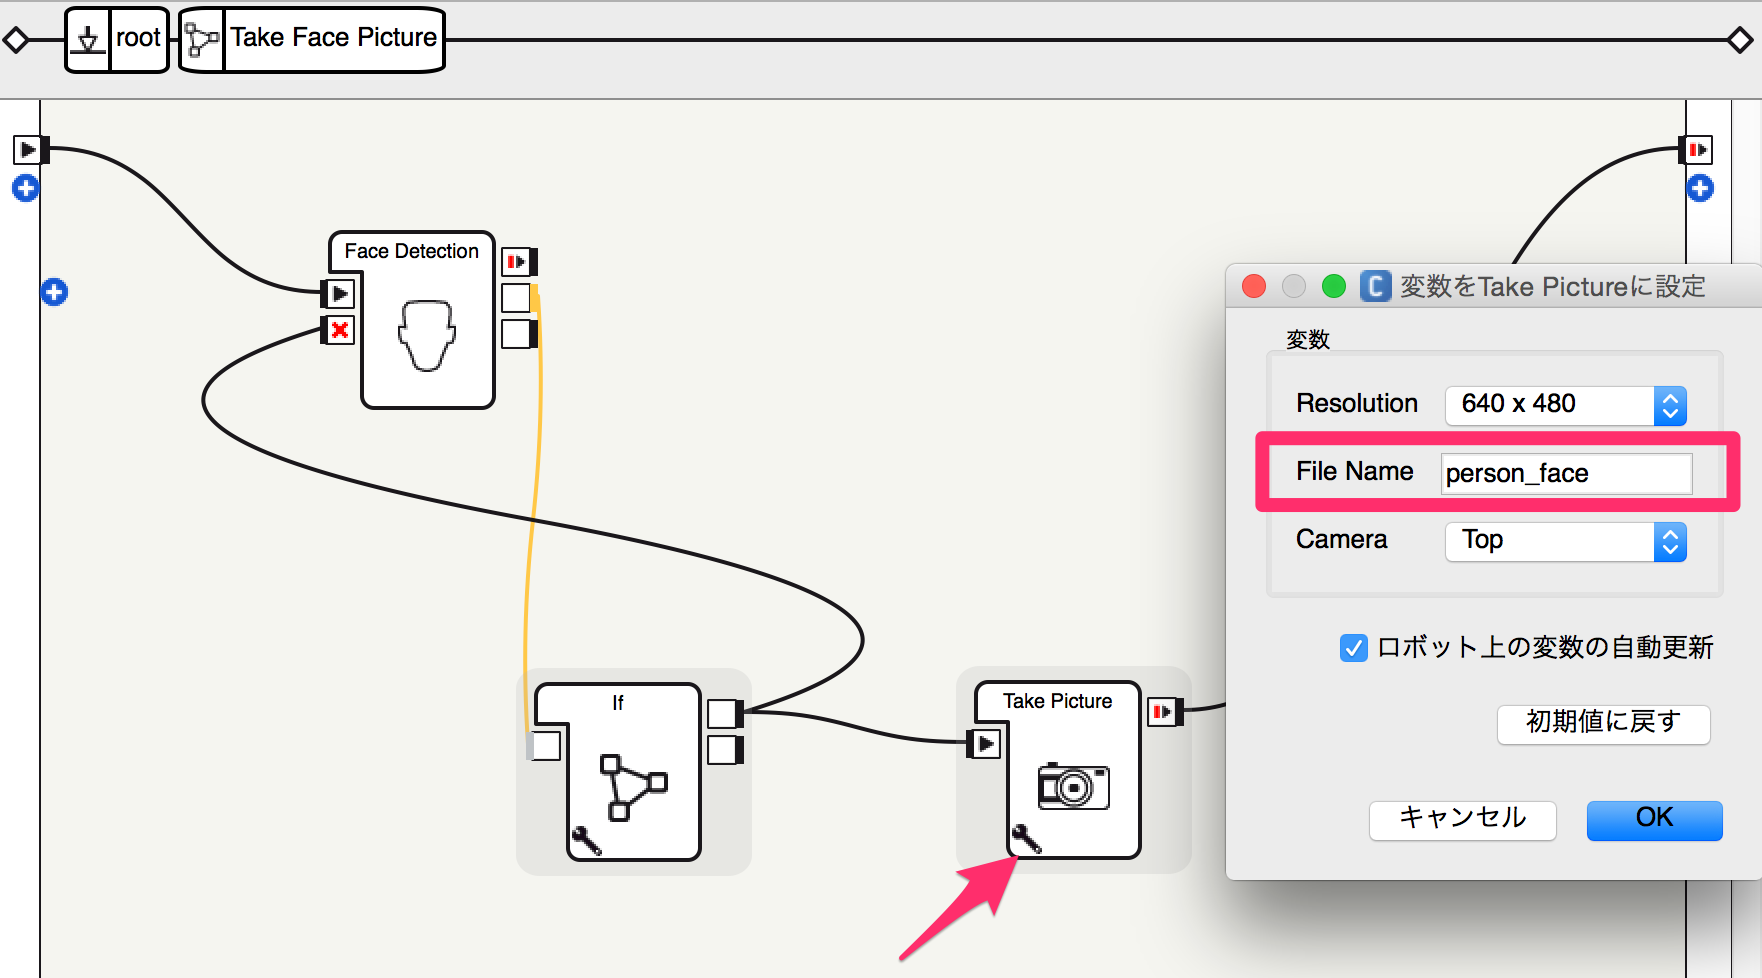
- Take Picture : 顔写真を撮影する
保存するファイル名は「person_face」とします。JPEGファイルとして保存されます。拡張子は指定しません。
HTTP ReKognition
Pepperが撮影した写真をReKognition APIへPOSTします。
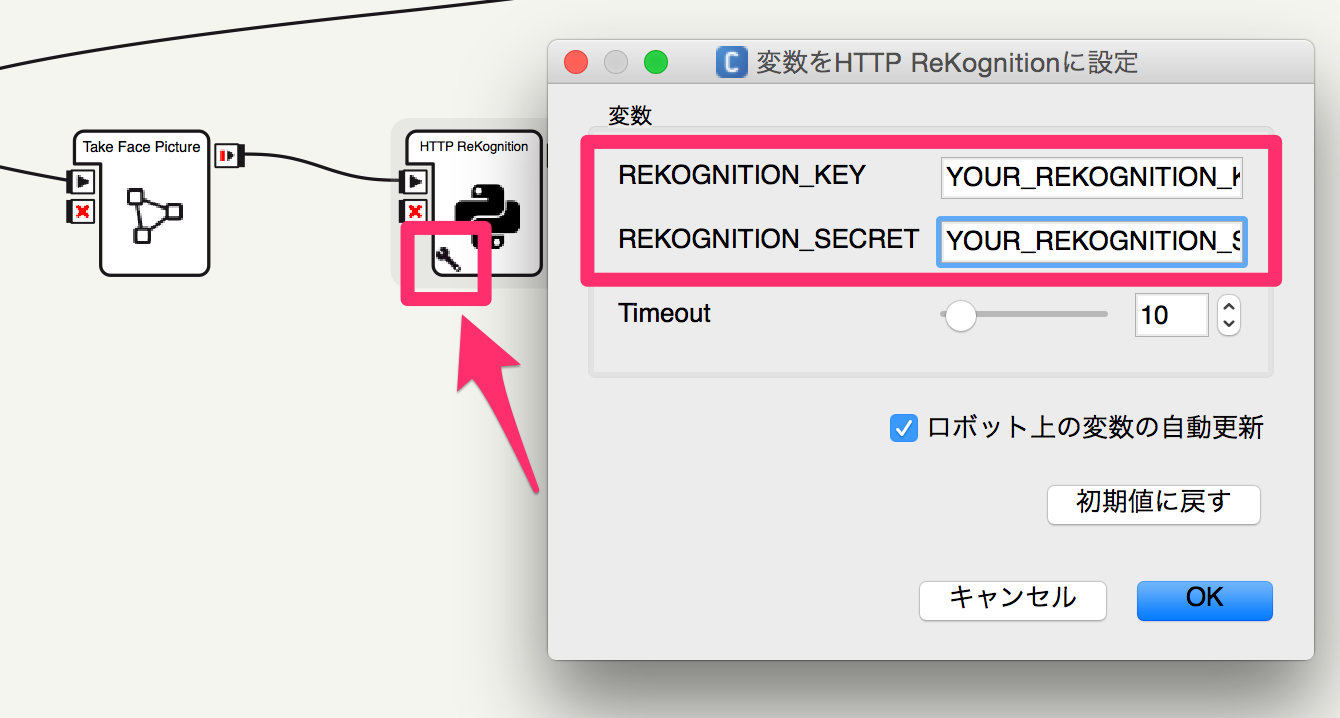
techcircle_boxボックスライブラリから、HTTP ReKognitionを配置します。
REKOGNITION_KEY, REKOGNITION_SECRETの値をあなたのAPI_KEYの値で上書きしましょう。
HTTP ReKognitionの中身を少し見ています。基本的には、②のrekognition.pyの内容をボックスへ埋め込んでいます。
**init()**メソッドでは写真が保存されたディレクトリを指定します。
    def __init__(self):
        GeneratedClass.__init__(self)
        self.recordFolder = "/home/nao/recordings/cameras/"
**onInput_onStart()**メソッドでPOSTします。
    def onInput_onStart(self):
        import os
        import json
        import requests
        from base64 import b64encode

        filename = "person_face.jpg"
        filepath = os.path.join(self.recordFolder, filename)

        self.logger.info("filepath" + filepath)

        try:
            timeout = int(self.getParameter("Timeout"))
            url = "http://rekognition.com/func/api/"
            jobs = "face_gender_age"

            response = requests.post(
                url,
                data = {
                    'api_key': self.getParameter("REKOGNITION_KEY"),
                    'api_secret': self.getParameter("REKOGNITION_SECRET"),
                    'jobs': jobs,
                    'name_space': 'multify',
                    'user_id': 'demo',
                    'base64': b64encode(open(filepath, 'rb').read()),
                },
                timeout = timeout
            )

            self.logger.info("%s %s %s" % (response.request.method,
                                           response.request.path_url,
                                           response.status_code))

            result = json.dumps(response.json(), indent = 4)

            self.logger.info("result: %s" % result)
            self.onStopped(result)

        except requests.exceptions.RequestException, message:
            self.logger.warn("Failed to open: message=%s" % (message))
            self.onFailed(message)
Get Face Info + Say Text
ReKognitionの結果のjsonから性別情報と年齢情報を取り出し、しゃべらせることばを組み立てます。
    def onInput_onStart(self):
        #self.onStopped() #activate the output of the box
        pass
↑を↓のように置き換えます。
    def onInput_onStart(self, p):
        import json
        face_recognized = json.loads(p)

        faces = face_recognized["face_detection"]
        faces = sorted(faces, key=lambda x: x["boundingbox"]["size"]["width"], reverse=True)

        text = None

        if len(faces) == 0:
            text = "誰も居ないようです"
            sex = "性別不詳"
            age = "年齢不詳"

        else:
            target_face = faces[0]
            sex = "男性" if target_face["sex"] == 1 else "女性"
            age = "%i歳" % int(target_face["age"])
            text = age + "の" + sex + "ですね!"

        memory = ALProxy("ALMemory")
        memory.insertData("pepper_rekognition_age", age)
        memory.insertData("pepper_rekognition_sex", sex)

        self.onStopped(text)
最後にSay Textを配置します。
アプリケーションの実行と動作確認
以上で完成です。実行してみましょう。あなたの名前を顔を見てPepperが年齢と性別を答えてくれます。
メモリウォッチャービューから、メモリキーpepper_rekognition_age、 pepper_rekognition_sexを追加しておくと、Pepperが性別と年齢を覚えてくれるのを確認できます。
解答例
(参考) Pepperが撮影した写真の確認
Pepper が実際に撮影した写真は以下のscpコマンドで取得できます。
$ scp nao@192.168.xxx.xxx:/home/nao/recordings/cameras/person_face.jpg .
passwordを聞かれます。デフォルトのパスワードの場合、naoと入力してください。
以上で、ハンズオン ~基本編~ は終了です。
いかがだったでしょうか。
さまざまなweb APIを使った開発は少し特殊なケースを取り扱ってみましたが、Pepperとクラウドにつなぐことで様々な可能性を感じて頂けたのではないでしょうか。
これらのweb APIや他のweb API、もしくは、自作のweb APIを用意して、Pepperを賢くする仕組みを考えてみましょう!
本ハンズオンのイベントページ
Tech-Circle#7 Pepper ハンズオン
